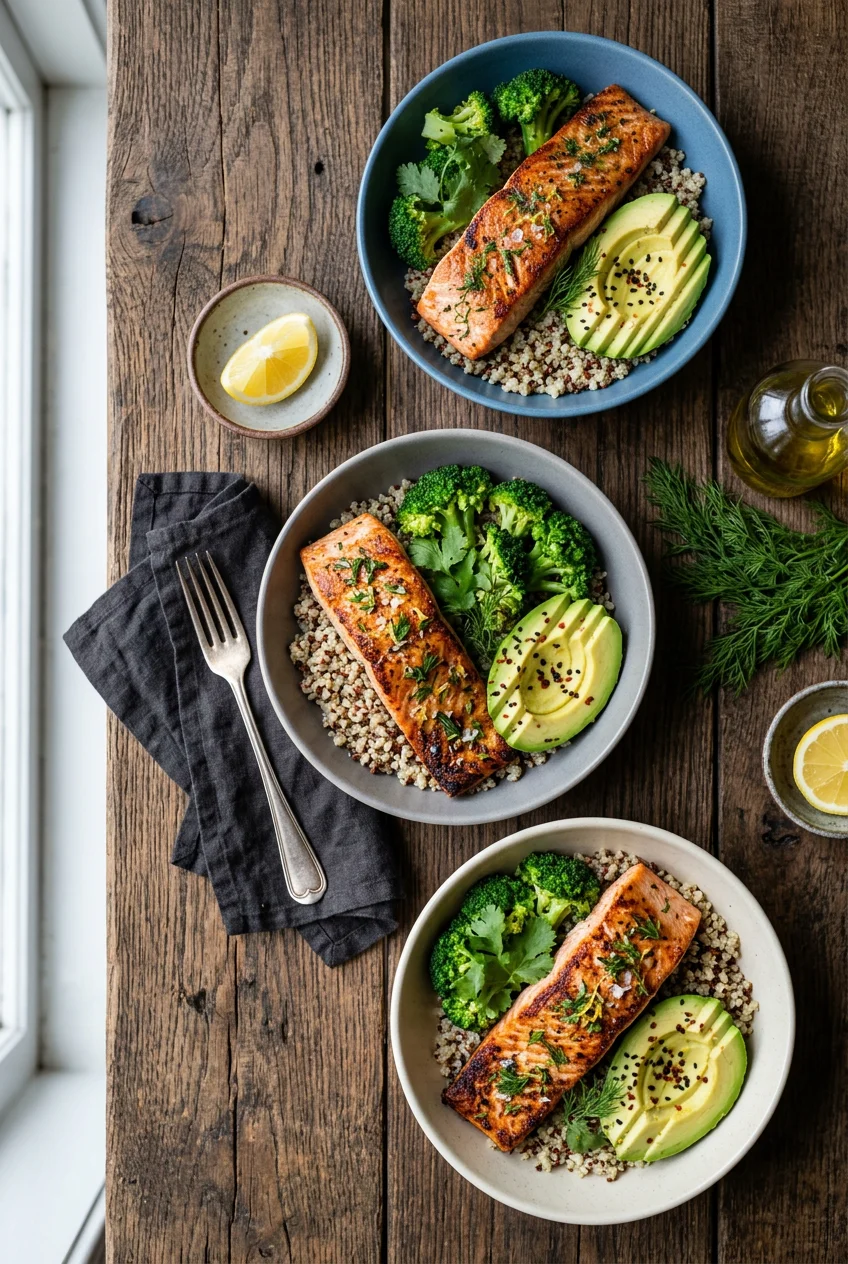
What’s Inside
- The Foundation of Protein Bowls Meal Prep Requires Glass Compartments
- Batch Cooking Quinoa Without the Mushy Texture
- Diversifying Lean Meats and Budget-Friendly Legumes
- Preventing Soggy Greens and Prepping Vegetables Properly
- Keeping Sauces Separate for Better Protein Bowls Meal Prep
- The Deconstructed Approach and Frozen Produce Hacks
- Fermented Foods and Plant Diversity for Gut Health
- Calculating Macros and Adding Healthy Fats
- Seasoning Post-Prep and Avoiding Overcooked Vegetables
Last Tuesday at Whole Foods, I dropped a plastic container of three-day-old chicken and rice right in front of the cheese section. The lid popped off, and the smell of sad, oxidized poultry forced me to rethink my protein bowl strategy. If you’re eating the same components four days straight, you need a strict, methodical approach. Throwing warm chicken over wet lettuce in a cheap tub doesn’t work. You’ll end up with a soggy mess by Wednesday. I spent two years testing materials, temperatures, and dressings to fix this. My system stops slimy greens and chalky chicken. I used to dread opening my lunch bag at the office. Condensation pooling at the bottom was enough to ruin my appetite. Learned that the hard way. Let’s break down the steps, temperatures, and products that keep food fresh from Sunday until Thursday.
1. The Foundation of Protein Bowls Meal Prep Requires Glass Compartments

I tried prepping in cheap plastic for months before getting it right. Plastic is porous. It absorbs the ghost of every meal. I packed garlic salmon last October. Even after three runs through the dishwasher, the plastic still smelled like low tide. That ruins the flavor of whatever you pack next. You need non-porous glass. I bought the Pyrex Snapware 10-piece Glass Food Storage Set at Target for $34.99. The heavy glass doesn’t hold odors. It also lets you reheat the protein without transferring chemicals into your food. The compartments are non-negotiable. If you let wet quinoa touch roasted sweet potatoes for three days, the potatoes turn to paste. Compartments keep the structural integrity of your ingredients intact. The snap lids on the Pyrex set latch tightly. This matters when you’re tossing the container into a canvas tote bag on a bumpy train. I dropped one of these glass containers on my kitchen floor last month. It didn’t crack. Skip the flimsy plastic containers you see in bulk on Amazon. They warp in the microwave and the lids stop sealing. The glass Pyrex set costs more upfront, but I’ve used the same set for two years. It’s a foundational requirement for keeping your food edible by the end of the week. The weight is slightly annoying in a backpack, but the tradeoff for fresh food is worth it.
2. Batch Cooking Quinoa Without the Mushy Texture

Most people get this wrong. I certainly did. For my first year, I cooked quinoa like pasta. I dumped it in boiling water and hoped for the best. The result was a waterlogged, mushy clump that tasted like wet cardboard. Quinoa is a great, protein-rich grain, but it requires exact ratios. It lasts five to seven days in the fridge if you keep it dry. To avoid the mush, you need a strict 1 to 1.75 ratio of quinoa to water. That means one cup of dry quinoa needs one and three-quarters cups of liquid. First, rinse one cup of dry quinoa in a fine mesh strainer for thirty seconds. If you skip rinsing, the natural saponins make it taste incredibly bitter. Combine the rinsed quinoa with the water and a heavy pinch of salt in a medium pot. Bring it to a boil. Reduce the heat to low, cover tightly with a heavy lid, and simmer for 15 minutes. Here is the critical step I used to skip. Take it off the heat and let it rest, covered, for 10 minutes. This lets the trapped steam finish the cooking process gently. Finally, fluff it with a fork. This yields about three cups of perfectly separated, chewy quinoa. If you want extra flavor, use leftover chicken broth instead of plain water. I started saving the liquid when I poach chicken breasts. Using that savory broth instead of tap water adds a deep, salty note to the grains without extra effort or cost.
3. Diversifying Lean Meats and Budget-Friendly Legumes

Eating dry, chalky chicken breast on a Thursday is depressing. I used to bake my chicken breasts at 400 degrees for an hour. They came out like shoe leather. Batch cooking protein requires strict temperature control. For chicken, I buy a one-pound pack of boneless, skinless breasts from Kroger. I season them with smoked paprika, garlic powder, onion powder, coarse sea salt, and black pepper. I roast them on a baking sheet at 375 degrees Fahrenheit for 40 to 45 minutes. You need a digital meat thermometer. Pull them out the second the internal temperature hits 165 degrees Fahrenheit. Let them rest on the cutting board for ten full minutes before slicing. If you cut them while hot, all the juice runs out, leaving the meat dry. Cooked chicken lasts three to four days in the refrigerator. I won’t eat it on day five. For a plant-based option, I rely on green or brown lentils. They’re a budget-friendly source of protein. I buy dry green lentils at Walmart. They usually cost less than $2 per pound. One cup of dry lentils yields about three cups cooked. They hold their shape much better than red lentils, which turn to mush. I boil them in low-sodium vegetable broth until they’re tender but still have a bite. They absorb the dressing beautifully and provide a dense texture that contrasts well with raw vegetables.

Food Scale, 11lb Digital Kitchen Scale with 6 Units LCD
Honestly, Food Scale surprised me — sturdier than it looks in the photos, and over 21 buyers gave it 4.5 stars.
4. Preventing Soggy Greens and Prepping Vegetables Properly

There’s nothing worse than opening your lunch to find black, slimy spinach. I ruined countless salads before I learned how to manage moisture. Water is the enemy of fresh produce in a sealed container. When you wash hearty vegetables like bell peppers, carrots, and broccoli, you can’t just shake them off and throw them in a tub. You have to dry them completely. I lay them on a clean dish towel and pat them down aggressively. Then, I store them in airtight glass containers lined with a dry paper towel. The paper towel absorbs the ambient condensation inside the cold fridge. This simple trick extends their crispness for four to seven days. For leafy greens, the rules are stricter. I buy the large plastic clamshells of mixed greens at Costco. I wash them and put them through a plastic salad spinner twice. If you don’t own a salad spinner, you’re going to have a bad time. Once they’re bone dry, I place a fresh, dry paper towel directly on top of the greens inside their storage container. This absorbs the excess moisture that causes wilting and sliminess. I change the paper towel on Wednesday morning if it feels damp. This keeps the spinach crisp all week. I learned this the hard way after throwing out half a box of rotting arugula last summer. Taking the extra five minutes to aggressively dry your vegetables saves you from eating a swampy mess on Thursday. You might also like: 9 Simple Meal Prep Worth Trying
5. Keeping Sauces Separate for Better Protein Bowls Meal Prep

Never dress your bowl on Sunday. If you pour vinaigrette over your ingredients and let it sit for 72 hours, the acid breaks down the cell walls of the vegetables. The result is a highly acidic, mushy disaster. You must keep your sauces separate until the exact moment you plan to eat. I used to use small plastic bags for dressing. That was a terrible idea. The bag leaked inside my purse last April, covering my leather wallet in sesame oil. No exaggeration. Now, I use Sistema Dressing Pots. I bought a pack of four on Amazon for $8.29. They hold exactly 1.1 ounces. The screw-top lids feature a rubber gasket that prevents leaks. The size is perfect for portion control, so I don’t accidentally pour 400 calories of oil over my lunch. I prefer homemade sauces over bottled ones. Store-bought dressings usually contain cheap soybean oil and excessive refined sugar. I make a Green Goddess Tahini Dressing every Sunday morning. I blend three tablespoons of tahini, the juice of one fresh lemon, two tablespoons of extra virgin olive oil, and a handful of fresh parsley. It takes three minutes in a mini food processor. Alternatively, I mix up a Spicy Thai-Inspired Peanut Sauce using two tablespoons of creamy peanut butter, one tablespoon of low-sodium soy sauce, lime juice, grated ginger, and a heavy squirt of sriracha. Both of these homemade options thicken up in the fridge and last up to a week. The Sistema pots make it easy to grab one and drop it into my lunch bag. You might also like: 10 High Protein Lunch Meal Prep You Need to See
6. The Deconstructed Approach and Frozen Produce Hacks

A major strategy I’ve adopted recently is the deconstructed bowl approach. It makes perfect logical sense. Instead of layering everything into one giant pile on Sunday, you keep the components separate until right before eating. I use my compartmentalized glass containers to store the cooked chicken in one section, the dry quinoa in another, and the raw vegetables in a third. This prevents cross-contamination of textures. It also stops ingredients like sliced avocado from turning brown against hot grains. When I sit down at my desk at noon, I dump everything into a larger ceramic bowl and mix it up. It feels like a freshly made meal rather than leftovers. To fill out these bowls without spending a fortune, I rely on frozen produce. Frozen vegetables are picked at peak ripeness and flash-frozen immediately. They often retain more nutrients than the fresh stuff that sits on a transport truck for two weeks. I buy Cascadian Farm Organic Frozen Sweet Corn at Sprouts for $3.49 a bag. I don’t even bother cooking it on the stove. I measure out half a cup of frozen corn or shelled edamame and put it directly into my container on Monday morning. By the time I eat lunch at 1 PM, the corn has completely thawed. It retains a crisp, popping texture that you lose completely if you boil it. It’s a cheap, zero-effort way to add volume and fiber. You might also like: 20 Inspiring Meal Prep Ideas for Any Style

Etekcity Food Kitchen Scale
A dependable everyday pick — Etekcity Food Kitchen Scale pulls in 1,736 ratings at 4.5 stars. Not flashy, just solid.
7. Fermented Foods and Plant Diversity for Gut Health

Gut health is dominating nutrition discussions right now. Fermented foods are moving from niche health food store items to daily staples. I used to ignore this. I thought yogurt was just for breakfast and sauerkraut was only for hot dogs. But adding fermented elements to your savory bowls provides a flavor upgrade and introduces beneficial bacteria. I keep a glass jar of Wildbrine Raw Organic Sauerkraut in my fridge at all times. I buy it at Whole Foods for $6.49. I add exactly one-quarter cup to my bowl right before eating. The sharp, acidic tang cuts through the heavy, savory flavors of roasted chicken and grains perfectly. If you don’t like cabbage, plain Greek yogurt is a brilliant substitute for sour cream. I buy the 35.3-ounce tub of Fage Total 0% Milkfat Plain Greek Yogurt for $5.99. A dollop of that mixed with hot sauce creates a creamy, probiotic-rich topping. Beyond fermentation, current advice emphasizes plant diversity. The goal is to consume 20 to 30 different types of plants per week to support a diverse gut microbiome. I tried hitting 30 plants in one week last January and failed miserably because I was only eating steamed broccoli and white rice. Now, I count every seed, nut, grain, and vegetable. Mixing quinoa, brown rice, green lentils, red bell peppers, spinach, walnuts, and sesame seeds into one bowl knocks out seven different plant types in a single meal.
8. Calculating Macros and Adding Healthy Fats

A bowl of lettuce and a few thin slices of chicken won’t keep you full. I used to pack low-fat lunches. By 2 PM, I was starving and inevitably bought a stale, overpriced pastry from the office cafeteria. You have to calculate your actual protein requirements and include dense fats. Registered dietitians recommend a general protein intake ranging from 0.8 to 1.2 grams per kilogram of body weight for average adults. If you’re lifting weights, that jumps to 1.2 to 1.7 grams per kilogram. I weigh 150 pounds, which is roughly 68 kilograms. Because I work out four days a week, I aim for the higher end. That translates to roughly 82 to 116 grams of protein daily. I divide that across four meals, meaning my lunch bowl needs at least 25 to 30 grams of protein. Four ounces of my roasted chicken hits that number easily. But protein alone isn’t enough for satiety. You need healthy fats to slow down digestion and absorb fat-soluble vitamins. I bring a whole, unpeeled avocado to work and slice a quarter of it fresh each day. Pre-slicing avocado on Sunday is a fool’s errand. It turns gray and slimy by Tuesday, no matter how much lemon juice you squeeze on it. I also keep a glass jar of Trader Joe’s Everything But The Bagel Seasoning Blend at my desk. It costs $1.99. The sesame seeds and dried garlic add crunch and a small hit of fat. Sometimes I throw in a quarter cup of raw, chopped walnuts for extra density.
9. Seasoning Post-Prep and Avoiding Overcooked Vegetables

A frequent meal prep error is overcooking the vegetables on Sunday. If you roast broccoli until it’s completely soft, it will disintegrate when you reheat it on Wednesday. I pulled a container of pulverized, mushy broccoli out of the microwave last month and had to throw it in the trash. The texture was repulsive. You must roast vegetables to an al dente state. They should be tender but still offer a distinct, audible crunch. I chop my broccoli florets and red bell peppers into uniform, bite-sized pieces. I toss them in one tablespoon of olive oil and roast them at 400 degrees Fahrenheit for 15 to 20 minutes. I pull them out of the oven while they still look slightly underdone. The residual heat on the hot metal baking sheet continues to cook them as they cool. Another rule is to season your food post-prep. If you heavily salt and pepper your entire batch on Sunday, the flavors dull significantly after sitting in the cold fridge for three days. The salt also draws out moisture, contributing to the soggy vegetable problem. Instead, I keep the initial cooking relatively plain. I rely on a small shaker of McCormick Himalayan Pink Salt, Black Pepper, and Garlic All Purpose Seasoning. I buy the 3.38-ounce grinder at Target for $4.69. I grind it fresh over the bowl right before I eat. I also keep a damp paper towel wrapped around a bunch of fresh cilantro in my fridge drawer. Tearing fresh herbs over the reheated grains instantly revives the dish.
Figuring out the exact mechanics of a reliable lunch routine takes serious trial and error. I ate a lot of sad, rubbery chicken and mushy grains before I perfected these methods. If you stick to the glass compartments, manage your ambient moisture with dry paper towels, and keep your sauces locked away in Sistema pots, you won’t dread your leftovers. Clean eating doesn’t have to mean suffering through a wet, soggy salad on a Thursday afternoon. Buy the heavy glass containers, watch your oven roasting times closely, and measure your quinoa water accurately. I highly recommend trying the deconstructed method next week. It completely changed how I view my packed lunches, making them feel fresh instead of recycled. Save this guide for your next Sunday grocery run, and pin it to your meal prep boards so you don’t forget the exact quinoa ratios or roasting temperatures.

Bento Box Adult Lunch Box – 4 Pack, 5
Bento Box Adult Lunch Box – 4 Pack punches above its price — 24 buyers rated it 4.5 stars. I would buy it again.
Frequently Asked Questions
How long do protein bowls last in the fridge?
When stored correctly in airtight glass containers, most cooked components like chicken, quinoa, and roasted vegetables will last three to four days. If you keep your sauces separate and manage moisture with paper towels, your meals stay fresh until Thursday.
Can you freeze protein bowls meal prep?
You can freeze cooked meats and grains, but raw vegetables and leafy greens won’t survive the freezer. They turn to mush when thawed. It’s better to freeze components like chicken or lentils separately and add fresh vegetables during the week.
How do you keep avocado from turning brown in meal prep?
Pre-slicing avocado on Sunday doesn’t work. Even with lemon juice, it turns gray and slimy by Tuesday. The only effective method is bringing a whole avocado to work and slicing a fresh quarter directly into your bowl just before eating.
What is the best way to reheat protein bowls?
If you use the deconstructed method, remove the raw vegetables and greens first. Microwave the glass container with just the grains and protein for two minutes. Then, add your cold, crisp vegetables and fresh dressing back into the warm base.
