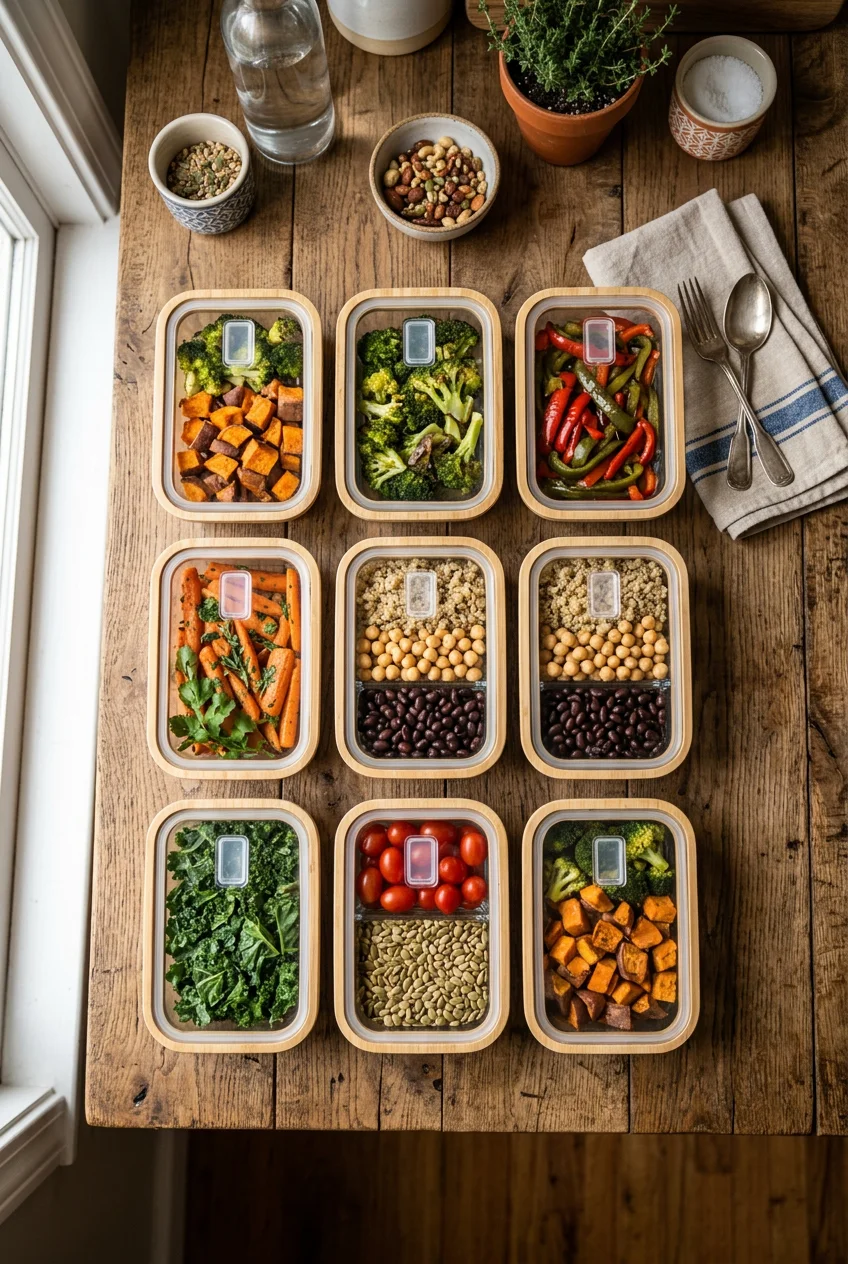
What’s Inside
- Master the “Hero Grain” Approach for Vegetarian Meal Prep for the Week
- Prioritize High-Protein Plant Sources Beyond Tofu
- Invest in Quality Glass Containers
- Rapid Cooling is Non-Negotiable
- Embrace the Instant Pot for Efficiency
- Pre-Wash and Prep Sturdy Vegetables
- Flavor Bomb Your Meals with Nutritional Yeast
- Organize Your Fridge for Vegetarian Meal Prep for the Week
Last November, I stood in my kitchen staring at a $14 container of slimy, brown spinach from Whole Foods. My attempt at vegetarian meal prep for the week had failed by Wednesday. I dumped the spinach in the trash, watching fourteen dollars literally rot away. I ended up eating a bowl of dry Cheerios for dinner because the lentils I cooked on Sunday had turned into a solid, unappetizing brick. The Cheerios were stale, too. Getting vegetarian meal prep for the week right requires more than just roasting vegetables and throwing them in plastic tubs. I tried doing it the lazy way for months before figuring out the actual mechanics of keeping plant-based food fresh and edible for five days. You need specific cooling methods and the right containers to stop your grains from turning to mush. You also need to understand how different plant proteins react to a few days in the cold environment of your fridge. Let’s break down exactly how to prep plant-based meals that actually taste good by Thursday. I’ve ruined enough expensive quinoa and thrown away enough moldy bell peppers to know what doesn’t work. We’re skipping the soggy salads and focusing on hearty, texturally interesting meals you’ll actually want to eat when you come home tired from work.
1. Master the “Hero Grain” Approach for Vegetarian Meal Prep for the Week

Cooking grains every night is a waste of time. Instead, I dedicate 45 minutes on Sunday afternoon to preparing a large batch of a whole grain. I used to cook my grains in a standard electric rice cooker, but they always clumped together into a solid cake by Tuesday. Now I use the pasta method. Boil 4 to 6 cups of a dry grain like farro, wild rice, or quinoa in a large pot of heavily salted water. Once it’s tender, drain it through a fine-mesh sieve. A regular colander lets the quinoa slip right through the holes and down the drain, which is incredibly frustrating. Then, spread the drained grains out on a large aluminum baking sheet to cool completely. This stops the cooking process and prevents mushiness. I buy the Kirkland Signature Organic Quinoa from Costco. It costs $10.99 for a 4.5-pound bag, which lasts me about two months. Once the quinoa cools to room temperature on the sheet pan, I transfer it to a large container. This batch serves as a versatile base for bowls, side salads, or stuffed peppers for up to five days in the refrigerator. If you pack warm quinoa directly into a container and seal it, the trapped steam turns it into a gummy paste. I ruined three separate batches of farro before I learned to let it cool completely. Trust me on this. You want individual, distinct grains that hold their shape when you mix them with a vinaigrette on Wednesday. The sheet pan cooling step takes up counter space, but it’s the only way to get the texture right.
2. Prioritize High-Protein Plant Sources Beyond Tofu

Relying solely on plain tofu gets boring fast. You need diverse plant proteins to keep your meals interesting and to ensure you’re getting complete nutrition. I focus on seitan, lentils, and tempeh. Seitan packs 25 grams of protein per 3.5 ounces. Lentils give you 18 grams of protein per cooked cup, and tempeh offers 12 to 20 grams per 3.5 ounces. I buy Trader Joe’s Organic Tempeh. It costs $1.99 for an 8-ounce block. It has a slightly bitter, fermented taste straight out of the package. I fix this by steaming the block in a metal basket for 10 minutes before marinating it. I whisk soy sauce, olive oil, and maple syrup with a fork until it emulsifies, then pour it over the steamed tempeh in a shallow dish. Then I bake it at 400 degrees for 20 minutes on a parchment-lined tray. The texture becomes firm and chewy, with crispy edges. I also buy dry brown lentils from Target. The Good & Gather brand costs $1.39 for a 16-ounce bag. I cook a large pot of hearty lentil dal on Sundays with coconut milk and curry powder. I simmer the lentils uncovered so the liquid reduces down into a thick, rich gravy instead of a watery soup. A common mistake is adding salt or acidic ingredients like diced tomatoes to lentils before they’re fully cooked. This hardens the skins and keeps them crunchy, no matter how long you boil them on the stove. Add your salt at the very end. The soft, creamy texture of properly cooked lentils is perfect for scooping up with naan bread later in the week. You might also like: 10 Healthy Lunch Meal Prep Worth Trying
3. Invest in Quality Glass Containers

Plastic containers ruin food. I used cheap plastic tubs for my prep until I noticed my Friday quinoa tasted exactly like the pungent garlic broccoli I stored in the same container on Monday. Plastic absorbs odors and stains over time. I’d scrub the plastic tubs with boiling water and Dawn dish soap, but the garlic smell lingered for weeks. I switched entirely to glass. I bought a 24-piece Pyrex Simply Store glass container set at Walmart for $34.99. Glass allows for safe reheating in the microwave or oven. It also prevents food from absorbing plastic chemicals, which is a big deal when you’re eating out of these things every single day. When you heat tomato-based pasta sauce in a plastic container, it leaves a permanent, greasy orange ring. Glass washes completely clean with just dish soap and warm water. The Pyrex set has different sizes. I use the 4-cup round containers for my main meals and the 2-cup rectangular ones for side salads. The lids on this specific set are plastic, so I remove them before microwaving to prevent warping. The lids press down firmly and create an airtight seal that you just don’t get with flimsy plastic containers that warp in the dishwasher. The heavy glass keeps the food noticeably colder in the fridge compared to thin plastic. The only negative is that carrying three thick glass containers in my canvas tote bag to work gets heavy. The extra weight is worth it to avoid eating food that tastes like old plastic and dish soap.

buluker 4 Pack Bento Lunch Box Set 3 Compartment Food
If you want something that just works, buluker 4 Pack Bento Lunch Box Set 3 Compartment Food Storage Containe is a safe bet (23 reviews, 4.5 stars).
4. Rapid Cooling is Non-Negotiable

Food safety is serious business. I got mild food poisoning two years ago after leaving a giant pot of vegetarian black bean chili on my stove overnight to cool. I thought it was fine because the heavy cast iron lid was on tight. It wasn’t. After cooking, you must cool food rapidly to prevent bacterial growth. Food safety experts say you need to keep food out of the danger zone, which is between 40 and 140 degrees Fahrenheit. You need to cool large batches of food, like a pot of chili or cooked grains, to 80 degrees or less within two hours before refrigerating them. I divide my hot chili into shallow glass containers. Sometimes I spread the hot mixture on a rimmed sheet pan. This drastically increases the surface area and speeds up the cooling process. I leave the sheet pan on the counter, away from the hot stove, and set a timer on my phone for ninety minutes. If you put a massive, boiling hot container of soup directly into your fridge, it raises the internal temperature of the entire refrigerator. This puts your almond milk and other perishables at risk of spoiling. I check the temperature with an instant-read meat thermometer I bought from Kroger for $12.99. The Kroger thermometer has a digital display that reads the temperature in three seconds, which is much better than the old analog dials. Once the food drops below 80 degrees, I put the lids on and move the containers to the fridge. It adds an extra step to my Sunday routine, but I won’t risk getting sick again. Learned that the hard way. You might also like: 8 Meal Prep Lunches You Need to See
5. Embrace the Instant Pot for Efficiency

Cooking dry beans on the stove takes hours. You have to soak them overnight in a massive glass bowl and watch the pot constantly so it doesn’t boil over and ruin your stove. I stopped doing that when I bought an Instant Pot. I purchased the 6-quart Instant Pot Duo at Target for $99.99. It cooks dry beans and grains hands-free. I can cook 1 cup of dry black beans in about 30 minutes. That includes the time it takes for the pressure to build up and release. I don’t even soak them anymore. I just rinse the dry beans, add 3 cups of water, half a yellow onion, a smashed garlic clove, and a bay leaf. I use a wooden spoon to push the beans down so they’re fully submerged in the water before I lock the lid in place. Then I set it to high pressure for 25 minutes. I let the pressure release naturally for ten minutes before flipping the valve, which keeps the beans from splitting open. Quinoa cooks in just one minute of active pressure cooking. The machine takes about 10 minutes to come to pressure, but I can chop vegetables or wash dishes while it works. The silicone sealing ring on the Instant Pot lid absorbs strong smells incredibly fast. Mine permanently smells like cumin and chili powder. I bought a two-pack of replacement rings on Amazon for $11.95. I use the red ring for savory dishes like spicy beans and the clear ring for plain grains or oatmeal.
6. Pre-Wash and Prep Sturdy Vegetables

Washing and chopping vegetables on a Tuesday night after work is exhausting. I do it all on Sunday afternoon. I focus on hearty vegetables like broccoli, cauliflower, sweet potatoes, and bell peppers. Delicate greens like arugula or spring mix turn to slime if you wash them too far in advance, so I leave those alone in their original packaging. A few months ago, my prepped bell peppers kept getting fuzzy mold spots by Thursday. I started washing my produce with a half white vinegar and half purified water solution. I buy the massive 1-gallon jug of Heinz Distilled White Vinegar from Costco for $5.49. I scrub my stainless steel sink with baking soda and rinse it clean before filling it with the vinegar solution. I soak the vegetables in the solution for five minutes, then rinse them thoroughly with freezing cold water. This removes bacteria and keeps them crisp for 5 to 7 days. I dry them completely using a clean cotton kitchen towel. Any leftover moisture causes rapid rot. I slice the broccoli florets so they have a flat edge. This flat side caramelizes perfectly when it touches the hot roasting pan later in the week. I store the chopped vegetables in airtight containers with a folded paper towel at the bottom. The paper towel absorbs excess moisture. I get my produce from Sprouts. Their loose broccoli crowns are usually $1.49 per pound, and they stay incredibly crisp in the fridge all week using this exact method. You might also like: 20 Inspiring Sunday Dinner Ideas You Need to See

Etekcity Food Kitchen Scale
Honestly, Etekcity Food Kitchen Scale surprised me — sturdier than it looks in the photos, and over 1,736 buyers gave it 4.5 stars.
7. Flavor Bomb Your Meals with Nutritional Yeast

Plant-based meals can taste flat and boring if you don’t intentionally add umami. I rely on nutritional yeast to add a cheesy, savory depth to my dishes. It looks like flaky yellow fish food, but the flavor is incredible. I buy Bragg Nutritional Yeast. It costs $8.49 for a 4.5-ounce shaker bottle at Kroger. I sprinkle 1 to 2 tablespoons into my breakfast tofu scrambles, over roasted root vegetables, and into plain tomato pasta sauces. It deepens the flavor profile without adding dairy. I tried a generic bulk-bin nutritional yeast once from a local health food store, and it tasted like actual dust. I stick to the Bragg brand now because the flavor is much sharper, nuttier, and more concentrated. When I make a quick vegan cheese sauce for macaroni, I blend half a cup of soaked raw cashews, a quarter cup of nutritional yeast, a teaspoon of garlic powder, a pinch of salt, and half a cup of warm water. I boil the cashews for ten minutes if I forgot to soak them overnight, which softens them up perfectly for the blender. It blends into a creamy, rich sauce in sixty seconds. Nutritional yeast also sticks perfectly to hot, oil-popped popcorn. The shaker bottle can get clogged from the steam if you hold it directly over a boiling pot, so I always pour the flakes into a measuring spoon first before adding them to hot food.
8. Organize Your Fridge for Vegetarian Meal Prep for the Week

Prepping healthy food is useless if you forget it exists. I used to push my prepped meals to the back of the bottom shelf, only to find them covered in green fuzz two weeks later. You need strict visual organization. I use clear acrylic bins I found at Target. The Brightroom brand bins cost $10 each. I designate one specific bin entirely for my prepped proteins like baked tempeh and cooked lentils, and another bin for chopped raw vegetables. I keep the acrylic bins on the middle shelf because the back of the bottom shelf tends to freeze my vegetables. I practice the first in, first out method. I place the oldest containers at the front of the shelf at eye level. This forces me to eat the meals that will expire first. I also label every single glass container before it goes into the fridge. I use a roll of green painter’s tape I got at Home Depot for $4.98 and a thick black Sharpie. The painter’s tape peels off the glass easily before I wash the containers, unlike regular paper stickers that leave a sticky residue. I write the exact contents and the date I cooked it. Staring at a mystery brown sauce in a glass jar on a Thursday morning is not appetizing. Labeling removes the guesswork. I keep my fresh herbs like cilantro and parsley in a heavy glass jar with an inch of water at the bottom, like a bouquet of flowers, right in the main compartment of the fridge. It keeps them fresh and perky for ten days.
Getting your meals organized on Sunday saves you from eating sad, expensive takeout on Wednesday night. Start small. You don’t need to prep three complicated meals a day for seven days straight. Pick one sturdy grain, one high-protein source, and a bunch of hearty vegetables to roast. Make sure you let everything cool completely on a sheet pan before snapping those lids on. I’m telling you, the vinegar water wash and the heavy glass containers make a massive difference in how long your food actually lasts. No exaggeration. You’ve got this, and your Thursday self will thank you for putting in the effort. If you found this helpful, pin this article to your meal prep board so you have the temperature guidelines and the vinegar ratio saved for your next massive grocery run.
Frequently Asked Questions
How long does vegetarian meal prep for the week last in the fridge?
Most cooked vegetarian meals, like roasted vegetables, grains, and baked tofu or tempeh, will last 4 to 5 days in the refrigerator when stored in airtight glass containers. Always cool your food completely before sealing to prevent excess moisture and rapid spoilage.
How do I keep my prepped vegetables from getting soggy?
Wash hearty vegetables in a solution of half water and half white vinegar, rinse thoroughly, and dry them completely with a towel. Store them in airtight containers with a folded paper towel at the bottom to absorb any lingering moisture.
What is the best way to store cooked grains?
Spread freshly cooked grains like quinoa or wild rice on a large baking sheet to cool completely to room temperature before storing them. This stops the cooking process and prevents the grains from clumping together into a gummy paste in the fridge.
Can I prep delicate greens in advance?
You shouldn’t wash delicate greens like arugula or spring mix days in advance, as they will quickly turn to slime. Keep them in their original packaging and only wash the exact amount you plan to eat that same day.
