What’s Inside
- Start Small With Meal Prep For The Week Ideas To Prevent Burnout
- Implement the Component Prep Strategy Instead of Full Meals
- Master the Air Fryer for Crispy Reheats
- Invest in High-Quality, Leak-Proof Containers
- Embrace Sous Vide for Perfectly Tender Proteins
- Batch Cook Cheap Seasonal Staples
- Prioritize Protein In Your Meal Prep For The Week Ideas
- Be Meticulous About Food Safety and Storage Times
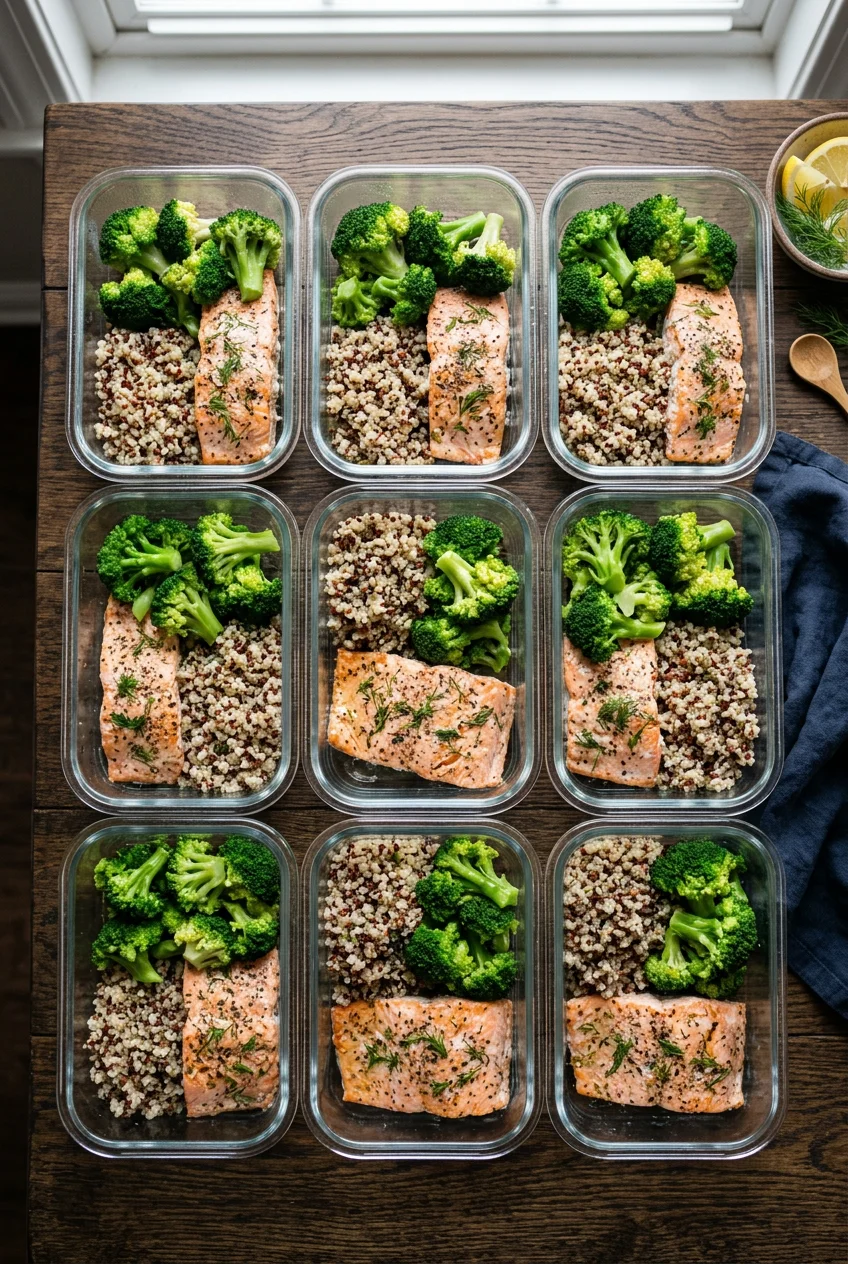
Last October, I stood in my kitchen at 11 PM on a Sunday, staring at five pounds of overcooked, unseasoned chicken breast while my toddler screamed in the living room. I threw half of that chicken in the trash by Wednesday because it tasted like wet cardboard. If you need meal prep for the week ideas that actually work, you’ve got to stop trying to cook a massive, dry banquet in one night. Finding realistic meal prep for the week ideas means accepting your own limits. I spent years trying to copy those perfect social media grids showing twenty identical plastic boxes of broccoli and rice. It never worked for me. I’d get to Thursday, look at the sad, soggy green vegetables in my fridge, and order a $25 pizza instead. You don’t need to prep every single bite of food you plan to eat. You just need a system that keeps you from starving at 2 PM on a Tuesday. I’ll walk you through exactly how I fix my fridge for the week, using real ingredients from real stores. I’ve made every mistake you can make with food storage and bulk cooking. I learned that the hard way. Now, I stick to a few strict rules that actually keep my family fed without making me hate my kitchen.
1. Start Small With Meal Prep For The Week Ideas To Prevent Burnout

When I first started trying to organize my kitchen, I thought I had to make breakfast, lunch, and dinner for Monday through Friday in one sitting. I spent five hours chopping vegetables and washing heavy pans. By Wednesday, I was completely exhausted and the food was already starting to look questionable. Dietitians actually recommend starting by preparing just 2-3 meals for your busiest days. For me, that means I only prep lunches and dinners for Monday through Wednesday. I won’t touch Thursday or Friday until later in the week. This approach prevents the massive burnout that makes people quit after one week. It also significantly reduces potential food waste, which is the most common mistake for beginners. Last Tuesday at Whole Foods, I watched a woman buy what looked like forty pounds of fresh produce. I wanted to warn her that most of it would probably rot in her crisper drawer. Instead of a massive haul, just grab enough for a few days. I like to boil 4-5 large Grade A eggs for exactly 9 minutes to keep in the fridge for instant snacks. It takes ten minutes and gives you a quick protein source with a slightly jammy center when you’re rushing out the door. If you try to do too much at once, you’ll end up hating the entire process. Start small. Prep your Monday lunch. See how that feels before you commit your entire Sunday afternoon to the stove.
2. Implement the Component Prep Strategy Instead of Full Meals

I used to build complete, identical meals in single containers. Chicken, rice, and broccoli, stacked together in twenty different boxes. The problem is that by day three, you’re incredibly sick of eating the exact same flavor profile. A better approach is to prep individual components rather than full meals. I call this component prep, and it completely fixed my meal fatigue. I prepare a big batch of grilled chicken seasoned with smoked paprika, a pot of white quinoa, and a large tray of half-inch roasted sweet potato cubes separately. I store them in large containers in the fridge. This allows for flexible meal assembly. I can make chicken and quinoa bowls one day, and then throw that same chicken into tacos with the sweet potatoes the next day. I buy most of my base ingredients at Trader Joe’s. I grab their pre-washed quinoa and bags of sweet potatoes. It saves me about twenty minutes of rinsing and scrubbing. When I store these components, I use the Rubbermaid Brilliance 12-Piece Food Storage Set. It usually costs around $25-35 on Amazon. The airtight seals keep the quinoa from drying out and turning into tiny rocks. Storing ingredients separately also keeps them fresher. When you mix wet vegetables with dry grains in a single container for four days, everything turns into a soggy mess. Component prep lets you control the texture of your food right up until the minute you eat it. Trust me on this.
3. Master the Air Fryer for Crispy Reheats

Microwaves destroy the texture of almost everything you put in them. I ate rubbery, microwaved chicken breasts for months before I finally figured out how to reheat food properly. The air fryer is the only way I reheat my prepped meals now. It restores the crispiness that microwaves completely ruin. I use my 6-quart basket air fryer for both the initial batch cooking and the daily reheating. When I buy a bulk pack of chicken breasts from Costco, I cook them in the air fryer at 380°F for 15-20 minutes. I always flip them halfway through so they cook evenly. For vegetables, I set it to 400°F for 10-15 minutes, shaking the basket halfway. The hot air circulates and creates a slight char that you just can’t get in a regular oven without waiting forty minutes. When it’s time to reheat my lunch, I put the cold components into the air fryer at 350°F for 2-3 minute intervals. It brings back that fresh-cooked texture instantly. The breading on chicken gets crispy again. Roasted potatoes stop being mushy. It takes slightly longer than hitting a button on a microwave, but the difference in taste is massive. If you’re going to spend your Sunday cooking, you shouldn’t ruin the food on Wednesday by blasting it with microwaves until it turns into a wet sponge. Take the extra three minutes to use the air fryer. You might also like: 8 Low Calorie Meal Prep You Need to See

Etekcity Food Kitchen Scale
Honestly, Etekcity Food Kitchen Scale surprised me — sturdier than it looks in the photos, and over 1,736 buyers gave it 4.5 stars.
4. Invest in High-Quality, Leak-Proof Containers

You absolutely need durable, microwave-safe, and leak-proof containers. I learned this the hard way. A few years ago, I bought a cheap stack of plastic containers from a discount bin. I packed a beautiful spinach salad with a thin vinaigrette dressing. On the way to work, the container tipped over in my tote bag. The flimsy lid popped open, and vinaigrette soaked into my passenger car seat and ruined my leather planner. I smelled like cheap Italian dressing for a week. Now, I refuse to use cheap plastic. I rely heavily on the 3.2-cup Rubbermaid Brilliance containers I mentioned earlier. Their plastic latches actually lock down tight with an audible snap. For things I want to reheat in the oven, I use Prep Naturals Glass Containers. They cost around $35-50 for a set. They use thick borosilicate glass, which means they can safely transition from the freezer straight into the oven without shattering. You just have to remember to take the plastic lids off first. I usually pick up extra sets at Walmart when they go on sale. Avoiding ill-fitting containers is crucial if you commute. There’s nothing worse than opening your bag to find that your lunch has become a greasy puddle at the bottom. Spend the extra twenty dollars on containers that actually seal. It pays for itself the first time you don’t have to pay for an interior car detailing.
5. Embrace Sous Vide for Perfectly Tender Proteins

My husband bought an immersion circulator last year. I honestly thought it was a stupid, overpriced kitchen gadget that would just collect dust in the pantry. I was completely wrong. Sous vide cooking is incredible for its precision, especially when you’re cooking chicken breast in bulk. Chicken breast dries out so easily in the oven. With a sous vide machine like the Anova Culinary or Breville Joule, you get consistently tender and juicy results every single time. I seal multiple portions of chicken breast in heavy-duty freezer bags and cook them in a water bath at 145°F for exactly 90 minutes. You don’t even have to watch it. You just drop the bags in and walk away. After cooking, you have to rapidly cool the sealed bags in an ice bath before you put them in the refrigerator. This rapid cooling step is mandatory. It stops the cooking process and keeps bacteria from forming. Using this method can actually extend the refrigerated shelf life of your proteins up to a full week. I usually sear the chicken in a hot cast-iron pan for one minute right before I eat it to get a nice brown crust. The inside stays perfectly juicy. Skip the fat-free, oven-baked chicken recipes you see online. They taste like dry wall. Invest in a sous vide setup if you hate dry meat. You might also like: 12 Low Carb Meal Prep Worth Trying
6. Batch Cook Cheap Seasonal Staples

You can save a massive amount of money by cooking large quantities of cheap, versatile staples. I always buy fruits and vegetables when they’re in season. It’s a highly effective way to reduce your grocery costs and get better-tasting food. Out-of-season produce is expensive and usually lacks flavor. For Spring 2026, I focus heavily on produce like green cabbage, which runs about $0.50 to $0.80 per pound. I also buy whole carrots for $0.80 to $1.00 per pound, and fresh zucchini for $1.00 to $1.50 per pound. I always keep frozen peas on hand, which cost around $1.00 to $1.50 per pound. These ingredients are affordable and nutrient-dense. I go to Sprouts on Sunday mornings to check their seasonal bins. I’ll buy 2 lbs of mixed vegetables, chop them up, and throw them on a large aluminum sheet pan. I toss them with 2 tablespoons of California Olive Ranch olive oil (usually $12.99 a bottle), coarse salt, and heavy black pepper. Then I roast them at 400°F for 20-25 minutes. The edges get crispy and caramelized. Buying these ingredients in bulk and sticking to store brands can reduce your weekly grocery bill by 20-35%. I used to buy pre-chopped vegetables in plastic tubs to save time, but I was paying triple the price for food that went slimy in two days. Chopping fresh, seasonal produce yourself takes ten minutes and saves you a ton of money.

Bento Box Adult Lunch Box – 4 Pack, 5
Honestly, Bento Box Adult Lunch Box – 4 Pack surprised me — sturdier than it looks in the photos, and over 24 buyers gave it 4.5 stars.
7. Prioritize Protein In Your Meal Prep For The Week Ideas

If you don’t pack enough protein in your containers, you’re going to be starving by mid-afternoon. I used to pack these huge salads with just iceberg lettuce, tomatoes, and a tiny sprinkle of feta cheese. I’d eat lunch at noon, and by 2 PM I was raiding the office vending machine for stale potato chips. Nutritionists consistently recommend aiming for 25-40g of protein per meal. This amount supports muscle maintenance and promotes much longer-lasting satiety. I always make sure I incorporate 4-6 ounces of cooked lean protein into every single container. This usually means chicken breast, white fish, or a 14 oz block of firm tofu pressed and cubed. If I’m eating plant-based that day, I’ll use 1 cup of cooked brown lentils instead. To keep my portions exact without having to weigh my food every day, I use containers with built-in dividers. I really like the Bentgo Prep 3-Compartment containers. You can get a 10-pack for around $20-25. I fill the large compartment with my 4-6 ounces of protein, and use the smaller sections for my roasted vegetables and a complex carb like brown rice. I usually buy my bulk chicken and fish at Kroger because their meat counter runs great weekend specials on family packs. Hitting that 25-40g protein target is what actually keeps me full. If you skip the protein, you aren’t prepping a meal. You’re just packing a heavy snack.
8. Be Meticulous About Food Safety and Storage Times

Most people are completely clueless about food safety timelines. I used to leave cooked white rice in my fridge for eight days and wonder why my stomach always hurt on Fridays. Most properly refrigerated foods are only safe for 3-5 days when stored at or below 40°F. Cooked poultry and meat should be eaten within 3-4 days. You can’t just cook a massive batch of chicken on Sunday and eat it the following Sunday. That’s a guaranteed way to get food poisoning. You also need to cool your food rapidly. You should get cooked food into the fridge within 2 hours of taking it off the stove. Leaving it on the counter all afternoon while you watch television is a huge mistake. I label all my glass containers with a piece of sticky masking tape showing the meal name and the exact date I cooked it. This creates a strict first in, first out system. Also, don’t overlook your hydration setup. I used to throw a cheap plastic water bottle into my lunch bag, and it would sweat heavy condensation all over my dry food containers. Now, I use a 32 oz wide-mouth insulated Hydro Flask that costs about $45. I keep it in a dedicated bottle pocket on the outside of my bag. I bought my current lunch tote at Target specifically because it keeps drinks separate and stable. Keep your food cold, eat it within four days, and keep your water bottle away from your dry snacks. No exaggeration.
Figuring out a cooking rhythm that actually fits your real life takes a lot of trial and error. I ruined a lot of expensive groceries before I finally accepted that prepping three days of food is better than failing at prepping seven days of food. Buy the good glass containers with the locking lids, stop microwaving your chicken breasts, and pay attention to how long things sit in your fridge. If you found these tips helpful, pin this article to your favorite recipe board so you can check the roasting temperatures next time you’re standing in your kitchen on a Sunday afternoon.
Frequently Asked Questions
How many days in advance should I meal prep?
Start by prepping just 2-3 days of meals at a time. This prevents burnout and keeps your food from spoiling. Most cooked proteins and vegetables are only safe in the fridge for 3-4 days anyway.
What are the best containers for meal prep?
Look for containers with airtight, locking latches. Rubbermaid Brilliance plastic containers are great for cold items, while Prep Naturals borosilicate glass containers are perfect if you plan to reheat your food in the oven.
How do I reheat prepped food without it getting soggy?
Skip the microwave and use an air fryer. Reheating cold components at 350°F for 2-3 minutes restores the crispy texture of roasted vegetables and keeps breaded proteins from turning into mush.
How much protein should be in my meal prep containers?
Aim for 25-40g of protein per meal to stay full until dinner. You can hit this by packing 4-6 ounces of cooked chicken, fish, or firm tofu, or 1 cup of cooked lentils.
