What’s Inside
- Choose Leaner Cuts for Consistent Steak Meal Prep Ideas
- Master the 24-Hour Marinade for Tougher Cuts
- Season Generously with Quality Rubs
- The Sous Vide Method for Foolproof Prep
- The Reverse Sear Strategy for Thick Cuts
- High-Heat Searing and Avoiding the Overcrowded Pan
- The Room Temperature Rule (And Why Cold Steak Fails)
- The Mandatory Resting Period and Grain Slicing
- Smart Storage in Glass Containers and Reheating
- Advanced Tactics: Koji Aging and Dirty Steak
I tossed $35 worth of grey, rubbery meat last Tuesday. I bought three beautiful cuts of beef at Whole Foods, cooked them all on Sunday, and by Wednesday my lunch tasted like a wet hiking boot. If you want steak meal prep that actually tastes good by day four, stop treating it like a restaurant dinner. I spent three years ruining perfectly good food before figuring out the science of keeping it tender in a glass box. Learned that the hard way. Most people just fry a piece of meat, shove it in a plastic tub, and wonder why it’s inedible two days later. You can’t do that. You need the right cuts, the right storage, and a different approach to reheating. I used to dread my Wednesday lunches because the texture was so awful I’d end up throwing it away and buying a $15 salad from the cafe downstairs. Let’s fix your lunch routine so you aren’t chewing on dry, flavorless leftovers. Here are the methods I use to prep beef that survives the fridge.
1. Choose Leaner Cuts for Consistent Steak Meal Prep Ideas

I used to buy thick, marbled ribeyes for my Sunday prep. I figured the extra fat would keep the meat moist. I was wrong for months. When you cook a fatty piece of meat and fridge it, that rendered fat solidifies into a chalky, waxy paste. Reheating it in an office microwave just turns it into a greasy puddle. Skip the fatty stuff. You want lean cuts like sirloin, flank steak, or tenderloin. Sirloin is my standard. I pick up a three-pound pack at Costco for about $9.99 per pound. It has just enough marbling for flavor but won’t leave a grease slick in your Tupperware. Flank steak is another brilliant option if you want to slice it thin for rice bowls. I usually grab a 1.5-pound flank steak at Sprouts when they run their weekend meat specials. Leaner beef reheats better. It holds its texture. When you build your grocery list, walk right past the ribeyes and chuck steaks. Save those for a Friday night dinner. For Monday through Thursday, sirloin and flank are the only cuts that survive.
2. Master the 24-Hour Marinade for Tougher Cuts

Since you’re buying lean cuts, you’ve got to introduce moisture before cooking. A good marinade does both. I learned this the hard way last October. I tossed a plain flank steak into a pan and it was so tough my jaw ached after lunch. Now, I use a specific formula. You need 1/4 cup of Chosen Foods 100% Pure Avocado Oil. I buy the 8.4-ounce bottle for $10.99 at Kroger. Don’t use olive oil. Avocado oil has a neutral taste and a high smoke point, which matters when you sear. Add 2 tablespoons of soy sauce, 1 tablespoon of apple cider vinegar, 1 teaspoon of minced garlic, and 1/2 teaspoon of coarse black pepper. The vinegar breaks down the tough proteins. Put your steak and the liquid in a glass bowl, cover it, and leave it in the fridge. Marinate for at least 2 hours, but 24 hours is the sweet spot. Don’t push it. I forgot a batch for two days once, and the acid turned the meat into a grey, mushy paste. It was disgusting. Pull it out a day later, wipe off the excess, and it’s ready for the heat. You might also like: 11 Meal Prep For The Week For Beginners for Every Budget
3. Season Generously with Quality Rubs

If you aren’t using a marinade, you need a heavy dry rub. Most people drastically under-season their beef. You lose about 35 percent of your seasoning during the cooking process; it falls off in the pan or drips away. I used to just sprinkle a tiny pinch of salt and pepper. The result was boring, hospital-grade food. Now, I coat the meat heavily. My current rotation includes Meat Church Holy Cow BBQ Rub. It costs about $12.99 for a 12-ounce bottle at my local hardware store. It’s gluten-free and specifically formulated for beef. If I want something simpler, I use Kinder’s Butcher’s All-Purpose Seasoning. I grab the 9.4-ounce bottle for $6.48 at Walmart. It’s a heavy blend of sea salt, garlic, and coarse spices. Apply these at least an hour before cooking. Even better, season the steak and leave it uncovered on a wire rack in your fridge overnight. This dries out the surface, which means a better crust when it hits the pan. Press the rub into the meat so it sticks. You might also like: 10 Postpartum Meal Prep You Need to See

Rubbermaid Brilliance Tritan Plastic Food Storage
A dependable everyday pick — Rubbermaid Brilliance Tritan Plastic Food Storage Containers BPA Free pulls in 583 ratings at 4.5 stars. Not flashy, just solid.
4. The Sous Vide Method for Foolproof Prep

Sous vide is the best way to solve the overcooking problem. When you cook four steaks on a Sunday, it’s easy to get distracted and accidentally cook them to well-done. I bought an Anova Precision Cooker at Target for $129.00 last year. I thought it was a stupid, overpriced gadget at first, but it changed my entire routine. You seal your seasoned steak in a bag, submerge it, and set the Anova to 130 degrees for medium-rare. The machine holds the temperature. Your meat physically can’t overcook. I leave it for two hours for a tender, edge-to-edge finish. For meal prep, leave the cooked steaks in their sealed bags, plunge them into an ice bath to chill, and keep them in the fridge. On Wednesday, take one out, pat it dry, and sear it in a hot pan for sixty seconds per side. It tastes like you just cooked it. You might also like: 10 Healthy Meal Prep Ideas for Every Budget
5. The Reverse Sear Strategy for Thick Cuts

If you don’t have a sous vide machine, the reverse sear is your best alternative for thick cuts. You need a steak at least 1.5 inches thick. I usually buy a massive top sirloin roast at Whole Foods for this. The standard pan method often leaves you with a burnt outside and a raw inside. The reverse sear fixes this. Bake the meat in a low oven at 250 degrees Fahrenheit on a wire rack. Cook it slowly until the internal temperature is 10 to 15 degrees below your target. For medium-rare, I pull it at 115 degrees. This usually takes about 45 minutes. Once it’s out, drop it into a blistering hot skillet to build the crust. I tried this with thin steaks once and it was a disaster. The meat cooked through before I could sear it. Save this technique for the thick cuts you plan to slice up.
6. High-Heat Searing and Avoiding the Overcrowded Pan

When it’s time to cook, the temperature of your pan dictates the flavor. You need a dark, crispy crust. To get that, you need high heat and the right oil. I strictly use Chosen Foods 100% Pure Avocado Oil. It has a smoke point of 500 degrees. If you use standard olive oil, it will smoke up your kitchen and taste bitter. I set off my smoke detectors three weeks in a row before I switched. Also, do not overcrowd your pan. If you have four steaks, you can’t shove them all into one 10-inch skillet. When you add too much cold meat, the metal temperature drops instantly. Instead of searing, the steaks boil in their own juices and turn grey. I use a Lodge 12-inch Cast Iron Skillet from Target for $19.99. I cook a maximum of two steaks at a time. It takes ten extra minutes, but the crust is worth it.

Food Scale, 11lb Digital Kitchen Scale with 6 Units LCD
Honestly, Food Scale surprised me — sturdier than it looks in the photos, and over 21 buyers gave it 4.5 stars.
7. The Room Temperature Rule (And Why Cold Steak Fails)

This is the step everyone skips. You pull meat from the fridge and throw it directly into a hot pan. I did this for years. I couldn’t figure out why my steaks had a grey, overcooked band right under the crust while the center remained cold. The problem is the starting temperature. You have to let your beef sit on the counter for 30 to 45 minutes before cooking. If I’m cooking a two-pound roast, I leave it out for a full hour. It needs to come up to room temperature. Don’t leave it out for four hours, but 45 minutes is safe and necessary. I use a ThermoPro digital meat thermometer, which I grabbed for $14.99 on Amazon. I poke the center of the raw meat. If it reads 38 degrees, it stays on the counter. If it’s 60 degrees, it goes in the pan. Small detail, huge difference.
8. The Mandatory Resting Period and Grain Slicing

Once you pull the meat off the heat, your instinct is to immediately chop it up. Don’t. When beef cooks, the muscle fibers contract and push juices toward the center. If you slice it right away, all that flavor runs out onto your cutting board. I ruined a beautiful flank steak last month by slicing it hot. The meat was bone-dry by Tuesday. Let the steak rest for 5 to 10 minutes. Thicker cuts need 15. This allows the juices to redistribute. When you cut, slice against the grain. Look for the long muscle fibers and cut perpendicular to them. This shortens the fibers and turns a chewy piece of sirloin into a tender bite. I use a heavy wooden cutting board with a juice groove I bought at Trader Joe’s for $14.99.
9. Smart Storage in Glass Containers and Reheating

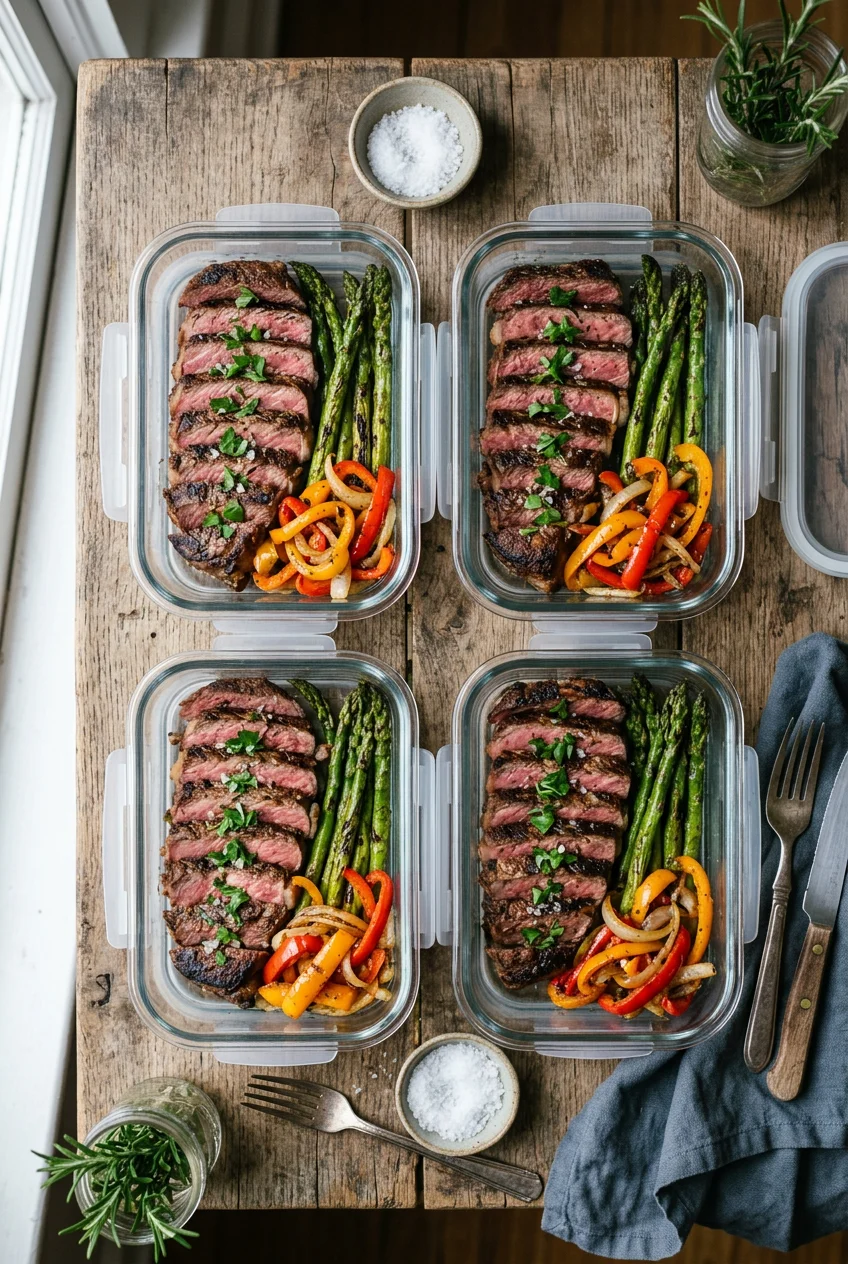
How you store your food dictates how it tastes later. If you put hot beef into a cheap plastic tub, it’s going to taste like plastic. I used flimsy containers for my first year. The plastic stained, warped, and absorbed the smell of old garlic. I threw them all away. Now, I exclusively use glass. I buy OXO Good Grips Smart Seal glass containers. A 3.3-cup container costs about $9.99 at Target. Glass is non-reactive and seals completely airtight. This prevents the beef from drying out. Your food will stay fresh for four days. When you eat, reheat smartly. Do not blast your lunch in the microwave on high. It will turn your sirloin into shoe leather. I sprinkle a few drops of water over the meat, cover it with a damp paper towel, and microwave at 50 percent power for 90 seconds. If I’m working from home, I skip the microwave. I put the slices in a small skillet over medium-low heat with a splash of beef broth until warmed through.

Food Scale -33lb Digital Kitchen Scale for Food Ounces
A dependable everyday pick — Food Scale -33lb Digital Kitchen Scale for Food Ounces Grams Rechargea pulls in 78 ratings at 4.5 stars. Not flashy, just solid.
10. Advanced Tactics: Koji Aging and Dirty Steak

If you want to try something different, look into koji dry-aging. Japanese chefs use a mold called Aspergillus oryzae to rapidly dry-age beef. You can buy a bag of Koji Rice for about $8.99 at Whole Foods. Grind the rice into a powder, rub it all over a sirloin roast, and leave it on a wire rack in your fridge for 48 hours. The enzymes break down the tough proteins fast. It gives cheap cuts the tender texture of an expensive steak. Just rinse the powder off before cooking. Another trend is the dirty steak method. You season a thick steak and cook it directly on glowing hot charcoal. No grill grates. You throw the meat right onto the coals. The intense heat creates a massive crust. I tried this last summer. I made the mistake of using chemical briquettes instead of natural lump charcoal. The meat tasted like lighter fluid. It took me years to realize you must use 100 percent natural hardwood lump charcoal. I buy a 15-pound bag of Royal Oak at Walmart for $15.99. It works perfectly.
I hope these methods save you from another sad, dry lunch. Meal prep shouldn’t feel like a punishment. Once you switch to leaner cuts and start using glass containers, the quality of your lunches will improve. Batch cook your sides at the same time to make it even easier. I usually roast a pan of asparagus and cook a pot of quinoa while the beef rests. I recommend starting with the reverse sear method this Sunday. Grab a thick sirloin, take your time, and see how it holds up in the fridge. If you found these ideas helpful, pin this article to your favorite recipe board. Let’s make this week’s prep session your best one yet.
Frequently Asked Questions
What is the best cut of steak for meal prep?
Leaner cuts like sirloin or flank steak are best for meal prep. Fatty cuts like ribeye tend to solidify in the fridge, creating a waxy texture that doesn’t reheat well.
How long should I marinate steak for meal prep?
You should marinate tougher cuts like flank steak for at least 2 hours, but 24 hours is the ideal sweet spot. Don’t exceed 24 hours, as the acid can turn the meat mushy.
How do I reheat steak without drying it out?
Avoid blasting it in the microwave on high. Instead, sprinkle a few drops of water on the meat, cover with a damp paper towel, and microwave on 50 percent power for 90 seconds.
Why is my meal prep steak always tough?
You might be cutting it incorrectly. Always let the meat rest for 5 to 10 minutes after cooking, then slice it thinly against the grain to physically shorten the muscle fibers for a tender bite.
