What’s Inside
- 1. Prioritize Component-Based Prep for Versatility
- 2. Master the High-Protein, High-Fiber Breakfast
- 3. Rely on Budget-Friendly Protein Sources
- 4. Invest in High-Quality Glass Containers
- 5. Embrace Sheet Pan Dinners as the Ultimate Healthy Meal Prep Ideas
- 6. Prevent Soggy Salads with Smart Layering
- 7. Batch Cook Grains and FIFO Your Fridge
- 8. Pre-Chop Vegetables and Use Weird Kitchen Tools
- 9. Adopt the Plate Method and Grow Fresh Herbs
- 10. Scale Down Your Healthy Meal Prep Ideas and Reimagine Instant Meals
I sat on the cold floor of my cramped apartment kitchen last Tuesday, staring at a plastic Tupperware container of gray, rubbery chicken and actually crying. I needed healthy meal prep ideas that didn’t taste like cardboard, but I was failing. My baked chicken was dry enough to choke on, my roasted broccoli smelled like sulfur, and I ended up tossing it all to order a $16 soggy burrito on DoorDash. Most people get this wrong when they start cooking for the week. They think healthy means boiling the life out of their food. I tried that for months before I finally figured out the mechanics of a good fridge. You don’t have to suffer through bland, depressing meals just to save a few bucks. Let’s fix your fridge right now with strategies that work for actual, busy people.
1. Prioritize Component-Based Prep for Versatility
I’m a huge fan of component cooking. Instead of building five identical plastic boxes of chicken and rice, just cook large batches of single ingredients. I swear by this because it stops palate fatigue. Batch-cook 2 cups of dry quinoa; it yields about 6 cups cooked. Roast 1.5 lbs of chicken breast with basic salt and pepper. Keep them in separate containers. On Monday, toss the quinoa with black beans, corn, and spicy salsa. On Tuesday, mix it with chopped chicken, shredded carrots, and a thick peanut sauce. Target sells their Good & Gather Organic Quinoa for $3.99 for a 16 oz bag. It’s cheap and cooks fluffy every time. I used to make five identical meals every Sunday, but by Wednesday, the texture of soggy rice made me gag. I’d toss the Thursday and Friday meals in the trash. It was a massive waste of money. Component prep changes your whole routine. You just mix and match grains, proteins, and veggies based on what you’re craving. It takes the same time on Sunday but keeps your brain interested all week. Plus, quinoa holds its texture in the fridge way better than white rice. The seeds pop between your teeth instead of turning to clumpy mush.

2. Master the High-Protein, High-Fiber Breakfast
Let’s talk mornings. Dietitians always say to start with protein and fiber for energy, and they aren’t wrong. I used to eat a bagel and crash by 10 AM, hitting the breakroom donuts. Now, I prep overnight oats. You need 1/2 cup of rolled oats, 1 scoop of vanilla protein powder, 1 tablespoon of chia seeds, and 1 cup of unsweetened almond milk. I buy Optimum Nutrition Gold Standard Whey at Costco. It’s $69.99 for a 5.64 lb bag. It mixes perfectly without leaving chalky clumps. If you buy these in bulk, this breakfast costs about $0.40 per serving. Skip the fat-free milk; it tastes like wet cardboard. You want that creamy, thick texture the chia seeds create after sitting overnight. I tried it without chia once—it was just sad, watery soup. The seeds are mandatory for that pudding-like consistency. Just shake it in a glass jar the night before. When you wake up, it’s thick, cold, and ready. It keeps me full until lunch, and I don’t get those mid-morning sugar cravings anymore.

3. Rely on Budget-Friendly Protein Sources
You can’t talk meal prep without talking grocery bills. To keep costs under five dollars a serving, rely on affordable proteins. I once tried to prep wild-caught salmon and ribeye for a week. I blew a $120 budget on three days of food. Disaster. Now, I lean on shelf-stable staples. Canned tuna is cheap and versatile. I buy StarKist Chunk Light Tuna in Water for $1.14 a can at Walmart. Drain the water, then mix the fish with Greek yogurt, diced celery, and Dijon mustard for a high-protein salad. Dried lentils and garbanzo beans are also fantastic and cost pennies. If you want fresh meat, buy a whole rotisserie chicken. They’re usually $4.99 at Costco or $6.99 at Kroger. Shred the meat off the bone while it’s warm. It’s easier than roasting raw breasts, and the meat stays juicy. I use it for tacos, salads, and soups all week. It’s a massive time saver. Plus, the dark meat adds a rich, salty flavor you don’t get from plain baked white meat. You’re saving money and getting better flavor. You might also like: 15 Lovely Kids School Lunch Ideas That Changed Everything

8 Pack 36oz Large Glass Meal Prep Containers with lids
8 Pack 36oz Large Glass Meal Prep Containers with lids has been one of the most consistently praised picks in this category. 859 reviewers averaged 4.5/5.

4. Invest in High-Quality Glass Containers
Ditch the flimsy plastic containers. Invest in heavy glass. I used cheap tubs for years, but last year, I put a spicy tomato sauce in one. No matter how much I scrubbed, the plastic stayed permanently stained orange and smelled like old garlic. It ruined the taste of the fresh strawberries I stored in it next. Now, I only use glass. Pyrex Glass Storage Containers are fantastic. You can get a 3-cup set for $24.99 at Target. They’re oven-safe, microwave-safe, and have thick lids that snap on tight. Glass won’t absorb smells or stains. I also use Souper Cubes for freezing liquids. They cost $29.95 on Amazon or at Target. You can freeze homemade bone broth or chili in 1-cup or 2-cup silicone blocks. Once frozen, pop the blocks out and store them in a freezer bag. It makes future meal assembly effortless. Just grab a frozen block of soup, drop it in a pot, and heat it up. Glass makes your food look appetizing, too. Seeing bright ingredients through clear glass makes me want to eat my prepped meals instead of ordering takeout. You might also like: 20 Lovely Work Lunch Ideas to Inspire Your Next Project

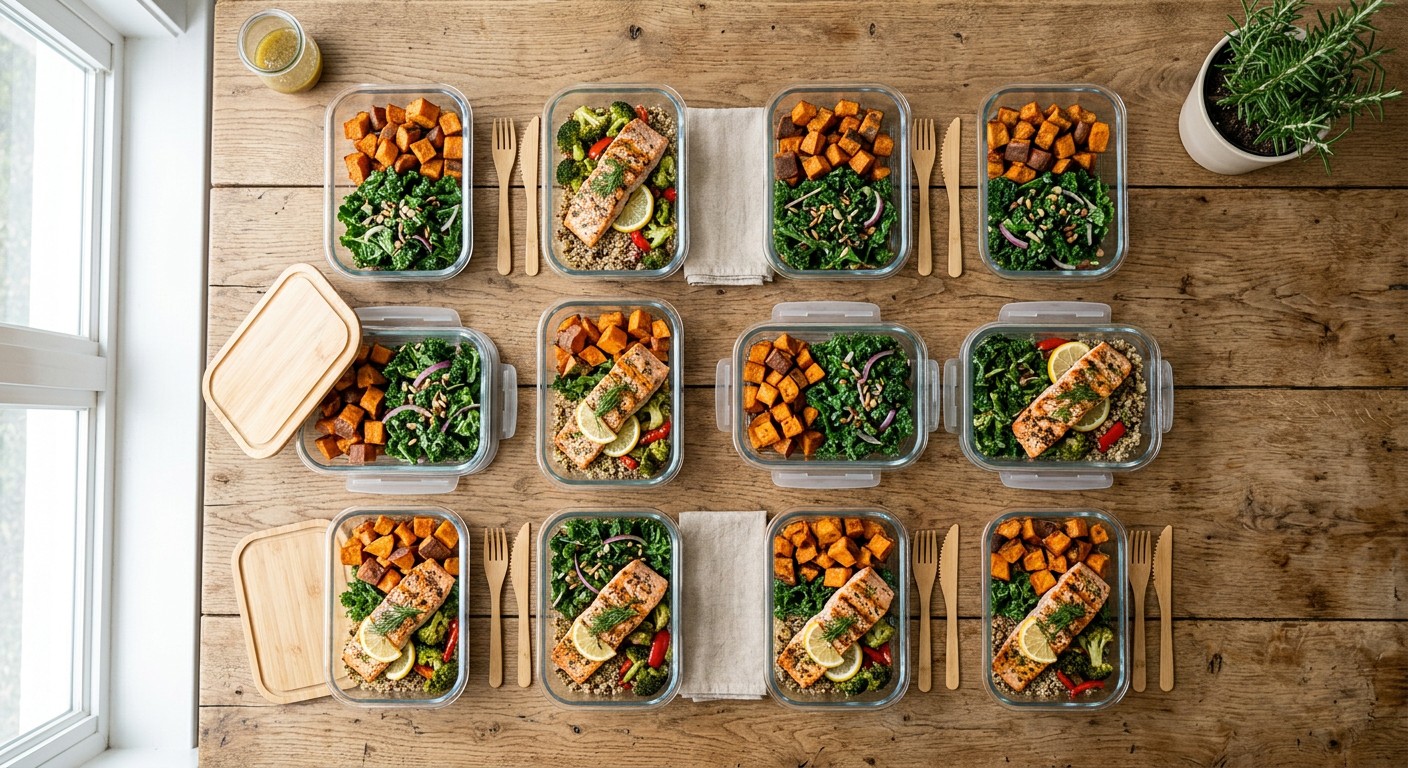
5. Embrace Sheet Pan Dinners as the Ultimate Healthy Meal Prep Ideas
This is the ultimate lazy hack. Combine 1.5 lbs of chopped veggies with 1 lb of protein on a large sheet pan. I like broccoli florets, sliced red peppers, and cubed sweet potatoes with boneless chicken thighs. Drizzle with 2 tablespoons of olive oil. Season it heavily so it doesn’t taste like diet food. I use McCormick Culinary Chili Powder. It’s $7.49 at Kroger for a large 18 oz container. Toss it all with your hands until every piece is coated. Bake at 400 degrees for 25 minutes. The edges of the sweet potatoes get dark and caramelized. The chicken fat renders down and coats the broccoli, making it savory and crispy. I used to cook every ingredient in a separate frying pan and spend an hour scrubbing greasy pots. With a sheet pan, line it with foil, bake, and throw the dirty foil away. Clean-up takes thirty seconds. Just don’t crowd the pan. If you pile the veggies, they’ll steam instead of roast. You want them in a single layer so they get that charred, crispy edge. You might also like: 15 Brilliant Batch Cooking Ideas That Actually Work

6. Prevent Soggy Salads with Smart Layering
This is a hill I’ll die on. A common mistake is dressing salads too early. I used to toss spinach, cucumbers, and vinaigrette in a bowl on Sunday. By Tuesday, the spinach was slimy and smelled like a swamp. To keep greens crisp, layer your salad in a tall Mason jar or deep container. Put the dressing at the very bottom. I use 2 tablespoons of Trader Joe’s Vegan Caesar Dressing. It’s $3.99 for an 11 oz bottle and tastes creamy and garlicky. Next, add hardier veggies that can soak up the dressing without getting mushy. Chopped carrots, cucumbers, and cherry tomatoes go here. Then, add your protein and grains. Finally, pack the delicate greens like baby spinach at the very top, far away from the liquid. When you’re ready to eat, shake the jar or dump it into a bowl. The greens stay dry and crunchy all week. The texture contrast is amazing.

HOMBERKING 10 Pack Borosilicate Glass Meal Prep Containers
Honestly, HOMBERKING 10 Pack Borosilicate Glass Meal Prep Containers with Lockin surprised me — sturdier than it looks in the photos, and over 23 buyers gave it 4.5 stars.

7. Batch Cook Grains and FIFO Your Fridge
Batch cook your grains and label everything. You must adopt the FIFO method: First-In, First-Out. I buy bulk brown rice at Sprouts for $1.99 a pound. I cook 2 to 3 cups of dry rice on Sunday, which yields 6 to 9 cups cooked. Grains last 4 to 5 days in the fridge. Here’s the critical part: label your containers with the meal name and date. Use masking tape and a Sharpie. I learned this the hard way. I once found an unlabeled, frosted container of mystery meat in the back of my fridge. I couldn’t remember if I made it five days ago or two weeks ago. I tossed it out of pure fear. Cooked chicken shouldn’t be stored for more than 4 days. Labeling prevents waste and stops you from getting food poisoning. When you load your fridge, push the newer meals to the back and bring the older ones to the front. You’ll always grab the oldest meal first. It takes five seconds to write a date and saves you so much anxiety.

8. Pre-Chop Vegetables and Use Weird Kitchen Tools
Pre-chop your vegetables right after grocery shopping. Don’t put whole, unpeeled onions and peppers in the crisper drawer. You won’t want to drag out a cutting board to chop them on a busy Wednesday night. Chop them immediately and store the pieces in airtight containers. I use Rubbermaid Brilliance Food Storage Containers. A 12-piece set is around $44.99 at Walmart. They’re clear, seal tightly, and stack beautifully. I also use unexpected tools to save my sanity. An egg slicer isn’t just for eggs. You can use it to quickly slice soft foods like strawberries, mushrooms, or fresh mozzarella. It saves a ridiculous amount of time. For garlic, I use a weird but effective hack. Place a whole, unpeeled bulb in a Mason jar, screw the lid on tight, and shake it violently for twenty seconds. The loud rattling is intense, but the papery skins fall right off. You’re left with peeled garlic without getting your fingers sticky. I used to dread mincing garlic because the skin would stick to my knife. This jar trick removed the friction from my routine.

9. Adopt the Plate Method and Grow Fresh Herbs
I hate tracking calories. It makes me obsessed with numbers. Instead, I follow the plate method: fill half your plate with non-starchy vegetables, a quarter with lean protein, and a quarter with grains. It’s a simple visual guide that ensures balance without math. To make these plates taste incredible, I started growing my own herbs. Grocery store herbs are a rip-off. You pay $3 for a tiny clamshell of basil that turns black in two days. Instead, I bought a Bonnie Plants sweet basil plant for $4.98 at Home Depot. I keep it in a sunny window in my kitchen. Whenever I need flavor, I snip off a few leaves. The smell of fresh basil is incredible. It adds a bright, sweet flavor to plain chicken and rice that dried herbs can’t touch. I also grow cilantro and green onions in small pots. You just chop the tops off the onions and they grow back. It’s practically free flavor for all your meals.

M MCIRCO 10-Pack,30 Oz Glass Meal Prep Containers 2
If you want something that just works, M MCIRCO 10-Pack is a safe bet (23 reviews, 4.5 stars).

10. Scale Down Your Healthy Meal Prep Ideas and Reimagine Instant Meals
This is the most important advice: don’t try to prep 21 meals on a Sunday. I did this once. I spent six grueling hours cooking and cleaning. By 4 PM, my feet ached, my kitchen looked like a war zone, and I was crying on the floor. I hated meal prep for a month after that. Start slow. Prepare 2 or 3 large dishes at a time. Work your way up to 5 or 6 once you’re comfortable. To fill the gaps, upgrade your instant pantry staples. The instant food trend focuses on convenience without sacrificing quality. I make spicy desk drawer ramen for quick lunches. I use a high-quality liquid bone broth instead of the salty seasoning packet. Kettle & Fire Chicken Bone Broth is $6.99 for a 16.2 oz carton at Whole Foods. I heat it up, pour it over instant wheat noodles, and add a spoonful of spicy chili crisp. It’s a rich, savory bowl of comfort that takes three minutes. You don’t have to cook everything from scratch to eat well. Trust me.
Start these strategies this weekend. You’ll save money, eat better, and finally reclaim your weeknights. Meal prep doesn’t have to mean dry chicken and soggy broccoli from a stained plastic tub. It can be something you actually look forward to eating. Pin this guide to your favorite Pinterest board so you don’t lose these brand recommendations and prices. Let me know in the comments which glass container hack you try first, and please, stop putting your salad dressing on top of your spinach!

Frequently Asked Questions
How long does cooked chicken last in the fridge?
Cooked chicken shouldn’t be stored for longer than 4 days in the refrigerator. Always label your containers with the date you cooked the food to prevent accidental food waste or foodborne illness.
Can I freeze meals in glass containers?
Yes, high-quality tempered glass containers like Pyrex are freezer-safe. Leave a little room at the top because liquids expand as they freeze. You can also freeze portions in silicone trays first.
What are the best cheap proteins for meal prep?
Canned tuna, dried lentils, chickpeas, and whole rotisserie chickens are incredibly budget-friendly. They cost significantly less than raw chicken breasts or steak, keeping your per-meal cost under five dollars.
How do I keep my prepped salads crisp?
Layer your salads in tall jars. Put the dressing at the very bottom, add hard vegetables like carrots next, and pack your delicate greens at the very top so they stay dry.