What’s Inside
- Prioritize Glass Containers Over Plastic
- Master Component Prep Instead of Full Meals
- The 50/25/25 Rule for Balanced Portions
- Rely on “No-Reheat” Options for Busy Days
- Keep Dressings and Sauces Strictly Separate
- Utilize Your Freezer for the 4-Day Wall
- Integrate Plant-Based Proteins to Cut Costs
- Use Silicone Bags for Snacks and Sides
- Clean As You Go to Avoid the Sunday Night Crash
I stared at the soggy, greyish chicken and wilted spinach in my cracked plastic container last Tuesday at my office desk. The smell alone made me lose my appetite. I ended up tossing it and spending $16.50 on a mediocre, overdressed salad from the cafe downstairs. Getting lunch prep right took me three years of throwing away spoiled food, scrubbing stained Tupperware, and wasting money. I’ve made every mistake: soggy greens, rubbery chicken, and containers that leaked dressing all over my car seats. Learned that the hard way.
I’m sharing exactly how I build my lunches now. No complicated, four-hour recipes that leave your kitchen a wreck. Just functional, affordable food that actually tastes good by Thursday. I used to think prepping meant eating bland, dry chicken and broccoli every day. I’d force myself to eat it on Monday, and by Wednesday, I’d be ordering takeout. You don’t have to do that. I’ve learned how to store ingredients so they stay crisp, how to portion things without a food scale, and how to use my freezer to avoid the Friday food poisoning scare. Here’s the routine I use to pack my lunches.
1. Prioritize Glass Containers Over Plastic

I used cheap plastic bins from Walmart for two years. They warped in the microwave after a month, held onto garlic smells for weeks, and turned a permanent cloudy orange after one batch of turkey chili. I finally bought Pyrex Glass Storage Containers. A set with 3-cup, 4-cup, and 6-cup sizes costs $24.99 at Target. It’s a heavy bag to carry to work, which is annoying on the subway, but the glass won’t leach chemicals or stain.
I drop the 4-cup container in my dishwasher every night. No warping, and the glass comes out spotless. They cool down much faster in the fridge, too. When you pack hot food into a plastic container, the condensation gets trapped and makes everything soggy. Glass regulates the temperature better. I also tried the Rubbermaid Brilliance Glass Food Storage Containers, which run $29.98 at Walmart. The plastic latches are stiff and require two hands to snap shut, but they’re completely leak-proof.
If you’re carrying soup or a dressing-heavy bowl, get the Rubbermaid. If you’re packing dry grains and roasted vegetables, the standard Pyrex with flexible rubber lids works fine. Skip the massive 20-piece plastic sets on sale. You’ll just throw them away in six months when the lids stop fitting the warped bases.
2. Master Component Prep Instead of Full Meals

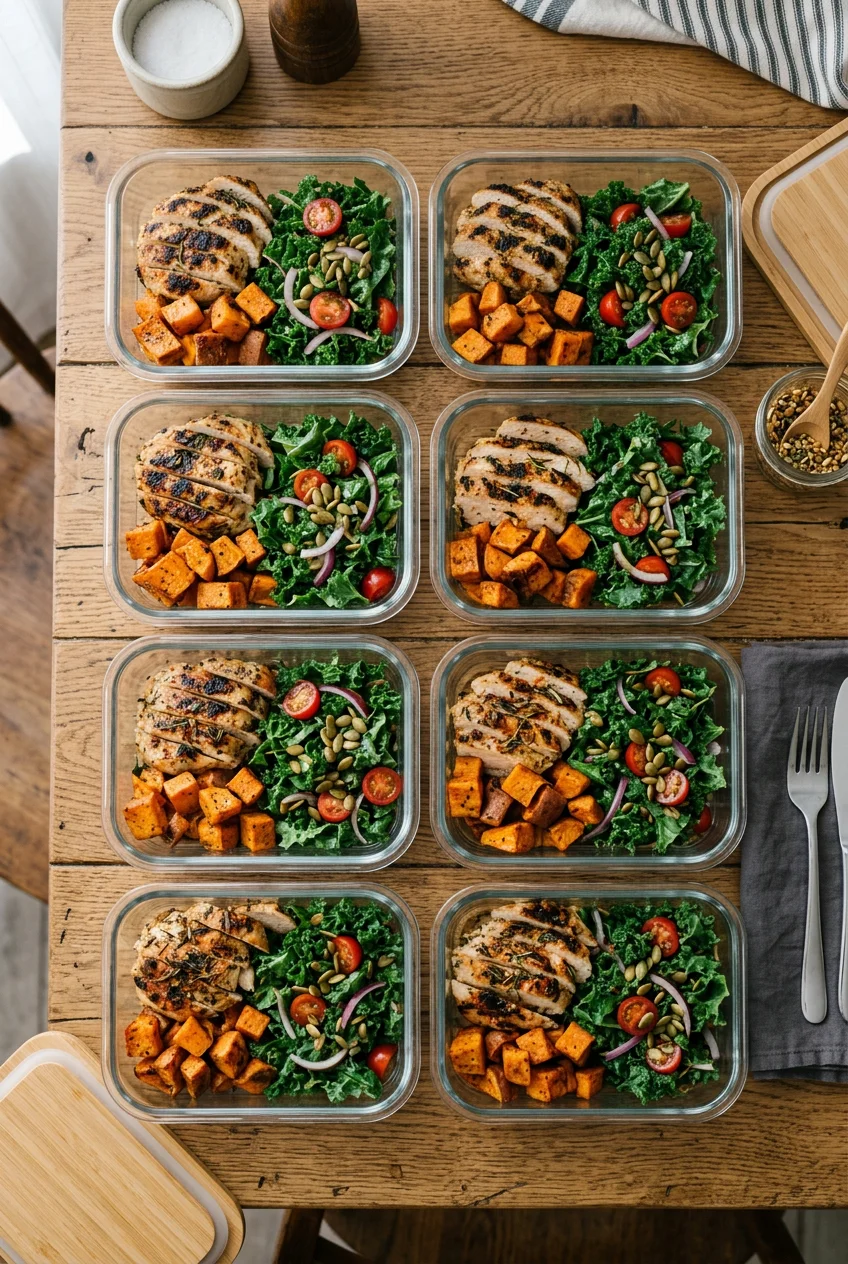
I tried making five identical chicken and rice bowls every Sunday for a month. By Wednesday, I couldn’t stomach the thought of eating another one. Component prep fixes this. Instead of building identical meals, I prep large batches of versatile basics. I’ll cook 4 cups of brown rice, bake 1.5 lbs of chicken breast, and roast a massive tray of broccoli and sweet potatoes.
I buy 365 Everyday Value Extra Virgin Olive Oil for $7.99 at Whole Foods to toss the vegetables in. I use exactly 2 tablespoons of oil for a large baking sheet, adding salt and pepper. Storing the components in separate containers in the fridge means I can mix and match daily. Monday might be a simple rice bowl with chicken and roasted broccoli. Tuesday, I’ll take that same chicken and put it over fresh spinach with feta and a different dressing.
The biggest mistake is mixing wet and dry components in storage. If you put roasted sweet potatoes in the same container as juicy baked chicken on Sunday, those potatoes will be mush by Wednesday. Keep them in separate 3-cup Pyrex containers. I only combine them in my lunchbox the morning of. It takes two extra minutes, but your food won’t taste like wet cardboard.
3. The 50/25/25 Rule for Balanced Portions

Measuring cups make prep take twice as long. I stopped using them last year after getting tired of washing four different spoons just to pack one lunch. Dietitians suggest the 50/25/25 rule, which is a simple visual guide you can do with your hands. Half your container gets filled with greens or roasted veggies. That’s about two cupped hands of volume.
A quarter of the container gets 3 to 4 oz of protein, which is roughly the size of your palm. The last quarter gets a cupped-hand serving of grains, usually about 1/2 cup. I use Trader Joe’s Organic Quinoa, which runs $3.99 for a 16 oz bag. This method stops you from over-packing heavy carbs and feeling sluggish at 2 PM. I used to pack two cups of pasta and a tiny piece of chicken. I’d crash hard and need three cups of coffee to finish my shift.
Now, I fill half my 4-cup Pyrex with fresh arugula, add a palm-sized piece of salmon, and a small scoop of quinoa. You’re getting the fiber and protein you need without the food coma. It takes ten seconds to eyeball the portions. You won’t need to weigh your food or track every gram to build easy lunches that keep you full. You might also like: 20 Inspiring Sunday Dinner Ideas You Need to See

buluker 4 Pack Bento Lunch Box Set 3 Compartment Food
buluker 4 Pack Bento Lunch Box Set 3 Compartment Food Storage Containe punches above its price — 23 buyers rated it 4.5 stars. I would buy it again.
4. Rely on “No-Reheat” Options for Busy Days

Waiting in line for the single office microwave at 12:15 PM is miserable. I stood there for ten minutes last Thursday while a coworker microwaved leftover fish. It’s the absolute worst. I started making lunches that taste better cold. Grain bowls with hearty dressings or pasta salads hold up perfectly in the fridge and require zero heating. You might also like: 15 Stunning Aesthetic Batch Cooking You Need to See
I buy Banza Chickpea Pasta for $3.79 a box at Sprouts. I boil 8 oz, rinse it heavily in cold water so it doesn’t get gummy, and toss it with cherry tomatoes, fresh spinach, and a sharp vinaigrette. Cold chicken can get a weird, rubbery texture if you aren’t careful. If I’m eating a cold meal, I usually skip the chicken breast and use shredded rotisserie chicken or a plant-based protein instead. You might also like: 15 Stunning Lunch Weekly Meal Prep Ideas You Haven’t Thought Of
Cold tofu cubes or chickpeas have a much better texture straight out of the fridge. If you do use chicken in a cold salad, chop it fine. Big chunks of cold, dense meat aren’t enjoyable. Pasta salads and grain bowls actually taste better on day three because the dressing has time to soak in. You won’t have to wait in the microwave line ever again.
5. Keep Dressings and Sauces Strictly Separate

I ruined dozens of salads by dressing them on Sunday. By Tuesday, the spinach was black slime and the croutons were wet sponges. You have to store liquids separately. I use tiny 4 oz Ball Mason Jars. You can get a 12-pack for $12.49 at Kroger. They have a tight metal seal so they won’t leak in your work bag and ruin your laptop.
I pour exactly 2 tablespoons of Primal Kitchen Ranch into the jar. It’s $6.49 at Kroger, and the avocado oil base means it doesn’t separate like cheaper brands do. I only pour the dressing on right before I eat. The same rule applies to soy sauce, teriyaki, or salsa. Keep them away from your dry ingredients until lunchtime.
Another trick to avoid relying on sauces is to season your main components aggressively. Bland chicken is a common fail. I rub my chicken breasts with 1 tablespoon of smoked paprika, 1 teaspoon of garlic powder, and a heavy pinch of kosher salt before baking at 400 degrees. When the meat has flavor baked into it, you don’t need to drown your lunch in high-calorie dressings. Trust me on this.
6. Utilize Your Freezer for the 4-Day Wall

Most people prep for Monday through Friday on Sunday. Friday’s chicken is usually questionable. Cooked chicken and quinoa are only safe and tasty in the fridge for 3 to 4 days. I prep my fresh meals for Monday through Wednesday only. For Thursday and Friday, I pull from my freezer stash.
I freeze 1-cup portions of cooked quinoa in Ziploc Freezer Quart Bags. I buy the massive 216-count box for $16.99 at Costco. Cooked quinoa lasts up to 6 months in the freezer without losing its texture. I also freeze shredded chicken in 4 oz portions. The trick is rapid cooling. Let your hot food cool down in a shallow container on the counter for 30 minutes, then put it in the fridge. Once it’s cold, transfer it to the freezer bags.
If you put warm food in the freezer, condensation turns into ice crystals, and your food will taste like freezer burn. On Wednesday night, I move a bag of quinoa and a bag of chicken from the freezer to the fridge. By Thursday morning, it’s perfectly thawed and ready to pack. You won’t have to throw away spoiled food on Friday afternoon anymore.

Bento Box Adult Lunch Box – 4 Pack, 5
Bento Box Adult Lunch Box – 4 Pack punches above its price — 24 buyers rated it 4.5 stars. I would buy it again.
7. Integrate Plant-Based Proteins to Cut Costs

Buying 3 lbs of raw chicken breast every week gets expensive, especially if you’re buying organic. I started swapping in plant-based or cheaper proteins for two lunches a week to keep my grocery bill down. Trader Joe’s Organic Firm Tofu is $2.29 a block. I press it with a cast iron pan for 20 minutes to drain the water, cut it into cubes, toss it with 1 tablespoon of cornstarch, and bake it at 400 degrees until crispy.
It holds its texture in the fridge much better than beef or pork. I also boil 6 Kirkland Signature Organic Eggs, which cost $7.99 for two dozen at Costco, to slice over salads. Hard-boiled eggs last all week in the fridge in their shells. Another cheap option is canned tuna. I grab the Starkist Chunk Light Tuna in Water for about $1.50 a can at Target.
I mix one can with 1 tablespoon of plain Greek yogurt and diced celery for a quick protein boost. I’d rather spend two dollars on tofu than eight dollars on steak for a Tuesday lunch. Mixing up your protein sources prevents boredom and saves you at least $15 a week. You aren’t sacrificing nutrition, you’re just shopping smarter.
8. Use Silicone Bags for Snacks and Sides

I used to throw a handful of almonds or grapes into a thin plastic sandwich bag. They always ended up crushed at the bottom of my tote, leaking sticky grape juice onto my laptop charger. I switched to reusable silicone bags last year. A standard Stasher Sandwich Bag costs $12.99 at Target.
It’s an annoying upfront cost, I’ll admit. Spending $13 on a single bag feels ridiculous. But the thick silicone protects fragile fruits like raspberries or sliced peaches from getting smashed. The pinch-loc seal actually stays shut, unlike the flimsy zippers on cheap bags that pop open if you look at them wrong. I use them for carrot sticks, nuts, and apple slices.
When I get home, I turn them inside out and throw them in the top rack of the dishwasher. They don’t hold onto smells like cheap plastic bags. If you put sliced onions in a plastic bag, that bag smells forever. The silicone washes completely clean. I own four of them now, and I haven’t bought a box of disposable plastic bags in over eight months. It’s a small change, but it makes packing snacks much easier.
9. Clean As You Go to Avoid the Sunday Night Crash

My first few months of prepping, I’d finish cooking and turn around to a kitchen that looked like a disaster zone. Pots with crusted rice, greasy baking sheets, and dirty cutting boards were piled everywhere. I’d spend an hour scrubbing pans, which made me dread Sunday afternoons. Now, I clean while things are in the oven.
I use Dawn Powerwash. The starter kit is $4.99 at Walmart. I spray my plastic cutting board immediately after slicing raw chicken, let the foam sit for two minutes, and scrub it in the sink. While the quinoa simmers for 15 minutes, I load the dishwasher with the prep bowls and measuring spoons. By the time the food goes into the glass containers, the kitchen is 90 percent clean.
This breaks down the chore and makes the process feel less daunting. If you leave hot pans on the stove to cool while you eat dinner, the food hardens like cement. Washing a pan while it’s still warm takes ten seconds. Waiting three hours means you’re scrubbing it with a Brillo pad for five minutes. Clean as you go. You won’t hate meal prep if you aren’t left with a massive mess at the end.
Figuring out this routine took a lot of trial and error. You don’t need to do all of these at once. Start by buying two glass containers and prepping your lunches for just Monday and Tuesday. See how it feels to not rush around your kitchen at 7 AM looking for a clean lid. Pin this page so you can come back to the temperature guides and portion rules when you’re ready to add more days to your routine. Let’s make lunch less stressful and actually enjoy what we pack.

EASYFUN Bento Box Adult, Lunch Box
Honestly, EASYFUN Bento Box Adult surprised me — sturdier than it looks in the photos, and over 13 buyers gave it 4.5 stars.
Frequently Asked Questions
How long do healthy easy meal prep lunches last in the fridge?
Most cooked proteins like chicken and grains like quinoa last 3 to 4 days in the refrigerator. For meals eaten on Thursday or Friday, it’s safer to freeze portions on Sunday and thaw them mid-week.
What is the best container for meal prep?
Glass containers are superior to plastic. Brands like Pyrex or Rubbermaid Brilliance don’t stain, won’t hold onto food odors, and are safe for the microwave and dishwasher without warping.
How do I stop my meal prep salads from getting soggy?
Never add dressing to your greens during prep. Store dressings and sauces in separate small containers, like 4 oz mason jars, and only pour them over your salad right before eating.
What is the 50/25/25 rule for lunches?
It is a visual portion guide: fill 50% of your container with vegetables or fruit, 25% with lean protein (about the size of your palm), and 25% with complex carbohydrates like brown rice or quinoa.
