What’s Inside
- Embrace Authentic Plant-Based Ingredients
- Batch Cook Dried Legumes for Vegetarian Lunch Meal Prep
- Strategic Layering to Prevent Soggy Salads
- The Ingredient Prep Method Over Full Meals
- Mastering Portions for Vegetarian Lunch Meal Prep
- Utilizing Frozen Produce and Undercooking Vegetables
- Pantry Shortcuts for Flavor Boosts
- Preventing Soggy Wraps and Proper Cooling
Last Tuesday at my office desk, I bit into a wrap that had the structural integrity of wet toilet paper. The hummus had completely saturated the spinach, and a cold, murky liquid dripped onto my keyboard. That soggy disaster is exactly why mastering vegetarian lunch meal prep matters if you want to actually eat the food you bring to work. I spent two years throwing away sad, limp salads before I figured out the mechanics of keeping plant-based food fresh for five days. You don’t need expensive delivery services. You just need a methodical approach to moisture control and ingredient selection.
I tried doing this the wrong way for months. I’d pack hot rice directly next to cold greens, seal the lid immediately, and wonder why my Monday lunch tasted like a swamp by Wednesday. Let’s break down how to build filling, texture-rich meals that cost less than a fancy coffee. If you’re tired of spending fifteen dollars on a mediocre grain bowl at noon, this process fixes that. I’ve ruined enough groceries to know exactly what fails in the fridge. We’re going to focus on exact measurements, specific containers, and the actual science of food storage. Skip the fat-free dressings and flimsy plastic bags. They taste like wet cardboard and leak in your tote bag. Trust me.
1. Embrace Authentic Plant-Based Ingredients

If you want to keep your budget under five dollars per serving, you have to stop buying highly processed meat substitutes. I bought a package of fake chicken strips at Trader Joe’s last month for $7.99. It barely contained enough protein for two meals. The math simply doesn’t work for daily lunches. Instead, focus on authentic plant-based eating. This means celebrating vegetables and legumes in their natural form.
Functional mushrooms are a massive part of this shift. Last Friday at Whole Foods, I picked up an 8 oz package of lion’s mane mushrooms for $5.99. When you tear them into shreds and roast them with a little olive oil, they develop a dense, chewy texture that mimics shredded meat perfectly. I use 1 tablespoon of olive oil and a pinch of smoked paprika per 4 oz of mushrooms. You’re getting actual nutrients instead of soy isolates and synthetic blends. Oyster mushrooms work the same way. I chop 2 cups of oyster mushrooms, toss them with 1 tablespoon of soy sauce, and bake them at 400 degrees for twenty minutes. The edges get crispy, and they hold up brilliantly in the fridge for four days. Relying on whole root vegetables, lentils, and mushrooms cuts your grocery bill in half while providing better texture. Processed patties get rubbery in the microwave. Roasted root vegetables just get sweeter. I’ve noticed my digestion is significantly better since I stopped relying on the frozen fake meat section.
2. Batch Cook Dried Legumes for Vegetarian Lunch Meal Prep

The fastest way to ruin a grocery budget is buying canned beans. I stood in the aisle at Target three weeks ago comparing prices. A 15 oz can of chickpeas costs $1.19. A 1 lb bag of dried chickpeas costs $1.39. That dried bag yields more than three times the amount of cooked food. If you’re serious about vegetarian lunch meal prep, you need to batch cook dried legumes. I soak 2 cups of dried chickpeas overnight in a large bowl with 6 cups of water. The next morning, I boil them for forty-five minutes until they’re tender but not mushy. You might also like: 15 Stunning Lunch Weekly Meal Prep Ideas You Haven’t Thought Of
This single batch yields enough protein for three large meals, plus you get the leftover aquafaba for baking. I store the cooked chickpeas directly in their cooking liquid in the fridge. This prevents them from drying out and getting chalky. They last for up to five days this way. If I make too much, I freeze 1-cup portions in my Snapware Total Solution 10-piece glass set. I bought that set for $16.99 specifically because the lids latch tightly enough to prevent freezer burn. You can freeze cooked beans for up to three months. When you need them, just run the glass container under warm water for a minute. I tried cooking lentils without soaking them first, and they took over an hour to soften on the stove. Now I always soak my green lentils for at least two hours. It cuts the boiling time down to twenty minutes and keeps the skins intact so they don’t turn to mush in your lunchbox.
3. Strategic Layering to Prevent Soggy Salads

Salads are usually a disaster by day three. I ruined a perfectly good batch of mixed greens last month because I bought beautiful, juicy heirloom tomatoes at Sprouts and chopped them directly over my lettuce. The acid and water from the tomatoes wilted the greens overnight. To prevent soggy salads, you have to use strategic layering. I rely heavily on my Glasslock 24-Piece Glass Food Storage Containers. I bought the set for $39.99 because the vertical space allows for proper ingredient separation.
You always start with the wettest ingredients at the very bottom. I pour 2 tablespoons of vinaigrette into the base. Next, I add 1/2 cup of halved cherry tomatoes or diced cucumbers. These dense, wet vegetables can sit in the dressing without losing their structure. Above that, I layer 1/2 cup of cooked grains, like farro or quinoa, which acts as a barrier to absorb excess moisture. Then comes 1/2 cup of roasted chickpeas or baked tofu. The very top layer is always 2 cups of dry, crisp greens. Keep the croutons or pumpkin seeds in a separate tiny plastic bag until you’re ready to eat. If you construct it this way, the greens stay completely dry until you shake the container at your desk. I used to think shaking a plastic container was enough, but the Glasslock seals actually hold tight so dressing doesn’t fly across the breakroom. Let’s be honest, cleaning vinaigrette off an office wall is embarrassing. Layering is the only way a Monday salad survives until Thursday. You might also like: 20 Brilliant Quick Dinner Ideas You’ll Want to Bookmark

Bento Box Adult Lunch Box – 4 Pack, 5
Bento Box Adult Lunch Box – 4 Pack has been one of the most consistently praised picks in this category. 24 reviewers averaged 4.5/5.
4. The Ingredient Prep Method Over Full Meals

Prepping five identical meals on a Sunday afternoon is incredibly tedious. I burned out on the traditional method after eating the exact same rice and bean bowl four days in a row. By Thursday, I couldn’t even look at it. Instead, I follow a dietitian tip and focus on ingredient prep rather than full meal assembly. When I get home from a Kroger grocery run, I immediately process the raw materials. I chop 2 cups of raw broccoli florets and 1 cup of bell peppers, storing them in separate glass containers. You might also like: 20 Inspiring Carnivore Meal Prep Ideas That Are Totally Worth It
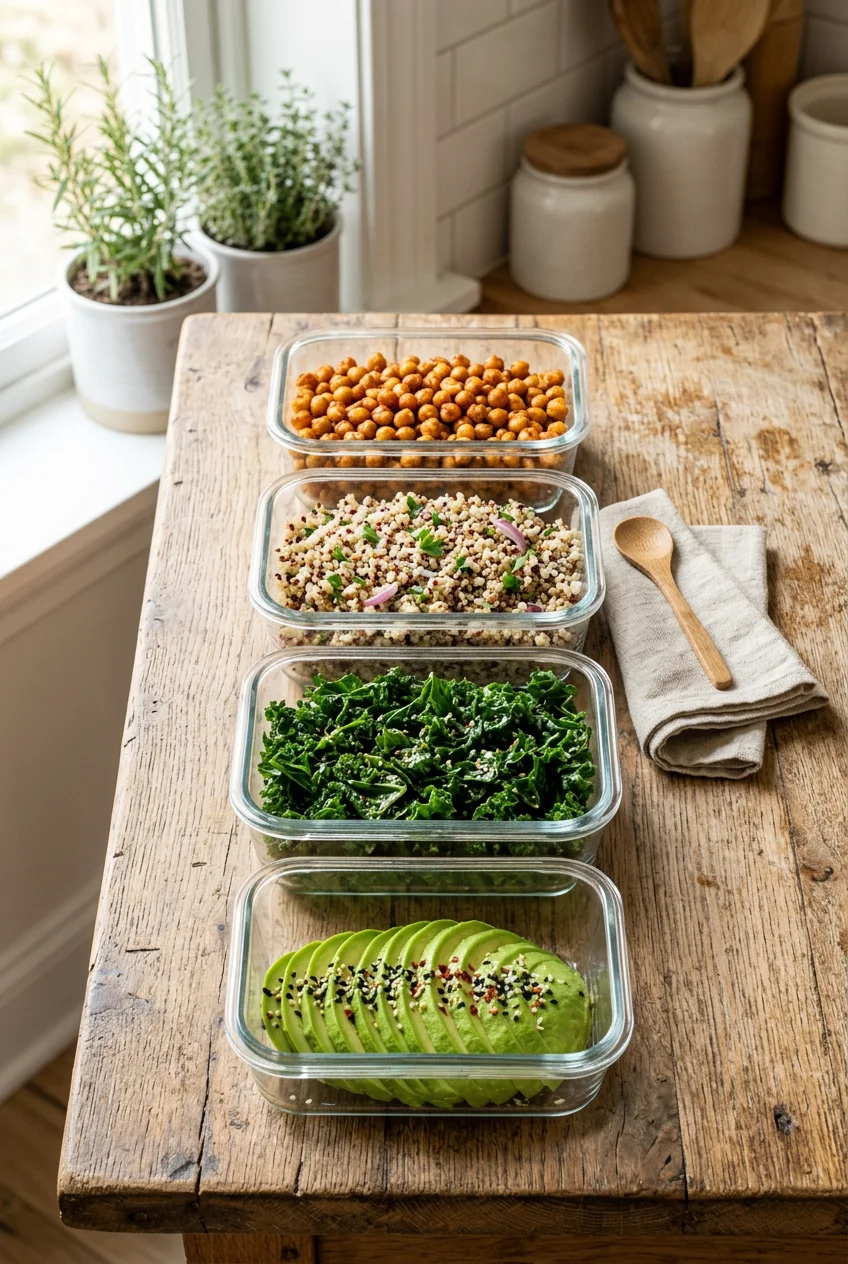
I boil a large batch of grains, usually 4 cups of cooked quinoa. Then I bake a block of extra firm tofu cut into 1/2-inch cubes. I store all these components individually using PrepNaturals borosilicate glass containers. The set costs $35.99 and stacks perfectly in my narrow fridge. Storing components separately means you can build different flavor profiles each morning. On Tuesday, I might toss 1/2 cup of quinoa with 1 cup of raw peppers and a peanut sauce. On Wednesday, I might take the same quinoa, add 1 cup of steamed broccoli, and use a lemon tahini dressing. It takes less than three minutes to assemble a lunch in the morning when the raw ingredients are already processed. I tried leaving bell peppers whole in the crisper drawer, telling myself I’d chop them daily. They always rotted by Friday. Processing vegetables the minute they cross the threshold of your kitchen guarantees you’ll actually eat them before they spoil.
5. Mastering Portions for Vegetarian Lunch Meal Prep

Getting the macros right on a plant-based diet requires a bit of math. If you just throw random vegetables in a bowl, you’ll be starving by 2:00 PM. A registered dietitian taught me the exact formula for a balanced meal, and it completely changed my afternoon energy levels. For vegetarian lunch meal prep, you need specific ratios. I aim for exactly 3.5 ounces of protein. This looks like a hand-sized piece of baked tempeh, or 1.5 cups of cooked black beans.
Next, I add 2 heaping spoonfuls of complex carbohydrates, usually brown rice or whole wheat couscous. The rest of the container gets filled with 2 to 2.5 cups of vegetables. That usually translates to two large handfuls of spinach or eight large roasted broccoli florets. To hit my protein goals without adding expensive meat substitutes, I rely on nutritional yeast. I buy the 5oz container of Bragg Nutritional Yeast at Walmart for $8.49. It looks like fish food, but it provides 5g of complete protein per 2 tablespoons. I sprinkle it heavily over roasted root vegetables or whisk it into a cashew cream sauce to make a vegan cheese alternative. It’s rich in Vitamin B12, which is crucial when you aren’t eating meat. The current trend for 2026 is treating fiber as the new protein. People are finally realizing that 15 grams of fiber from black beans and farro keeps you full much longer than a highly processed soy patty. Hitting these exact portion metrics prevents the mid-afternoon sugar crash entirely.
6. Utilizing Frozen Produce and Undercooking Vegetables

There is a weird stigma against frozen vegetables that needs to stop. Fresh produce sitting on a truck for a week loses nutritional value rapidly. Frozen vegetables are picked at peak ripeness and flash-frozen immediately. I keep my freezer stocked constantly. Last weekend at Costco, I bought a 4 lb bag of Kirkland frozen broccoli florets for $6.99 and a massive bag of frozen edamame. You can pull 1 cup of frozen peas or edamame and toss them directly into a hot pasta sauce right before packing your lunch. The residual heat thaws them perfectly without turning them to mush.
When I do cook fresh vegetables for meal prep, I purposefully undercook them. This is a crucial step. If you roast sweet potatoes until they are completely soft on Sunday, they will turn into a gritty paste when you microwave them on Wednesday. I aim to undercook all my roasted vegetables by about three minutes. I pull my roasted carrots out of the oven while the center still has a slight crunch. This prevents them from releasing excess water during storage in the fridge. I learned this the hard way after prepping a massive batch of zucchini. I roasted it until it was soft, packed it in tight containers, and by Tuesday, it had released half a cup of dirty green water into my quinoa. It was inedible. Undercooking preserves the cell walls of the plant, ensuring your Thursday lunch has the exact same texture as your Monday lunch.

buluker 4 Pack Bento Lunch Box Set 3 Compartment Food
buluker 4 Pack Bento Lunch Box Set 3 Compartment Food Storage Containe has been one of the most consistently praised picks in this category. 23 reviewers averaged 4.5/5.
7. Pantry Shortcuts for Flavor Boosts

You can’t eat plain steamed vegetables and brown rice for long before you order takeout out of sheer boredom. Good quality pantry staples are the only way to make cheap ingredients taste expensive. You don’t need to spend an hour making complex sauces from scratch. I keep three specific jars in my fridge at all times. First, a high-quality tahini. I buy the 16oz jar of 365 brand Tahini from Whole Foods for $8.99. I choose this specific brand because it blends smooth without separating into a rock-hard block at the bottom.
I mix 2 tablespoons of tahini with 1 tablespoon of warm water and a squeeze of lemon for an instant, creamy dressing. Second, I always have white miso paste. Miso lasts indefinitely in the back of the fridge. A single teaspoon of miso paste whisked into a basic vinaigrette adds a savory, salty depth that mimics the umami you usually get from meat or aged cheese. Third, I keep a jar of red curry paste. When my prepped vegetables start looking sad by Thursday, I throw 1 cup of chopped vegetables into a pan with 1 tablespoon of curry paste and 1/4 cup of coconut milk. It creates a rich, fragrant sauce in under three minutes. I tried making my own curry paste from scratch once. I spent twenty dollars on specialty ingredients and an hour grinding spices, and it tasted exactly like the four-dollar jar. Skip the intensive labor and use these concentrated flavor shortcuts instead.
8. Preventing Soggy Wraps and Proper Cooling

The biggest mistake people make with meal prep happens right after the cooking stops. If you take hot black beans and roasted sweet potatoes, put them in a plastic container, and snap the lid shut immediately, you’re ruining your food. The trapped steam creates heavy condensation. That moisture drips back down, turning your grains into a soggy, gelatinous mess. You must let your cooked food cool completely before sealing it. I spread my hot ingredients out on a baking sheet and let them sit at room temperature for thirty to sixty minutes. Once they are entirely cool to the touch, I pack them into my Rubbermaid Brilliance 10-piece plastic set. I use these specific containers, which cost $22.99, because they are lightweight for my commute and completely leak-proof.
If you’re building wraps, moisture control is even more critical. You have to construct a dry barrier layer. I lay the tortilla flat, then cover the entire surface with a large, dry piece of romaine lettuce or a slice of provolone cheese. The wet fillings, like hummus or salsa, go inside this barrier. The wet ingredients never actually touch the tortilla. I also pack any thin sauces in tiny 1 oz dressing cups on the side. I used to wrap my burritos tightly in foil while the filling was still steaming. By lunchtime, the tortilla was welded to the foil, and peeling it off tore the whole thing apart. Let the filling cool, build a barrier, and your wraps will stay structurally sound.
Getting your lunch routine organized doesn’t require a culinary degree or a massive grocery budget. It just takes a little bit of structural planning and an understanding of how moisture behaves in a closed container. If you prep your components separately, utilize your freezer for long-term storage, and rely on cheap, whole-food proteins like dried lentils and chickpeas, you can easily keep your costs under five dollars a day. I highly recommend starting with the ingredient prep method this weekend. Just chop your vegetables and cook one batch of grains. Don’t try to build fifteen intricate meals on your first try. If you end up with extra portions, remember that soups, stews, and bean patties freeze exceptionally well for up to three months. Save this page, pin the ideas for your next grocery run, and let’s stop eating sad, wilted desk salads. It’s time to get better at this.
Frequently Asked Questions
How long does vegetarian lunch meal prep last in the fridge?
Most prepped vegetarian ingredients, like roasted vegetables, cooked grains, and baked tofu, will last 4 to 5 days in airtight glass containers. Keep dressings and wet ingredients separate until you are ready to eat to maintain texture.
Can I freeze my vegetarian meal prep containers?
Yes, meals like bean stews, soups, and cooked legumes freeze beautifully for up to three months. Use freezer-safe containers and let the food cool completely before freezing to prevent condensation and freezer burn.
What is the cheapest protein for vegetarian meal prep?
Dried beans and lentils are the most cost-effective protein source, often costing around $1 to $2 per pound. Batch cooking dried chickpeas or green lentils on a Sunday provides cheap, high-quality protein for the entire week.
How do I stop my salads from getting soggy?
Always layer your ingredients vertically in a tall container. Put wet dressings at the very bottom, followed by dense vegetables like tomatoes, then grains, and keep your dry leafy greens at the very top away from the moisture.
