What’s Inside
- Master Blanching for Vibrant Meal Prep Veggies
- Invest in Quality Glass Containers
- Embrace Vacuum Sealing for Extended Freshness
- Utilize Reusable Silicone Bags for Snacks
- Prevent Soggy Veggies By Cooling Completely
- Portion Smartly with the 50/25/25 Rule
- Optimize Storage for Specific Meal Prep Veggies
- Invest in a Multifunctional Vegetable Chopper
- Separate Ethylene Producers from Ethylene-Sensitive Veggies
Last Tuesday, I tossed a $14 bag of slimy, foul-smelling chopped peppers from Whole Foods because I didn’t know how to prep veggies right. I opened my fridge, caught a whiff of what smelled like a wet dog, and realized my entire Sunday session was toast. If you want meal-prepped veggies to last until Thursday, you need a real system. I spent three years eating rubbery carrots and wilted spinach before I figured out the science of keeping produce crisp. I used to chop everything on Sunday, shove it into cheap plastic tubs, and hope for the best. That doesn’t work. Moisture builds up, edges turn brown, and by Wednesday, you’re ordering takeout because the thought of soggy zucchini makes you gag. I’m sharing the exact techniques and tools that keep my fridge organized and my produce fresh. I’ve wasted hundreds of dollars learning these lessons the hard way. Trust me. No more throwing money in the trash. Let’s fix your Sunday routine right now.
1. Master Blanching for Vibrant Meal Prep Veggies

I tried eating raw, week-old broccoli for months. It tasted like sulfur and had the texture of dry chalk. If you’re prepping sturdy produce like broccoli florets or green beans, you can’t just leave them raw for five days. You need to blanch them. I fill a 6-quart stainless steel pot with water, add 2 tablespoons of kosher salt, and bring it to a boil. I drop in 4 cups of raw broccoli florets from Sprouts. When the water bubbles up again, I set my timer for 2 minutes. The second that alarm goes off, I use a slotted spoon to scoop the bright green pieces into a bowl filled with 3 cups of ice and cold water. This 1-3 minute boil and ice bath keeps the color and crunch. More importantly, blanching deactivates the enzymes that cause decay. Skip the ice bath and the broccoli keeps cooking from residual heat, turning into mush. Once they’re cold, I lay them on a cotton kitchen towel to dry for 20 minutes. This adds four days to their shelf life, making them perfect for Thursday night stir-fries.
2. Invest in Quality Glass Containers

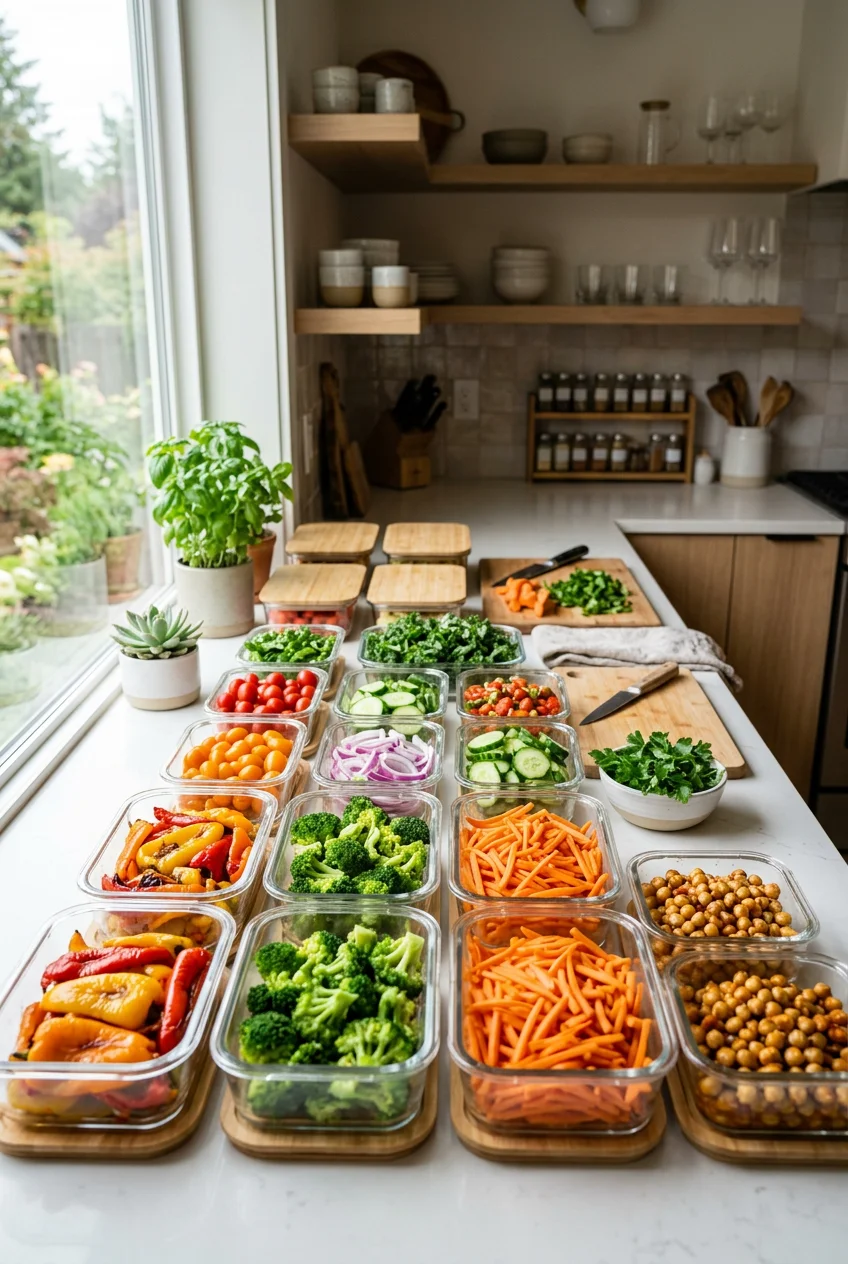
Most people mess up by using flimsy plastic takeout containers. I used cheap plastic for a year until a batch of turmeric-roasted cauliflower permanently stained my tubs neon yellow and left them smelling like cumin for months. You won’t regret upgrading to heavy-duty glass. I bought a 5-pack of OXO Smart Seal rectangular glass containers for $29.99 at Target, and it changed how my food tastes on day four. These 30-ounce containers fit 1 cup of brown rice, 4 oz of chicken, and 1.5 cups of roasted vegetables perfectly. Glass doesn’t absorb odors or stains. It’s also freezer, microwave, and oven-safe (just pull the plastic lids before heating). The OXO lids have a thick silicone gasket that snaps down tight. When I press them closed, I hear a loud click, which tells me no air is getting in. Air is the enemy. Spending $30 on a good set of Pyrex or OXO pays for itself in one month just by saving the food you aren’t tossing.
3. Embrace Vacuum Sealing for Extended Freshness

Last October, I bought a massive flat of zucchini and bell peppers from Costco for $18. I chopped it all on Sunday, and by Wednesday, it was covered in white fuzz. Bulk buying only saves money if you actually eat the food. I bought a FoodSaver vacuum sealer on Amazon for $89.99, and it fixed my bulk produce problem. Vacuum sealing pulls oxygen out, adding 1-2 weeks of life to pre-chopped vegetables. It also stops freezer burn. I use the heavy-duty plastic rolls that come with the machine. I cut a 10-inch piece, seal the bottom, drop in 3 cups of bell peppers, and hit the button. The machine hums as it shrinks the plastic tight. There is one catch with high-moisture items like cucumbers or zucchini: the suction pulls liquid out and ruins the seal. My trick is to fold a half-sheet of paper towel and put it inside the bag near the seal line. The paper towel absorbs the stray liquid before it hits the heating element. It’s a small step that ensures a perfect seal. You might also like: 15 Cozy Freezer Meals Ideas to Transform Your Space

Vtopmart 5Pack 22oz Glass Storage Containers with Lids
A dependable everyday pick — Vtopmart 5Pack 22oz Glass Storage Containers with Lids pulls in 34 ratings at 4.5 stars. Not flashy, just solid.
4. Utilize Reusable Silicone Bags for Snacks

I’m done with flimsy plastic bags that rip when I stuff carrots inside. I used to burn through two boxes a month just packing snacks for work. I finally walked into Whole Foods and bought a 4-pack of Stasher Premium Silicone Reusable Food Storage Bags for $48.99. Yes, $49 is a lot, but I’ve used this same set for two years. They’re made of thick, BPA-free platinum silicone. No annoying plastic sliders that break. You just pinch the top edges together and they seal flat. I use the sandwich-sized bags for 1/2 cup portions of cherry tomatoes or sliced cucumbers. Because they’re thick silicone, they protect delicate items from getting crushed in my work tote. They’re dishwasher safe, too. I just prop them open over two prongs on the top rack. If you’re trying to cut down on single-use plastics, this is the easiest swap. They replace hundreds of disposable bags a year and look better on your fridge shelf. You might also like: 11 Vegan Meal Prep That Actually Work
5. Prevent Soggy Veggies By Cooling Completely

This is the number one mistake I see on Sunday afternoons. You roast asparagus, pull it out, scoop it into containers, snap the lids on, and put them in the fridge. I did this with Trader Joe’s bell peppers. When I opened the container the next day, the lid was dripping with water, and my peppers were sitting in a gray puddle. When you seal warm food in an airtight container, the steam has nowhere to go. It hits the cold lid, turns into condensation, and rains back onto your food. You’re essentially steaming your roasted vegetables into mush. You must let cooked vegetables cool completely before you even think about putting a lid on them. I pull my baking sheets out and leave them on the counter for 45 minutes. I touch the thickest piece of broccoli. If it’s even slightly warm, I wait another 15 minutes. Only when they’re room temperature do I transfer them to my glass containers. This habit keeps roasted produce crispy instead of soggy. You might also like: 20 Beautiful High Protein Meal Prep Ideas That Are Totally Worth It
6. Portion Smartly with the 50/25/25 Rule

I used to pack lunches with 2 cups of brown rice, a massive chicken breast, and three sad pieces of broccoli. By 2 PM, I’d feel exhausted. I read about the 50/25/25 rule from a dietitian, and it changed how I assemble meals. The rule: half your container is non-starchy vegetables, 25% is lean protein, and 25% is complex carbs. I bought divided glass containers to force myself to follow this. Now, when I prep with ingredients from Kroger, I measure out 2.5 cups of roasted cauliflower and spinach to fill the large half. I put 4 oz of grilled chicken in one section, and 1/2 cup of quinoa in the other. Packing that volume of vegetables hits my daily fiber goals and keeps me full. Skip the fat-free salad dressings. They taste like wet cardboard and have tons of sugar. I just drizzle 1 tablespoon of olive oil and a squeeze of fresh lemon juice over the vegetables right before eating. The healthy fats help your body absorb vitamins.
![C CREST [10 Pack] Glass Meal Prep Containers](https://m.media-amazon.com/images/I/81HfSfzlqUL._AC_UL320_.jpg)
C CREST [10 Pack] Glass Meal Prep Containers
A dependable everyday pick — C CREST [10 Pack] Glass Meal Prep Containers pulls in 349 ratings at 4.5 stars. Not flashy, just solid.
7. Optimize Storage for Specific Meal Prep Veggies

You can’t treat all produce the same. Shoving everything into the crisper drawer won’t work. I learned this after buying a bag of carrots from Walmart. I peeled and chopped them on Sunday, left them in a dry container, and by Tuesday they were white, dry, and bending like rubber. Carrots need moisture. Now, I store peeled and cut carrots submerged in 2 cups of cold water in an airtight container. I change the water every 3 days. They stay crisp for two weeks. Leafy greens are the opposite. They hate moisture. When I buy a tub of spinach, I wash it and dry it in a salad spinner. Then, I line a container with two dry paper towels, drop in the greens, and place another paper towel on top before sealing. The paper towels absorb the humidity that causes slime. For sturdy things like cauliflower, I wrap the unwashed florets in a damp paper towel and leave them in an uncovered bowl in the fridge. This keeps them fresh for up to 10 days.
8. Invest in a Multifunctional Vegetable Chopper

I’m not someone who enjoys standing at the kitchen island dicing onions for an hour. My wrists would ache, my eyes would water, and I’d end up with uneven chunks. I finally bought a Fullstar 16-in-1 multifunctional vegetable chopper on Amazon for $24.99, and it saves me 25 minutes every prep session. It comes with a 1.5L catch tray and 8 interchangeable stainless steel blades. I peel a red onion, cut it in half, place it on the blade, and push the lid down. It makes a loud clack, and perfectly uniform diced onions fall into the tray. I use it for bell peppers, zucchini, and potatoes. One rule: don’t chop too soon. Chopping delicate vegetables too far in advance exposes the flesh to oxygen. This oxidation destroys Vitamin C and Vitamin A. I’ll dice my root vegetables on Sunday, but I leave delicate things like tomatoes or avocados whole until the morning I eat them.
9. Separate Ethylene Producers from Ethylene-Sensitive Veggies

I used to keep my onions and potatoes in the same wire basket. I couldn’t figure out why my potatoes were growing massive sprouts after five days. It turns out onions release ethylene gas. Ethylene is a ripening hormone that accelerates decay in sensitive produce. When you store onions next to potatoes, the gas forces the potatoes to rot. I keep my onions in a dark cabinet on the left side, and my potatoes in a bin on the right. You also need to keep ethylene-producing fruits like apples away from your prepped greens. If you put an apple in the fridge drawer with your spinach, the greens will turn yellow in 48 hours. While you’re organizing, keep a freezer-safe bag in the door. Every time I peel a carrot or trim celery, I drop the clean scraps into that bag. At the end of the month, I boil those scraps in 8 cups of water with 1 teaspoon of salt for a rich, free vegetable broth. It reduces waste and tastes better than the boxed stuff. Learned that the hard way.
Meal prepping doesn’t mean eating soggy, flavorless food by Wednesday. If you invest in glass containers, manage your moisture, and respect the differences between your ingredients, your Friday lunch will taste as fresh as your Sunday dinner. I’d suggest grabbing a set of those OXO glass containers this weekend to start. Pin this guide to your favorite recipe board so you can reference the blanching times and storage tricks next time you unpack your grocery haul. No exaggeration.

Skroam 10 Pack Glass Meal Prep Containers
Skroam 10 Pack Glass Meal Prep Containers punches above its price — 57 buyers rated it 4.5 stars. I would buy it again.
Frequently Asked Questions
How long do meal prep veggies last in the fridge?
Most chopped and blanched vegetables will last 4 to 5 days in an airtight glass container. If you use a vacuum sealer, you can extend that freshness up to 1-2 weeks depending on the moisture content of the specific vegetable.
Should I cook my meal prep veggies before storing them?
It depends on the vegetable. Sturdy items like broccoli and green beans benefit from a quick 2-minute blanch to preserve color and crunch. Delicate greens should be stored raw and completely dry with a paper towel to absorb excess humidity.
Why do my stored vegetables get soggy?
Sogginess happens when you seal warm food inside a container. The residual heat creates steam, which turns into condensation on the lid and drips back down. Always cool cooked vegetables for 30-60 minutes on the counter before putting the lid on.
Can I freeze meal prep veggies?
Yes, but you must blanch them first. Boiling them for 1-3 minutes and plunging them into an ice bath stops the enzyme activity that causes mushiness. Once dry, store them in vacuum-sealed bags or thick silicone bags to prevent freezer burn.
