What’s Inside
- Choose Leaner Cuts for Your Meal Prep Steak
- The Vacuum-Sealed Sous Vide Method
- Reverse Sear for a Better Meal Prep Steak
- Dry Brining for Maximum Tenderness
- Acid and Oil Marinade Ratios
- Stop Cooking Past Medium-Rare
- The Mandatory 15-Minute Rest Period
- Slicing Against the Grain
- Storing in Airtight Glass Containers
- Vacuum Sealing for Freezer Storage
- Reheating Low and Slow in the Oven
- Air Fryer Reheating with Moisture
Three years ago I sat in my office breakroom chewing a piece of leftover sirloin that had the exact texture of a pencil eraser. Meal prep steak is notoriously unforgiving if you treat it like chicken breast. I’m writing this because you don’t have to eat gray, rubbery meat on a Wednesday afternoon. The secret is all about your temperature control from Sunday afternoon to Wednesday lunchtime. Last Tuesday at Whole Foods, I watched a guy load up his cart with premium ribeyes for his weekly lunches. I wanted to warn him. Ribeye fat congeals in the fridge and tastes terrible when reheated in a microwave. You need a specific strategy for beef. This guide covers exactly how I buy, cook, and store beef for the week so it actually tastes fresh. I’ve ruined enough expensive cuts of meat to know what fails. Let’s fix your weekly beef routine. Trust me.
1. Choose Leaner Cuts for Your Meal Prep Steak

Most people mess this up at the meat counter. You might think a marbled ribeye makes the best lunch, but cold beef fat turns waxy in the fridge. When you reheat it, that fat doesn’t fully render again. It just gets slimy. You’re better off with leaner cuts like flank steak, sirloin, or top round. These cuts have a tight grain that holds up to slicing and storing. Flank steak absorbs marinades well and costs less than premium cuts. I buy the Kirkland Signature Top Sirloin at Costco. It costs $9.99 per pound and comes in a massive three-pound pack that covers my entire week. For budget options, look for chuck eye steak. Butchers call it the poor man’s ribeye. It runs about forty-eight percent cheaper than an actual ribeye but packs enough flavor to stay interesting by Thursday. Picanha, or sirloin cap, is another solid choice if you trim the fat cap before storing. I tried leaving the thick fat cap on a picanha prep last year. Big mistake. The fat tasted rancid by day three. Stick to the lean muscle. It reheats cleanly and keeps your protein macros high without the grease.
2. The Vacuum-Sealed Sous Vide Method

I tried prepping steak by boiling it in a heavy-duty zip-top bag for months before I bought proper gear. Water leaked in. The meat turned gray and soggy. It was gross. Now I use an Anova Precision Cooker I picked up at Target for $129.00. This method cooks vacuum-sealed food in a precisely temperature-controlled water bath. You can’t overcook it. For meal prep, I drop a two-pound flank steak into a 130°F water bath for exactly three hours. The machine holds the water at that exact temperature. The meat tenderizes while staying pink from edge to edge. Once the timer goes off, I pull the bag out and plunge it into an ice bath to stop the cooking. Then I toss the whole sealed bag in the fridge. When I’m ready to eat on Tuesday, I open the bag, pat the meat dry with paper towels, and sear it in a screaming hot cast iron pan for forty-five seconds per side. You get a dark, crusty exterior and a flawless medium-rare interior. The sous vide method locks in natural moisture. Reheated steak usually tastes stale because it loses water during the initial cook. This prevents that entirely.
3. Reverse Sear for a Better Meal Prep Steak

If you aren’t ready to buy a water bath setup, the reverse sear is your best bet. Traditional cooking tells you to sear the meat first to lock in juices. That’s a myth. Searing first just overcooks the outer half inch. The reverse sear involves cooking your steak slowly at a low oven temperature until the inside is just warm, followed by a quick, high-heat sear. I set my oven to 250°F. I place the steaks on a wire rack over a baking sheet. I insert my ThermoPro TP19H thermometer, which I bought at Kroger for $14.99. I leave the meat in the oven until the internal temperature hits exactly 110°F. This takes about forty-five minutes for a thick sirloin. The exterior of the meat dries out in the warm oven air. This sounds bad, but it’s perfect. A dry exterior means when you drop it into a hot skillet, it develops a thick, crunchy crust in seconds instead of steaming. For meal prep, you can do the low-oven step on Sunday, keep the pale steaks in the fridge, and do the quick one-minute sear right before you eat. It saves a lot of time. You might also like: 10 High Protein Lunch Meal Prep You Need to See

Etekcity Food Kitchen Scale
A dependable everyday pick — Etekcity Food Kitchen Scale pulls in 1,736 ratings at 4.5 stars. Not flashy, just solid.
4. Dry Brining for Maximum Tenderness

Dry brining sounds complicated. It’s just salting your meat in advance and walking away. I ignored this for years because I thought salting early would dry the meat out. I was wrong. When you apply salt to raw beef, it draws moisture to the surface. But if you wait long enough, that salty liquid breaks down the muscle proteins and gets reabsorbed into the center of the steak. I use Diamond Crystal Kosher Salt. I buy the three-pound box at Whole Foods for $9.49. You need exactly one teaspoon of kosher salt per pound of meat. I rub it all over the steaks, place them on a wire cooling rack, and leave them uncovered in the fridge for at least twenty-four hours. Up to forty-eight hours is even better. The cold air circulates under the meat, drying the surface while the inside becomes tender. When you cook it, the meat holds onto its internal moisture much better. This is crucial for meal prep because reheating strips moisture away. A dry-brined steak survives the microwave better than an unbrined one. Plus, the dry surface guarantees a dark crust in the pan. You might also like: 15 Creative Healthy Meal Prep Ideas That Make a Real Difference
5. Acid and Oil Marinade Ratios

Marinades aren’t just for flavor. They alter the structure of tougher cuts like flank or skirt steak. A proper marinade needs three things: fat, acid, and salt. I use a specific ratio for my Sunday prep. I mix one-third cup of fresh lemon juice, one-half cup of olive oil, and one-quarter cup of Worcestershire sauce. Instead of heavy soy sauce, I use Coconut Secret Aminos. I grab the eight-ounce bottle at Sprouts for $7.39. It has a sweeter, less aggressive salt profile that doesn’t overpower the beef. I add one tablespoon of minced garlic and a heavy pinch of red pepper flakes. This makes enough liquid to cover four pounds of steak. You must marinate the meat for at least two hours. Overnight is ideal. The lemon juice breaks down the tough muscle fibers on the surface. The olive oil carries the garlic flavors deep into the meat. The aminos provide savory depth. Don’t leave it in the acid for more than twenty-four hours, though. I did that once with a batch of skirt steak. The acid cooked the exterior, turning the meat mushy before it even hit the grill. You might also like: 20 Gorgeous Meal Planning Ideas for Any Style
6. Stop Cooking Past Medium-Rare

You have to plan for the reheat. If you cook your steak to a perfect medium on Sunday, you’ll eat a well-done, tough piece of leather on Wednesday. The reheating process adds residual heat. Always. You must intentionally undercook your meal prep meat. I aim for medium-rare, pulling the meat off the heat when the internal temperature reads 130°F. I sear my steaks in a Lodge 10.25-inch Cast Iron Skillet. It costs $19.90 at hardware stores and holds heat better than anything else. I get the pan smoking hot. I sear the steaks fast. I pull them off while they still feel soft to the touch. The center should be bright red and cool. When you portion this out, it might look too raw for your liking. Trust the process. When you gently warm it up later, that red center will turn into a warm, juicy pink. If you start with pink meat on Sunday, you end up with gray meat on Wednesday. Buy a digital thermometer. Guessing the doneness by poking the meat with your finger is a bad strategy.

buluker 4 Pack Bento Lunch Box Set 3 Compartment Food
Honestly, buluker 4 Pack Bento Lunch Box Set 3 Compartment Food Storage Containe surprised me — sturdier than it looks in the photos, and over 23 buyers gave it 4.5 stars.
7. The Mandatory 15-Minute Rest Period


I used to pull my steaks off the stove and slice them immediately because I was rushing to pack my containers. I’d watch a puddle of red juice flood the cutting board and run onto my floor. The meat I packed ended up dry. When steak cooks, the muscle fibers contract and squeeze the juices toward the center. If you cut into it while it’s hot, the pressure releases instantly. The liquid escapes. You must let the steak rest for at least fifteen minutes before your knife touches it. During this time, the muscle fibers relax and the juices redistribute. I use an OXO Good Grips Carving Board. I bought it at Target for $22.99. It has deep trenches to catch any stray drips, but if you rest the meat properly, you won’t see much liquid at all. I usually transfer the hot steaks to the board, tent them with foil, and use those fifteen minutes to wash my cast iron skillet. Patience dictates whether your Thursday lunch is juicy or chalky. I learned that the hard way.
8. Slicing Against the Grain

The direction you slice your meat matters as much as how you cook it. Meat is made of long bundles of muscle fibers. If you slice parallel to those fibers, you end up with stringy pieces that are hard to chew. You have to slice perpendicular to the fibers. This is called cutting against the grain. It severs the tough strands into manageable pieces. You can take a tough, cheap cut like a flank steak, slice it against the grain, and it will chew like a filet mignon. I use a Victorinox 8-Inch Chef’s Knife. It costs $39.95 on Amazon and holds a sharp edge. Look at the surface of the rested steak. You’ll see visible lines running across the meat. Position your knife at a ninety-degree angle to those lines. Slice the meat as thinly as possible, holding the blade at a slight bias to make wider strips. I learned this after prepping a skirt steak for fajita bowls. I sliced it with the grain and couldn’t chew it. I had to throw away four days of lunches.
9. Storing in Airtight Glass Containers

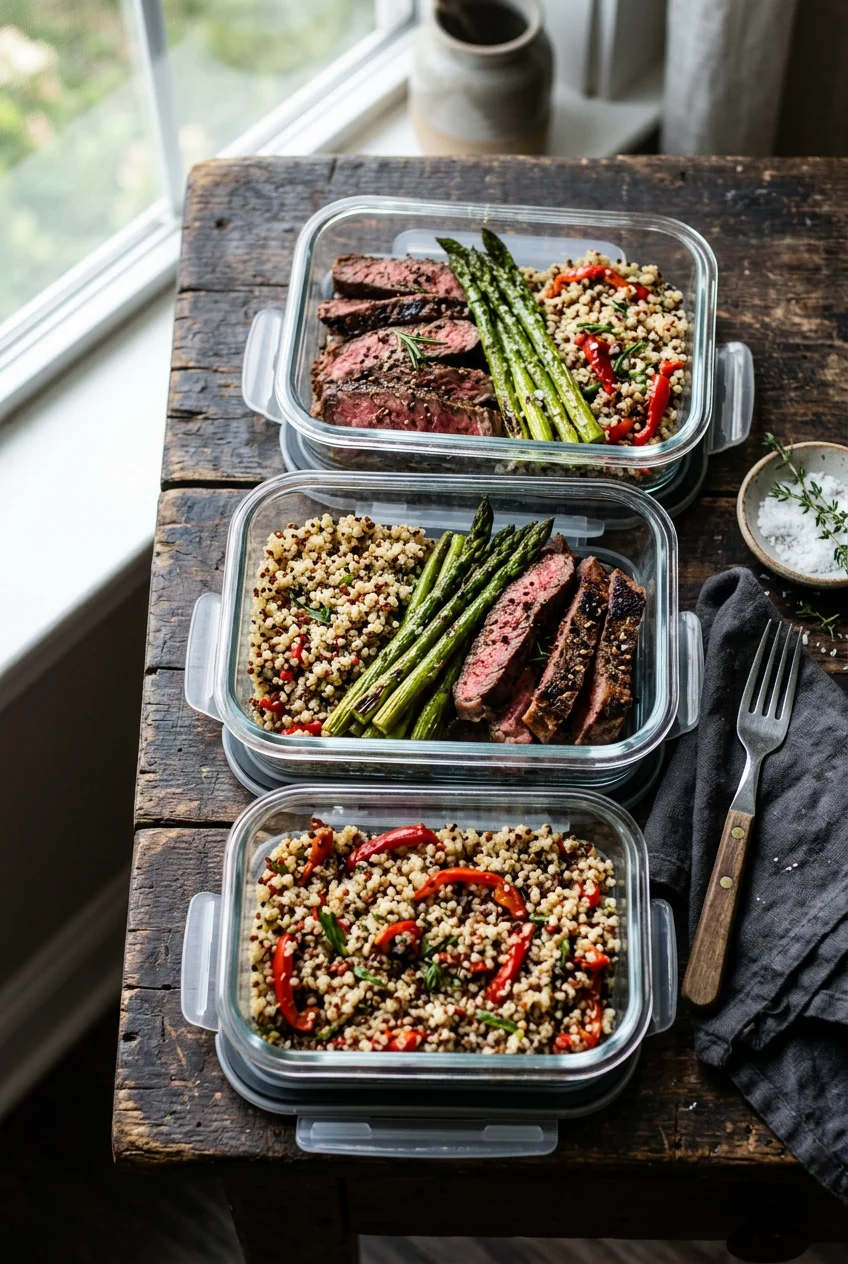
Plastic containers ruin good beef. I prepped in cheap plastic tubs for my first year. The plastic absorbed the smell of garlic and onions. The fat stained the sides orange. Worse, cheap plastic lids don’t seal properly, letting fridge air dry out the sliced meat. You need glass. I use Pyrex 3-Cup Rectangular Glass Containers. You can get a four-pack at Target for $24.99. Glass is non-porous. It won’t hold odors or stain. The silicone lids snap down tightly, creating an airtight seal that prevents oxidation. When sliced steak hits oxygen, it turns an unappetizing gray. The airtight seal keeps the meat looking fresh for up to four days. I portion five ounces of sliced steak into each glass container. I make sure the meat is cooled down before I snap the lids on. If you seal the containers while the meat is warm, condensation builds up on the lid. That water drips back down onto your steak and turns the crust to mush. Let it cool completely.

Bento Box Adult Lunch Box – 4 Pack, 5
If you want something that just works, Bento Box Adult Lunch Box – 4 Pack is a safe bet (24 reviews, 4.5 stars).
10. Vacuum Sealing for Freezer Storage

Sometimes I buy ten pounds of sirloin on sale. You can’t eat that much in four days. Freezing cooked steak is possible, but you have to protect it from freezer air. Standard zip-top bags fail after a few weeks. The cold air penetrates the plastic, pulls moisture out, and leaves behind dry freezer burn. I use a FoodSaver V4400 vacuum sealing system. I found mine at Walmart for $149.99. It pulls every bubble of air out of the bag and melts a seal across the top. I slice the cooked steak, lay it flat, and seal it. It stays fresh in the freezer for up to three months. When I need a lunch, I pull a frozen bag out on Sunday night and let it thaw in the fridge. The texture remains intact. Don’t microwave the meat straight from frozen. The edges will boil while the center stays a block of ice. Let it thaw slowly.
11. Reheating Low and Slow in the Oven

The microwave is the enemy of meal prep steak. High-frequency radiation heats water molecules rapidly, boiling the meat from the inside out. This squeezes out the juices and leaves you with rubber. If you have time, the oven-to-stovetop method is better. I preheat my oven to 250°F. I take my sliced steak out of the fridge and place it on foil. Before wrapping it, I add one tablespoon of Swanson Beef Broth. I buy the thirty-two-ounce cartons for $2.89. The broth provides humidity inside the foil packet. I seal the foil tightly and warm it in the oven for about twelve minutes. The gentle heat brings the internal temperature back up to 110°F without cooking the meat further. The steam from the broth keeps the slices tender. If I want to revive the crust, I’ll take the warm slices out and toss them in a hot skillet for thirty seconds. It requires a few extra dishes, but it tastes like it did on Sunday night.
12. Air Fryer Reheating with Moisture

When I’m at the office, I can’t use an oven. But if I’m working from home, the air fryer is my fastest method. The fan heats the meat quickly, but the dry air can ruin thin slices if you aren’t careful. I use a Ninja 4-Quart Air Fryer from Target. It costs about $89.99. I preheat the basket to 350°F empty. I take my cold, sliced steak and toss it with one tablespoon of melted butter. The fat coats the meat, protecting it from the harsh, dry air. I spread the slices in a single layer. I run it for exactly three minutes. I check the temperature. I want it around 100°F. If it needs more time, I do it in one-minute bursts. The hot air crisps the edges of the steak beautifully, mimicking a fresh sear. Don’t walk away from the air fryer. The difference between perfectly warm steak and beef jerky is sixty seconds. Stand there and watch it. Took me years to figure out.
Meal prep steak doesn’t have to be a miserable, chewy experience. If you buy the lean cuts, control your temperatures, and store everything in heavy glass, you’ll look forward to your lunches. I highly recommend trying the reverse sear method this Sunday. Pin this guide to your meal prep boards so you can reference the cooking temperatures later. Try tossing your reheated sirloin slices into a stir-fry or a fajita bowl with roasted peppers. You won’t ever go back to plain grilled chicken breasts.

Rubbermaid Brilliance Tritan Plastic Food Storage
Honestly, Rubbermaid Brilliance Tritan Plastic Food Storage Containers BPA Free surprised me — sturdier than it looks in the photos, and over 583 buyers gave it 4.5 stars.
Frequently Asked Questions
What is the best cut of meat for meal prep steak?
Leaner cuts like flank steak, top sirloin, and top round are the best options. They have less fat, which means they won’t turn greasy or waxy when stored in the fridge and reheated later in the week.
How long does cooked steak last in the fridge?
Cooked steak safely lasts three to four days in the refrigerator. You must store it in airtight glass containers to prevent the cold air from oxidizing the meat and turning it gray or dry.
How do you reheat steak without drying it out?
Avoid the microwave if possible. Reheat your steak gently in a 250°F oven wrapped in foil with a splash of beef broth. If using a microwave, use 50% power in short bursts with a damp paper towel.
Should I slice my steak before or after storing it?
It is best to slice your steak before storing it in your meal prep containers. Make sure you let the steak rest for fifteen minutes after cooking, then slice against the grain for maximum tenderness.
