Last Tuesday at Whole Foods, I dropped a massive plastic container of cooked quinoa right in the middle of the produce section. The flimsy lid popped off instantly. Tiny, sticky grains scattered everywhere under the organic Fuji apples. I stood there frozen, staring at the mess while a guy holding a bunch of kale awkwardly stepped around me. I wanted to cry. I’m telling you this embarrassing story because finding healthy meal prep ideas usually starts with a total disaster.
I used to spend seven grueling hours on Sundays cooking complicated, Pinterest-perfect recipes. By Wednesday, those meals tasted like cold rubber. I’d cry over spilled grains, soggy broccoli, and wasted money. I used to buy those cheap plastic tubs that stained orange the second you put spaghetti sauce in them. They’d warp in the dishwasher until the lids wouldn’t even snap on. I’ve ruined enough cheap Tupperware to know what actually works in a real kitchen. I’m Esperanza Eliza, and I’m obsessed with making prep day painless. Let’s fix your Sunday routine. We aren’t going to spend all day chopping. We’re going to use smart shortcuts, better gear, and a little common sense. Here’s exactly how I survived my own kitchen disasters and built a system that actually works.
1. Start With Component Prep For Healthy Meal Prep Ideas

Component prep completely changed my life. I tried making fully assembled meals for months before figuring it out. I’d pack a beautiful, layered salad on Sunday night, feeling incredibly proud of myself. By Tuesday lunch, the spinach smelled like a swamp. The cherry tomatoes were wrinkled, and the croutons were mush. When you try to force a fully assembled meal to last five days, you’re fighting a losing battle against moisture. Don’t do this. It’s a massive waste of expensive produce.
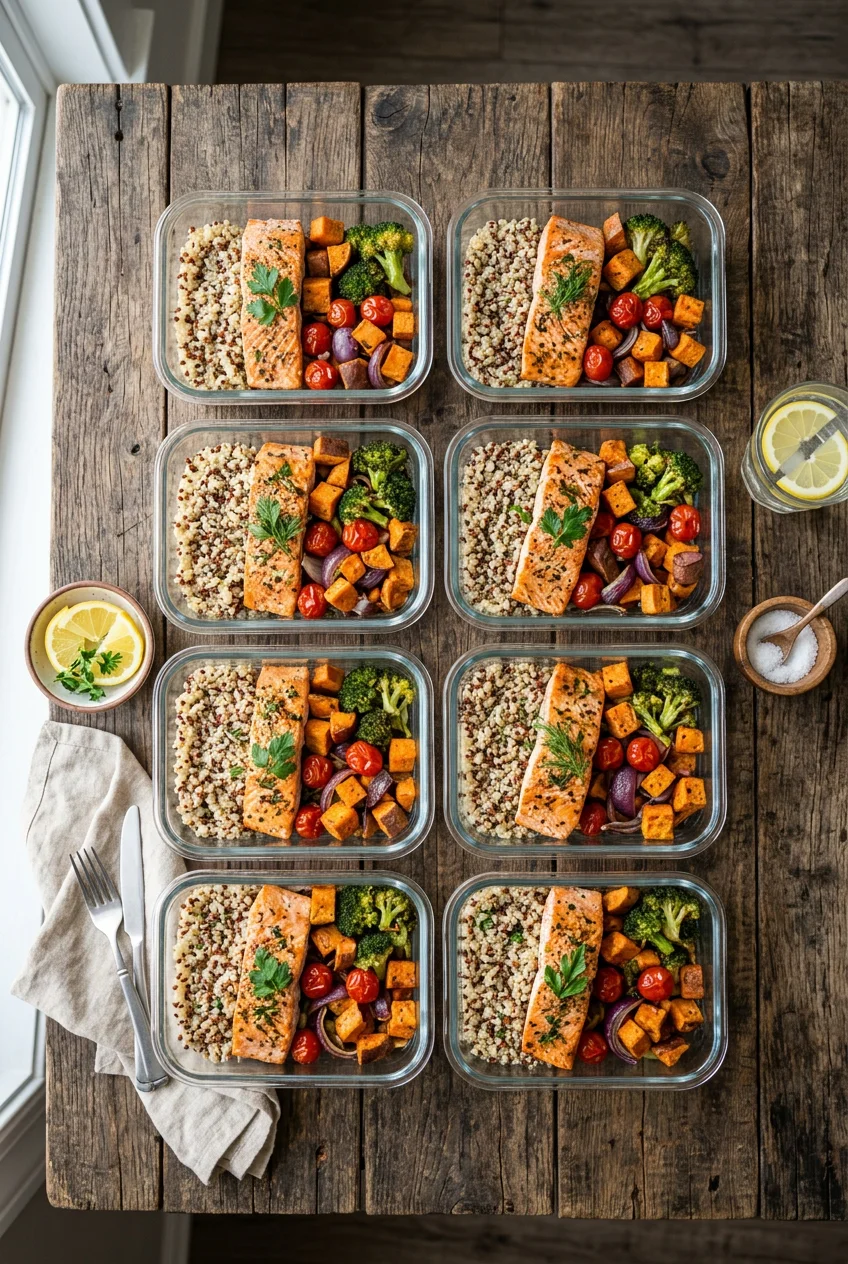
Instead, try component prep. You cook individual ingredients and store them separately. You’re basically building a custom salad bar inside your fridge. I keep my roasted veggies in one container, my cooked grains in a second, and my proteins in a third. For storage, skip the cheap takeout boxes from the dollar store. I’m obsessed with the Rubbermaid Brilliance 5-piece glass container set. I bought mine at Target for exactly $23.99. They have an airtight snap lid that actually seals out oxygen. The thick glass doesn’t stain when I store bright yellow turmeric rice. I’ve dropped these heavy containers on my hard kitchen tile and they won’t shatter easily. Learned that the hard way.
When you prep components, you aren’t stuck eating the exact same bowl four days in a row. Monday is a warm grain bowl. Tuesday is a cold wrap using the same shredded chicken. Wednesday is a massive salad. It’s the only way I avoid intense meal fatigue. I pull out my clear Rubbermaid containers, grab a handful of this and a scoop of that. Lunch is ready in two minutes flat. Total lifesaver.
2. Master The Instant Pot For Grains And Legumes

I used to burn brown rice on my stove constantly. I’d get distracted by a text message or a YouTube video. Suddenly my kitchen smelled like a campfire. The smoke alarm would shriek. The bottom of the stainless steel pot was completely crusted black. I vividly remember scrubbing a ruined pot for forty-five minutes with a wire brush, crying out of sheer frustration. I ruined three good pots this way before I finally gave up. If you want to stop scraping burnt rice off the bottom of your pans, you need an electric pressure cooker.
I personally swear by the Instant Pot Duo 6-quart. I picked mine up at Walmart last year for $99.95. It completely handles the heavy lifting for my complex carbs. Every Sunday morning, I toss in exactly 2 cups of dry brown rice with 2.5 cups of cold water. I press the manual button, set it for 22 minutes, and walk away. While the rice cooks perfectly, I open 2 cans of organic black beans. I rinse them thoroughly in a metal colander until the water runs clear. I throw them in a glass container with a squeeze of fresh lime juice and chopped cilantro.
You can’t mess this up. The Instant Pot beeps loudly when it’s done. You get fluffy, separate grains every single time. I also use it to cook 2 cups of dry quinoa in just one minute of high pressure. Buying dry grains in bulk bags is so much cheaper than buying those wet microwavable pouches. Plus, the texture is incredibly soft and never crunchy in the middle. I’ve saved hours of standing over a hot, steaming stove just by letting this heavy machine do the work.
3. Prep Versatile Protein Sources For Grab-and-Go Meals

Most people get protein prep completely wrong. I know I did. I used to buy the cheapest, massive bags of frozen chicken breasts I could find at the discount grocery store. I’d bake them plain on a sheet pan. They shrank into tiny, dry hockey pucks that required a gallon of water to swallow. I used to think all chicken was exactly the same. I was so wrong. The cheap stuff is pumped full of water and sodium, which is exactly why it shrinks to half its size in the oven. I’d choke them down on Wednesday afternoon at my desk and hate every single second of it. Quality matters here. You might also like: 15 Inspiring Chicken Meal Prep Ideas You Haven’t Thought Of
Now, I go straight to the meat counter at Sprouts and buy exactly 3 lbs of fresh organic chicken breast. It usually costs me about $6.49 per pound. I bake the whole batch on a heavy aluminum sheet pan with a heavy drizzle of olive oil, coarse sea salt, and smoked paprika. Then I take two metal forks and shred it all aggressively while it’s still piping hot. Shredded chicken soaks up sauces way better than cubed chicken. It stays incredibly moist in the fridge for four days. You might also like: 15 Stunning Lunch Weekly Meal Prep Ideas You Haven’t Thought Of
If you aren’t a fan of chicken, hard-boiled eggs are the ultimate lazy protein. I boil a full dozen on Sunday afternoon. I peel them immediately under cold running water so the shells don’t stick and tear the egg whites. I store them in a glass bowl covered with a damp paper towel. They last up to 7 days in the fridge. You can slice them over salads or just eat two whole with some flaky sea salt for a fast afternoon snack. Having 3 lbs of cooked meat and a dozen eggs ready to go means I’m never tempted to order an expensive, greasy turkey sandwich from the deli down the street. You might also like: 15 Brilliant Good Meal Prep Ideas That Changed Everything

Skroam 10 Pack Glass Meal Prep Containers
Skroam 10 Pack Glass Meal Prep Containers punches above its price — 56 buyers rated it 4.5 stars. I would buy it again.
4. Embrace The Air Fryer For Quick Crispy Components

Let’s talk about texture. Healthy food often gets a terrible reputation for being soft, wet, and mushy. I used to bake canned chickpeas in my oven hoping for a crunchy, salty snack. They always came out tasting like wet sand. I remember standing in my kitchen, staring at a tray of sad, pale chickpeas that took forty minutes to bake, wondering why I even bothered trying to eat healthy. I’d literally spit them into the trash can. It was a massive disappointment every single time.
Then I finally bought the Ninja Foodi Smart XL air fryer. I found it on sale at Best Buy for $199.99. Honestly this machine completely changed how I view meal prep. The air fryer circulates blistering hot air so fast that you get a deep-fried crunch without pouring a gallon of vegetable oil into a deep fryer. I toss my rinsed, dried chickpeas with exactly one tablespoon of olive oil and a heavy pinch of garlic powder. I air fry them at exactly 380 degrees Fahrenheit for 12 minutes. They come out audibly crunchy. They literally pop in your mouth. Trust me on this.
I also use it for homemade chicken tenders. I cut 1 lb of raw chicken breast into long strips. I coat them lightly in seasoned almond flour. I air fry them at 375 degrees Fahrenheit for 18 minutes. They get this gorgeous, thick golden brown crust on the outside. The inside stays incredibly juicy and tender. I can’t recommend this machine enough. The air fryer cuts my active cooking time in half. I don’t have to wait twenty agonizing minutes for a massive oven to preheat just to crisp up a single handful of food.
5. Strategic Vegetable Prep For Diverse Nutrition

Chopping raw vegetables feels like a massive chore. I used to skip it entirely. I’d buy whole heads of fresh broccoli and let them rot in the dark depths of my crisper drawer. I’d buy ambitious amounts of produce on a Sunday morning, fully intending to become a health goddess. By Friday, my crisper drawer was a graveyard of good intentions and wasted cash. I’d find them three weeks later, yellow, limp, and covered in slimy spots. It was gross and a huge waste of my grocery budget. The guilt was awful.
Now, I’ve got a strict system. The minute I get home from the grocery store, I wash and chop everything immediately. I process exactly 2 lbs of fresh broccoli florets on my big green cutting board. I slice 1 lb of red bell peppers into thin strips. I peel and cube 1 large sweet potato with a heavy chef’s knife. I spread all of this across two massive metal baking sheets so they aren’t crowded. I drizzle them heavily with olive oil and roast at 400 degrees Fahrenheit for 25 minutes. The sweet potatoes get beautiful caramelized, sticky edges. The broccoli gets slightly crispy, charred tips on the little trees.
If you’re really short on time or energy, just pay for the pre-cut stuff. I frequently grab the plastic container of pre-cut butternut squash from Trader Joe’s for $3.99. It saves me ten minutes of dangerously hacking at a rock-hard squash with a dull knife. Having three different brightly colored vegetables cooked and ready in my fridge ensures I actually eat them. I just toss a cold handful right into my lunch container every single morning.
6. Become A Sauce Boss With Homemade Dressings

Skip the fat-free stuff at the grocery store. It tastes like wet cardboard. I spent years buying those sad, watery diet dressings in the condiment aisle. I used to drown my greens in a miserable, chalky ranch substitute that smelled like plastic. It completely defeated the purpose of eating a fresh, vibrant salad in the first place. They ruined perfectly good, fresh salads. They’re usually packed with weird xanthan gums and artificial sweeteners that leave a terrible, metallic aftertaste in your mouth. You’re eating a chemical soup just to save fifty calories.
Making your own dressing takes exactly three minutes of actual effort. I personally swear by a simple, punchy apple cider vinaigrette. I measure out exactly 1/4 cup of extra virgin olive oil, 2 tablespoons of raw apple cider vinegar, and 1 teaspoon of spicy Dijon mustard. I add a heavy pinch of kosher salt and cracked black pepper. I pour all of this directly into a small Ball brand 4 oz glass Mason jar. I buy a 12-pack of these specific jars at Kroger for $11.49.
I screw the metal lid on extremely tight and shake it violently for ten seconds. The thick mustard emulsifies the oil and vinegar into a bright yellow, creamy dressing. It won’t separate immediately like cheap oil and vinegar do. I keep three of these little glass jars lined up in my fridge door. When I pack my work lunch, I just grab a single jar. Pouring fresh, tangy, real dressing over my shredded chicken and roasted veggies makes the entire meal taste like it came from an expensive downtown cafe.

Vtopmart 5Pack 22oz Glass Storage Containers with Lids
Honestly, Vtopmart 5Pack 22oz Glass Storage Containers with Lids surprised me — sturdier than it looks in the photos, and over 32 buyers gave it 4.5 stars.
7. Combat Over-Portioning With A Digital Food Scale

I used to eyeball all my portions. I thought I was eating a reasonable, single serving of peanut butter on my morning toast. Turns out, my casual spoonful was actually four heaping tablespoons. I’d scoop peanut butter straight from the jar, convincing myself it was just a little protein boost. I couldn’t figure out why I felt so sluggish and heavy immediately after lunch. Most people get this wrong. We are absolutely terrible at guessing what a true, healthy serving size looks like on a plate.
You absolutely need a digital food scale on your counter. I use the Etekcity ESN-C551S. I ordered it on Amazon last year for $13.99. It’s incredibly thin, sleek black glass, and fits right in my silverware drawer. When I build my meal prep bowls on Sunday night, I place my heavy glass container right on the scale. I hit the tare button to zero it out. I weigh exactly 4 oz of my cooked shredded chicken. I hit tare again. I add exactly 1/2 cup of my cooked brown rice. I hit tare again. Then I pile on 1.5 cups of my roasted broccoli and peppers.
This simple process takes out all the stressful guesswork. You aren’t accidentally eating a massive mountain of dense rice with only two tiny bites of chicken. The scale forced me to face reality. It’s wildly humbling to see what an actual serving of pasta looks like. The scale keeps my macros perfectly balanced without making me do complex math in my head. It’s a tiny, ten-second extra step that makes a massive difference in how energetic I feel throughout the long afternoon.
8. Don’t Overlook Breakfasts In Your Healthy Meal Prep Ideas

Weekday mornings are pure chaos in my house. If I don’t prep my breakfast in advance, I’ll inevitably end up eating a stale, pink-frosted donut in the office breakroom at 9 AM under those awful fluorescent lights. I used to sprint out the door with nothing but a giant iced coffee, which left me shaking and starving by my morning meeting. I tried waking up early to cook scrambled eggs on the stove, but I value my sleep way too much. Breakfast prep is absolutely mandatory for my sanity.
Overnight oats are my favorite lazy solution. I use exactly 1/2 cup of plain rolled oats, 1 cup of unsweetened vanilla almond milk, and 1 tablespoon of black chia seeds. I mix it all vigorously in a jar and leave it in the cold fridge. By morning, it’s incredibly thick, creamy, and satisfying. Taking five minutes on Sunday to prep overnight oats stops that vicious cycle. If I want to bake something warm, I make a batch of blueberry protein muffins. I specifically use Bob’s Red Mill Gluten Free 1-to-1 Baking Flour. A blue bag costs $8.39 at Whole Foods. It gives the muffins a perfect, fluffy texture without being heavy or dense.
I also prep freezer smoothie packs on Sundays. I stuff a plastic zip-top bag with 1 cup of fresh spinach, 1/2 cup of frozen berries, and half a peeled banana. I buy the massive 3 lb bag of frozen mixed berries at Costco for $10.99. I dodge the massive carts just to get to that freezer aisle. In the morning, I dump the solid frozen block into my blender with some almond milk. It’s ice-cold, perfectly sweet, and ready to drink in sixty seconds flat. No exaggeration.
Meal prep shouldn’t make you want to pull your hair out or cry in the produce section. If you’re spending your entire Sunday trapped in a hot kitchen washing a mountain of dishes, you’re doing it wrong. Start small this week. Pick just two of these methods to try on your next grocery run. Maybe you just roast a huge sheet pan of broccoli, or maybe you blend up a quick vinaigrette in a jar. You don’t need to become a professional chef overnight. You just need a few reliable glass containers and a plan that doesn’t involve spending your entire weekend staring at a cutting board.
I’ve learned the hard way that basic consistency beats Pinterest perfection every single time. I’d rather have a fridge full of basic, tasty components than one complicated, beautiful recipe that I inevitably mess up. If you loved these practical tips, please pin this post to your favorite healthy recipe board on Pinterest. Share it with a friend who hates chopping raw vegetables just as much as I do. Let’s make our weekday lunches something we actually look forward to eating, instead of a sad desk salad we force down. You’ve got this.