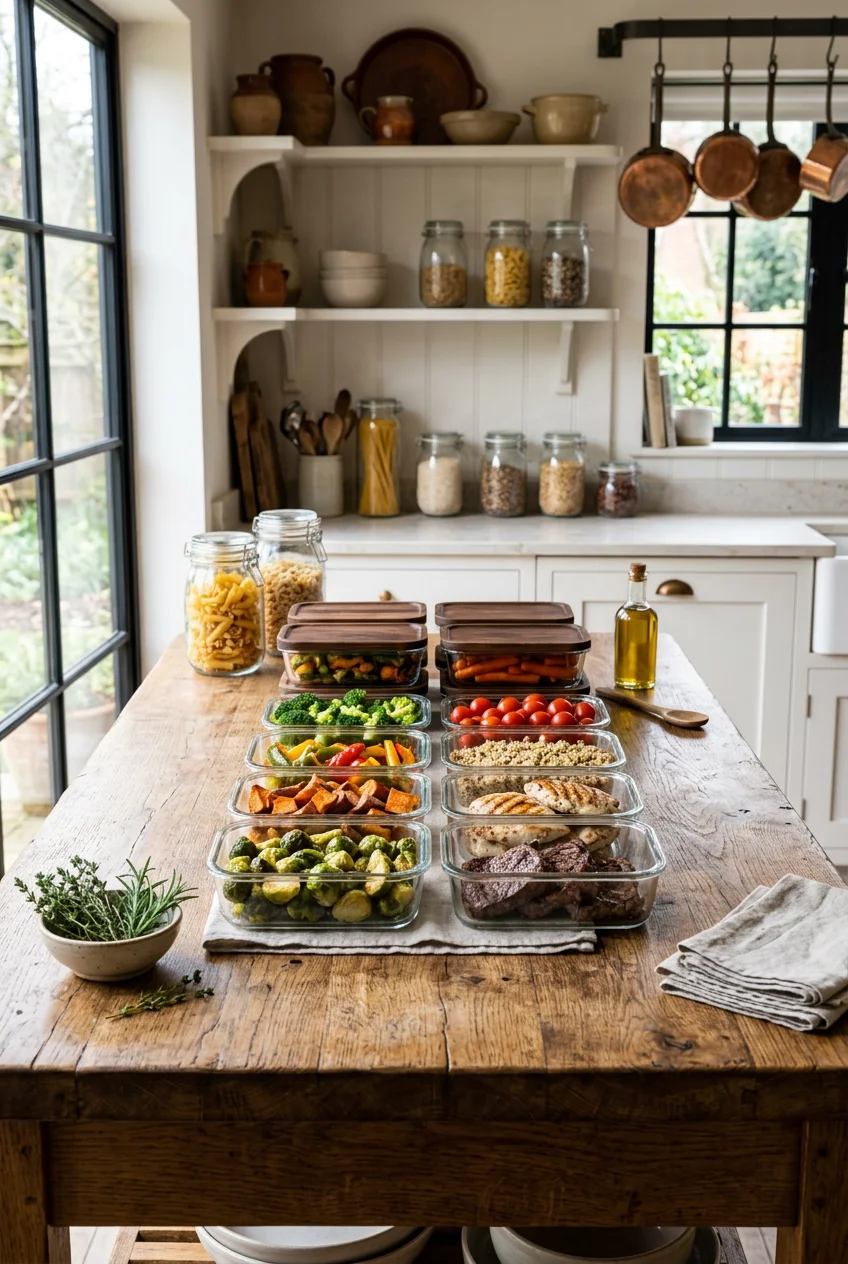
What’s Inside
- The Two-Hour Cooling Rule For Meal Prep To Freeze
- Silicone Trays Over Rigid Glass Every Time
- Vacuum Sealing Meats To Prevent Freezer Burn
- Portioning Into Single Servings Saves Your Sanity
- Leaving Headspace To Stop Exploding Containers
- Labeling Everything Because Memory Lies
- The Only Safe Way To Thaw Your Food
- Blanching Vegetables So They Don’t Turn To Mush
- Undercooking Pasta For Your Meal Prep To Freeze
- Freezing Herb Flavor Bombs In Olive Oil
- Freezing Grains Flat To Stop Clumping
- Skipping Heavy Dairy Until After You Reheat
Three years ago, I opened my freezer to find a $14 batch of homemade chicken tortilla soup frozen solid to the bottom shelf. The glass mason jar had shattered overnight. Figuring out how to meal prep to freeze without destroying my groceries took me a solid year of trial and error. You can’t just throw hot food into a plastic tub and hope for the best. I tried this wrong for months before figuring it out—learned that the hard way. Condensation builds up, ice crystals form, and you end up with food that tastes like wet cardboard. If you want meals that actually taste fresh when you reheat them weeks later, you have to follow specific rules for cooling, packaging, and thawing. I’m sharing the exact methods, specific container brands, and temperature rules that finally stopped me from wasting money on ruined freezer meals.
1. The Two-Hour Cooling Rule For Meal Prep To Freeze

Cooling your food completely and quickly before freezing is the most critical step you’re probably skipping. Placing hot food directly into the freezer raises the temperature of the surrounding items. Last Tuesday, I ruined a bag of frozen berries because I put a hot container of turkey chili right next to it. The berries partially thawed and refroze into a solid, icy block. You need to bring food down to room temperature within two hours of cooking.
For larger quantities, leaving it in a massive stockpot on the stove won’t work. The center stays hot for hours. Instead, divide your meals into shallow containers about 2 to 3 inches deep. You can also spread thick items like cooked grains or roasted vegetables flat on a baking sheet to speed things up. I use a basic Taylor Precision Products digital thermometer I bought for $12.99 at Target to check the center. Once it hits room temperature, it’s safe to cover and stash in the freezer. Skipping this step leads to massive condensation inside the lid, which turns directly into freezer burn ice crystals.
2. Silicone Trays Over Rigid Glass Every Time

While glass containers are great for the fridge, they’re a massive liability in the freezer. Glass can’t handle rapid temperature changes, and if you overfill it, the liquid expands and cracks the sides. I switched to specialized silicone trays in October after losing three expensive glass dishes to freezer expansion. My specific recommendation is the Souper Cubes brand. You can usually find them for $19.95 per tray at Whole Foods or order them online.
I buy the trays with 1-cup and 2-cup portion sizes. The reason these work better than cheap silicone molds is the embedded steel wire rim. When you fill a flimsy silicone tray with 4 cups of liquid soup, it buckles when you try to carry it to the freezer. The steel rim prevents this. Once the food is frozen solid, you just pop out the rectangular blocks and transfer them to a freezer bag. If you absolutely must use hard containers for dry items, the Rubbermaid Brilliance 10-piece set runs about $29.99 at Walmart. They’re highly rated for leak-proof, freezer-safe storage, but I still prefer silicone for anything liquid.
3. Vacuum Sealing Meats To Prevent Freezer Burn

If you plan to keep meats, thick vegetables, or dense cooked meals in the freezer for more than a month, standard zip-top bags won’t protect them. Oxygen is the enemy. It causes freezer burn, which dehydrates the surface of the meat and turns it tough and gray. Vacuum sealing removes the oxygen and extends the freezer life of your food up to five times longer than standard plastic bags.
I bought the Anova Culinary Precision Vacuum Sealer for $74.99 at Target last year, and it paid for itself in two months. I buy bulk chicken breasts at Costco, portion them out, and seal them flat. If you need something for heavy-duty, continuous use, the FoodSaver V4840 runs between $150 and $220. The trick is to lay the bags completely flat while the machine sucks the air out. This creates neat, stackable packages that take up half the space of bulky round containers. Just don’t vacuum seal soft items like bread or muffins, because the suction will crush them into dense hockey pucks.

Rubbermaid Brilliance Tritan Plastic Food Storage
A dependable everyday pick — Rubbermaid Brilliance Tritan Plastic Food Storage Containers BPA Free pulls in 583 ratings at 4.5 stars. Not flashy, just solid.
4. Portioning Into Single Servings Saves Your Sanity

Freeze meals in the exact serving sizes you intend to eat. I used to freeze entire 9×13 pans of baked ziti. When I wanted a quick lunch, I had to chip away at a frozen block of pasta with a butter knife or thaw the entire six-serving pan just to eat one piece. Thawing and reheating a massive batch for a single serving ruins the flavor and texture of the remaining food. You might also like: 15 Creative Cold Lunch Ideas to Transform Your Space
Food Editor Taylor Ann Spencer specifically advises freezing in single-sized portions so it’s easy to grab what you need. I use Ziploc Endurables medium silicone pouches, which cost $14.99 at Kroger, to hold exactly 4 oz of cooked protein and 1/2 cup of vegetables per bag. When I get home from work, I pull out exactly one pouch. It thaws faster, reheats evenly, and keeps me from eating a massive portion just because I didn’t want to put the leftovers back in the fridge. Single portions also mean you can mix and match different proteins and sides throughout the week without committing to eating the same casserole for five days straight. You might also like: 11 Meal Prep Breakfast Ideas That Actually Work
5. Leaving Headspace To Stop Exploding Containers

Liquids and foods with high water content expand significantly when frozen. If you fill a rigid container to the brim, the expanding ice will force the lid off or crack the sides. I learned this the hard way with a batch of homemade salsa. I filled four glass jars to the top, screwed the lids on tight, and woke up to a sticky, frozen explosion of tomatoes across my freezer shelves. You might also like: 8 Low Calorie Meal Prep You Need to See
When you use rigid containers like plastic tubs or Ball 16 oz wide-mouth mason jars (which cost $12.49 for a 12-pack at Target), you must leave headspace. The rule is to leave at least 1/2 inch to 1 inch of empty space between the food and the lid. For liquids like broths, stews, or pureed soups, I only fill the container three-quarters full. This gives the liquid plenty of room to push upward as it freezes. If you’re using flexible silicone bags, you still need to leave a little room so you can press the air out before sealing, but the risk of bursting is much lower than with rigid plastic or glass.
6. Labeling Everything Because Memory Lies

You won’t remember what is in that frosted plastic container three weeks from now. I once thawed what I thought was a block of frozen marinara sauce to serve over spaghetti. It turned out to be pureed red bell peppers I had prepped for a soup base. Dinner was ruined, and my kids were thoroughly disgusted—no exaggeration. Labeling is a non-negotiable step.
Don’t bother with regular masking tape because it loses its adhesive in sub-zero temperatures and falls off. I use Scotch Freezer Tape, which costs $4.59 a roll at Sprouts, paired with a Sharpie Pro permanent marker ($3.48 at Walmart). You need to write three specific things on every label: the name of the dish, any major allergens, and the date it was cooked and frozen. This prevents mystery meals and helps you rotate your stock effectively. I keep the newest items at the back of the freezer and pull the older items to the front. If a label shows a meal is past the three-month mark, I know I need to eat it that week before the quality drops.

Etekcity Food Kitchen Scale
Honestly, Etekcity Food Kitchen Scale surprised me — sturdier than it looks in the photos, and over 1,736 buyers gave it 4.5 stars.
7. The Only Safe Way To Thaw Your Food

Never thaw perishable foods on the countertop at room temperature. The outer layer of the food will reach the bacterial danger zone (between 40°F and 140°F) while the center remains frozen solid. I used to leave frozen chicken breasts on the counter all day while I was at work, which is a massive food safety hazard. The safest method is always refrigerator thawing.
Transfer your frozen meal to the fridge 24 to 48 hours before you plan to eat it. I always place the frozen container inside a Pyrex 9×13 glass baking dish ($16.99 at Target) to catch any condensation or leaks as it thaws. If you forget to pull a meal out the night before, use the cold water method. Submerge the sealed freezer bag in a large bowl of cold tap water. You must change the water every 30 minutes to keep it cold and safe. A 1-pound block of ground beef will thaw in about an hour using this method. Microwave thawing is my absolute last resort because it usually cooks the edges of the food while leaving the center icy.
8. Blanching Vegetables So They Don’t Turn To Mush

If you chop raw broccoli and throw it straight into the freezer, it’ll turn rubbery, gray, and bitter when you cook it. Raw vegetables contain enzymes that continue to break down flavor and color even in freezing temperatures. To stop this, you have to blanch your vegetables before freezing them. Blanching means briefly boiling them and then rapidly cooling them in ice water.
I use an OXO Good Grips stainless steel spider strainer ($17.95 at Whole Foods) to drop chopped carrots and green beans into boiling water for exactly two minutes. Then, I immediately plunge them into a bowl of ice water for another two minutes to stop the cooking process. Dry them thoroughly with a paper towel before freezing. Keep in mind that vegetables with high water content simply don’t freeze well. Lettuce, raw cucumbers, and raw celery will become a mushy, watery mess. Skip freezing those entirely and stick to hearty vegetables like carrots, peas, corn, and broccoli.
9. Undercooking Pasta For Your Meal Prep To Freeze

Freezing fully cooked pasta is a guaranteed way to ruin a meal. When you thaw and reheat it, the pasta absorbs more liquid from the sauce and turns into a mushy, unappetizing paste. I tried making a massive batch of baked ziti last winter, and the reheated noodles completely disintegrated into the ricotta cheese. It was an awful texture.
If you plan to freeze pasta dishes, you must undercook the pasta slightly. I buy De Cecco penne rigate ($2.49 a box at Trader Joe’s) and set my timer for exactly two minutes less than the package instructions for al dente. The pasta should still have a tough, chalky bite in the center when you drain it. Toss it with a little olive oil to prevent sticking, let it cool completely, and then mix it with your sauce before freezing. When you eventually pull the meal out and heat it, those extra two minutes of cooking time will happen naturally, leaving you with perfectly textured pasta.

buluker 4 Pack Bento Lunch Box Set 3 Compartment Food
buluker 4 Pack Bento Lunch Box Set 3 Compartment Food Storage Containe punches above its price — 23 buyers rated it 4.5 stars. I would buy it again.
10. Freezing Herb Flavor Bombs In Olive Oil

Fresh herbs go bad in my fridge faster than I can use them. A bundle of fresh basil turns black and slimy in about four days. Instead of throwing them away, I chop them up and turn them into freezer flavor bombs. You can’t freeze delicate herbs dry because they turn brittle and lose their flavor, but freezing them in fat preserves the essential oils perfectly.
I use an OXO Good Grips silicone ice cube tray with a lid, which costs $11.99 at Target. I finely chop fresh basil, parsley, or dill, and pack a generous tablespoon of the herbs into each cube slot. Then, I pour Pompeian robust extra virgin olive oil ($8.99 at Walmart) over the herbs until they’re submerged. I freeze the tray overnight, pop the cubes out, and store them in a freezer bag. When I’m making soup, roasting potatoes, or cooking a quick pan sauce, I drop one of these frozen oil cubes directly into the hot skillet. It melts instantly and tastes incredibly fresh.
11. Freezing Grains Flat To Stop Clumping

Cooked rice, quinoa, and farro freeze exceptionally well, but if you pack warm grains into a deep container, they’ll freeze into a giant, impenetrable boulder. I used to chip away at a frozen block of brown rice with an ice pick just to get a single serving. The secret to freezing grains so they remain loose and scoopable is to freeze them flat first.
I cook a large batch of Lundberg Family Farms brown rice ($5.49 at Sprouts). Once it cools, I spread the cooked grains in a thin, even layer on a baking sheet lined with Reynolds Kitchens unbleached parchment paper ($4.79 at Kroger). I place the entire baking sheet in the freezer for two hours. Because the grains are spread out, they freeze individually without clumping together. After two hours, I lift the parchment paper and funnel the frozen rice into a gallon-sized freezer bag. When I need a side dish, I can easily scoop out exactly 1/2 cup of loose, frozen rice and microwave it with a splash of water.
12. Skipping Heavy Dairy Until After You Reheat

Cream-based sauces and high-fat dairy don’t survive the freezing and thawing process intact. If you freeze a chicken Alfredo or a creamy potato soup, the fat and water molecules will separate. When you reheat it, you’ll be left with a grainy, curdled texture and an unappetizing puddle of separated oil on top. I ruined a beautiful batch of Swedish meatballs because I froze them in the sour cream gravy—took me years to figure out why.
For the best results, freeze the main components of the dish and add the fresh dairy after reheating. If I’m making a creamy tomato soup, I freeze the pureed tomato base by itself. When I heat the soup on the stove weeks later, I stir in 2 tablespoons of Philadelphia heavy cream ($3.99 at Target) right at the end. If a recipe absolutely requires a thickener before freezing, skip the dairy and use a cornstarch slurry or alternative thickeners that hold up better to sub-zero temperatures. Keep the cheese, cream, and yogurt in the fridge until you’re actually ready to eat.
Learning to properly meal prep to freeze completely changed how I handle my weekly groceries. I don’t throw away half-eaten casseroles or wilted vegetables anymore. Start small by doubling just one of your favorite recipes this week and freezing the extra portions using these exact container methods. Pin this guide so you can check the cooling times and thawing rules next time you’re prepping a big batch!
Food Scale, 11lb Kitchen Scale with 0.05oz/1g Precision
Food Scale punches above its price — 15 buyers rated it 4.5 stars. I would buy it again.
Frequently Asked Questions
How long should food cool before freezing?
You must cool food to room temperature within two hours before freezing. Placing hot food in the freezer causes condensation, which leads to ice crystals and freezer burn. Use shallow containers to speed up the cooling process.
Can I freeze cooked pasta?
Yes, but you should undercook the pasta by two minutes before freezing. If you freeze fully cooked pasta, it will absorb moisture from the sauce and become unpleasantly mushy when you thaw and reheat it.
What are the best containers for freezing liquids?
Silicone trays with wire rims, like Souper Cubes, are the best option for freezing liquids. Glass containers can crack from rapid temperature changes or liquid expansion, while silicone allows you to pop out frozen blocks easily.
Why did my frozen cream sauce separate?
Heavy dairy and cream-based sauces naturally separate and become grainy when frozen and thawed. To avoid this, freeze the base of the meal without the dairy, and stir in fresh cream or cheese after reheating the dish.
