What’s Inside
- Select the Right Potato Variety for Your Dish
- Pre-Soak for Superior Crispiness
- Utilize High Smoke Point Oils for Roasting
- Season Generously for Flavorful Results
- Invest in High-Quality Airtight Glass Containers
- Prioritize Food Safety with Cooked Potatoes
- Batch Cook and Freeze for Extended Shelf Life
- Store Raw Potatoes in Optimal Conditions
Last November, I opened my glass storage container on a Tuesday afternoon and found a batch of gray, slimy wedges staring back at me. Getting meal prep potatoes right takes a specific, methodical approach. Ignore the starch content or mismanage the storage temperature, and you’ll end up with a soggy, unappetizing mess. I spent months eating wet, cardboard-textured roots before I figured out the exact science. You can’t just chop a potato, throw it in a hot cast iron pan, and expect it to survive in the fridge for five days. It’s a disaster waiting to happen.
Potatoes are a cost-effective staple for batch cooking. In April 2026, the retail price for US potatoes typically ranges between $0.90 and $1.79 per pound. Wholesale prices are often even lower, sitting from $0.63 to $1.26 per pound. This makes them an economical base for your weekly lunches. When paired with chicken breast or lean beef, meal prep potatoes become a satisfying anchor for high-protein diets. I’m going to walk you through the exact temperatures, storage containers, and chemical processes required to keep your prepared food safe, crispy, and flavorful all week long.
1. Select the Right Potato Variety for Your Dish

Choosing the correct potato variety dictates the final texture of your meal. For fluffy mashed potatoes or traditional crispy fries, you need starchy varieties like Russet or Idaho potatoes. Their high starch and low moisture content allow them to break down easily when boiled and crisp up beautifully when fried. However, if you’re aiming for dishes where the potato needs to hold its shape, such as potato salads, soups, or roasted chunks mixed with heavy proteins, you must choose waxy potatoes like Red Bliss or fingerlings. Waxy potatoes have less starch and more moisture, so they won’t turn to mush after three days in your fridge.
If you want a reliable middle ground, all-purpose potatoes are your best bet. Yukon Golds are great because their balanced starch and moisture content makes them versatile for roasting, boiling, and mashing. I bought a 5-pound bag of organic Yukon Golds at Trader Joe’s last Sunday for $4.99, and they performed perfectly across three different recipes. When prepping them for roasting, cut them into uniform 1-inch to 1.5-inch pieces. This sizing ensures even cooking and prevents you from biting into a chunk that’s burnt on the outside and raw in the center. I tried eyeballing the cuts for months before I finally started measuring them. It took me years to figure out that consistent knife work leads to consistent results.
2. Pre-Soak for Superior Crispiness

If you want extra crispy roasted potatoes that survive the microwave, you must soak your cut pieces in cold water before cooking. This step is non-negotiable. Submerge the raw, chopped pieces in a large bowl of cold water for 20 minutes to an hour. This pulls excess surface starch out of the potato. You can actually see the water turn cloudy as the starch releases. Removing this starch leads to a fluffier interior and a much crispier exterior. I skipped this for years because I thought it was a waste of time. The result was a sticky sheet pan and potatoes that fused together into a giant, burnt clump. Learned that the hard way.
After the soaking period, you must drain and thoroughly dry the potatoes before seasoning and roasting. I dump them into a colander in the sink, shake off the excess water, and spread them out on a clean, dry kitchen towel. Pat them down aggressively. If you leave any residual moisture on the surface, the water will turn to steam in the oven. Steaming prevents the Maillard reaction, meaning your potatoes won’t brown or crisp. They’ll just turn soft and pale. Taking the extra three minutes to dry them completely is the only way to get that crunch you want on day four.
3. Utilize High Smoke Point Oils for Roasting

Roasting potatoes effectively requires high heat. You should be cooking them at temperatures between 375°F and 425°F (190-220°C). Because of these high temperatures, you must use cooking oils with high smoke points to prevent burning and the formation of bitter, unhealthy chemical compounds. I ruined an entire batch of expensive fingerlings last year by tossing them in extra virgin olive oil and roasting them at 425°F. The oil smoked out my kitchen, set off the fire alarm, and left the potatoes tasting like acrid ash. You can’t use finishing oils for high-heat roasting. You might also like: 10 High Protein Lunch Meal Prep You Need to See
Excellent choices for this temperature range include avocado oil, which has a massive smoke point up to 520°F (271°C), or refined safflower oil, which can handle up to 510°F (265°C). I buy the Chosen Foods 100% Pure Avocado Oil at Costco. A 1-liter bottle costs $18.99, and it lasts me through months of weekly meal prep. Light olive oil can also be used, but be mindful of its lower smoke point, which hovers around 400°F to 475°F depending on the brand. If your oven runs hot, stick to avocado oil. It has a neutral flavor that won’t compete with your seasonings, and it guarantees a clean, crispy finish without any burnt residue. You might also like: 20 Inspiring Sunday Dinner Ideas You Need to See

Duo 7-in-1 Electric Pressure Cooker, Slow Cooker, Rice
Honestly, Duo 7-in-1 Electric Pressure Cooker surprised me — sturdier than it looks in the photos, and over 1,841 buyers gave it 4.5 stars.
4. Season Generously for Flavorful Results

Potatoes are essentially blank canvases. If you under-season them, they taste like wet dirt. Don’t be shy with your spices. For a standard 2-pound batch of potatoes, use at least 2 tablespoons of your chosen high-heat oil. Add 1 teaspoon of garlic powder, ½ teaspoon of paprika, and season very liberally with kosher salt and freshly ground black pepper. Incorporating 3 tablespoons of fresh herbs like rosemary or thyme, or 2 teaspoons of dried herbs, will significantly improve the flavor. I pick up fresh rosemary from Sprouts. A 0.5-ounce plastic clamshell costs exactly $2.50, and the piney, earthy scent it releases in the oven is incredible. You might also like: 10 Healthy Breakfast Meal Prep That Actually Work
For a surprisingly crispy exterior, a lesser-known technique involves tossing your potatoes with a small amount of mayonnaise before roasting. This sounds strange, but it works flawlessly. The egg and oil emulsion in the mayonnaise coats the potato in a thin, even layer of fat that enhances browning and creates a unique, crackling texture. I use Duke’s Real Mayonnaise. A 32-ounce jar costs $4.98 at Walmart. Just swap out one tablespoon of your cooking oil for one tablespoon of mayonnaise, toss the raw potatoes in a large stainless steel bowl until they’re completely coated, and roast as usual. The mayonnaise flavor cooks off entirely, leaving behind only the crispy texture. Trust me on this.
5. Invest in High-Quality Airtight Glass Containers

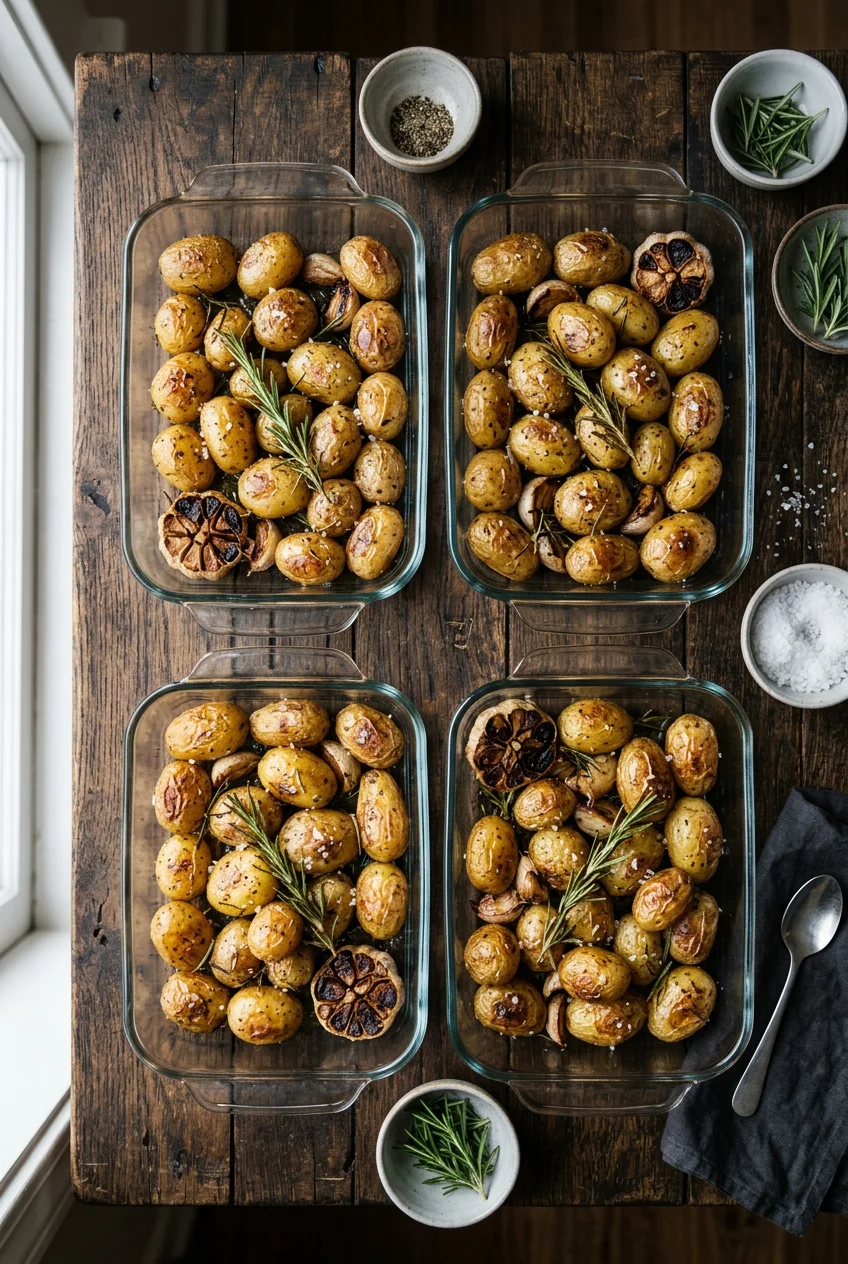
For storing cooked meal-prepped potatoes, glass containers are vastly superior to plastic. When you reheat plastic containers in the microwave, you risk warping the material and releasing chemical compounds into your food. Glass avoids this entirely. Furthermore, plastic absorbs odors and stains over time. If you prep potatoes with turmeric or heavy garlic, a plastic container will smell like that meal for the rest of its lifespan. I threw away an entire cabinet of stained plastic tubs last spring and replaced them with heavy-duty glass.
Brands like Pyrex, OXO Good Grips Smart Seal, and Caraway offer durable, airtight glass options that are freezer, dishwasher, and microwave safe. I use the Pyrex 4-cup round glass storage containers. You can buy a 4-pack at Target for $24.99. The IKEA 365+ range also provides excellent quality and highly affordable glass containers. Their 34-ounce rectangular glass container with a snap-on plastic lid costs just $5.99. The silicone gasket in the lid creates a hermetic seal, which locks out oxygen and prevents your potatoes from drying out or absorbing the ambient smells of your refrigerator. Proper storage hardware is just as important as the cooking method.
6. Prioritize Food Safety with Cooked Potatoes

Most people treat potatoes like a low-risk vegetable, but cooked potatoes are actually classified as a Time/Temperature Control for Safety (TCS) food. This means they’re highly susceptible to rapid bacterial growth if left out at room temperature. It’s crucial to cool your cooked potatoes rapidly and refrigerate them within two hours of cooking. If you leave a sheet pan of roasted potatoes sitting on your stove all afternoon while you run errands, you’re creating a breeding ground for pathogens. When you reheat your prepped meals later in the week, ensure the potatoes reach an internal temperature of 165°F (74°C) to eliminate any potential bacteria.
A common and dangerous mistake is refrigerating baked potatoes while they’re still wrapped in aluminum foil. This creates an anaerobic (oxygen-free) environment that can foster the rapid growth of Clostridium botulinum, the bacterium responsible for botulism. Botulism is a severe, potentially fatal illness. Always remove the foil from baked potatoes immediately after cooking, let them release their steam, and transfer them to an airtight glass container before placing them in the refrigerator. I learned this safety rule in a food handling course, and it completely changed how I process my baked potatoes. Never store foil in the fridge.

Duo Plus 9-in-1 Multicooker, Pressure Cooker, Slow Cook
Duo Plus 9-in-1 Multicooker punches above its price — 525 buyers rated it 4.5 stars. I would buy it again.
7. Batch Cook and Freeze for Extended Shelf Life

If you want to maximize your efficiency, you should align with the trend of “Freezer Fine Dining,” which emphasizes preparing high-quality frozen meals at home. Cooked potatoes can be frozen for an impressive 10 to 12 months, providing a massive meal prep advantage. You don’t have to eat the same side dish five days in a row. You can prepare potato-based casseroles, stews, or pre-portioned roasted chunks and freeze them for convenient, chef-inspired meals later.
To freeze them properly, par-boil your cut potatoes in salted water for 10 to 12 minutes until they’re just barely tender but still firm in the center. Drain them, cool them completely, and spread them out on a parchment-lined baking sheet to freeze individually. Once solid, transfer them to a freezer-safe bag. When you’re ready to eat, don’t thaw them. Roast them directly from frozen with a drizzle of oil at 390°F (200°C) for approximately 60 minutes until golden and crispy. I keep a gallon Ziploc bag of par-boiled Yukon Gold cubes in my freezer at all times. It saves me at least forty minutes of prep work on busy weeknights.
8. Store Raw Potatoes in Optimal Conditions

To prevent premature sprouting and greening, you must store raw potatoes in a cool, dark, and well-ventilated area. The ideal temperature range is between 45°F and 55°F (7-12°C). Do not put raw potatoes in the refrigerator. The cold temperatures of a fridge convert the potato’s starches into sugars. This chemical change alters their cellular structure, making them taste unnaturally sweet and causing them to burn rapidly when you try to roast them. I ruined a 10-pound bag of Russets doing this. They turned black in the oven within fifteen minutes. No exaggeration.
Keep your potatoes completely separate from ethylene-producing fruits and vegetables like onions, apples, and bananas. Ethylene gas accelerates the ripening and spoilage process. I used to store my potatoes and onions together in a wire basket I bought at Kroger. The potatoes grew massive sprouts and turned soft within six days. Now, I keep my potatoes in a breathable paper bag in the bottom of my pantry, far away from the onions. If you need to peel and chop potatoes a day in advance, store them completely submerged in cold water within an airtight container in the refrigerator. This method prevents oxidation and browning, but it’s only suitable for up to 24 hours before the water begins to degrade the potato’s texture.
Meal prepping potatoes doesn’t have to be a frustrating cycle of soggy leftovers and food waste. By paying attention to the starch content, utilizing the cold water soak, and adhering strictly to proper storage temperatures, you can guarantee a perfect batch every single time. I highly recommend switching to glass containers if you haven’t already. The investment pays for itself in the quality of your reheated meals. Pin this guide to your meal prep board so you have the exact roasting temperatures and safety guidelines handy for your next Sunday prep session.
Frequently Asked Questions
Can I store raw meal prep potatoes in the refrigerator?
No, you shouldn’t put raw potatoes in the fridge. Cold temperatures convert the potato’s starches into sugars. This alters their texture, makes them taste oddly sweet, and causes them to burn very quickly when you attempt to roast or fry them.
Why do my meal prep potatoes get soggy in the fridge?
They get soggy because of excess surface starch and trapped moisture. Soaking raw potatoes in cold water for 20 minutes removes starch. Drying them completely before roasting ensures a crisp crust. Storing them in airtight glass containers prevents them from absorbing ambient fridge moisture.
How long do cooked potatoes last in the fridge?
Cooked potatoes are a Time/Temperature Control for Safety (TCS) food. If cooled rapidly and stored in an airtight glass container, they will last three to four days in the refrigerator. Always reheat them to an internal temperature of 165°F before eating.
Is it safe to put foil-wrapped baked potatoes in the fridge?
No, it’s highly dangerous. Refrigerating a baked potato while it’s still wrapped in aluminum foil creates an oxygen-free environment. This specific condition allows Clostridium botulinum bacteria to grow, which can cause botulism. Always remove the foil before storing.
