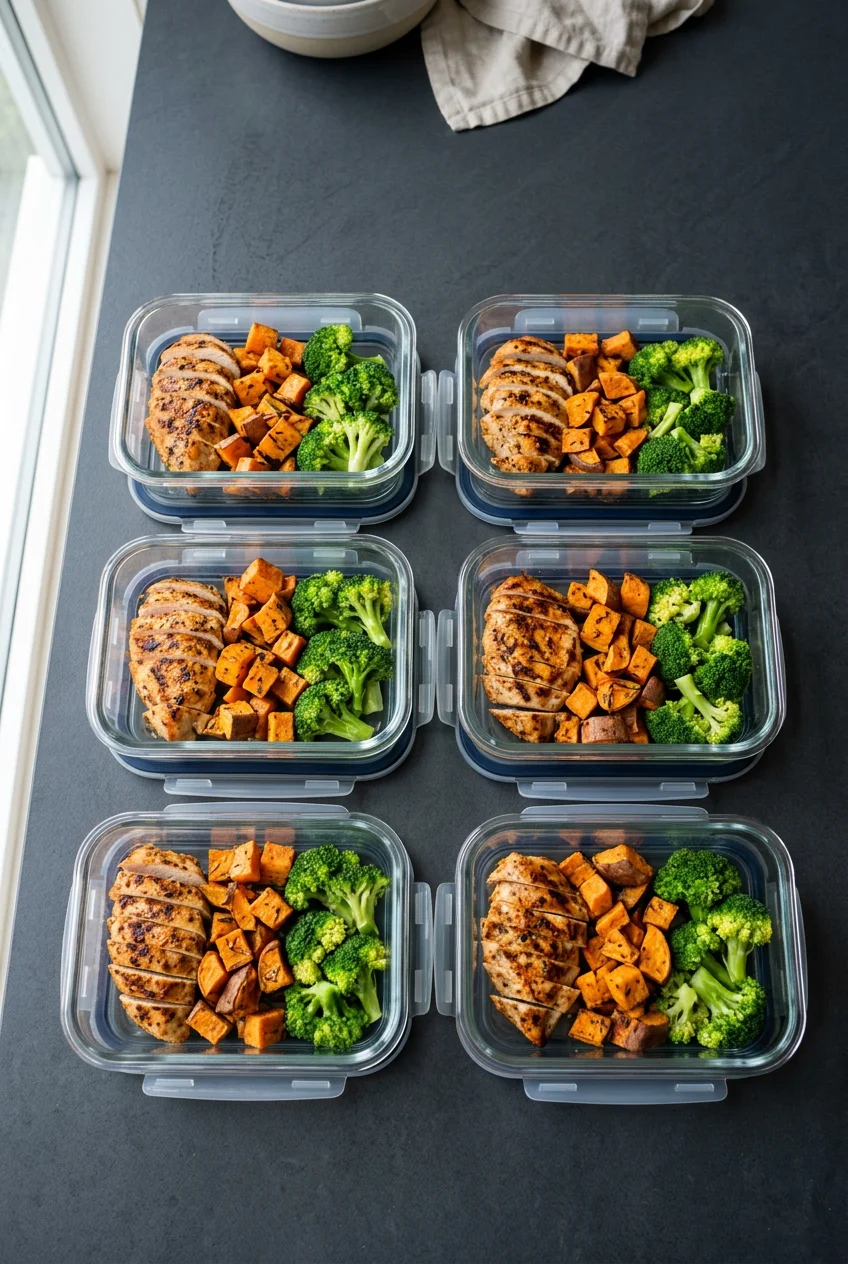
What’s Inside
- Ditch The Plastic For Tempered Glass Containers
- Master The Meal Prep Remix For Work Lunches
- Build Upside-Down Mason Jar Salads
- Batch Cook Versatile Grains With Precise Ratios
- Undercook Vegetables To Survive The Microwave
- Freeze Liquid Portions With Silicone Trays
- Use Bentgo Boxes For Compartmentalized Meal Prep For Work Lunches
- Wash Produce Thoroughly And Mix Your Own Vinaigrettes
Last Tuesday, I unzipped my canvas tote bag at my desk only to find a puddle of mysterious orange liquid soaking into my planner. That was the moment I realized my meal prep system was a total disaster. The flimsy plastic container I bought on clearance had cracked down the side, leaking leftover chicken tikka masala everywhere. It smelled like cumin and regret. Trust me, if you’re trying to figure out work lunches, you need strategies that actually hold up to commuting, reheating, and eating at a sad cubicle desk. I did this wrong for months. I bought cheap plastic bins, overcooked my broccoli until it tasted like wet paper, and ate the same dry chicken five days in a row. It was a miserable way to spend my lunch hour. Now, I approach Sunday afternoons with a methodical plan. I measure grains precisely, weigh proteins on a digital scale, and use containers that don’t warp in the office microwave. Let’s walk through the steps, measurements, and products that make packing a midday meal work.
1. Ditch The Plastic For Tempered Glass Containers

I tossed all my plastic containers last October after realizing they permanently smelled like old garlic. Plastic degrades, scratches, and holds onto grease no matter how much you scrub it. I switched to the Pyrex Simply Store 10-piece round glass set. I bought mine for $34.99 at Target. The tempered glass doesn’t absorb odors, which matters when you’re packing a pungent curry on Monday and a delicate pasta salad on Tuesday. They’re safe for the dishwasher, freezer, and microwave. The lids are still plastic, which is a downside since they can warp in the dishwasher. I wash the lids by hand now to keep them in shape. I use the 4-cup size for big salads and the 2-cup size for dense leftovers like beef chili. Glass is heavier than plastic. Carrying three containers on a subway commute takes effort. The tradeoff is worth it because your food heats up evenly and you aren’t eating microwaved chemicals. When I pack 4 oz of turkey and 1/2 cup of sweet potatoes, the thick glass retains heat perfectly after two minutes in the office microwave. No cold spots. They also stack perfectly, creating an organized shelf that makes grabbing lunch on a Wednesday morning stress-free.
2. Master The Meal Prep Remix For Work Lunches

Eating the same meal five days in a row is the fastest way to quit and buy a $15 deli sandwich. I use a remix strategy. I cook a large quantity of lean protein, usually 3 pounds of boneless, skinless chicken breast from Whole Foods. I season it with 1 teaspoon of kosher salt and 1/2 teaspoon of coarse black pepper. Then, I divide it and flavor it differently. For example, I take 4 oz of roasted chicken and toss it with 1 tablespoon of basil pesto for a Mediterranean bowl on Monday. On Wednesday, I shred another 4 oz portion and mix it with 1 tablespoon of Cholula hot sauce for a Mexican-inspired salad. On Friday, that same chicken goes into a cold pasta dish with 1/2 cup of marinara. This prevents palate fatigue. I used to season the whole batch with heavy taco seasoning, and by Thursday, the smell of cumin made me nauseous. Keeping the base protein neutral gives you options. I bake the chicken on a heavy aluminum sheet pan at 400 degrees Fahrenheit for 25 minutes. I let it rest for ten minutes, then chop it into 1-inch cubes. Having plain protein in the fridge means I can pivot if I crave something different on Thursday morning.
3. Build Upside-Down Mason Jar Salads

Nobody wants wilted, soggy lettuce at noon. I learned this the hard way when I packed a dressed spinach salad in a shallow Tupperware. By lunch, it was a slimy, inedible mess. To prevent this, you have to layer ingredients in a 32 oz wide-mouth Ball mason jar. I buy a case of twelve for $14.99 at Kroger. Start by pouring wet ingredients at the bottom. I measure 2 tablespoons of homemade vinaigrette into the base. Next, add hard, non-absorbent vegetables that handle marinating. I use 1/2 cup of chopped carrots and 1/2 cup of diced cucumbers. Above that, you add your grains or proteins, like 1/2 cup of brown rice or 4 oz of diced chicken. Finally, pack the greens, like 2 cups of chopped romaine, at the top. The greens stay dry because they’re suspended away from the dressing. When you’re ready to eat, unscrew the lid, dump it into a wide bowl, and the dressing coats the greens. The only downside is that you need a separate bowl at your desk. Eating out of a 32 oz jar is awkward and makes mixing impossible. You might also like: 11 Meal Prep Lunch Ideas That Actually Work

Bento Box Adult Lunch Box – 4 Pack, 5
If you want something that just works, Bento Box Adult Lunch Box – 4 Pack is a safe bet (24 reviews, 4.5 stars).
4. Batch Cook Versatile Grains With Precise Ratios

Cooking grains every night is time-consuming and creates a pile of dirty pots. I cook a big batch of quinoa or brown rice on Sunday. The trick to grains that don’t turn into a gelatinous paste is getting the water ratio right. For quinoa, a 1:2 ratio of grain to water works every time. I measure 1 cup of dry white quinoa and 2 cups of water. I bring it to a boil, drop the heat to low, cover with a tight lid, and simmer for 15 minutes. Once finished, I spread the grains on a large baking sheet to cool. If you leave them in the hot pot, they turn mushy. Once cool, I store the quinoa in an airtight glass container. It lasts for 4 to 5 days. I buy the 4.5-pound bag of Kirkland Signature Organic Quinoa for $10.99 at Costco because the price is unbeatable. It serves as a dense base for meals. I add 1/2 cup of cooked quinoa to salads or use it under roasted vegetables. I tried eyeballing the water for months, and my quinoa always tasted like wet sand. A proper measuring cup fixes the texture issue. You might also like: 20 Clever Quick Lunch Ideas You Haven’t Thought Of
5. Undercook Vegetables To Survive The Microwave

Most people get this wrong. If you roast broccoli until it’s tender on Sunday, it’ll turn to mush when you reheat it on Wednesday. To prevent this, slightly undercook them. I chop 2 cups of broccoli and 1 cup of bell peppers, toss them with 1 tablespoon of olive oil, and spread them on a sheet pan with parchment paper. I roast them at 400 degrees Fahrenheit. Instead of 25 minutes, I pull them out at 15. They’re still crunchy in the center. When I pack them and microwave for two minutes, the steam finishes the job. They come out tasting roasted, not boiled. I buy produce at Sprouts because their turnover is high, so the broccoli is fresher. Pre-cut bags are convenient but a waste of money. A bag of pre-cut florets costs $3.99 for 12 oz, while a whole crown is often $1.49 per pound. Plus, pre-cut vegetables lose nutrients faster. Just buy the whole vegetable and chop it yourself. You might also like: 15 Brilliant Batch Cooking Ideas That Actually Work
6. Freeze Liquid Portions With Silicone Trays

Liquid lunches like soups and stews are hard to transport. Pouring hot soup into plastic bags is dangerous, and freezing it in a tub means you have to thaw the whole thing to eat one bowl. I use Souper Cubes for this. These are thick silicone trays with steel-reinforced rims for stability. I use the 1-cup portion tray, which costs $29.95 on Amazon. I make a batch of black bean chili, let it cool, and ladle 1 cup into each of the four compartments. Once frozen solid, I pop out the blocks and transfer them to a freezer bag. When I need lunch, I grab one frozen block, drop it into my glass Pyrex container, and take it to work. It thaws in my bag by noon and takes three minutes in the microwave. The steel rim is crucial. I tried a cheaper, floppy silicone mold once. When I carried it to the freezer, it buckled and spilled two cups of soup all over my floor. The rigid rim on the Souper Cubes prevents that.

buluker 4 Pack Bento Lunch Box Set 3 Compartment Food
Honestly, buluker 4 Pack Bento Lunch Box Set 3 Compartment Food Storage Containe surprised me — sturdier than it looks in the photos, and over 23 buyers gave it 4.5 stars.
7. Use Bentgo Boxes For Compartmentalized Meal Prep For Work Lunches

Sometimes you want a lunch that feels like an adult snack plate. If you prefer keeping components separate, a compartmentalized box is the most logical choice. I use the Bentgo Fresh lunch box, which I picked up for $27.99 at Walmart. It has a leak-proof design that keeps wet and dry ingredients distinct. I use the large compartment for 1 cup of turkey roll-ups, a smaller one for 1/4 cup of almonds, and the tiny one for 2 tablespoons of hummus. The rubber seal presses down into the plastic dividers, so the hummus doesn’t ruin the crunch of the almonds. This is great if you hate foods touching. The inner tray is dishwasher safe, which simplifies cleanup on Friday. The outer shell has to be hand-washed, which is annoying, but the latch is strong. To ensure portions fit, I use an OXO Good Grips Food Scale. It costs $32.99 and ensures accurate portioning. Adding healthy fats and fiber keeps you full. I always include a small handful of walnuts or 1/4 of an avocado to keep my energy up during meetings.
8. Wash Produce Thoroughly And Mix Your Own Vinaigrettes

If you’re eating raw vegetables, you need to clean them properly. Rinsing an apple for two seconds doesn’t remove residue. I use Fit Organic Produce Wash, which is USDA-certified organic. A 32 oz bottle costs $12.99 at Trader Joe’s. It removes the wax and dirt that water leaves behind. I spray 3 squirts onto my tomatoes and cucumbers, rub them for thirty seconds, and rinse. You can see the water turn cloudy. Once clean, you need a good dressing. Skip the fat-free store-bought bottles. They taste like cardboard and use sugar to compensate for the lack of fat. I make a basic vinaigrette in a small jar. I use a ratio of 3 parts olive oil to 1 part vinegar. Specifically, I mix 3 tablespoons of extra virgin olive oil, 1 tablespoon of apple cider vinegar, 1/2 teaspoon of Dijon mustard, and a pinch of salt. I shake it until it emulsifies. This lasts two weeks in the fridge. Fight boredom by having a diverse spice rack. I often add 1/2 teaspoon of Italian seasoning or chili powder. Making it yourself means you know exactly how much sodium and oil you’re consuming.
Packing your food doesn’t have to be a chore that ends in soggy lettuce and stained bags. Once you get the right containers and figure out how to portion proteins and grains without overcooking, the process takes about an hour on Sunday. I recommend starting with glass Pyrex containers and mastering the 1:2 quinoa ratio before trying anything complicated like freezing soups. If you found these tips helpful, pin this article to your favorite recipe board so you can reference the measurements and temperatures later. Let’s make our midday meals something we actually want to eat, rather than a sad desk lunch we endure just to get through the day.
Frequently Asked Questions
How long do meal prep for work lunches last in the fridge?
Most cooked proteins and grains last 4 to 5 days in an airtight glass container. Homemade vinaigrettes can last up to two weeks, but if you add fresh garlic, consume it within 3 to 5 days.
How do I keep my salad crisp for work?
Use the upside-down mason jar method. Put 2 tablespoons of dressing at the bottom, layer hard vegetables next, add proteins, and pack delicate leafy greens at the very top so they stay completely dry.
Why do my microwaved vegetables get mushy?
You’re likely fully cooking them during your prep session. Try undercooking vegetables like broccoli by pulling them out of the oven 10 minutes early. The office microwave will finish the steaming process.
Are compartmentalized lunch boxes worth the money?
Yes, if you pack foods with different moisture levels. A leak-proof box like a Bentgo prevents wet ingredients like hummus from ruining dry items like almonds, keeping textures intact until you’re ready to eat.
