What’s Inside
- Buy Boneless, Skinless Thighs in Bulk for Meal Prep Chicken Thighs
- Pat the Meat Completely Dry Before Seasoning
- Use a Greek Yogurt Marinade for Tenderness
- Space Them Out on the Baking Sheet
- Cook to 185 Degrees, Not 165 Degrees
- Air Fry at 400 Degrees for Speed
- Broil for 12 Minutes for Quick Crispy Edges
- Save the Pan Juices for Reheating
- Rotate Seasonings to Avoid Meal Prep Fatigue
- Store in 3-Cup Glass Containers
- Reheat Meal Prep Chicken Thighs with a Damp Paper Towel
Last Tuesday, I sat in the breakroom at my corporate job staring at a plastic container of grey, rubbery meat. I realized right then that my approach to meal prep chicken thighs was completely wrong. My fork literally bounced off the meat. If you’re eating sad desk lunches, meal prep chicken thighs don’t have to taste like wet cardboard. I’ve spent the last three years testing temperatures, marinades, and reheating methods until I figured out the exact formula. I tried this wrong for months before figuring it out. I used to boil my chicken in its own juices by mistake. I ruined so many batches. Learned that the hard way. Let’s fix your Sunday prep routine. I’m going to walk you through exactly how I buy, season, and cook my lunches for the week.
1. Buy Boneless, Skinless Thighs in Bulk for Meal Prep Chicken Thighs

I used to buy standard chicken breasts because I thought they were healthier. I ended up chewing dry meat for twenty minutes every afternoon. I switched to thighs. You want boneless, skinless thighs for this. Bone-in thighs take too long to cook and they’re annoying to eat out of a container at your desk. I buy the family packs at Costco. They usually run between $2.99 and $4.99 per pound. The Kirkland Signature organic packs are $4.49 per pound right now. A standard adult portion is 4 to 6 ounces of cooked meat. That means a single Costco pack yields about twelve lunches. I tried buying the smaller packs at my local grocery store for a few months. I realized I was paying almost $7.99 a pound for the exact same cut. Skip the small packs. Buy in bulk and freeze what you won’t use this week. Boneless thighs also freeze incredibly well in vacuum-sealed bags. I keep a constant rotation in my chest freezer. When you open the Costco pack, take five minutes to trim the large pockets of yellow fat with kitchen shears. I use a pair of $15 OXO Good Grips shears for this. It takes the prep time down significantly compared to using a chef’s knife.
2. Pat the Meat Completely Dry Before Seasoning

This is the step most people skip because they’re rushing. I skipped it for a year. I’d pull the chicken straight from the plastic packaging, throw it on a pan, and wonder why it looked gray and boiled. You’ve got to pat the meat thoroughly dry with paper towels before you add any oil or spices. Chicken thighs sit in a lot of liquid inside their packaging. If you put wet chicken on a hot cast iron pan or in an oven, that surface moisture turns into steam. You end up steaming the meat instead of roasting it. I use two layers of Bounty paper towels. The cheap brands just disintegrate and leave paper lint stuck to the raw meat. I lay the thighs out on a large plastic cutting board and press the towels firmly into both sides. The surface should feel tacky to the touch. Once the meat is dry, your olive oil and spices will actually stick to the surface. This creates a crust when it cooks. A good crust is what makes meal prep chicken thighs appetizing on day three. If you skip this step, your marinade just slides off and forms a watery pool at the bottom of your baking sheet. Take the extra sixty seconds. It completely changes the texture.
3. Use a Greek Yogurt Marinade for Tenderness

Acidic marinades with vinegar or lime juice turn chicken mushy if you leave them too long. I ruined three pounds of meat last summer by leaving it in a heavy lime marinade for two days. The texture was chalky and grainy. I switched to a plain Greek yogurt marinade. The lactic acid in yogurt tenderizes the meat slowly without breaking down the protein structure too aggressively. I use the Fage 5% whole milk plain Greek yogurt. I buy the 32-ounce tub at Target for $6.39. For roughly two pounds of chicken (about 12 thighs), I mix 1/2 cup of plain Greek yogurt, the juice of half a lemon, 1 tablespoon of olive oil, and 3 cloves of minced garlic. I add a heavy pinch of kosher salt and smoked paprika. I put everything into a gallon-sized Ziploc bag and massage it into the meat. You need to let this sit in the fridge for at least 4 hours. Overnight is better. The thick yogurt clings to the meat and creates a protective coating that keeps the chicken juicy. When you’re ready to cook, don’t wipe the yogurt off. Skip the fat-free stuff. I tried it with a zero-percent yogurt once. It tasted like wet cardboard and separated in the hot oven.

Rubbermaid Brilliance Tritan Plastic Food Storage
If you want something that just works, Rubbermaid Brilliance Tritan Plastic Food Storage Containers BPA Free is a safe bet (583 reviews, 4.5 stars).
4. Space Them Out on the Baking Sheet

I’m guilty of trying to wash fewer dishes. I used to cram twelve chicken thighs onto a single small baking pan so I wouldn’t need to clean two pans. The thighs were touching each other. As they cooked, they released juices. Because there was no space for the heat to circulate, the juices pooled. I accidentally boiled my chicken in its own fat. You must arrange the chicken thighs in a single layer with at least an inch of space between each piece. Heat needs to hit all sides of the meat to evaporate the surface moisture and brown the edges. I use two Nordic Ware half-sheet pans. I bought them at Target for $17.99 each. They’re heavy aluminum and they don’t warp in a 400-degree oven. If you’re cooking a large bulk pack, you’ll definitely need two pans. Line them with heavy-duty aluminum foil for easier cleanup. I spray the foil with a quick coat of Pam avocado oil spray ($4.98 at Walmart) so the meat doesn’t stick. Giving the meat room to breathe is the only way to get those crispy, caramelized edges. If your oven is small, cook them in two separate batches. Batch cooking takes an extra twenty minutes, but it yields food you actually want to eat. You might also like: 11 Meal Prep Breakfast Ideas That Actually Work
5. Cook to 185 Degrees, Not 165 Degrees

The USDA tells you to cook all poultry to a minimum internal temperature of 165 degrees Fahrenheit for food safety. That’s technically correct. But if you pull chicken thighs out of the oven at exactly 165 degrees, they’ll be rubbery and chewy. I chewed through a lot of weird, stringy chicken before I learned this rule. Chicken breasts dry out past 165 degrees. Chicken thighs aren’t the same. They contain a lot of dark meat, fat, and connective tissue. That connective tissue doesn’t break down and render until the meat hits between 175 and 195 degrees Fahrenheit. I aim for 185 degrees. At this temperature, the fat melts into the muscle fibers. The meat becomes incredibly tender and pulls apart easily with a fork. You need an instant-read thermometer to track this accurately. I use a ThermoPro digital meat thermometer. I bought it on Amazon for $14.99 two years ago and it still works perfectly. I insert the probe into the thickest part of the thigh. Don’t guess by looking at the color of the juices. Push past the standard temperature advice. Your meal prep will taste significantly better on Thursday if you cook the dark meat properly on Sunday. It feels wrong to intentionally overcook chicken, but dark meat handles the higher heat. Trust me on this. You might also like: 12 Ground Beef Meal Prep That Actually Work
6. Air Fry at 400 Degrees for Speed

The air fryer is the most efficient tool for this specific cut of meat. I resisted buying one for years because I hate single-use kitchen appliances. I finally caved and bought a Ninja 4-quart Air Fryer at Walmart for $89. It completely changed my Sunday routine. If you’re prepping a smaller batch (four to six thighs), the air fryer is faster than preheating a standard oven. You cook boneless, skinless thighs at 400 degrees Fahrenheit for 11 to 15 minutes total. You need to flip them halfway through the cooking time so both sides get direct heat. The high convection heat sears the outside quickly while keeping the inside juicy. If you prefer bone-in, skin-on thighs, you’ll need to cook them for 16 to 18 minutes at 400 degrees. The skin gets incredibly crispy with almost zero added oil. I usually spray the basket with a tiny bit of Chosen Foods avocado oil spray. Don’t use aerosol cooking sprays like Pam in your air fryer basket. The propellants degrade the non-stick coating over time. I ruined my first air fryer basket doing exactly that. The air fryer method is perfect if you only need enough protein for two or three days of lunches. It produces a texture that’s very close to pan-frying.
Food Scale, 11lb Kitchen Scale with 0.05oz/1g Precision
A dependable everyday pick — Food Scale pulls in 15 ratings at 4.5 stars. Not flashy, just solid.
7. Broil for 12 Minutes for Quick Crispy Edges

When I’m completely exhausted on a Sunday afternoon and want my prep done in under twenty minutes, I use the broiler. Broiling is basically upside-down grilling. It uses intense, direct heat from the top of your oven to cook the meat rapidly. I set my oven broiler to high and let it preheat for five minutes. I line a baking sheet with heavy-duty foil and spray it with nonstick spray. I place the seasoned chicken thighs directly on the foil. I place the pan on the top rack, about four inches away from the heating element. Boneless thighs take about 12 to 15 minutes to cook through under the broiler. I’ve got to watch them closely. The line between a beautiful, charred crust and a smoking, burnt disaster is about ninety seconds. I burned an entire batch of honey garlic thighs last November because I walked away to answer a text message. The sugar in the marinade caught fire under the broiler. If you’re using a marinade with sugar, honey, or maple syrup, move the pan to the middle rack so it doesn’t scorch. Broiling gives you crispy edges that mimic the texture of outdoor grilling. Just make sure you verify the internal temperature hits that 185-degree mark before you pull the pan out. You might also like: 10 High Protein Lunch Meal Prep You Need to See
8. Save the Pan Juices for Reheating

Most people scrub their baking pans in the sink and wash all the leftover drippings down the drain. You’re throwing away the best part of the meal. When chicken thighs roast, they release a mixture of rendered fat, water, and whatever spices you used in your marinade. This liquid is liquid gold for meal prep. Chicken tends to dry out in the fridge after a few days. If you save those pan juices, you can use them to add moisture back into the meat when you reheat it. I carefully pour the drippings from my Nordic Ware pan into a small glass jar. Sometimes I use the juices exactly as they are. I just drizzle a spoonful over my lunch portion before I microwave it. Other times, I turn it into a quick gravy. I pour the juices into a small saucepan and whisk in a teaspoon of Bob’s Red Mill tapioca flour. I buy a 16-ounce bag at Whole Foods for $4.39. Tapioca flour thickens the liquid almost instantly without leaving a cloudy, floury taste. I pour this thickened sauce directly into my meal prep containers over the chicken and rice. It completely solves the dry, leftover meat problem. It takes three extra minutes of effort for a better lunch.
9. Rotate Seasonings to Avoid Meal Prep Fatigue

Eating the exact same flavor profile five days in a row is the main reason people quit meal prepping. By Thursday, your brain rejects the food. You need to vary your seasonings every single week. I rotate between four core flavor profiles: lemon herb, garlic sesame, chipotle, and a balsamic glaze. I don’t make complicated marinades from scratch when I’m tired. I rely heavily on ready-to-use ingredients to cut down my chopping time. I use Spice World Minced Garlic. I buy the 8-ounce jar at Kroger for $3.49. I also keep a tube of Gourmet Garden Squeezable Ginger in my fridge ($4.99 at Kroger). For a fast garlic sesame batch, I mix two tablespoons of soy sauce, a squeeze of ginger, a spoonful of minced garlic, and a dash of sesame oil. It takes thirty seconds to mix. The next week, I’ll use olive oil, dried oregano, and lemon juice for a Greek profile. If you buy a massive pack of chicken at Costco, you can actually split it into two different gallon bags. Put a chipotle marinade in one bag and a honey Dijon marinade in the other. You bake them on two separate pans. Now you’ve got two completely different flavors for the week with barely any extra effort.

Food Scale, 11lb Digital Kitchen Scale with 6 Units LCD
Food Scale punches above its price — 21 buyers rated it 4.5 stars. I would buy it again.
10. Store in 3-Cup Glass Containers

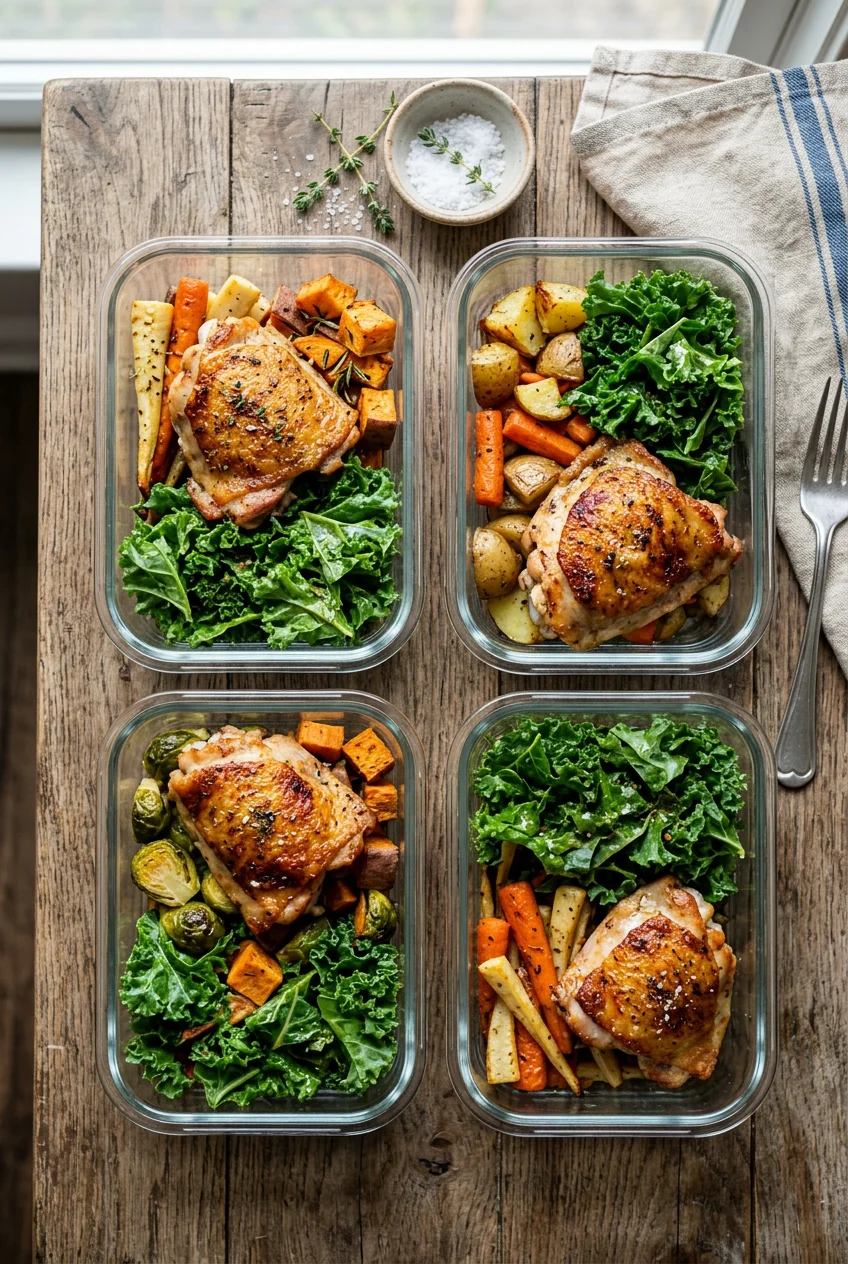
You can’t store your carefully cooked chicken in cheap, flimsy plastic containers. Plastic stains easily, absorbs the smell of old garlic, and warps in the microwave. I learned this the hard way when a cheap plastic lid popped off in my work bag and leaked chicken juice all over my laptop charger. I threw out all my plastic and invested in glass. I use the Rubbermaid Brilliance Glass containers. The 3.2-cup size is exactly right for two chicken thighs, a scoop of rice, and a side of roasted broccoli. I bought a set of four at Target for $29.99. They’ve got airtight, leak-proof lids that snap down securely. Cooked chicken thighs will stay safe and taste fresh in the refrigerator for 3 to 4 days. If I prep on Sunday, I only keep enough portions in the fridge to last through Thursday. I take any Friday or Saturday portions and put them straight into the freezer. Cooked thighs freeze beautifully for up to three months. I just pull a frozen container out on Thursday night and let it thaw in the fridge overnight. Glass containers go straight from the fridge to the microwave safely. The heavy glass actually insulates the food slightly, which helps it reheat more evenly than thin plastic.
11. Reheat Meal Prep Chicken Thighs with a Damp Paper Towel

The microwave is the enemy of leftover chicken. It blasts the meat with radiation, boils the remaining water molecules, and leaves you with a dry, rubbery puck that smells faintly of sulfur. That specific leftover chicken smell happens when the proteins oxidize in the fridge. You can mask the smell and fix the texture with one simple technique. You’ve got to introduce moisture back into the container before you hit start. I splash one tablespoon of chicken broth directly over the meat. I use the Pacific Foods organic low-sodium chicken broth. I buy the 32-ounce carton at Sprouts for $3.99. If I don’t keep broth open, I just use a tablespoon of tap water. Then, I take a half-sheet of a paper towel, run it under the faucet until it’s damp, and drape it directly over the chicken thighs. I microwave the container on 70% power for 90 seconds. Don’t use 100% power. The damp paper towel creates a mini steam room inside your microwave. The meat absorbs the steam as it heats up. The lower power setting warms the chicken gently instead of shocking it. I tried eating cold chicken for months to avoid the microwave entirely, but this damp towel trick actually makes the hot meat palatable again. Took me years to figure out.
Meal prep doesn’t have to be a miserable chore that results in dry, sad food. Once you master the temperature and the reheating tricks, dark meat is the most reliable protein you can make. I hope these tips save you from eating another rubbery lunch at your desk. It took me a long time to figure out that 165 degrees was ruining my meals. Pin this guide to your favorite recipe board so you keep the temperature and marinade ratios handy for next Sunday. Let’s make your next batch of lunches something you actually look forward to eating.
Frequently Asked Questions
How long do meal prep chicken thighs last in the fridge?
Cooked chicken thighs will stay fresh in an airtight glass container in the refrigerator for 3 to 4 days. If you need them to last longer, you should freeze the cooked portions and thaw them overnight before eating.
Can I freeze cooked meal prep chicken thighs?
Yes, cooked boneless skinless chicken thighs freeze incredibly well. Store them in airtight glass containers or vacuum-sealed bags for up to three months. Thaw them in the refrigerator overnight before reheating them in the microwave.
Why are my meal prep chicken thighs rubbery?
You’re likely pulling them out of the oven at 165 degrees Fahrenheit. Dark meat contains connective tissue that doesn’t break down until it hits 175 to 195 degrees. Cook them to 185 degrees for a much tender texture.
What is the best way to reheat chicken thighs?
The microwave can dry out leftover chicken. To fix this, add a tablespoon of chicken broth or water to your container, drape a damp paper towel over the meat, and microwave on 70% power for 90 seconds.
