What’s Inside
- Upgrade to a 7-Quart Capacity for Crockpot Chicken Meal Prep
- Pick Thighs Over Breasts and Add Olive Oil
- Never Put Frozen Meat in the Slow Cooker
- Use a Hand Mixer for Instant Shredding
- Control the Liquid and Season Generously
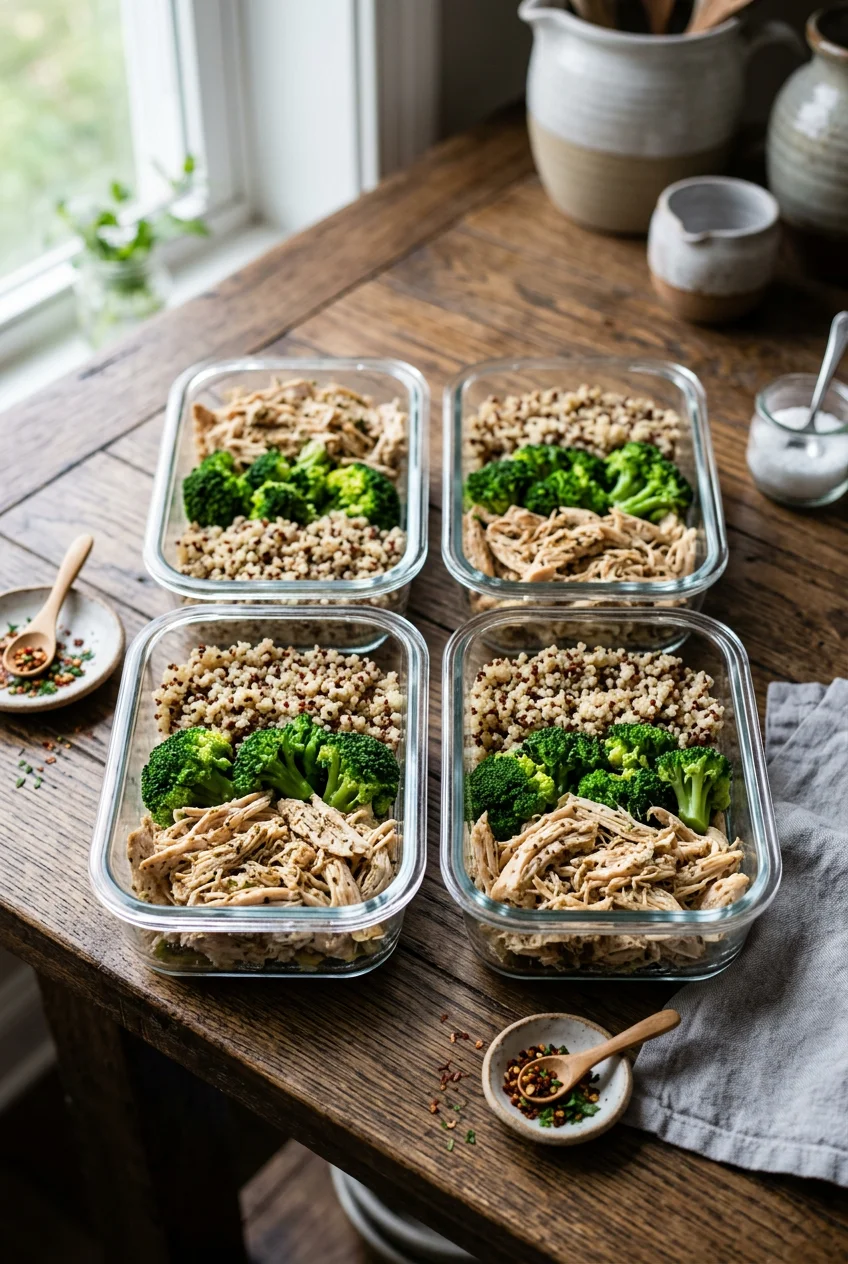
- Switch to Glass Containers for Crockpot Chicken Meal Prep
- Reincorporate the Juices and Freeze the Rest
- Rotate Global Flavors for Crockpot Chicken Meal Prep
I tossed four pounds of gray, rubbery meat last Tuesday. My frozen-solid Costco breasts had sat in the danger zone for six hours. If you’re trying to nail crockpot chicken, you’ll learn quickly that dumping ice-cold poultry into a ceramic bowl yields terrible results. I spent three years eating dry, stringy lunches before I figured out the formula for keeping shredded chicken juicy on a Thursday. When I started prepping meals on Sundays, I viewed the slow cooker as a magic trash can. I thought I could toss in cheap meat, walk away for a day, and return to tender protein. I was wrong. The texture was always chalky. The flavor washed out thanks to the condensation trapping inside the lid. I choked down so many bad salads out of sheer stubbornness. Now, my Sunday routine is a precise science. I know exactly how much liquid to add, which cuts of meat survive reheating, and how to store everything so it tastes freshly cooked four days later. Here’s my method for getting it right every time.
1. Upgrade to a 7-Quart Capacity for Crockpot Chicken Meal Prep

Let’s talk equipment. I tried cramming four pounds of chicken into a tiny 4-quart round slow cooker I bought at a garage sale for five dollars. The raw chicken piled up to the lid. The bottom pieces boiled into mush while the top pieces dried out in the hot air. I ate that batch for five days, chewing through chalky, flavorless meat at my desk. You need surface area. I bought the Crock-Pot 7 Quart Oval Manual Slow Cooker for $44.99 at Target last October, and it solved the overcrowding issue. The wide oval shape lets three to four pounds of boneless, skinless chicken breasts sit in a single, even layer across the ceramic bottom. This ensures the heat penetrates every piece at the same rate. If you work long shifts, you might want to upgrade to the Hamilton Beach Set & Forget Programmable Slow Cooker. It costs $64.99 at Kroger, but it automatically switches to the “warm” setting after the cycle finishes. I used a manual cooker for years and ruined batches when a meeting ran late. The meat would hit 190 degrees and turn to sawdust. A programmable model prevents your chicken from drying out if you aren’t standing right there. Make sure your pot is large enough for a double batch. You want 6 to 8 quarts for efficient cooking. Anything smaller just steams the meat unevenly, leaving you with tough, stringy protein.
2. Pick Thighs Over Breasts and Add Olive Oil

Most people default to chicken breasts for meal prep because they’re lean. I did this for months. I bought the giant $14.99 family packs at Sprouts and cooked them on high until they turned into dry shoelaces. Breasts have little intramuscular fat. When you reheat them in a harsh office microwave, they taste like wet cardboard. Switch to boneless, skinless chicken thighs. I grab a 3-pound pack from Whole Foods for about $16. Thighs offer more flavor and stay juicy after three days in the fridge. The dark meat holds up because the fat melts down and bastes the meat. If you insist on breasts for your macros, you have to add fat back in. Before I turn the heat on, I drizzle 2 tablespoons of Pompeian Extra Virgin Olive Oil ($8.49 at Kroger) over the meat. I use my hands to massage the oil and seasonings into the chicken. This creates a lipid barrier that stops the breasts from drying out during the four to six hours of cooking. The oil coats the fibers. When you skip this, the meat releases its water content and contracts into tight knots. The oil keeps the texture soft enough to shred. I learned that the hard way after tossing out batches of chalky meat I couldn’t even force down with ranch.
3. Never Put Frozen Meat in the Slow Cooker

This is the biggest food safety mistake I see. I did it myself two years ago. I pulled a 4-pound bag of Kirkland Signature frozen chicken breasts ($15.99 at Costco) straight from the freezer, dumped the icy block into the pot, and turned the dial to high. The chicken took three hours just to thaw inside the cooker. This keeps the meat sitting in the bacterial danger zone (40°F to 140°F) for way too long. The slow cooker doesn’t get hot enough, fast enough, to safely cook frozen poultry. Aside from the food poisoning risk, it ruins the texture. The ice crystals melt and flood the pot with water, essentially boiling the meat. You end up with gray, rubbery chunks that shred into mush. Always thaw your chicken completely. I move mine to the bottom shelf of the fridge on Saturday in a bin to catch drips. By Sunday, it’s soft and ready. If I forget, I place the vacuum bag in a bowl of cool water, changing it every thirty minutes. It takes extra planning, but starting with thawed meat is the only way to get a tender result that tastes good three days later. You might also like: 20 Beautiful High Protein Meal Prep Ideas That Are Totally Worth It

Duo 7-in-1 Electric Pressure Cooker, Slow Cooker, Rice
Duo 7-in-1 Electric Pressure Cooker punches above its price — 1,841 buyers rated it 4.5 stars. I would buy it again.
4. Use a Hand Mixer for Instant Shredding

I spent years standing over a hot pot, pulling at chicken with two forks. My wrists would cramp, the forks would screech, and I’d end up with uneven chunks. Some pieces were thin and stringy, while others were massive lumps. Then I tried the mixer. Let the chicken rest in the pot for 10 to 15 minutes first. If you shred it while boiling hot, the steam escapes and the meat dries out. After resting, I take my KitchenAid 5-Speed Hand Mixer ($44.99 at Target) and press the beaters into the pot. I turn it on the lowest setting. Within thirty seconds, three pounds of chicken turns into uniform, restaurant-quality shreds. The beaters pull the meat apart along the muscle fibers faster than forks ever could. It also whips the cooking liquids and rendered fat back into the meat. You can use a stand mixer, but transferring hot chicken to a bowl creates extra dishes. The hand mixer keeps the mess in one pot. Just keep the speed low, or you’ll fling broth across your kitchen. I learned that the hard way while wearing a white sweater.
5. Control the Liquid and Season Generously

Slow cooking is a wet process. As the chicken heats up, it releases a lot of water. I used to pour an entire 32-ounce carton of broth over my chicken, thinking it needed to be submerged. The result was a bland, watery soup where the seasoning washed off. You need very little liquid. For 3 to 4 pounds of chicken, I pour in exactly 1/2 cup of Trader Joe’s Low Sodium Chicken Broth ($1.99). This provides enough steam to cook without drowning the meat. Because the lid traps condensation, it mutes flavors over time. You have to season much heavier than you would for grilling. A light sprinkle of salt won’t survive four hours of braising. For a standard batch, I use 1 teaspoon of Morton Kosher Salt, 1/2 teaspoon of coarse black pepper, 1 teaspoon of McCormick Garlic Powder, 1 teaspoon of onion powder, and 1 teaspoon of smoked paprika. I rub this onto the raw meat before adding the broth. The spices form a thick paste. As the chicken cooks, this dissolves into a concentrated, flavorful liquid. If you skimp on the salt, the meat will taste flat by Tuesday, no matter how much hot sauce you use. You might also like: 8 Low Calorie Meal Prep You Need to See
6. Switch to Glass Containers for Crockpot Chicken Meal Prep

I used cheap plastic containers for three years. The plastic absorbed the smell of old garlic, developed a cloudy film, and warped in the dishwasher. Worse, heating chicken in scratched plastic can release microplastics into your food. I threw them out last January. I bought the Rubbermaid Brilliance Glass Storage Set. A 5-piece set costs $39.98 at Walmart. The glass is non-porous, so it doesn’t hold onto smells. The lids latch securely with one hand, which matters when I’m packing lunches in a rush. Glass containers are safe for the oven, microwave, and dishwasher. Once my chicken is shredded, I use a digital scale to portion exactly 5 ounces of meat into each container. This keeps my protein intake consistent. If I eyeball the portions, I usually end up eating 8 ounces on Monday and have nothing left by Thursday. The Rubbermaid containers stack perfectly, and the clear glass lets me see my inventory without popping the lids. The heavy glass keeps the chicken insulated when I reheat it, warming it gently instead of blasting the edges into rubber like thin plastic does.

Duo Plus 9-in-1 Multicooker, Pressure Cooker, Slow Cook
If you want something that just works, Duo Plus 9-in-1 Multicooker is a safe bet (525 reviews, 4.5 stars).
7. Reincorporate the Juices and Freeze the Rest

The spiced liquid left at the bottom is liquid gold. Don’t dump it. I used to drain my chicken using a colander. By Wednesday, the meat was so dry I had to choke it down with a glass of water. Now, after I shred the chicken, I stir it for two minutes. I want the meat to soak up all the reserved cooking liquid and fat. When I transfer the chicken to containers, I spoon an extra tablespoon of juice over each portion. Storing the shredded chicken in this liquid maintains its juiciness when hit with microwave radiation. If you’re doing a big prep, make a double batch. Cooked chicken only lasts about four days before it starts tasting sour. I portion half my batch into Ziploc Freezer Quart Bags ($5.49 at Target), press the air out, and freeze them flat. The meat stays good for three months. When I need dinner, I pull a block out, run it under warm water to loosen the plastic, and dump it into a skillet. It saves me hours on busy weeks. You might also like: 10 Healthy Meal Prep Ideas for Every Budget
8. Rotate Global Flavors for Crockpot Chicken Meal Prep

Eating plain salted chicken for five days is miserable. You’ll get meal prep fatigue and end up ordering a $20 desk salad on DoorDash. You have to change the flavor profile every week to keep this sustainable. For a Tex-Mex batch, I skip the broth. Instead, I pour 10 ounces of Trader Joe’s Chunky Salsa ($2.99) and 2 tablespoons of taco seasoning over three pounds of raw thighs. The acidity in the tomatoes breaks down the meat, making it tender for burrito bowls. The next week, I switch to an Asian profile. I mix 1/2 cup of Coconut Secret Coconut Aminos ($7.39 at Whole Foods), a tablespoon of toasted sesame oil, and a tablespoon of minced ginger. The aminos act like soy sauce but have a thicker consistency that coats the meat beautifully. If I’m cooking a whole chicken, I use a roasting rack trick. I place three celery stalks and two carrots at the bottom of the cooker. I rest the 4-pound bird ($12 at Sprouts) on top. This elevates the chicken, promoting even heat circulation and preventing the bottom skin from turning into a soggy mess. Rotating between salsas, aminos, and different spice rubs keeps the lunches interesting enough that I actually want to eat them.
Meal prep doesn’t have to mean eating dry, flavorless food out of cloudy plastic. Once you dial in the liquid ratios and use a hand mixer to shred the meat, the process takes fifteen minutes of active work on a Sunday. I recommend picking up the Rubbermaid glass containers the next time you’re at Walmart. The heavy glass makes reheating so much gentler, preserving the texture you worked hard to create. If you try the olive oil trick with your breasts this week, let me know how the texture turns out. Save this guide and pin it to your meal prep boards so you have the measurements handy the next time you’re in the grocery store aisle trying to remember how much broth you need.
Frequently Asked Questions
How long does cooked crockpot chicken last in the fridge?
Cooked shredded chicken lasts three to four days in an airtight glass container in the refrigerator. After four days, the texture degrades and the meat can develop a sour flavor. Freeze any leftover portions in flat bags for up to three months.
Can I put frozen chicken directly into the slow cooker?
No. Cooking frozen chicken in a slow cooker keeps the meat in the bacterial danger zone (40°F to 140°F) for too long. It also melts ice crystals into your cooking liquid, boiling the meat and resulting in a tough, rubbery texture.
Why is my slow cooker chicken always dry?
Chicken dries out if you cook it on high for too long, use breasts without adding fat, or shred it immediately while it’s boiling hot. Add a drizzle of olive oil, cook on low, and let the meat rest for 15 minutes before shredding.
How much liquid do I add for crockpot chicken meal prep?
You only need 1/2 cup of chicken broth for three to four pounds of chicken. The meat releases a massive amount of water as it cooks. Adding too much liquid dilutes your seasonings and boils the chicken instead of braising it.
