What’s Inside
- Prioritize Frozen, Peeled, and Deveined Shrimp
- Master the Quick Thaw Method for Meal Prep Shrimp
- Keep Marinades Under 30 Minutes
- Season Generously with Trending Flavor Profiles
- Avoid Overcrowding the Pan for Even Cooking
- Memorize the C-Shape Rule for Perfect Timing
- Utilize High-Heat Meal Prep Shrimp Methods
- Try the Baking Soda Trick for Extra Tenderness
- Cool Rapidly After Cooking to Halt the Process
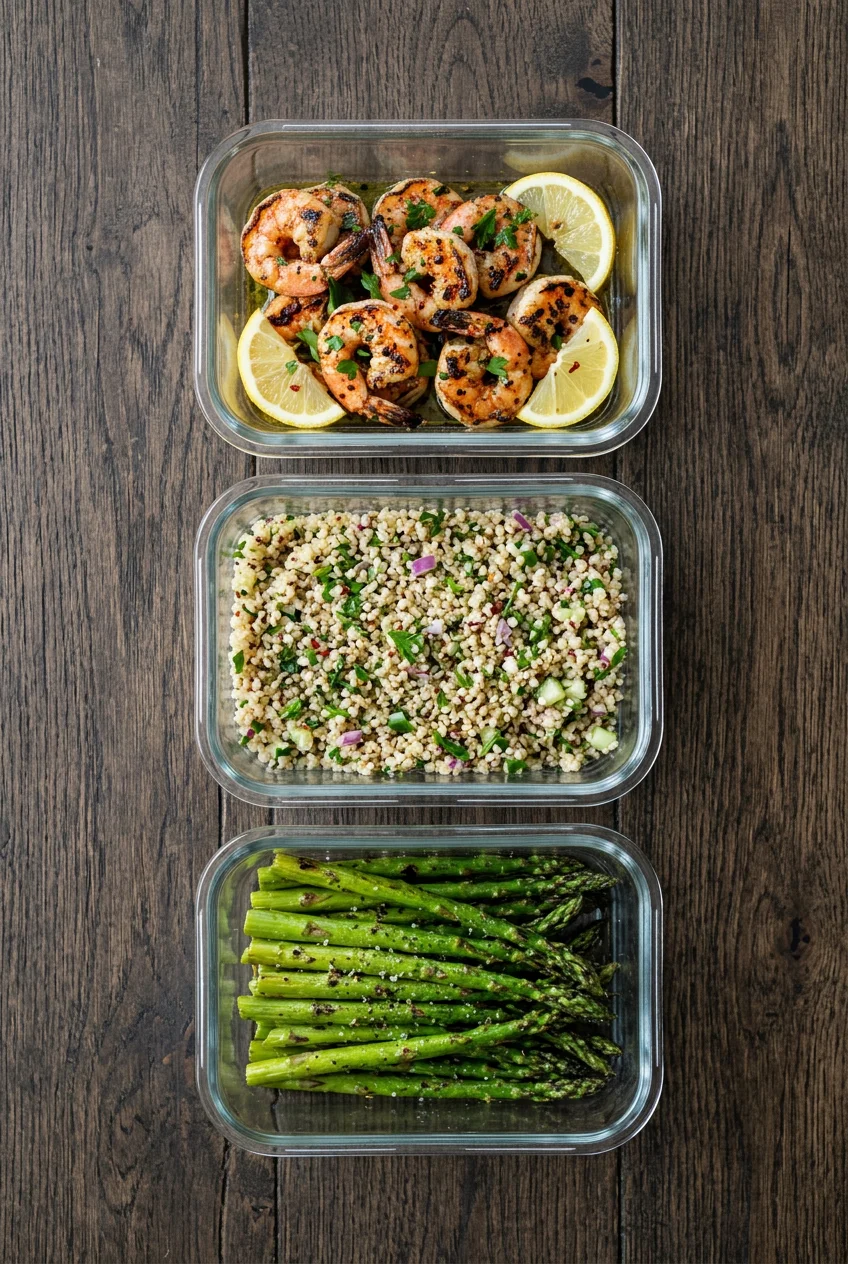
- Store in Airtight Glass Containers for 3 to 4 Days
- Portion Separately from Starchy Sides
- Reheat Gently or Eat It Cold
I tossed three pounds of rubbery, sad meal prep shrimp in the trash last February before I finally figured out how to cook it right. I’d microwave my lunch, take one bite, and realize I was chewing on a pink pencil eraser. Seafood is expensive, and ruining it week after week was killing my grocery budget. I tried different pans, marinades, and times, but failed for months. The breaking point was a Tuesday when a coworker asked if I was eating chicken cartilage. That afternoon, I went down a massive rabbit hole learning how restaurants keep seafood tender. I learned that the hard way.
Meal prepping this protein follows a different rulebook than chicken or beef. You can’t just toss it in a hot pan and hope for the best. The margin for error is about sixty seconds. But once you learn the basics of thawing, seasoning, cooking, and storing, it’s the easiest protein to make on a Sunday. It cooks in under five minutes and packs roughly 20 grams of protein per 3-ounce serving. Here are the steps, mistakes to avoid, and methods I use to get perfect results every single week.
1. Prioritize Frozen, Peeled, and Deveined Shrimp

Most people buy seafood from the glass counter, thinking it’s fresher. I did this for six months. Every Sunday, I stood in line at Kroger, paid a premium, and brought home raw shrimp that smelled fishy by Tuesday. The reality is that almost all “fresh” shrimp at standard counters has already been thawed. You’re paying for someone else to thaw your food, and you have no idea how long it’s been sitting there.
Instead, prioritize individually quick-frozen (IQF) shrimp. These are flash-frozen at sea, which locks in the texture immediately. I buy the Trader Joe’s Wild Raw Argentinian Red Shrimp for $10.99 for a one-pound bag. They come peeled and deveined, which is critical. The Kirkland Signature Farm-Raised Raw Shrimp from Costco is another solid choice at $14.99 for a two-pound bag. Buying frozen means you control the thawing.
You aren’t racing a clock that started ticking days ago in a delivery truck. Plus, buying pre-peeled bags saves you twenty minutes of standing over the sink pulling off tiny legs and shells. Skip the counter and head to the freezer aisle. It’s cheaper, safer, and tastes significantly better on day four.
2. Master the Quick Thaw Method for Meal Prep Shrimp

If you’re short on time, don’t use warm water. I tried running hot tap water over a frozen block of shrimp last Tuesday because I was running late. The hot water started cooking the edges. They turned a mushy pink while the centers stayed frozen. When I cooked them, the texture was ruined. They tasted like wet cardboard. No exaggeration.
The correct quick thaw method requires cold running water. Place your shrimp in a colander under the tap, stirring occasionally. They thaw in 15 to 20 minutes. If you don’t want to run the tap, put the seafood in a sealed bag. I use Target Up&Up gallon freezer bags, which cost $4.19 for a 40-count box. Submerge that bag in a bowl filled with cold water.
Change the water every 30 minutes. A one-pound bag thaws in an hour or less using the bowl method. Never leave them on the counter to thaw. The outside will reach an unsafe temperature long before the icy center thaws. Always stick to cold water and dry them thoroughly with paper towels. Wet seafood steams instead of searing.
3. Keep Marinades Under 30 Minutes

Shrimp absorbs flavor fast because the meat is delicate. You don’t need to prep the marinade the night before. In fact, if your marinade has acidic ingredients like lemon juice or vinegar, leaving it too long is a mistake. The acid breaks down the proteins, essentially cooking it without heat. It’s the same chemical process used to make ceviche.
If you leave raw seafood in a lemon-heavy marinade for two hours, you’ll pull it out and find it mushy and ruined before it hits the pan. I limit marinating time to 15 to 30 minutes. A basic mix of 2 tablespoons of fresh lemon juice, 1/4 cup of olive oil, and minced garlic works well. I use Whole Foods 365 Extra Virgin Olive Oil, which runs $8.49 for a 16.9-ounce bottle.
If you must prep a day in advance, leave out the acid. Mix your oil, garlic, and spices in a container. Keep it in the fridge overnight. Then, right before you turn on the stove, squeeze the fresh lemon juice over the top. This gives you the bright flavor without destroying the structure of your protein. You might also like: 11 Vegan Meal Prep That Actually Work

Food Scale -33lb Digital Kitchen Scale for Food Ounces
A dependable everyday pick — Food Scale -33lb Digital Kitchen Scale for Food Ounces Grams Rechargea pulls in 78 ratings at 4.5 stars. Not flashy, just solid.
4. Season Generously with Trending Flavor Profiles

Garlic and butter are classic, but eating the same flavor four days in a row gets boring. Because this protein is mild, it acts like a blank canvas for aggressive spice blends. Skip the fat-free, sugar-free bottled marinades. They taste like chemicals and leave a metallic aftertaste. Instead, rely on dry spice rubs that create a crust in a hot cast iron pan. You might also like: 20 Beautiful High Protein Meal Prep Ideas That Are Totally Worth It
I started using the Sam’s Club 6-Pepper Blend, which costs $6.98 for a 14-ounce shaker. I mix 1 tablespoon of that with 1 teaspoon of smoked paprika, 1 teaspoon of cumin, and 1/2 teaspoon of chili powder. Toss the meat in 1 tablespoon of avocado oil, then coat it in the dry spices. The paprika gives it a deep color, while the cumin adds an earthy base note that holds up in the fridge. You might also like: 12 Ground Beef Meal Prep That Actually Work
Another option is a Mediterranean herb blend. I mix 1 tablespoon of dried oregano, 1 teaspoon of dried basil, 1/2 teaspoon of onion powder, and a heavy pinch of kosher salt. The dry spices stick to the oil and form a protective barrier, locking in moisture. Don’t be shy with your measurements. Cold food mutes flavors, so you need to over-season if you plan to eat these lunches later.
5. Avoid Overcrowding the Pan for Even Cooking

This is the number one mistake I see people make. You have two pounds of raw protein and you dump it into your skillet to save time. I used to do this constantly. The problem is that dumping two pounds of cold, wet food into a pan drops the temperature of the metal instantly.
Instead of a loud sizzle, you hear a quiet bubbling sound. The seafood releases its internal moisture, and because the pan isn’t hot enough to evaporate that liquid, the meat ends up boiling. You lose the chance to build a crust, and the texture turns rubbery. To fix this, you have to cook in batches.
I use a 12-inch Lodge Cast Iron Skillet, which I bought for $19.90 at Walmart. Even with a pan that large, I only cook half a pound at a time. I leave half an inch of empty space between each piece. Yes, it takes an extra five minutes to cook separate batches. But those minutes mean the difference between a sad, steamed lunch and a perfectly seared meal. Wipe the pan out with a paper towel between batches if the spices burn.
6. Memorize the C-Shape Rule for Perfect Timing

Shrimp cooks faster than almost anything else. You have a window of about 60 to 90 seconds per side before they go from perfect to ruined. When I started, I was terrified of undercooking seafood. I’d leave it in the pan for four or five minutes, flipping it until the pieces looked like tight tires. They were hard to chew.
To get the timing right, watch the shape, not the clock. Raw shrimp hang straight. As they hit the heat, the proteins contract and they start to curl. An expert cue is the C-shape rule. Pull them off the heat the second they form a relaxed C. If they curl into a tight O, where the head touches the tail, they’re overcooked.
I buy the medium-sized raw tail-off bags from Sprouts Farmers Market for $9.99 a pound. For that size, it takes exactly 90 seconds on the first side and 60 seconds on the second. The flesh should turn from translucent gray to opaque pink. The moment you see that pink color wrap around the back, get them out of the pan. Don’t just turn off the burner, because the residual heat will keep cooking them.

Food Scale, 11lb Digital Kitchen Scale with 6 Units LCD
A dependable everyday pick — Food Scale pulls in 21 ratings at 4.5 stars. Not flashy, just solid.
7. Utilize High-Heat Meal Prep Shrimp Methods

Low and slow is great for pork, but a disaster for seafood. If you cook this over low heat, it takes too long to reach a safe temperature. By the time the inside is done, the outside is dried out. You need intense heat to cook the exterior rapidly while leaving the interior tender.
Pan-searing is my default, but air frying is actually incredible. I use the Ninja 4-Quart Air Fryer, which retails for $89.99. I preheat the basket at 400 degrees Fahrenheit for three minutes. I toss the raw pieces in 1 tablespoon of avocado oil—it has a high smoke point—then arrange them in a single layer. They cook in exactly 6 to 8 minutes at 400 degrees.
The high, circulating heat blisters the outside without drying out the meat. If you’re grilling, make sure your grates are hot and brushed with oil. Skewer the pieces so they don’t fall through, and grill for barely two minutes per side. The goal is maximum heat for minimum time. This seals the surface and prevents that rubbery texture.
8. Try the Baking Soda Trick for Extra Tenderness

I learned this from a Chinese takeout chef, and it changed how I prep. If you’ve ever wondered why restaurant seafood is so plump and tender, it’s usually because of a technique called velveting. You can replicate a simple version at home using a pantry ingredient you already own.
Take your thawed, raw meat and place it in a bowl. Sprinkle exactly 1/2 teaspoon of Arm & Hammer Baking Soda (a 1-pound box is $1.24 at Target) and 1 teaspoon of kosher salt over one pound of raw seafood. Toss it well and let it sit for exactly 15 minutes. The baking soda alters the pH level, preventing the proteins from contracting too tightly when they hit the pan.
After 15 minutes, you must rinse the seafood thoroughly under cold water, or your food will taste soapy. Pat them dry with paper towels before you add oil and spices. This extra step makes the meat snap when you bite it, keeping it juicy even after it sits in your fridge for three days. It’s optional, but I won’t skip it anymore.
9. Cool Rapidly After Cooking to Halt the Process

This is a crucial step most people skip. When you take your perfectly cooked, C-shaped protein out of the pan and dump it into a container, you’re trapping steam. The food is still 145 degrees internally. If you put the lid on right away, that trapped heat continues to cook the meat, turning your sear into a mess.
To stop the process, drop the temperature. I set up a cooling station next to my stove. I take a Pyrex 3-cup glass bowl and lay a paper towel at the bottom. I transfer the hot food directly onto the paper towel in a single layer. I don’t stack them. I let them sit uncovered for ten minutes until they’re cool to the touch.
If I’m making a cold salad, I use an ice bath. I’ll drop the hot pieces into a bowl filled with 2 cups of ice cubes and water for one minute, then drain them. This shocks the meat, stops the cooking, and firms up the texture. Never put hot seafood directly into a sealed container. Let it breathe first.

Bento Box Adult Lunch Box – 4 Pack, 5
A dependable everyday pick — Bento Box Adult Lunch Box – 4 Pack pulls in 24 ratings at 4.5 stars. Not flashy, just solid.
10. Store in Airtight Glass Containers for 3 to 4 Days

Proper storage is the only thing standing between a delicious lunch and a foul-smelling fridge. I used to store my lunches in cheap plastic containers. After a few weeks, those containers absorbed the seafood smell permanently. No amount of scrubbing could get the fishy odor out.
You have to upgrade to glass or high-quality hard plastic. I exclusively use Pyrex glass containers, which cost $24.99 for an 18-piece set at Target. Rubbermaid Brilliance containers ($12.99 for a 2-pack) are also excellent because they have a tight gasket that locks in odors. Glass doesn’t hold smells and cleans up perfectly in the dishwasher.
Cooked seafood should be refrigerated within two hours, but ideally as soon as it has cooled to room temperature. When stored in a shallow, airtight glass container, your protein will last for exactly 3 to 4 days. I prep on Sunday, which means my final portion is eaten on Thursday. I never push it to Friday. If it smells sour or feels slimy when you open the lid, throw it away. It isn’t worth the risk.
11. Portion Separately from Starchy Sides

Building a meal in one container looks great on Instagram, but it’s terrible for reheating. If you pack your delicate protein in the same compartment as dense rice or sweet potato cubes, you’re going to have a bad time. Rice takes two minutes in the microwave to get soft again. Two minutes in a microwave will decimate cooked seafood.
To solve this, keep your components separated. I use GoodCook 2-compartment containers, which run $14.99 for a 10-pack at Walmart. I put 1/2 cup of jasmine rice and roasted broccoli in the large compartment, and I put the cold protein in the smaller, separate one. When it’s time to eat, I remove the seafood and set it aside.
I microwave the rice and vegetables until they’re piping hot. Then, I stir the cold protein back into the hot rice. The residual heat gently warms the meat without nuking it into a rubbery oblivion. If you don’t have compartment containers, just wrap your protein in a small piece of aluminum foil or a silicone baking cup inside the main container so you can lift it out before microwaving.
12. Reheat Gently or Eat It Cold

The best way to eat this meal prep is cold. I know that sounds unappealing if you’re used to hot lunches, but cold, seasoned protein over a crisp romaine salad is incredible. I toss cold, cooked pieces with 2 cups of chopped romaine, cherry tomatoes, and 2 tablespoons of Primal Kitchen Ranch, which I grab for $6.49 at Whole Foods. The texture stays bouncy because it never touches a microwave. It took me years to figure that out.
If you must eat it warm, reheat it gently. Never use the default high setting. Drop the microwave power to 50 percent. Add a tablespoon of water or broth to the container, leave the lid resting loosely on top, and heat it in short 30-second bursts. Check the temperature after every burst.
Alternatively, if you work from home, reheat it on the stovetop. Put a small non-stick pan over low heat, add a drop of olive oil, and toss the food for 60 seconds until the chill is gone. It takes two extra minutes, but it saves the texture. Take the time to heat it properly, and you’ll never dread eating your prepped lunches again.
If you’re tired of spending money on lunches that disappoint you by Wednesday, try these twelve steps this weekend. I’d recommend starting with the baking soda trick and the air fryer method—they make the biggest immediate difference. Pin this guide to your favorite recipe board so you can check the cooking times before your next Sunday prep.

buluker 4 Pack Bento Lunch Box Set 3 Compartment Food
If you want something that just works, buluker 4 Pack Bento Lunch Box Set 3 Compartment Food Storage Containe is a safe bet (23 reviews, 4.5 stars).
Frequently Asked Questions
How long does meal prep shrimp last in the fridge?
Properly cooked and stored shrimp lasts 3 to 4 days in the refrigerator. You should store it in shallow, airtight glass or high-quality plastic containers to maintain freshness and prevent odors from spreading to other foods.
Can I microwave meal prep shrimp?
Yes, but you must do it carefully to avoid a rubbery texture. Reduce your microwave power to 50 percent, add a splash of water for moisture, and heat in short 30-second bursts. Alternatively, eat it cold over a salad.
Why does my cooked shrimp taste rubbery?
Rubbery shrimp is caused by overcooking. Shrimp only needs 1 to 2 minutes per side in a hot pan. If it curls into a tight ‘O’ shape, it is overcooked. Look for a gentle ‘C’ shape instead.
Is it better to buy fresh or frozen shrimp for meal prep?
Frozen is almost always better. Most fresh shrimp at the seafood counter is simply thawed frozen shrimp. Buying individually quick-frozen (IQF) bags ensures peak freshness and allows you to control exactly when the thawing process begins.
