What’s Inside
- Build a Quick And Easy Meal Prep Routine With Component Cooking
- Use Your Air Fryer for Crispy Reheats
- Master the Instant Pot for Bulk Cooking
- Prioritize Fiber-Forward Meals
- Focus on Purposeful Protein Distribution
- Invest in Quality, Versatile Containers
- Pre-Chop and Wash Produce Immediately
- Buy Smart Convenience Foods for Quick And Easy Meal Prep
- Assemble Salads with Dressing on the Bottom
Last Tuesday at Whole Foods, I found myself staring blankly at a $14 pre-packaged wilted salad. I realized my quick and easy meal prep routine had entirely crumbled by 1:00 PM. I bought it, ate the soggy spinach, and decided I was done failing at weekday lunches. You won’t stick to a routine if it requires three hours of active chopping. I’ve learned that the hard way. I’d buy fifty dollars worth of organic produce, shove it in the crisper drawer, and watch it rot because I was too tired to cook after work. The guilt was heavy. The plastic clamshell from that Whole Foods salad cut my thumb when I tried to pry it open. The dressing tasted like pure vinegar. It was a miserable desk lunch. I realized that if I didn’t figure out a system, I’d keep bleeding money on mediocre takeout. I started testing methods. I threw out the complicated internet recipes that required forty-five ingredients. True prep means getting strategic with your time and your tools. Let’s break down exactly how I get my food sorted in thirty-minute bursts without losing my mind. I’m going to show you exactly what I do.
1. Build a Quick And Easy Meal Prep Routine With Component Cooking

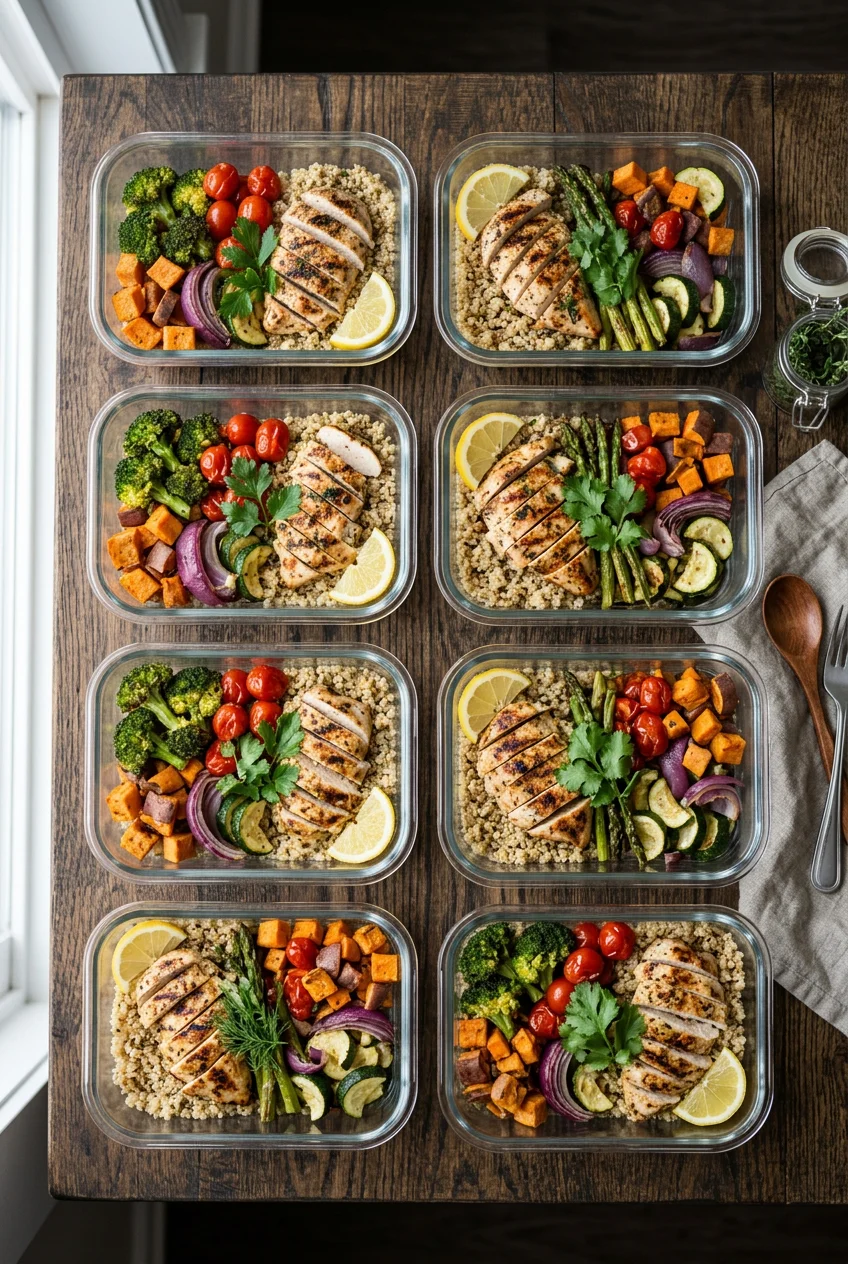
Instead of making five identical containers of chicken and rice, I do component prep. I roast 1.5 lbs of chicken breast, simmer 3 to 4 cups of quinoa, and chop 4 to 5 cups of mixed vegetables. Usually, I stick to broccoli, bell peppers, and zucchini tossed with 2 tablespoons of olive oil, 1 teaspoon of kosher salt, and black pepper. I roast the vegetables in a hot oven at 400°F for 20 to 25 minutes until the broccoli edges get crispy. I store each component separately in my fridge. I use the Rubbermaid Brilliance containers. A 12-piece set costs $23.99 at Target. The latches on these lids snap down tight. That matters when I’m stacking them four high in my narrow fridge. I tried cheaper plastic bins from the dollar store last year, but the lids warped in the dishwasher and my fridge smelled like roasted garlic for a week. Learned that the hard way. Keeping the ingredients separate means I won’t get flavor fatigue. On Monday, I can throw chicken and vegetables over quinoa with a peanut sauce. On Tuesday, I can wrap the same chicken and peppers in a tortilla. It takes thirty minutes of active work on a Sunday. You aren’t locked into one flavor profile for five days straight. I’ve found this is the only way I don’t get bored by Wednesday. I’m constantly mixing up the sauces to keep things interesting.
2. Use Your Air Fryer for Crispy Reheats

The microwave turns leftover breaded chicken into a sad, rubbery sponge. If you want your food to actually taste fresh on Wednesday, you need to reheat it in an air fryer. I use my Ninja 4-Quart Air Fryer, which I picked up for $89.99 at Best Buy. It completely fixes the texture issue. I cook 1.5 lbs of raw chicken breast coated in 1 tablespoon of olive oil and 2 teaspoons of lemon pepper seasoning. I set the air fryer to 375°F for 18 minutes, flipping the meat at the halfway mark. The outside gets a crisp, golden-brown crust while the inside stays tender. When I pull my prepped meals out of the fridge later in the week, I don’t use the microwave. I toss the protein and vegetables back into the air fryer basket at 350°F for 2 to 3 minutes. I give the basket a hard shake halfway through. The hot circulating air evaporates the fridge moisture and restores the crunch. I ruined a lot of good salmon by microwaving it at the office. The smell lingered in the breakroom, and the fish turned to mush. Now, I do all my reheating at home in the air fryer before packing it in a thermos. It’s an extra step in the morning, but I won’t compromise on texture anymore. Trust me on this. You won’t enjoy your lunch if it’s soggy. I’d rather spend three minutes reheating it properly than choke down rubbery meat.
3. Master the Instant Pot for Bulk Cooking

I resisted buying an Instant Pot for two years because I thought it was just another bulky appliance that would gather dust on my counter. I finally caved and bought the Instant Pot Duo 7-in-1 for $99.95 at Walmart. It cuts my Sunday cooking time in half. You can dump raw ingredients into the stainless steel pot, lock the heavy lid, and walk away. I regularly cook 4 center-cut pork chops that are about 1.5 inches thick. I add 2 cups of halved baby potatoes, 1 cup of chopped carrots, and 1/2 cup of chicken broth. I lock the lid, set it to high pressure for exactly 5 minutes, and then let it do a 10-minute natural release. The steam hisses out loudly at the end, but the meat comes out incredibly tender. I used to bake thick pork chops in the oven, but I’d inevitably get distracted answering emails and dry them out until they tasted like sawdust. The pressure cooker traps all the moisture. I portion the pork and root vegetables into four glass containers. It yields four heavy, filling lunches with about five minutes of actual hands-on chopping. I’m always surprised by how quickly it comes together. If you aren’t using a pressure cooker for tough cuts of meat, you’re wasting hours of your weekend standing by the stove. I’ve completely abandoned my slow cooker because this is so much faster.

Bento Box Adult Lunch Box – 4 Pack, 5
A dependable everyday pick — Bento Box Adult Lunch Box – 4 Pack pulls in 24 ratings at 4.5 stars. Not flashy, just solid.
4. Prioritize Fiber-Forward Meals

Most people build their lunches entirely around protein and completely ignore fiber. I made this common mistake for years. I ate plain chicken and white rice every day at 12:30 PM. By 2:00 PM, my stomach would be growling aggressively during team meetings. You need 25 to 35 grams of fiber daily to actually stay full. I started adding high-fiber ingredients like brown lentils, black beans, and rolled oats to my weekly prep. My favorite fast recipe is a Mediterranean chickpea salad. I drain and rinse two 15 oz cans of garbanzo beans. I chop 1 large English cucumber, 1 pint of cherry tomatoes, and 1/2 cup of red onion. I toss it all with 3 tablespoons of feta cheese and a simple vinaigrette. I buy the 365 Everyday Value Organic Garbanzo Beans for $1.39 a can at Whole Foods. The beans hold their firm texture in the fridge for up to five days without getting mushy. If I want a hot meal, I make a massive batch of vegetarian lentil tortilla soup in my Instant Pot using 1 cup of dry brown lentils. The lentils soak up the cumin and chili powder, thickening the broth perfectly overnight. It’s cheap, filling, and packed with fiber. I won’t pack a lunch anymore unless it has at least ten grams of fiber. I’d end up raiding the office vending machine for stale pretzels otherwise.
5. Focus on Purposeful Protein Distribution

You can’t just eat a massive 50-gram protein dinner and expect your energy levels to stay stable all day. Dietitians recommend spreading your intake, aiming for roughly 0.8 grams of protein daily per kilogram of body weight. I make sure every single container I pack has a dense protein source. I rely heavily on Kirkland Signature boneless, skinless chicken breasts. I buy the bulk freezer packs for $3 a pound at Costco. The quality is consistent, and the vacuum-sealed pouches prevent freezer burn. I thaw three pouches on Saturday night and grill them on Sunday morning. For snacks, I prep hard-boiled eggs. Costco sells a 24-pack of cage-free eggs for around $5. I boil a dozen at a time. I place the eggs in a saucepan, cover them with 1 inch of cold water, bring it to a rolling boil, and then let them sit off the heat for exactly 10 minutes. Here’s a pro tip: transfer them to an ice bath immediately. I used to skip the ice bath because I was lazy, and the shells would stick to the egg whites, tearing them into ugly, mangled chunks when I tried to peel them. The sudden temperature drop from the ice water shrinks the egg slightly inside the shell, making them peel perfectly clean. I’ll never boil eggs without an ice bath again. You aren’t saving time by skipping it. You’re just ruining your eggs. You might also like: 20 Beautiful High Protein Meal Prep Ideas That Are Totally Worth It
6. Invest in Quality, Versatile Containers

Your food is only going to last if you store it correctly. Flimsy takeout containers let air seep in, turning your spinach to slime and making your grains stale. I use Glasslock containers for meals that need to go in the microwave. A 24-piece set usually runs between $40 and $70 on Amazon. The heavy glass doesn’t stain when I pack tomato-based curries, and the snap-on lids have a thick silicone gasket that creates a true airtight seal. I dropped one on my tile kitchen floor last month. It didn’t shatter, but the plastic lid cracked. That was annoying but proved the glass is durable. For cold items or dry snacks, I use Freshware plastic containers. You can get a 50-pack of their 16 oz rectangular tubs for about $18.99 at Walmart. They stack perfectly in the pantry. I portion out 1/4 cup of raw almonds or 1/2 cup of trail mix into these smaller tubs. Having the exact portion already measured out stops me from mindlessly eating an entire $12 bag of macadamia nuts while staring at a spreadsheet on a Tuesday afternoon. I’ve learned that if I leave the bag open on my desk, I won’t stop eating. I’d highly recommend buying containers in uniform sizes so they stack neatly. It’s incredibly frustrating trying to match random lids to mismatched bowls when you’re rushing to pack your lunch.

buluker 4 Pack Bento Lunch Box Set 3 Compartment Food
buluker 4 Pack Bento Lunch Box Set 3 Compartment Food Storage Containe has been one of the most consistently praised picks in this category. 23 reviewers averaged 4.5/5.
7. Pre-Chop and Wash Produce Immediately

If I put a plastic produce bag of unwashed carrots into my crisper drawer, I won’t eat them. They will turn into orange mush three weeks later. The friction of having to wash, peel, and chop vegetables on a busy weeknight is too high. Now, I process my produce the second I walk through the door from Kroger. I don’t even take my shoes off. I dump the grocery bags on the counter and pull out my cutting board. I wash 2 large crowns of broccoli, peel 4 large carrots, and slice 3 bell peppers. I store the chopped vegetables in clear glass containers lined with a dry paper towel to absorb excess moisture. This single habit cuts down my active cooking time by 15 to 20 minutes per meal. Last winter, I tried storing sliced onions in a flimsy plastic baggie. The smell permeated the entire fridge, and my milk tasted vaguely like red onion for a week. Now, pungent vegetables go straight into a sealed glass jar. Having a container of crisp, pre-cut bell peppers ready to go means I can throw a stir-fry together in the time it takes to boil water. I’ve found that if the vegetables aren’t visible and ready to cook, I’m just going to order takeout. You’re setting yourself up for failure if you hide unwashed produce in the bottom drawer. You might also like: 20 Cozy High Protein Lunch Ideas for Any Style
8. Buy Smart Convenience Foods for Quick And Easy Meal Prep

There’s a weird stigma against using frozen or canned ingredients in the fitness community. Skip the purist mentality. Utilizing convenience foods is the secret backbone of my quick and easy meal prep strategy. Frozen vegetables are often flash-frozen at peak ripeness, meaning they hold more nutrients than the limp asparagus that spent a week on a truck before hitting the grocery store display. I buy the 32 oz bags of frozen organic broccoli florets from Sprouts for $4.99. I don’t even thaw them. I toss them directly onto a hot sheet pan with 1 tablespoon of avocado oil and roast them at 425°F for 20 minutes. The high heat evaporates the ice crystals, leaving the edges browned and crisp. I also rely heavily on canned foods. I buy the store-brand low-sodium black beans from Target for $0.89 a can. I always dump them into a mesh strainer and rinse them under cold water for a full minute. I skipped rinsing once when I was rushing to make a chili, and the starchy, salty liquid from the can made the entire pot taste metallic and overly thick. Rinsing removes that tinny flavor and cuts the sodium down significantly. I’d argue that keeping a stocked pantry of canned beans is the best insurance policy against a busy week. It’s cheap, and I’m always prepared.
12. Assemble Salads with Dressing on the Bottom

Packing a salad for work usually ends in a soggy, depressing mess. A common mistake is pouring vinaigrette directly over mixed greens on a Sunday. The acid in the vinegar breaks down the cell walls of the lettuce by Monday morning. The trick is vertical layering. I use 32 oz wide-mouth Ball Mason Jars, which cost about $14.99 for a 12-pack at Target. I pour 2 tablespoons of balsamic vinaigrette directly into the bottom of the empty glass jar. Next, I drop in the hard, dense vegetables that won’t absorb the liquid. I use 1/2 cup of chopped carrots and 1/2 cup of diced cucumbers. Then, I add 1/2 cup of cooked quinoa and 4 ounces of chopped grilled chicken. Finally, I stuff the top half of the jar with 2 cups of delicate greens, like baby spinach or arugula. The greens stay completely dry at the top of the jar, suspended far above the dressing. When I sit down at my desk on Wednesday, I just unscrew the metal lid and dump the entire jar upside down onto a paper plate. The dressing washes down over the greens right as I’m ready to eat. I’ve eaten way too many slimy salads in my life before figuring this out. You can’t just throw everything in a bowl and hope for the best. I’m strict about the layering order because it actually preserves the crunch.
Figuring out a solid routine takes a little trial and error, but once you nail it, your entire week runs smoother. You won’t get it perfectly right on the first try, and that’s fine. I’ve burned my fair share of sheet pan chicken and ruined plenty of expensive salmon in the microwave before I figured out what actually works for my schedule. Start with just one or two of these methods this weekend. Buy the right containers, grab a rotisserie chicken, and roast a pan of broccoli. It’s honestly that simple. If you found these tips helpful, pin this article to your favorite food board so you can reference the temperature guides and container brands next time you’re stuck in the grocery store aisle. Let’s make this Sunday a productive one. I’m going to go label my chili now.

Food Scale -33lb Digital Kitchen Scale for Food Ounces
If you want something that just works, Food Scale -33lb Digital Kitchen Scale for Food Ounces Grams Rechargea is a safe bet (78 reviews, 4.5 stars).
Frequently Asked Questions
How long does quick and easy meal prep last in the fridge?
Most prepped meals stored in airtight glass containers will last three to four days in the fridge. Seafood should be eaten within two days, while sturdy vegetable soups or bean-based dishes can stretch to five days if sealed properly.
Can I freeze my prepped meals?
Yes, but avoid freezing meals with high water content like cucumbers or lettuce, as they turn to mush when thawed. Soups, stews, and cooked meats freeze beautifully. Always label your containers with the date before freezing.
What is the best way to reheat prepped chicken?
The air fryer is the best tool for reheating chicken. Microwaves often make poultry rubbery and dry. Toss your cooked chicken in the air fryer at 350°F for two to three minutes to restore its crispy texture and retain moisture.
Do I need expensive containers for meal prep?
You don’t need the most expensive option, but investing in containers with airtight silicone gaskets is crucial. Glass containers prevent stains and odors, while uniform plastic tubs are great for dry snacks. Avoid flimsy takeout containers that leak air.
