What’s Inside
- Master Portion Control In Your Meal Prep Freezer With Souper Cubes
- Invest In Quality Glass Containers
- Embrace Vacuum Sealing For Expensive Proteins
- Stop Freezing Watery Vegetables In Your Meal Prep Freezer
- The Secret To Freezing Rice And Grains
- Assemble Raw Crockpot Dump Meals
- Prevent Soggy Breakfast Burritos
- Freezing Pasta Without Ruining The Texture
- Labeling Like Your Life Depends On It
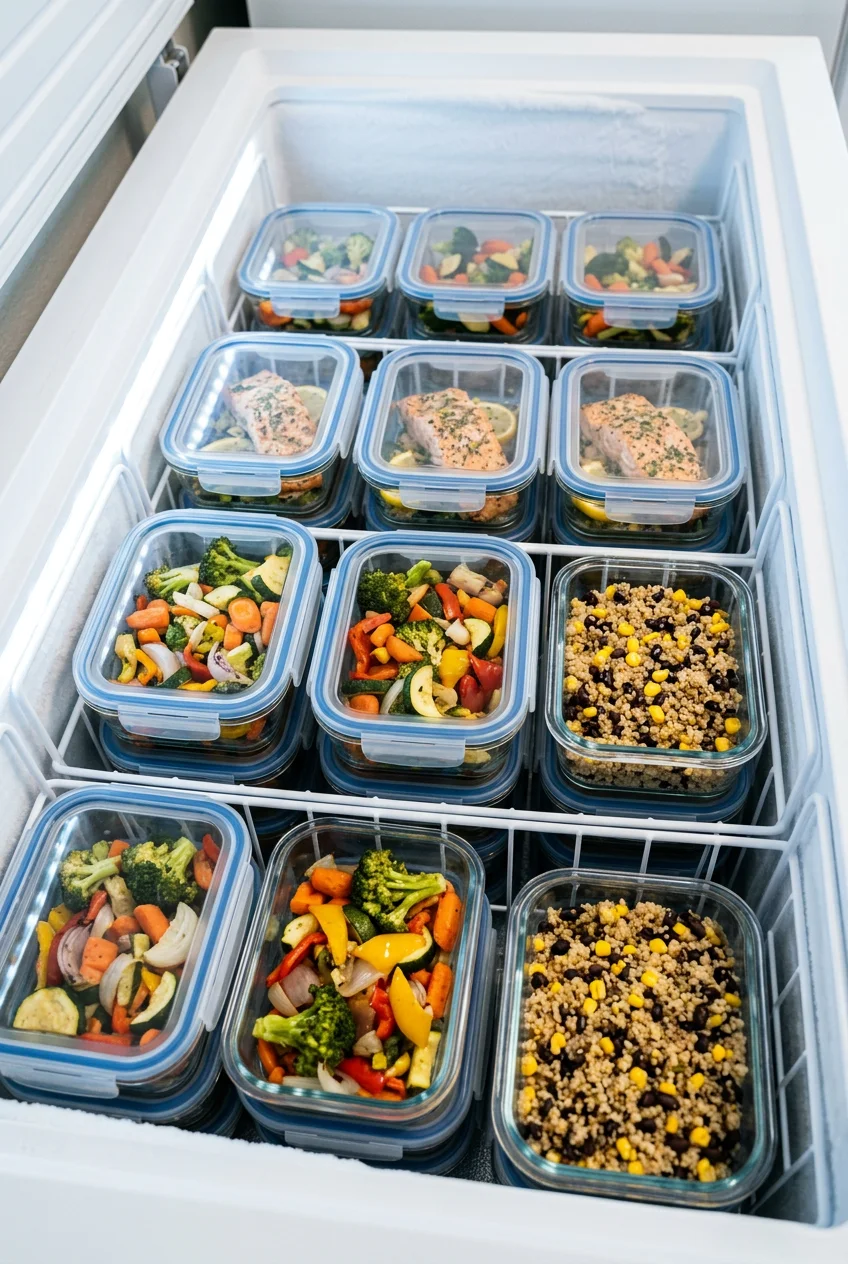
Last Tuesday night at my kitchen island, I dropped a 32 oz solid block of frozen tomato soup directly on my toe. That painful mistake forced me to rethink my entire meal prep freezer strategy. I tried chiseling a single serving out of a massive plastic Tupperware with a dull butter knife, slipped, and ended up with a bruised foot and zero dinner. I was doing it all wrong. If you’re tired of thawing giant ice blocks of chili that taste like freezer burn, I’m right there with you. Building a stash of frozen meals that actually tastes good takes a little strategy. You can’t just toss hot food into a cheap plastic bag and hope for the best. I’ve ruined enough expensive groceries to know exactly what works and what fails. Let’s fix your freezer routine so you aren’t eating soggy burritos and mushy vegetables anymore.
1. Master Portion Control In Your Meal Prep Freezer With Souper Cubes

I used to make a massive 6-quart batch of chicken tortilla soup and dump the entire thing into one giant plastic bowl. When I wanted just 1.5 cups for lunch, I’d have to thaw the whole thing. It’s ridiculous. The constant freezing and thawing ruined the texture of the black beans. They turned into a gritty paste. Now, I strictly portion everything before it hits the ice. I’m obsessed with Souper Cubes. You can grab a 2-pack of the 1-cup size silicone trays for $34.95 at Target. These trays are perfect for freezing individual servings of soups, stews, or pasta sauce. You just pour your liquid in, freeze it overnight, and pop out perfect rectangular bricks the next morning. It’s so satisfying. For solid foods like cooked quinoa or roasted sweet potatoes, I always measure out exactly 1 cup per serving. This guarantees even thawing in the microwave. Don’t eyeball it. If you freeze a random 3.5 cup blob of rice, the outside will turn to lava in the microwave while the center stays frozen solid. I learned that the hard way. Portioning takes an extra ten minutes on Sunday, but it saves your sanity on Wednesday night. Plus, the silicone material means you aren’t wrestling with stiff plastic. You just push the bottom and the cube slides right out. I also love that the cubes stack perfectly on top of each other in the freezer, saving so much space. If you’re serious about your prep, these silicone trays aren’t optional. They changed how I handle liquid meals. No more chiseling frozen soup blocks for me.
2. Invest In Quality Glass Containers

Let’s talk about the garbage plastic containers most people use. I bought a cheap 10-pack of flimsy plastic tubs from Walmart for $8.99 three years ago. I thought I’d hacked the system. Two weeks later, I pulled a container of frozen beef stew out, dropped it on the counter, and the plastic shattered into a dozen sharp shards. I had to throw the whole meal away because I couldn’t risk eating plastic splinters. It’s just not worth it. The right containers stop freezer burn and keep your food tasting fresh. I strictly use Pyrex glass meal prep containers with BPA-free lids. You can get a 3-pack of the 4-cup rectangular size for $29.99. They’re heavy, durable, and airtight. I love that I can pull a frozen 2-cup portion of lasagna out of the freezer and stick the glass directly into the oven without it exploding. If you’re on a tight budget and don’t want to drop thirty bucks on three containers, the IKEA 365+ glass line is a fantastic alternative. You can buy their 34 oz rectangular glass containers for just $5.99 each. The lids snap on super tight. The snap-lock lids have a silicone gasket that blocks out that gross stale freezer smell. Skip the cheap plastic. It makes your food taste like wet cardboard and snaps when it’s cold. Plus, glass doesn’t stain. I used to hate when my plastic containers turned permanently orange after holding spaghetti sauce for a week. Glass washes perfectly clean every single time, making it worth every penny.
3. Embrace Vacuum Sealing For Expensive Proteins

Buying meat in bulk is smart, but throwing it into the freezer in the flimsy grocery store packaging is a disaster. I bought 4 lbs of beautiful wild-caught salmon at Costco last year. I left it in the original plastic wrap. Two months later, the edges were gray, dry, and covered in thick ice crystals. I cooked it anyway and it tasted like a wet dog. I had to toss $40 worth of fish in the trash. That hurt. If you’re buying expensive proteins, you need a vacuum sealer. I use the FoodSaver PowerVac. It costs $79.99 at Kroger, but it pays for itself in two months. Vacuum sealing pulls all the oxygen out of the bag, which stops freezer burn. I buy a massive 5 lb pack of chicken breasts, slice them into 6 oz portions, and seal them individually. I add 1 tablespoon of olive oil and 1/2 teaspoon of smoked paprika right into the bag before sealing. The meat marinates while it freezes. It’s a great trick. When I thaw the chicken, it tastes incredibly fresh. The texture stays firm and juicy, never stringy or dry. Vacuum sealing also compresses the food, so you can fit twice as much in your freezer drawers. The bags lay perfectly flat. Don’t skip this step if you want your meat to actually taste good months later. I also use the vacuum sealer for blocks of hard cheese. I’ll buy a 2 lb block of sharp cheddar, cut it into 8 oz chunks, and seal them. It stops the cheese from getting that weird crumbly texture in the cold. Honestly, this changed how I buy groceries in bulk. I save so much money now. You might also like: 20 Inspiring Meal Prep Ideas for Any Style

Vtopmart 5Pack 22oz Glass Storage Containers with Lids
Vtopmart 5Pack 22oz Glass Storage Containers with Lids has been one of the most consistently praised picks in this category. 34 reviewers averaged 4.5/5.
4. Stop Freezing Watery Vegetables In Your Meal Prep Freezer

Not every vegetable belongs in a meal prep freezer. I spent an entire Sunday afternoon chopping 3 cups of fresh zucchini, 2 cups of cucumbers, and 1 cup of celery that I bought at Sprouts. I tossed them all into a Ziploc gallon freezer bag (which costs $6.49 for a 28-count box, by the way) and froze them for stir-fries. When I thawed them three days later, it looked like a swamp. The zucchini turned to mush, and the cucumbers literally dissolved into a puddle of green water. It was disgusting. Vegetables with high water content simply don’t survive the freezing process. The water inside their cells expands when frozen, bursting the cell walls. When they thaw, they turn to sludge. Instead, focus on dense, hearty vegetables. Carrots, broccoli, cauliflower, and butternut squash freeze beautifully. I always blanch my broccoli before freezing it. I boil 4 cups of broccoli florets for exactly two minutes, then immediately plunge them into a bowl of ice water. This stops the cooking process and locks in that bright green color. Once they dry completely on a paper towel, I freeze them flat on a baking sheet before transferring them to a bag. This prevents them from clumping together into one giant frozen boulder. If you want your veggies to have a crisp texture when reheated, stick to the dense ones and always blanch them first. I also recommend avoiding raw potatoes. I tried freezing chunks of raw russet potatoes once, and they turned completely black and spongy. If you want to freeze potatoes, you must cook them fully first. Mash them with 1/4 cup of heavy cream and 2 tablespoons of butter, and they’ll freeze beautifully. You might also like: 15 Lovely Kids School Lunch Ideas That Changed Everything
5. The Secret To Freezing Rice And Grains

Cooked rice can be incredibly tricky to freeze. If you do it wrong, you end up with hard, chalky pebbles that ruin your meal. For months, I’d cook a huge batch of Lundberg Family Farms Jasmine Rice (it’s $8.49 for a 32 oz bag at Whole Foods) and let it sit on the counter until it was completely cold. Then I’d pack it into containers and freeze it. When I microwaved it a week later, it was incredibly dry and crunchy. I couldn’t figure out why. It turns out, letting the rice cool completely on the counter is a massive mistake. You lose all the moisture. The secret is to freeze the rice while it’s still slightly warm. I cook 2 cups of dry rice with 3 cups of water. Once it’s done, I let it sit for just ten minutes so it’s not boiling hot. Then, I scoop 1-cup portions into my glass containers, snap the lids on tight, and put them straight into the freezer. The steam gets trapped inside the container. When you microwave it later, that trapped ice turns back into steam and perfectly rehydrates the grains. It comes out fluffy, soft, and sticky every single time. I also add 1 teaspoon of toasted sesame oil to the rice before freezing. It adds a gorgeous nutty aroma and keeps the individual grains from sticking together too much. You can do the exact same trick with quinoa or farro. I cook 1 cup of dry quinoa in 2 cups of chicken broth, let it rest for ten minutes, and pack it warm. The trapped moisture makes a massive difference in the final texture. You might also like: 20 Beautiful High Protein Meal Prep Ideas That Are Totally Worth It
6. Assemble Raw Crockpot Dump Meals

One of my absolute favorite tricks is prepping raw ingredients in a bag and freezing them together. You don’t actually cook anything on prep day. You just dump the frozen block into a slow cooker later in the week. But you have to layer the ingredients correctly, or it’s a disaster. I once threw 2 lbs of raw ground beef, 1 cup of diced onions, and 14 oz of crushed tomatoes into a bag and froze it. The tomatoes completely broke down the texture of the raw meat, turning it into a weird, stringy paste. Now, I follow a strict layering system. I use Trader Joe’s Organic Free-Range Chicken Thighs, which run about $6.99 per pound. I put the meat at the very bottom of the bag. Next, I add 1 cup of chopped onions and 1 cup of diced bell peppers. The sauces and liquids always go in last, poured right on top. I love using 1/2 cup of soy sauce, 2 tablespoons of honey, and 1 tablespoon of minced garlic for a quick teriyaki chicken. When you freeze it upright, the sauce stays at the top. When you dump it into your Crockpot, the meat hits the bottom of the pot first, closest to the heat source, and the sauce melts down over it. It cooks perfectly. Just make sure you squeeze every tiny bit of air out of the bag before zipping it shut. I press the bag flat against the counter and roll it up from the bottom to push the air out. It saves space and stops ice crystals from forming on the chicken.

M MCIRCO 10-Pack,22 Oz Glass Meal Prep Containers
If you want something that just works, M MCIRCO 10-Pack is a safe bet (86 reviews, 4.5 stars).
7. Prevent Soggy Breakfast Burritos

Breakfast burritos are the ultimate grab-and-go meal, but they’re notoriously hard to freeze. My early attempts were pathetic. I’d scramble 6 eggs, cook 1/2 lb of bacon, roll them up in tortillas while everything was still piping hot, and throw them in the freezer. When I reheated one in the office microwave, the tortilla was a soggy, wet mess that completely fell apart in my hands. The eggs tasted like rubber. I had to eat it with a fork. The steam from the hot eggs ruined the tortilla before it even froze. To fix this, you have to let your fillings cool completely. I scramble my eggs with 1/4 cup of whole milk and let them sit in a bowl in the fridge for twenty minutes. I use Mission Burrito Flour Tortillas, which cost $3.79 for an 8-count bag at Target. They’re stretchy and hold up well. I sprinkle 2 tablespoons of shredded cheddar cheese directly onto the cold tortilla to act as a barrier. Then I add the cold eggs and cold bacon. I roll it up tightly, wrap it in a paper towel, and then wrap the whole thing tightly in Reynolds Wrap Aluminum Foil (usually $4.99 a roll). The paper towel absorbs any excess moisture when you microwave it later. When you’re ready to eat, unwrap the foil, leave the paper towel on, and microwave for exactly two minutes. It comes out warm, soft, and perfectly structured. I personally swear by adding 1 tablespoon of diced green chiles to the eggs, too. It adds a nice kick without introducing too much liquid. If you use salsa, drain the liquid first. Watery salsa is the enemy of a firm, freezable burrito.
8. Freezing Pasta Without Ruining The Texture

Freezing cooked pasta is highly debated in the meal prep community. Most people think you can’t do it because the noodles turn to mush. They’re mostly right. If you boil pasta until it’s completely soft and then freeze it in sauce, it will disintegrate when you reheat it. I tried freezing a huge batch of spaghetti and meatballs last year. The noodles soaked up all the moisture from the sauce in the freezer. It turned into a solid, unappetizing brick of tomato-flavored dough. It was completely inedible. The trick is to undercook your pasta significantly. I buy Barilla Penne Pasta for $1.79 a box at Kroger. The box says to boil it for 11 minutes. I boil it for exactly 7 minutes. It’s very firm and crunchy in the center. I drain it, toss it with 1 tablespoon of olive oil to prevent sticking, and let it cool. Then, I mix it with a high-quality sauce like Rao’s Homemade Marinara, which is pricey at $7.99 a jar but totally worth it. The acidic tomato sauce breaks down the pasta slightly while it sits in the freezer. When you finally heat it up in the oven or microwave, the noodles finish cooking in the hot sauce. They come out perfectly al dente, never mushy. Stick to tubular or thick pasta shapes like penne, rigatoni, or ziti. Delicate noodles like angel hair just can’t survive the freezing process. They turn into a starchy paste. Also, make sure you let the sauce cool slightly before mixing it with the pasta. If you dump boiling hot marinara over the noodles, they’ll keep cooking in the container before they freeze. Let everything reach room temperature, mix it up, and get it into the cold quickly.
9. Labeling Like Your Life Depends On It

You think you’ll remember what’s inside that frosted plastic container. You won’t. I promise you. Six months ago, I pulled a container of what I thought was frozen pumpkin soup out of my freezer. I microwaved it for three minutes, took a huge bite, and realized it was actually a pureed sweet potato baby food recipe I’d made for my niece. It was bland, weird, and completely ruined my lunch hour. After that disaster, I started labeling everything like a crazy person. Don’t use standard masking tape. The adhesive freezes, dries out, and falls off in the cold. I swear by Scotch Blue Painter’s Tape. A roll costs $4.98 at Walmart and lasts for a year. It sticks perfectly in sub-zero temperatures but peels off glass and plastic without leaving any sticky residue behind. I write on the tape using Sharpie Extreme Permanent Markers. You can get a 4-pack for $6.48. They don’t smudge when condensation builds up on the container. Every single label must include three things. I write the exact name of the dish, the date I cooked it, and reheating instructions. For example, my label will say: “Spicy Black Bean Chili. Made 10/12. Microwave 4 mins.” It sounds tedious, but when you’re staring into a packed freezer at 6:00 PM on a Tuesday, you’ll be so grateful you wrote down the instructions. It completely removes the guesswork from your dinner routine. I also highly recommend writing an inventory list and sticking it to the outside of your freezer door. I write down exactly how many portions of each meal I’ve stored. When I eat a portion of chili, I cross it off the list. It stops me from losing meals in the back of the drawer for two years.
Building a reliable freezer stash takes a little trial and error, but these specific tweaks completely changed my routine. I don’t throw away fuzzy leftovers anymore, and I actually look forward to eating my prepped meals during busy work weeks. I highly recommend starting small. Pick just one recipe this Sunday, grab some quality glass containers, and undercook your pasta. You’ll be amazed at the difference it makes in the taste and texture of your food. I’m so glad I stopped using cheap plastic and watery vegetables. Please save this post or pin it to your favorite Pinterest board so you can reference these exact measurements and product prices next time you’re prepping! Let’s make your weeknight dinners stress-free.
![C CREST [10 Pack] Glass Meal Prep Containers](https://m.media-amazon.com/images/I/81HfSfzlqUL._AC_UL320_.jpg)
C CREST [10 Pack] Glass Meal Prep Containers
C CREST [10 Pack] Glass Meal Prep Containers punches above its price — 349 buyers rated it 4.5 stars. I would buy it again.
Frequently Asked Questions
How long do meals last in a meal prep freezer?
Most cooked meals will last three to four months if stored in airtight glass containers or vacuum-sealed bags. After that, they won’t spoil, but the texture and flavor degrade rapidly.
Can I freeze cooked pasta?
Yes, but you must undercook it first. Boil pasta for four minutes less than the box instructions before mixing it with sauce and freezing, so it doesn’t turn mushy when reheated.
What vegetables freeze best?
Dense vegetables like broccoli, carrots, cauliflower, and butternut squash freeze beautifully. Always blanch them in boiling water for two minutes and cool them in ice water before freezing.
Should I let food cool completely before freezing?
For most foods, yes. But for cooked grains like rice and quinoa, freeze them while they’re still slightly warm. The trapped steam rehydrates the grains when you microwave them later.
