What’s Inside
- Prioritize 80/20 Ground Beef for Your Carnivore Meal Prep Ideas
- Integrate Beef Liver for Micronutrients
- Master Electrolyte Supplementation Early
- Add Tallow to Your Ground Beef Containers
- Use a Slow Cooker for Effortless Chuck Roasts
- Keep Hard-Boiled Eggs Ready for Quick Snacks
- Stock Up on Shelf-Stable Carnivore Bars
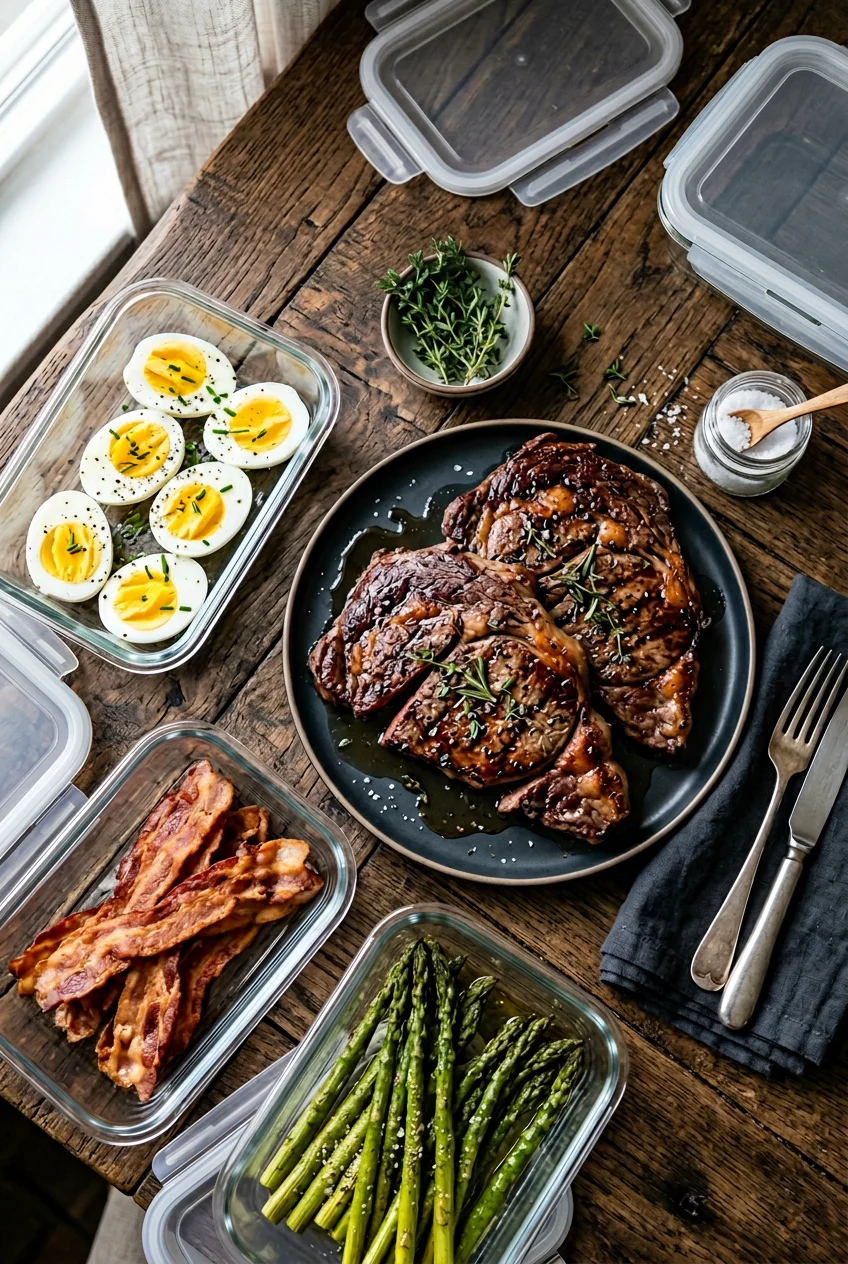
- Upgrade Your Carnivore Meal Prep Ideas with Glass Storage
- Keep Carnivore Crisps in Your Bag
- Season Strategically with Redmond Real Salt
- Try Hardcore Carnivore Black Seasoning
Last November, I sat at my kitchen island staring at seven plastic containers of plain, boiled chicken breasts and realized my approach to carnivore meal prep ideas was completely broken. I bought six pounds of lean chicken breasts from Trader Joe’s thinking I’d just eat meat and get shredded. I chewed through a piece that tasted like wet cardboard on a Tuesday afternoon and threw the rest in the trash. The chicken was dry, the plastic was stained orange from old marinades, the lids barely snapped shut, and I was so hungry I almost ordered a pizza. If you’re struggling to figure out carnivore meal prep ideas that actually taste good on day four, I’ve been there. I spent three months eating cold, gray steak before I figured out the mechanics of storing and reheating meat properly. Took me years to figure out. Today, I’m sharing the exact methods I use to prep my food for the week. These routines aren’t complicated chef techniques. They’re straightforward, practical habits that keep me fed without living in the kitchen.
1. Prioritize 80/20 Ground Beef for Your Carnivore Meal Prep Ideas

Lean meat is a disaster on this diet. I tried 93/7 ground beef for a month and felt exhausted every afternoon. You’re going to need 80/20 ground beef or fattier to maintain your energy levels. I buy the Kirkland Signature 80/20 ground beef chubs from Costco. A 3-pack costs $19.99 and gives me enough to cook 1.5 kg of meat in one massive batch on Sunday. I use a 12-inch hot cast-iron skillet, letting the edges get crispy and dark brown before breaking it apart. I use a stainless steel spatula to press the meat flat against the hot iron, creating a crust before I scramble it. The fat renders out and coats the meat, which prevents it from drying out in the fridge. When I reheat it on Wednesday, it doesn’t have that stale, leftover meat smell. Batch cooking five to ten meals at once this way cuts my daily kitchen time down to three minutes. I portion exactly 1/2 cup of the cooked beef into individual bowls. Skip the fat-free stuff. It tastes like wet cardboard. The extra fat is non-negotiable for sustained energy when you aren’t eating carbohydrates. I’d rather eat fatty ground beef every day than force down another dry chicken breast. Trust me on this.
2. Integrate Beef Liver for Micronutrients

Organ meats look intimidating. The first time I bought beef liver at Whole Foods, it sat in the back of my fridge until it went bad. I couldn’t get past the intense, metallic smell. Now, I eat exactly 200g of beef liver twice a week for the micronutrients. The trick to making it palatable is soaking it first. I place the raw liver in a glass bowl with 2 cups of cold water and 2 tablespoons of salt for two hours before cooking. This draws out the blood and significantly mellows that harsh, iron-heavy flavor. I buy the White Oak Pastures grass-fed beef liver. A 16 oz pack costs $9.99. After soaking, I pat it completely dry with paper towels and sear it in a hot pan for just 60 seconds per side. I use a well-seasoned carbon steel pan for this because it gets ripping hot without the weight of cast iron. Overcooking liver makes it chalky and tough. I slice it into thin strips and store it in a small container. Eating small portions mixed with my regular ground beef masks the texture. You won’t even notice it’s there. Let’s be honest, it’s an acquired taste, but the energy boost is noticeable.
3. Master Electrolyte Supplementation Early

Most people fail in the first two weeks because they ignore their sodium intake. Without carbohydrates holding onto water, your kidneys flush out sodium rapidly. I learned this the hard way when I woke up with leg cramps so bad I fell out of bed. You need 3,000 to 5,000mg of sodium daily. I use Redmond Re-Lyte Unflavored electrolyte mix. A 16 oz tub costs $44.99 on Amazon. It breaks down to about $2.78 per day to hit 3000mg of sodium, plus it provides 400mg of potassium per serving. I measure exactly 1 scoop into a 32 oz Nalgene bottle every morning. The wide mouth of the Nalgene makes it easy to dump the powder in without spilling. I also tried LMNT raw unflavored packets. They cost around $4.50 per day if you use three packets to get 3000mg of sodium, 200mg of potassium, and 60mg of magnesium. The LMNT packets are highly portable for my gym bag, but the Redmond tub is more economical for daily prep at home. Don’t skip this step. The fatigue you feel isn’t from a lack of food. It’s a lack of salt. You might also like: 15 Brilliant Simple Meal Prep Ideas for a Fresh New Look
![[8-Pack,30 oz]Glass Meal Prep Containers](https://m.media-amazon.com/images/I/713Zfdsgi4L._AC_UL320_.jpg)
[8-Pack,30 oz]Glass Meal Prep Containers
Honestly, [8-Pack surprised me — sturdier than it looks in the photos, and over 7 buyers gave it 4.5 stars.
4. Add Tallow to Your Ground Beef Containers

Undereating fat is the most common error I see. You’re prepping your meals, but you’re draining the grease out of the pan. I did this out of pure habit for weeks. I’d cook my ground beef, drain it, and then wonder why I was starving two hours later. Now, I actually add fat back into my prep containers. I use South Chicago Packing Wagyu Beef Tallow. A 42 oz tub runs $19.99 at my local Sprouts. The tallow is snow-white and solid at room temperature, looking almost like coconut oil. When I portion out my cooked 80/20 ground beef, I add exactly 1 tablespoon of solid tallow directly on top of the cold meat in each container. When I microwave the container at work, the tallow melts down through the beef, adding incredible moisture and a rich, buttery flavor. The melted fat coats the meat, masking any hint of that warmed-over flavor that plagues meal-prepped beef. It’s a simple step that takes ten seconds during your Sunday prep but completely changes how the food tastes on Thursday. You can’t rely on protein alone. You might also like: 10 Healthy Meal Prep Ideas for Every Budget
5. Use a Slow Cooker for Effortless Chuck Roasts

Standing over a stove every day gets old fast. I use a basic 6-quart Crockpot I bought at Target for $39.99 to handle the heavy lifting. Chuck roast is my preferred cut for this. I buy a 3-pound chuck roast from Kroger for about $7.99 per pound. The meat is marbled with thick veins of fat that break down beautifully over low heat. I place the raw roast in the slow cooker, add 2 tablespoons of tallow, and cover it heavily with coarse salt. No water, no broth. I set it to low for 8 hours. The meat cooks in its own juices and the added tallow until it’s fall-apart tender. The connective tissue completely dissolves, leaving behind strands of beef that pull apart with zero resistance. I use two forks to shred the entire roast right in the ceramic pot, letting the shredded meat soak up every drop of liquid fat. I portion 6 oz of the shredded beef into five separate containers. It reheats perfectly without drying out because the fat is fully integrated into the muscle fibers. If you aren’t using a slow cooker, you’re working too hard. You might also like: 10 Easy Meal Prep Lunches You Need to See
6. Keep Hard-Boiled Eggs Ready for Quick Snacks

Sometimes you need food immediately and warming up a steak isn’t an option. Hard-boiled eggs are the most reliable, portable snack for this way of eating. I buy Vital Farms pasture-raised eggs. A dozen costs $6.99 at Sprouts. The yolks are deep orange and taste significantly richer than cheap conventional eggs. I boil a full dozen on Sunday afternoon. I used to struggle with peeling them, ending up with mangled whites that looked terrible. The trick is dropping cold eggs directly into rapidly boiling water for exactly 11 minutes, then plunging them into an ice bath for 5 minutes. The thermal shock pulls the membrane away from the shell. I peel them all at once and store them in a glass container lined with a dry paper towel. They stay perfectly fresh in the refrigerator for up to a week. I grab two eggs and a pinch of flaky salt when I need something fast before running errands. I use Maldon sea salt flakes for the eggs because the large pyramid crystals provide a satisfying crunch. I’ve tried pre-peeled eggs in plastic bags, but they always have a weird, slimy texture.
![C CREST [10 Pack] Glass Meal Prep Containers](https://m.media-amazon.com/images/I/81HfSfzlqUL._AC_UL320_.jpg)
C CREST [10 Pack] Glass Meal Prep Containers
Honestly, C CREST [10 Pack] Glass Meal Prep Containers surprised me — sturdier than it looks in the photos, and over 349 buyers gave it 4.5 stars.
7. Stock Up on Shelf-Stable Carnivore Bars

Traveling or being stuck at an office without a fridge requires shelf-stable options. Most protein bars are packed with artificial sweeteners and fiber syrups that cause severe bloating. I keep a stash of The Carnivore Bar in my desk drawer. They cost about $17 for a 3-pack online. The ingredient list is literally just beef, tallow, and salt. The bars come in a sturdy, vacuum-sealed foil wrapper that protects them from getting crushed in my bag. The texture is unique. It’s crumbly and dense, with a slightly waxy mouthfeel from the high tallow content. It doesn’t taste like a chewy candy bar. It tastes like concentrated, salted beef fat. I eat one slowly with a hot cup of black coffee. The heat from the coffee melts the tallow in your mouth. I tried a cheaper jerky brand from a gas station once in a pinch, and the hidden sugar triggered a massive headache. The Carnivore Bar provides exactly what I need without the crash. I keep one in my glove compartment for emergencies. They won’t melt in the heat, which makes them highly practical.
8. Upgrade Your Carnivore Meal Prep Ideas with Glass Storage

Storing fatty meat in cheap plastic containers is a mistake. The fat etches into the plastic when you reheat it, leaving a permanent greasy film and a lingering smell that soap won’t remove. I threw away my entire plastic collection last year. I use a Pyrex 18-piece glass storage set. It costs $34.99 at Walmart. Glass doesn’t absorb odors, and the snap-tight lids prevent leaks in my lunch bag. I run the glass bases through the bottom rack of the dishwasher, and they come out completely squeaky clean. The most important rule for storing cooked meat is letting it cool completely before putting the lid on. If you seal hot ground beef in a container and put it in the fridge, condensation forms on the lid. That water drips back down into the fat, turning your meal into a soggy, unappetizing mess. I leave my glass containers open on the counter for 45 minutes until the meat reaches room temperature. Then I snap the lids on and stack them in the fridge. I use a piece of blue painter’s tape to label the date on each lid.
9. Keep Carnivore Crisps in Your Bag

The one texture you lose when you stop eating plants is crunch. Everything on this diet is soft, chewy, or tender. After a few weeks, the lack of crunch can cause serious cravings for potato chips. I use Carnivore Crisps to solve this. I buy the Beef Brisket variety. A 1.5 oz bag runs $15.99 on their website. It’s expensive for the volume, but you’re paying for the convenience and the texture. They slice the meat paper-thin and dehydrate it with Redmond salt until it shatters when you bite into it. The brisket crisps have a visible rim of yellow fat on the edges that melts instantly on your tongue. I keep a bag in my tote bag when I go to the movies. The sound and sensation mimic eating chips perfectly. I tried making my own dehydrated beef in the oven to save money, but I couldn’t get it thin enough. It just turned into tough, leathery jerky. The commercial crisps have a delicate snap that I can’t replicate at home. I’d recommend buying them in bulk to save on shipping.

KOMUEE 10 Packs 30 oz Glass Meal Prep Containers
Honestly, KOMUEE 10 Packs 30 oz Glass Meal Prep Containers surprised me — sturdier than it looks in the photos, and over 46 buyers gave it 4.5 stars.
10. Season Strategically with Redmond Real Salt

When your entire diet consists of meat, the quality of your salt matters immensely. Standard iodized table salt has a sharp, almost chemical bite that ruins the flavor of a good steak. I use Redmond Real Salt exclusively. I buy the 26 oz refill pouch for $16.99 on Amazon and fill a small glass shaker for my counter. The glass shaker has large holes in the metal lid, which is necessary because the coarse minerals will clog a standard salt shaker. The salt is mined in Utah and contains trace minerals that give it a slightly sweet, earthy flavor. The coarse grain sticks to the exterior of a steak, creating a beautiful crust when it hits a hot cast-iron pan. I use exactly 1 teaspoon of Redmond salt per pound of raw ground beef during my Sunday prep. The minerals in this salt also help offset the electrolyte flushing that happens when you don’t eat carbs. I keep a tiny 2 oz travel shaker of it in my purse because restaurant salt is always too fine and overly processed. You can’t underestimate how much good salt improves plain beef.
11. Try Hardcore Carnivore Black Seasoning

If you’re a strict, beef-and-water-only purist, skip this section. But if you’re a relaxed carnivore who tolerates spices, plain salt gets boring after month three. I use Hardcore Carnivore Black seasoning when I prep steaks. A 13 oz shaker costs $11.99 at Academy Sports. The ingredient list is clean, mostly coarse salt, garlic, black pepper, and activated charcoal. The charcoal is the reason I buy it. It dyes the exterior of the meat jet black. When I sear a ribeye in butter, the charcoal creates a visually stunning, crunchy crust that looks like it came out of a professional steakhouse broiler. The butter foams up and toasts the garlic in the rub, filling the kitchen with an incredible savory scent. I use 1 tablespoon of the rub on a thick-cut steak, pressing it firmly into the meat before cooking. I tried a generic steak rub from the grocery store once and immediately broke out in a rash because it contained hidden maltodextrin and anti-caking agents. Hardcore Carnivore gives me the flavor variety I need without the garbage fillers. I won’t cook a ribeye without it now.
Figuring out your routine takes a few weeks of trial and error. You’ll probably under-salt your food at first, or buy meat that’s too lean. I certainly did. But once you lock in these methods, your weekly prep takes less than an hour. I spend exactly 45 minutes cooking on Sunday, and zero minutes cooking during the work week. The energy stability you get from eating fatty, salted meat makes the initial learning curve entirely worth the effort. No exaggeration. I don’t miss the bloated feeling I used to get from eating huge containers of rice and broccoli. Keep your ingredients simple, invest in glass storage, and don’t fear the fat. If you found these tips helpful, pin this article to your meal prep board for next Sunday.
Frequently Asked Questions
How long does cooked ground beef last in the fridge on a carnivore diet?
Cooked 80/20 ground beef stored in an airtight glass container lasts up to four days in the refrigerator. Letting the meat cool completely before sealing prevents condensation, which helps maintain flavor and texture for your carnivore meal prep ideas.
Can I freeze my carnivore meal prep ideas?
Yes, you can freeze cooked meats. Ground beef and shredded chuck roast freeze exceptionally well in glass containers. Thaw them in the refrigerator overnight before reheating to retain the fat content and moisture.
How do I reheat carnivore meals without drying out the meat?
Reheat your meals gently. Adding a tablespoon of tallow or butter before microwaving at 50% power prevents the meat from drying out. The added fat melts over the beef, restoring moisture and flavor.
What are the best containers for carnivore meal prep?
Glass containers with snap-tight lids are superior. Plastic absorbs the heavy fats and odors from the meat, leaving a permanent greasy film. Glass cleans easily and doesn’t leach chemicals into your food.
