What’s Inside
- Master Potato Selection for Potato Meal Prep
- Optimal Raw Storage Before Prepping
- The Cold Water Starch Extraction Method
- Batch Roasting Mechanics for Potato Meal Prep
- Freezing Cooked Potatoes Without Texture Loss
- Mashing and Portioning for Clean Eating
- The Right Containers for Starch Storage
- Reheating Without Drying Them Out
Last October, I opened my bottom pantry cabinet and got hit by a smell of rotting dirt and sweet decay. I’d shoved a 5 lb bag of raw potatoes back there after a rushed grocery run and forgot them. The bottom of the bag turned into a foul, leaking liquid that ruined the shelf liner. Potato meal prep requires real mechanical planning. You can’t just buy a sack of tubers, throw them in a dark corner, and hope for the best. If you’re trying to stick to clean eating, your carbohydrate sources need to be reliable, filling, and actually good to eat by the end of the week. I’m going to break down exactly how I handle my weekly starches. It’s a methodical process. I don’t rely on luck to keep my food fresh from Sunday to Thursday. I rely on strict temperature control, moisture management, and understanding how starch molecules behave under heat. If you’ve been eating soggy, gray potatoes by Wednesday, you’re skipping the basic chemistry of meal prep.
1. Master Potato Selection for Potato Meal Prep

Let’s talk about starch content. Not all potatoes behave the same way in a glass container on day four of your work week. Understanding the cellular structure of your ingredients is the first step. For fluffy baked potatoes or smooth mashed potatoes, I buy starchy Russet potatoes. I get a 10 lb bag of Kirkland Signature Russets at Costco for $5.99, which works out to about $0.60/lb. If you’re prepping for a massive family, the 50 lb bag drops to $0.40/lb, but I find that impossible to store properly in my standard kitchen without them spoiling. The high starch and low moisture content in Russets mean they absorb liquids easily, making them perfect for mashing. However, if you’re planning to roast them or need them to hold their shape in salads, all-purpose Yukon Gold or waxy red potatoes are the right choice. They retain moisture well and get crispy exteriors while keeping a firm interior. I tried roasting Russets for a week of lunch salads last Tuesday. By Thursday, they’d absorbed all the vinaigrette and turned into a mealy, disintegrating paste that ruined the fresh spinach. It was texturally awful. Trust me on this. Stick to waxy varieties for salads and roasting. I buy the 3 lb bag of Green Giant Klondike Goldust potatoes at Kroger for $4.49. They have thin skins, so I don’t even bother peeling them. Just scrub the dirt off with a vegetable brush, dice them into uniform 1-inch cubes, and they’re ready for the hot cast iron pan. Uniformity is critical. If your pieces are different sizes, the small ones will burn while the big ones stay raw in the center.
2. Optimal Raw Storage Before Prepping

Before you even turn on the oven or boil water, raw storage dictates how long your prep will last. Store unwashed raw potatoes in a cool, dark, and well-ventilated area. The ideal temperature is between 45-55 degrees Fahrenheit (7-13 degrees Celsius). A pantry shelf or a dry cellar works best. Don’t put them in the refrigerator. The cold converts potato starches into sugars, which makes them turn black when you cook them and gives them a weirdly sweet flavor that ruins savory dishes. I keep mine in a Target Room Essentials wire mesh basket ($12.00) lined with a heavy brown paper bag. The paper blocks the light, preventing the potatoes from turning green and developing solanine, a bitter toxin, while the wire mesh keeps the air flowing. Never store potatoes next to onions. I learned that the hard way. Onions emit ethylene gas, which is a ripening agent. This gas causes potatoes to sprout thick, alien-looking roots and rot twice as fast. I keep my onions in a different cabinet now. If you buy a plastic bag of potatoes, take them out immediately. The plastic traps moisture and promotes mold growth. A simple cardboard box or a breathable mesh bag is all you need to keep them dormant until you’re ready to prep. You might also like: 15 Stunning Lunch Weekly Meal Prep Ideas You Haven’t Thought Of
3. The Cold Water Starch Extraction Method

If you want crispy roasted potatoes that don’t turn into soggy sponges in your meal prep containers, you have to physically remove the surface starch before cooking. After dicing my Yukon Golds into uniform 1/2-inch cubes, I submerge them in a large stainless steel bowl of cold water. I add exactly 1 tablespoon of Morton Kosher Salt ($3.49 for a 3 lb box at Walmart) to the water and let them sit for exactly 30 minutes. Within ten minutes, you’ll see the water turn cloudy and milky. That’s the excess amylose starch leaching out of the cut surfaces. If you leave that starch on the potato, it acts like glue in the oven, causing the cubes to stick stubbornly to the baking sheet and steam rather than roast. After the 30-minute soak, I drain them in a colander and pat them completely dry with a clean, lint-free cotton dish towel. Don’t use paper towels. The sharp edges of the cut raw potatoes will shred the wet paper, and you’ll end up picking wet white lint off your food for ten minutes. They must be bone dry before any oil hits them. If there’s residual water on the surface, that water creates steam in the hot oven, preventing the Maillard reaction that creates a crispy, golden-brown crust. You might also like: 8 Low Calorie Meal Prep You Need to See

M MCIRCO 10-Pack,30 Oz Glass Meal Prep Containers 2
M MCIRCO 10-Pack has been one of the most consistently praised picks in this category. 23 reviewers averaged 4.5/5.
4. Batch Roasting Mechanics for Potato Meal Prep

Roasting is my default cooking method for clean eating, but the mechanics matter if you want the texture to survive until Thursday. I preheat my oven to 400 degrees Fahrenheit. I use Trader Joe’s California Estate Extra Virgin Olive Oil ($7.99 for a 16.9 oz bottle). The measurement is strict: exactly 2 tablespoons of oil for every 2 lbs of diced potatoes. Too much oil makes them greasy and heavy when reheated in the microwave. Too little oil, and they burn and stick to the pan. I toss the dried potatoes in a large bowl with the olive oil, 1 teaspoon of kosher salt, 1/2 teaspoon of coarse black pepper, and 1 teaspoon of smoked paprika for depth. I spread them onto a Nordic Ware bare aluminum half sheet pan ($17.99 at Target). The biggest mistake I used to make was crowding the baking pan. If the potato cubes are touching, the moisture escaping from them will cause the entire batch to steam. You need at least a quarter-inch of empty space between each piece. I roast them for 45 minutes total, flipping them once at the 25-minute mark with a thin, flat metal spatula to ensure even browning. The edges get sharp, blistered, and crispy, which holds up much better in a humid refrigerator than soft, pale potatoes. You might also like: 20 Gorgeous Meal Planning Ideas for Any Style
5. Freezing Cooked Potatoes Without Texture Loss

Sometimes I prep more than I can eat in five days, and letting food rot is a waste of money. Freezing potatoes is tricky because their cellular structure breaks down easily, resulting in a grainy, watery, disintegrating texture when thawed. You can’t freeze raw potatoes. The water inside them expands, ruptures the cell walls, and they turn black and mushy. To freeze roasted or boiled potatoes successfully, they must be fully cooked first. I let my roasted potatoes cool completely on the baking sheet at room temperature for about an hour. Then, I place the uncovered baking sheet directly into the freezer for two hours. This technique is called flash freezing. It freezes the cubes individually so they don’t clump together into a giant ice block. Once they’re frozen solid, I transfer them into Ziploc Gallon Freezer Bags ($5.48 for a 30-count box at Walmart). I squeeze out as much air as possible before sealing to prevent freezer burn. When I’m ready to eat them weeks later, I don’t thaw them in the fridge. Thawing makes them release cellular water and get soggy. I dump the frozen cubes directly onto a hot skillet or into an air fryer at 375 degrees Fahrenheit for 10 minutes.
6. Mashing and Portioning for Clean Eating

Mashed potatoes are excellent for a clean eating regimen if you skip the heavy cream and butter. I use Greek yogurt to get a creamy, rich texture while adding a lean protein source. I boil 2 lbs of peeled Russet potatoes until a fork pierces the center with zero resistance. I drain them completely in the sink and then return them to the hot, empty pot on the stove for two minutes over low heat to let the residual surface moisture evaporate. Wet potatoes make a watery, depressing mash. I mash them manually using an OXO Good Grips stainless steel potato masher ($16.99 at Whole Foods). I add 1/2 cup of Fage Total 2% Plain Greek Yogurt ($6.99 for a 32 oz tub at Sprouts), 1/4 cup of unsweetened almond milk, and 1 teaspoon of sea salt. I tried using a food processor to mash potatoes last year because I was tired and wanted to save five minutes. It was a disaster. The high-speed metal blades over-worked the starches, turning the potatoes into a sticky, glue-like paste that was inedible. No exaggeration. I had to throw the entire batch in the trash. Always mash by hand. The texture stays light and fluffy, which is crucial when you’re eating the same side dish four days in a row.

Skroam 10 Pack Glass Meal Prep Containers
If you want something that just works, Skroam 10 Pack Glass Meal Prep Containers is a safe bet (57 reviews, 4.5 stars).
7. The Right Containers for Starch Storage

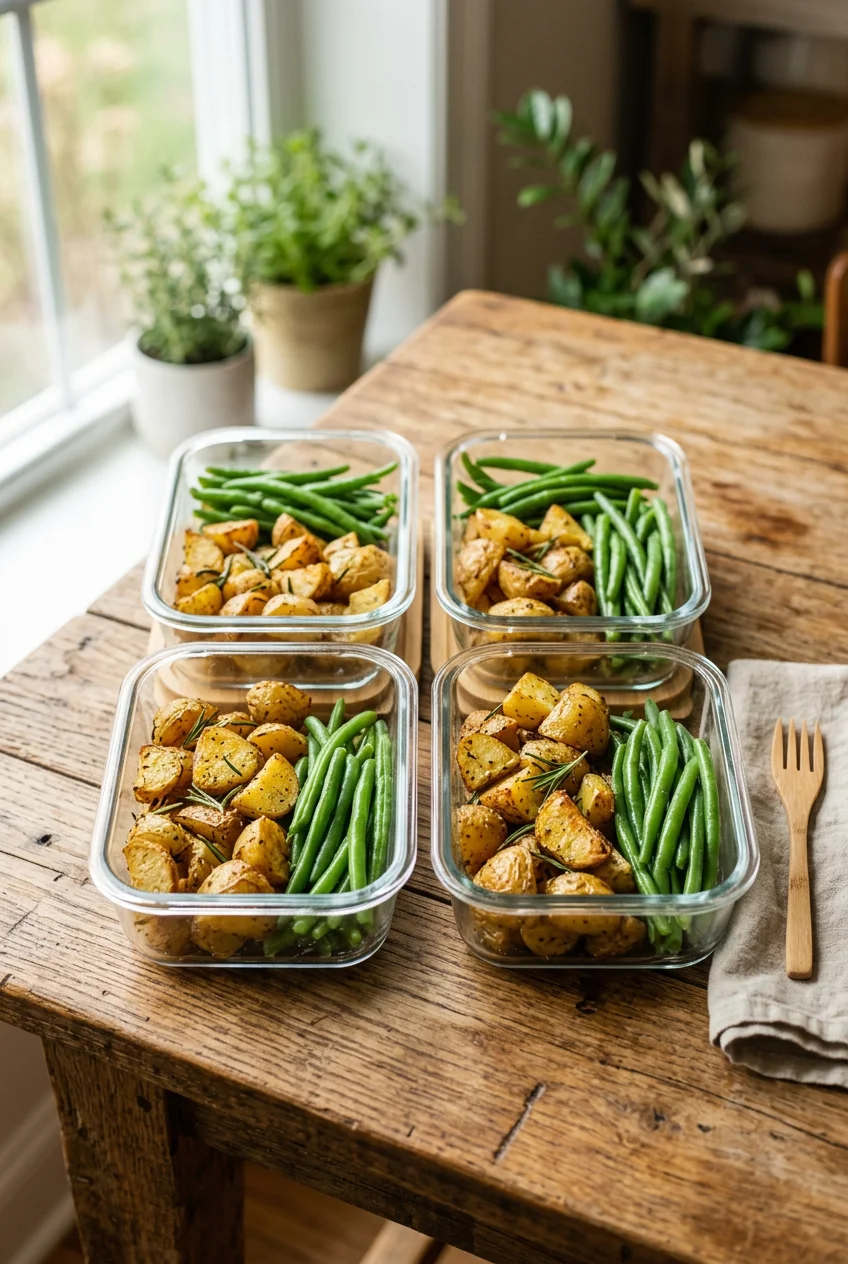
Plastic containers are the enemy of potato meal prep. Plastic is a porous material. It holds onto odors from previous meals, and it stains easily. More importantly, when you reheat potatoes in plastic, they tend to take on a strange, chemical taste that ruins the flavor of your clean eating ingredients. I only use glass. I bought a 4-pack of Pyrex 3-cup rectangular glass containers with snap lids for $22.99 at Target. Glass provides a completely airtight, non-porous seal that prevents the potatoes from absorbing ambient fridge smells, like the leftover garlic chicken sitting on the shelf next to them. I portion exactly 1 cup of mashed or roasted potatoes into each glass container alongside my protein and vegetables. I let the potatoes cool completely to room temperature before snapping the lids on. If you seal them while they’re warm, condensation forms on the inside of the plastic lid. That condensation eventually drips back down onto the potatoes, making them aggressively soggy and accelerating bacterial spoilage. I learned that the hard way when my Tuesday lunch smelled sour and had a slimy texture. Cool them down first. It’s a non-negotiable step in my kitchen.
8. Reheating Without Drying Them Out

The final hurdle of meal prep is reheating. Microwaving roasted potatoes usually turns them into rubbery, dry pellets. If I have to use a microwave at the office because I have no other choice, I use a specific method to retain internal moisture. I take my Pyrex container, place exactly 1 teaspoon of water directly onto the roasted potatoes, and cover the glass container with a damp paper towel. I microwave it on 50% power for two minutes. The damp paper towel creates a mini steam room, rehydrating the exterior just enough so they aren’t tough to chew. If I’m working from home, I skip the microwave entirely because it ruins the texture. I heat a small non-stick skillet over medium heat, add 1 teaspoon of Whole Foods 365 Organic Unsalted Butter ($4.29 for 16 oz), and toss the cold roasted potatoes in the pan for five minutes. The butter helps crisp the edges back up, and the slow, direct heat warms them through without destroying the cellular structure. It takes a few extra minutes of active cooking time, but eating rubbery, sad potatoes is demoralizing. Taking the time to reheat them properly makes the meal actually enjoyable.
Potato meal prep doesn’t have to end in soggy, unappetizing lunches that you dread eating by Wednesday. It just requires attention to starch types, strict moisture control, and proper storage temperatures. I’ve ruined enough batches of expensive groceries to know that cutting corners with wet potatoes or cheap plastic containers won’t work in the long run. Stick to the mechanics I outlined above. Pin this guide for your next Sunday prep session, and your Thursday self will appreciate the effort when you sit down to a meal that actually tastes fresh.
Frequently Asked Questions
Which potatoes are best for meal prep?
Use Yukon Gold or waxy red potatoes for roasting and salads because they hold their shape and resist getting mushy. Use starchy Russet potatoes exclusively for mashing or baking.
Can I freeze cooked potatoes for meal prep?
Yes, but you must flash-freeze them first. Let cooked potatoes cool completely, freeze them on a flat baking sheet for two hours, then transfer to a freezer bag. Never freeze raw potatoes.
Why do my roasted potatoes get soggy in the fridge?
Soggy potatoes usually result from failing to remove surface starch before cooking, crowding the baking pan, or sealing the meal prep containers before the potatoes have completely cooled to room temperature.
How do I reheat meal prep potatoes without drying them out?
If microwaving, add a teaspoon of water and cover the container with a damp paper towel to create steam. For better texture, reheat them in a skillet over medium heat with a small amount of butter or oil.
