What’s Inside
- Prioritize Moisture Control for Fillings
- Strategic Cheese Layering for Burrito Meal Prep
- Choose the Right Tortilla for Freezing
- Pre-Warm Your Tortillas to Prevent Cracking
- The Less is More Filling Strategy
- Safe Ingredients vs. Freezer Nightmares
- Plant-Based Tofu and Bean Fillings
- Budget-Friendly Meat for Burrito Meal Prep
- The Double-Wrap Storage and Reheating Method
Last Tuesday at Whole Foods, I grabbed a pre-made frozen burrito out of desperation. I was starving, running late, and paid $6.99 for a frozen brick of beans. I microwaved it in the office breakroom, and the smell of sad, stale spices filled the room. I bit into it and got a mouthful of mushy, lukewarm disaster that tasted exactly like wet cardboard. That specific, awful moment reminded me why I strictly stick to my own burrito meal prep routines now. Burrito meal prep saves my sanity and my wallet, but only if you actually do it right. I spent months making tragic, soggy tubes of sadness in my own kitchen before I figured out the actual science behind freezing and reheating them. I’d just throw hot meat on cold bread and wonder why my lunches tasted like a wet sponge by Wednesday. It was depressing. Let’s fix your prep routine right now so you aren’t eating sad desk lunches. I’ve got the exact methods, the specific brands, and the hard lessons I’ve learned from completely ruining my own food.
1. Prioritize Moisture Control for Fillings

The absolute number one enemy of a good wrap is trapped steam. I learned this the hard way last January. I cooked up a massive batch of fajita veggies with onions and bell peppers, and I dumped them straight onto my tortillas while they were still sizzling hot from the hot cast iron pan. I rolled them up, tossed them in the freezer, and thought I was an absolute genius. Two days later, I reheated one at work. The tortilla completely disintegrated into a slimy, gray paste in my hands. It was disgusting. I ended up throwing it away and buying a vending machine candy bar for lunch. You absolutely must cool your cooked fillings completely to room temperature before assembling anything. Hot ingredients create steam. Steam gets trapped inside the tightly rolled tortilla, and it completely ruins the texture of the bread. I spread my cooked veggies, rice, and meats out on a large metal baking sheet and stick them in the fridge for twenty minutes. You also need to drain your wet ingredients. I use a simple OXO Good Grips fine mesh colander I grabbed at Target for $11.99 to drain my black beans and cooked ground meat. If you skip this step, that excess liquid pools at the bottom of the tortilla while it’s sitting in the freezer. Nobody wants a soggy bottom. Take the extra twenty minutes to let things cool and drain. Your future self will thank you when you bite into a perfectly intact, structured wrap instead of a mushy, falling-apart mess. It’s the most crucial step in the entire process.
2. Strategic Cheese Layering for Burrito Meal Prep

This specific trick changed my burrito meal prep game. You need to create a physical moisture barrier between your wet fillings and the actual tortilla bread. The best, most delicious way to do this? A solid wall of cheese. I lay down a generous layer of shredded cheese directly on the tortilla first, right before adding the rice, meat, or veggies. When you eventually reheat the burrito, that bottom layer of cheese melts first. It forms a greasy, delicious little shield that stops the salsa, bean juice, and meat fat from soaking into the bread. I personally swear by the Tillamook Farmstyle Thick Cut Shredded Cheddar. I grab the 8 oz bag at Kroger for exactly $4.49. The thick shreds melt perfectly without turning into an oily puddle. Skip the fat-free stuff entirely. It tastes like wet cardboard and doesn’t melt right anyway. I tried using fat-free mozzarella once to save a few calories, and it turned into these hard, rubbery pellets that literally poked holes through my tortilla. It was an awful texture. Just use the real stuff. After laying down about 1/4 cup of the Tillamook cheddar, I add my dry rice, then the cooked meat, and finally the wetter veggies on top. This specific stacking order keeps the wettest ingredients trapped safely in the middle. It’s a tiny adjustment to your Sunday assembly line, but it prevents the dreaded structural blowout when you’re eating on the go in your car.
3. Choose the Right Tortilla for Freezing

You can’t just use cheap, tiny tortillas for this process. I tried using standard 8-inch corn tortillas from a local corner market once because they were on sale for two bucks. It was a total disaster. They shattered into a million dry pieces the second I tried to fold the sides in. Corn tortillas just don’t have the gluten structure to handle being stuffed to the brim, frozen solid, and reheated. You need large, pliable flour tortillas. Specifically, you want the 10-inch or 12-inch sizes labeled as burrito size. I usually grab a pack of Maria and Ricardo’s Burrito-Size White Flour Tortillas at Whole Foods for $4.29. You get 6 massive tortillas in the pack, and they’re incredibly soft and stretchy. If I’m trying to hit my protein macros for the week, I’ll swap those out for the Mission Protein Tortilla Wraps. I buy the 6-count pack at Walmart for $5.48. They give you 7 grams of plant-based protein and 12 grams of fiber per tortilla. Surprisingly, they don’t taste like chalk. They actually stay really flexible even after sitting in the fridge for four days. I also love how the Mission wraps don’t tear when you pull them out of the package. Some of the cheaper brands stick together and rip before you even get them on the cutting board. It’s incredibly frustrating when you’re trying to prep quickly. Whatever brand you pick, just make sure they’re incredibly fresh when you buy them. Check the dates. Stale tortillas will crack right down the middle, spilling your precious, hard-earned fillings all over your clean kitchen counter. A cracked tortilla is a ruined lunch, so don’t skimp on the foundation of your meal. You might also like: 15 Cozy Freezer Meals Ideas to Transform Your Space

M MCIRCO 10-Pack,22 Oz Glass Meal Prep Containers
If you want something that just works, M MCIRCO 10-Pack is a safe bet (86 reviews, 4.5 stars).
4. Pre-Warm Your Tortillas to Prevent Cracking

Cold tortillas are stiff, rigid, and basically guaranteed to tear when you roll them. I used to just pull my tortillas straight out of the fridge and start aggressively folding them. I’d end up frustrated, with black beans spilling out of massive tears in the dough. You have to warm them up first to relax the gluten. I’ve got two specific methods for this. If I’m in a huge rush on a Sunday afternoon, I stack four tortillas on a microwave-safe plate, separate them with damp Bounty paper towels (the 2-pack is $5.99 at Target), and microwave them for exactly 25 seconds. The damp paper towel creates a little steam bath that makes the dough incredibly soft and stretchy. If I have a bit more time and want better flavor, I prefer the skillet method. I heat a dry 12-inch Lodge Cast Iron Skillet (mine was $24.90 at Costco) over medium heat. I drop each tortilla in for about 15 seconds per side. You don’t want to toast them until they’re crispy. You just want them warm to the touch and slightly pliable. This makes rolling them incredibly easy. The ends tuck in neatly, and you get that tight, professional-looking cylinder that won’t fall apart when you take your first bite. I tried skipping this step last month because I was feeling lazy, and I ripped three tortillas in a row. Just take the extra two minutes to warm them up. You might also like: 20 Inspiring Meal Prep Ideas for Any Style
5. The Less is More Filling Strategy

I’m totally guilty of overfilling my wraps. When I first started prepping, I wanted these massive, restaurant-style logs that looked like they came from Chipotle. I’d pile two huge scoops of rice, a mountain of meat, and a massive handful of veggies onto a single tortilla. Naturally, I couldn’t close the thing. I’d try to force it, the tortilla would rip in half, and I’d end up eating a deconstructed, ugly mess out of a Tupperware container. It completely defeats the purpose of making a handheld meal. You have to restrain yourself. Aim for exactly 1 to 1.5 cups of total filling per 10-inch tortilla. It doesn’t look like enough when it’s sitting in the middle of the dough, but trust me, it’s the absolute perfect amount for a tight, secure roll. I actually use a specific measuring cup for this now so I don’t get carried away. I use my 1-cup Pyrex glass measuring cup (part of a 3-piece set I got for $18.99 at Target) to scoop the mixed filling. This ensures every single wrap is exactly the same size. Consistency means they all freeze at the exact same rate and reheat in the exact same amount of time. I used to think more filling meant a better meal, but it just means a messier one. When you stick to the 1.5 cup rule, you can actually fold the sides in tightly and roll it over itself without any gaps. The structural integrity is so much better. Plus, you won’t be fighting the tortilla trying to tuck in the sides. A perfectly portioned wrap holds its shape, looks beautiful, and actually fits in your hand without exploding onto your shirt. You might also like: 20 Beautiful High Protein Meal Prep Ideas That Are Totally Worth It
6. Safe Ingredients vs. Freezer Nightmares

Not everything belongs in the freezer. I ruined an entire week’s worth of lunches last January because I thought it would be brilliant to put fresh diced tomatoes and a huge dollop of sour cream inside my wraps before freezing them. When I reheated them at work, the sour cream had separated into this horrifying, watery milk liquid. The fresh tomatoes had turned into mushy, acidic sponges that leaked pink juice everywhere. The smell alone was enough to make me toss them straight in the trash. Never freeze sour cream, guacamole, fresh tomatoes, or lettuce. They become texturally unpleasant and completely ruin the integrity of the bread. If you want that creamy element, use a thick cheese or freeze a starchier filling like mashed sweet potatoes. I stick strictly to rice, beans, cooked meats, and heavily roasted vegetables. If I desperately need salsa inside the wrap for flavor, I use a really thick, chunky one and drain it first. I buy the Pace Thick & Chunky Mild Salsa (the 16 oz jar is $2.68 at Walmart) and literally run it through a fine-mesh strainer to get the watery tomato juice out. Save the fresh guacamole and sour cream in little separate containers. You can just dip your hot, reheated wrap into them when you’re ready to eat. Keep the wet, fresh stuff out of the freezer.

Vtopmart 5Pack 22oz Glass Storage Containers with Lids
Honestly, Vtopmart 5Pack 22oz Glass Storage Containers with Lids surprised me — sturdier than it looks in the photos, and over 32 buyers gave it 4.5 stars.
7. Plant-Based Tofu and Bean Fillings

Plant-based fillings are having a massive moment right now, and they’re honestly perfect for meal prepping because they hold up so incredibly well in the freezer. I’m not even strictly vegetarian, but I make tofu wraps all the time because it’s cheap and absorbs flavor like a sponge. I take two blocks of Nasoya Extra Firm Tofu (usually $3.29 a block at Sprouts), press the water out with heavy books, and grate it on a standard cheese grater. Then I toss the shreds in a hot skillet with 4 tablespoons of taco seasoning and a little olive oil. It gets crispy, chewy, and mimics the texture of ground meat surprisingly well. I also heavily rely on black beans and pinto beans for bulk. They’re incredibly cost-effective. I buy the generic 365 Everyday Value Organic Black Beans at Whole Foods for $1.39 a can. I rinse them thoroughly, mash about half of them with a fork, and mix them with the cooked tofu. The mashed beans act like a thick binder, holding the crumbly tofu together so it doesn’t spill out when you take a bite. It’s a super filling, high-fiber option that costs pennies per serving compared to buying premium cuts of steak or chicken. Plus, tofu doesn’t get that weird, rubbery texture that chicken breast sometimes gets when you microwave it from frozen.
8. Budget-Friendly Meat for Burrito Meal Prep

If you’re a heavy meat eater, ground turkey and lean ground beef are your absolute best friends for burrito meal prep. Whole cuts of steak or diced chicken breast can sometimes get a little tough or rubbery when microwaved from a frozen state. Ground meat reheats beautifully and distributes evenly throughout the wrap so you get some in every single bite. I usually buy a 1 lb package of Jennie-O Lean Ground Turkey (the 93% lean one is about $5.49 at Target). That single pound of meat, once cooked down with onions, diced bell peppers, and heavy spices, can easily stretch to fill 10 large wraps if you bulk it up with a cup of brown rice and a can of beans. It’s incredibly budget-friendly. Plus, ground meat absorbs the taco seasoning so much better than chunks of chicken. Every single bite is packed with cumin, chili powder, and garlic. It’s just a superior texture for something that’s going to sit in the freezer for a month. I brown the turkey in a cast iron skillet until it’s slightly crispy on the edges. That crispy texture is crucial. If you just boil the meat in its own juices, it gets terribly mushy. I made that mistake early on. I’d crowd the pan with two pounds of cold beef, and it would just steam itself into sad, gray crumbles. Now, I cook it in smaller batches so it actually sears. Drain the excess fat, toss in your seasoning, and let it cool completely before adding it to your assembly line.
9. The Double-Wrap Storage and Reheating Method

Throwing a naked wrap directly into a plastic zipper bag is a guaranteed way to get nasty freezer burn. I know because I used to do it all the time. The tortillas would get these nasty, icy patches that turned into rock-hard crusts when microwaved. You have to double-wrap them. First, I wrap each cooled wrap tightly in a square of Reynolds Kitchens Unbleached Parchment Paper (a roll is $4.99 at Kroger). The parchment stops the tortilla from sticking to the outer layer. Then, I wrap it tightly in Reynolds Wrap Aluminum Foil (the 50 sq ft roll is $4.79 at Walmart). This double layer acts as heavy armor against the harsh freezer air. When it’s time to eat, reheating is an absolute art form. Microwaving a frozen wrap for three minutes straight just gives you a lava-hot center and a soggy, wet exterior. I unwrap the foil, leave the parchment paper on, and microwave it on high for exactly 2 minutes to thaw the inside. Then, I take off the parchment and throw the wrap into my Ninja Air Fryer at 400°F for about 4 minutes. It comes out with a perfectly crispy, golden-brown shell and a steaming hot center. It’s a tiny bit of extra work, but it completely mimics that fresh-from-the-restaurant crunch.
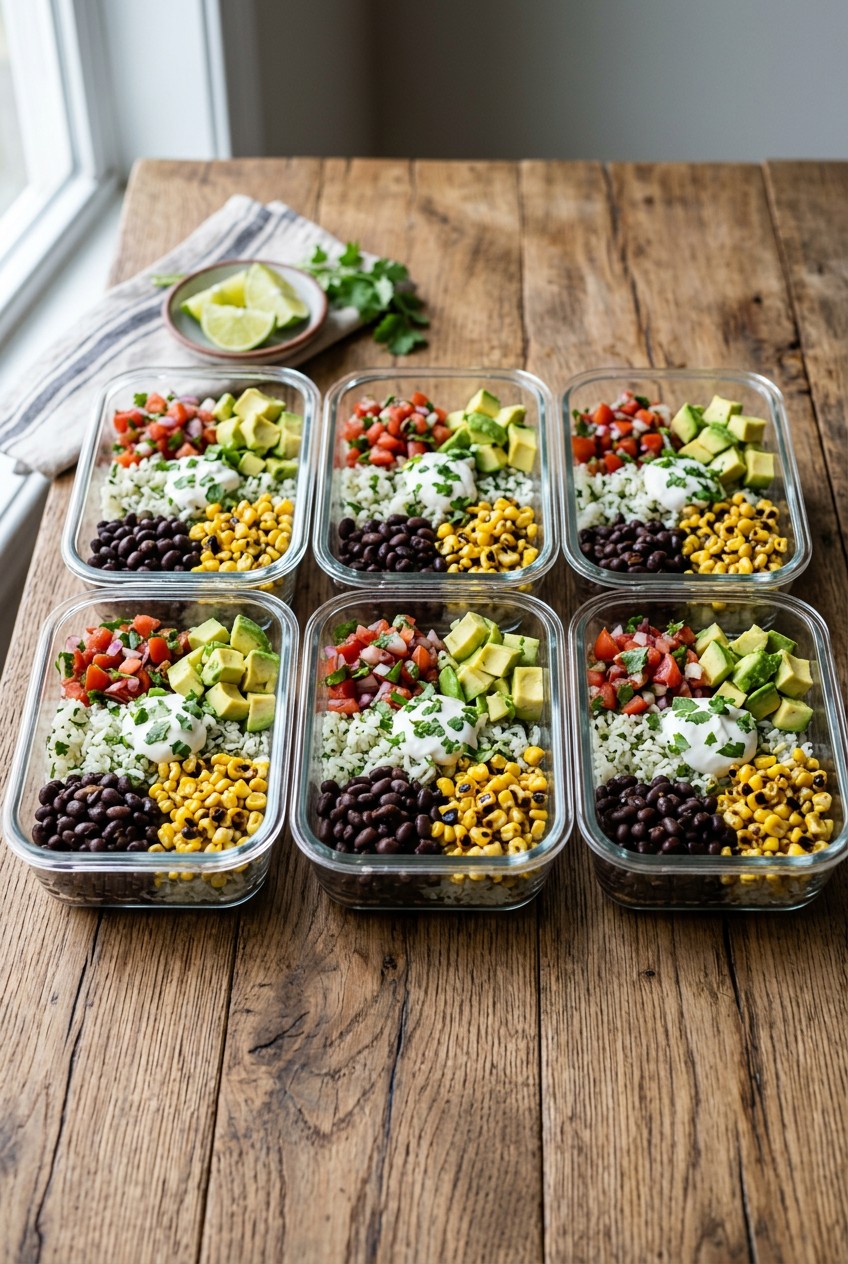
Honestly, spending one single hour on a Sunday rolling these up saves me from eating greasy, expensive takeout five days a week. It’s the ultimate lazy-girl hack that actually makes you feel incredibly productive. Just remember to cool your fillings completely, use the cheese barrier trick, and double-wrap them before freezing. If you skip the cooling step, I promise you’ll regret it when you’re holding a wet, disintegrating tortilla in your office breakroom. I’ve been there, and I don’t want that for you. Grab some quality containers. I use the glass Pyrex ones for my leftover fillings. Start experimenting with different flavor combos. If you found these tips helpful, please pin this article to your favorite meal prep Pinterest board! It helps me out a ton, and you’ll have the guide saved for your next massive Sunday prep session. Let’s get wrapping.

KOMUEE 10 Packs 30 oz Glass Meal Prep Containers
If you want something that just works, KOMUEE 10 Packs 30 oz Glass Meal Prep Containers is a safe bet (45 reviews, 4.5 stars).
Frequently Asked Questions
How long do meal prep burritos last in the freezer?
They’ll stay fresh for about three to six months if you double-wrap them in parchment paper and aluminum foil. After that, they won’t spoil, but you’ll definitely start noticing freezer burn and a decline in texture.
Why do my frozen burritos get soggy when I reheat them?
You’re probably trapping steam inside. You must let all your cooked fillings cool completely to room temperature before assembling. If you wrap hot rice or meat in a tortilla, the steam condensates and turns the bread into mush.
Can I freeze sour cream or guacamole inside my burrito?
Absolutely not. Dairy products like sour cream separate and turn into a watery, gross liquid when frozen and thawed. Fresh veggies like lettuce and tomatoes turn into mush. Add these fresh ingredients after you reheat the wrap.
What’s the best way to reheat a frozen burrito?
Don’t just microwave it. I microwave mine for two minutes to thaw the center, then throw it in an air fryer at 400°F for four minutes. It gives you a steaming hot center and a perfectly crispy, golden-brown shell.
