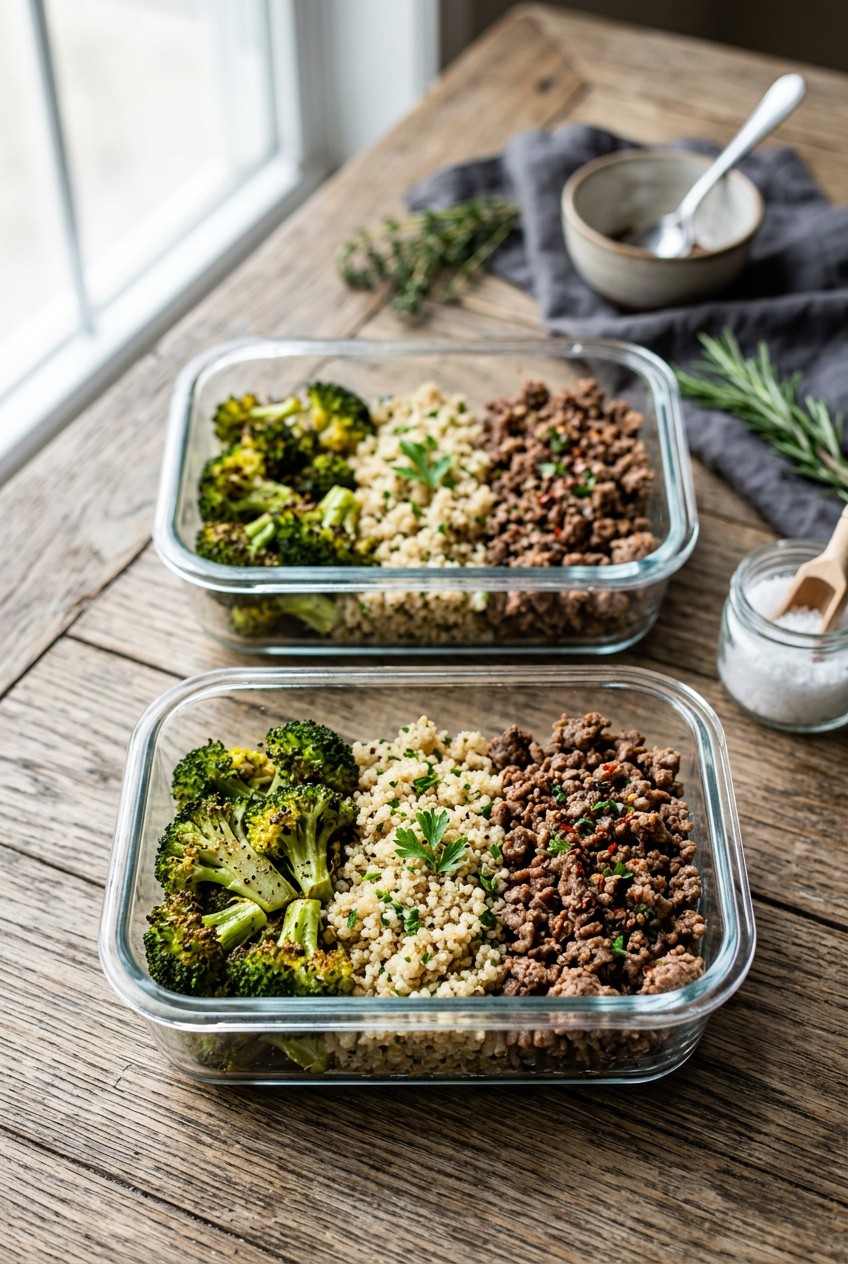
What’s Inside
- Pick the Right Fat Ratio for Meal Prep Ground Beef
- Use the Meat Disk Method and Baking Soda
- Cook Your Aromatics Completely Separately
- Drain the Grease and Season Like a Pro
- Try Steaming Large Batches of Ground Beef
- Flatten and Score Your Freezer Bags
- Thaw Safely and Reheat Without Drying
- Build 2026 Trending Bowls with Hidden Veggies
Last Tuesday at Whole Foods, I stared at a sad, gray puddle of meal prep ground beef in my glass Tupperware. I honestly wanted to toss the whole thing in the trash. It smelled like wet dog and looked like soggy pencil erasers. I’ve ruined so many batches over the years. I used to dump three pounds of cold, cheap meat into a tiny pan and stir until it turned a depressing shade of gray. Disgusting. I’m here to tell you there’s a better way. You don’t have to suffer through dry, rubbery lunches. I finally figured out how to get that crispy, diner-style crust at home, and it changed my Sunday routine. It only takes thirty minutes. Let’s fix your weekly cooking habits right now.
1. Pick the Right Fat Ratio for Meal Prep Ground Beef

Listen, I know it’s tempting to buy the leanest meat possible. I did it wrong for months. Learned that the hard way. Last year, I bought a massive pack of 99% lean ground turkey and beef from Sprouts for $7.49 a pound. I cooked it, packed it, and by Wednesday, I was chewing on literal sawdust. Skip the fat-free stuff. It tastes like wet cardboard.
If you want flavor and a texture that survives the microwave, you’ve got to use beef with a fat content between 80/20 and 90/10. A popular internet chef known as “The Salad Whisperer” swears by this, noting that anything leaner than 90/10 results in dry meat once reheated. The fat protects the protein during cooking.
If you’re on a budget, I swear by the Kirkland Signature 88% lean, 12% fat ground beef at Costco. It comes in a three-pack of vacuum-sealed bricks for about $5.99 per pound. Their bulk pricing is usually 20 to 40 percent lower than stores like Kroger or Safeway. The 88/12 ratio is the sweet spot. It provides enough fat for a sizzling crust in a hot cast iron pan, but it won’t leave your containers swimming in orange grease. Trust me, your tastebuds will thank you.
2. Use the Meat Disk Method and Baking Soda

Most people get this wrong. They dump a mountain of raw meat into a cold pan and hack at it with a spatula. When you cook three to five pounds at once, the meat releases all its water. Because the pan isn’t hot enough to evaporate that water, your beef boils in its own juices. You won’t get browning. You just get gray mush.
Try the “Meat Disk” method. I learned this from The Salad Whisperer, and it blew my mind. Take one to two pounds of meat and press it flat into a hot, wide skillet. I use a 12-inch non-stick pan I grabbed at Target for $24.99. Press the meat down until it covers the bottom like one giant burger patty. Don’t stir. Let it sit until a deep brown crust develops. Only then do you break it up.
Here’s my secret trick. For a better crust and faster browning, add a bit of baking soda. For every 2 pounds of beef, dissolve 3/4 teaspoon of baking soda in 2 tablespoons of water. Mix this into the raw meat before cooking. It alters the pH level, which creates a restaurant-quality crust in half the time. It sounds crazy, but it works.
3. Cook Your Aromatics Completely Separately

I used to chop a yellow onion and throw it in with the raw beef. I thought I was saving time. Instead, the water from the onions stopped the beef from browning, and the beef fat made the onions soggy instead of sweet. It was a lose-lose. You might also like: 15 Inspiring Chicken Meal Prep Ideas You Haven’t Thought Of
A big trend for 2026 is cooking your meat and aromatics separately. Aromatics include diced onions, minced garlic, and chopped celery. This allows each ingredient to develop a golden-brown crust. It prevents the meat from steaming and ensures better flavor. You might also like: 15 Creative Cold Lunch Ideas to Transform Your Space
Here’s how I do it. I buy a bag of yellow onions from Kroger for about $0.89 each. I dice one cup of onions and mince two cloves of garlic. First, I sear the beef using the Meat Disk method. Once the beef has that crust, I remove it with a slotted spoon, leaving the fat behind. Then, I drop the onions and garlic into that bubbling fat. They sizzle, soften, and absorb all that flavor. Once the onions have golden edges, I add the beef back and mix. The difference is incredible. You might also like: 20 Gorgeous Meal Planning Ideas for Any Style

8 Pack 36oz Large Glass Meal Prep Containers with lids
8 Pack 36oz Large Glass Meal Prep Containers with lids has been one of the most consistently praised picks in this category. 866 reviewers averaged 4.5/5.
4. Drain the Grease and Season Like a Pro

After browning, it’s crucial to drain the excess fat. This is vital if you’re using an 80/20 or 85/15 blend. Leaving all that grease creates a heavy, oily mess that congeals into an unappetizing white layer in your fridge. Nobody wants that.
I learned how not to drain grease the hard way. In my first apartment, I dumped hot beef fat down the sink. Two days later, my pipes were clogged, and I had a $200 plumber bill. Don’t do that. Push the beef to one side and tilt the pan. Use tongs and a wad of paper towels to absorb the pooling fat. Or, place a metal colander over a heat-safe glass bowl and pour the meat in. I put the collected grease in an old jar, freeze it, and toss it in the trash.
Once drained, season it. If you want versatility, leave the beef unseasoned. Divide it into containers and add sauces later. If you’re making taco bowls, season it in the pan. I love McCormick Original Taco Seasoning Mix, usually $1.29 at Walmart. If I’m at Costco, I’ll grab Kinder’s The Taco Blend for $7.99. You’ll need 2 to 3 tablespoons per pound. If you’re watching your sodium, Mrs. Dash Original is a great salt-free option for $3.49.
5. Try Steaming Large Batches of Ground Beef

I know, steaming meat sounds repulsive. I thought the same thing. But if you’re prepping a massive amount of food for a family or a bodybuilding routine, this is efficient.
For large batches and a leaner result, steam your beef. You’ll need a large spaghetti pot with a metal steamer basket. I use an 8-quart stainless steel pot I’ve had for years. You can load up to 10 pounds of beef or turkey into the basket. As the water boils, the steam cooks the meat. The best part? The excess fat melts and drains into the water below, separating from your food.
I tried this last month with 365 Everyday Value Ground Turkey from Whole Foods ($6.49 a pound). I was skeptical. I watched the steam rise and the meat turn from pink to opaque. It requires zero attention. You don’t have to dodge grease splatters. When it’s done, you get soft, clean-tasting crumbles perfect for mixing into sauces, chilis, or casseroles where a crust isn’t necessary. It’s a great, healthier option for bulk prepping.
6. Flatten and Score Your Freezer Bags

If you’re cooking three or four pounds, you probably won’t eat it all in four days. Food safety experts are strict here. Cooked ground beef only lasts 3 to 4 days in the fridge. After that, it gets sketchy. You need to use your freezer.
I used to dump leftover meat into one giant container and shove it in the freezer. It turned into a frozen bowling ball. When I wanted a quick dinner, I had to wait three days for the block to thaw. It was frustrating.
Here’s the right way. Repackage your cooled beef into heavy-duty freezer bags. I buy the 40-count box of Ziploc freezer bags at Target for $5.49. Scoop the meat in, then use your hands to flatten it into a thin, even layer. Squeeze out as much air as possible before sealing. This prevents freezer burn and saves space. Before it freezes, use a ruler to press deep indentations into the meat, scoring it into 1-pound or 2-cup squares. Once frozen, you can snap off a perfect square without thawing the whole bag. It’s brilliant.

Skroam 10 Pack Glass Meal Prep Containers
Honestly, Skroam 10 Pack Glass Meal Prep Containers surprised me — sturdier than it looks in the photos, and over 56 buyers gave it 4.5 stars.
7. Thaw Safely and Reheat Without Drying

Let’s talk about the worst part of meal prepping: the microwave reheat. We’ve all been there. You bring your glass container to the office, pop it in for two minutes, and pull out a meal that chews like rubber tires. The microwave pulls moisture out, leaving it dry and squeaky.
To prevent this, add moisture back into the container before you hit start. I always add two tablespoons of liquid. You can use water, but I recommend a splash of bone broth. I buy Kettle & Fire Beef Bone Broth from Whole Foods for $6.99 a carton. Pour it over the cold meat, cover with a microwave-safe lid or damp paper towel, and heat. The steam revitalizes the meat, making it juicy again. Always reheat ground beef to 165 degrees Fahrenheit for safety.
Never thaw frozen beef on the counter. Room temperature promotes bacterial growth. I made this mistake in college and ended up with food poisoning. The safest methods are thawing the flat Ziploc bag in the fridge, or submerging the sealed package in cold tap water, changing the water every 30 minutes. Thawing slowly in the fridge helps the meat reabsorb its own ice crystals, preventing it from tasting watery.
8. Build 2026 Trending Bowls with Hidden Veggies

Eating the same meal four days in a row is the fastest way to kill your habit. By Thursday, you’re bored and ordering a $20 salad on DoorDash. You’ve got to mix up your flavors.
In 2026, the biggest trend is customizable bowl formats. You start with a base of plain, unseasoned ground beef cooked on Sunday. On Monday, make a Korean-inspired beef bowl. Heat the beef with soy sauce, sesame oil, and serve over Organic Jasmine Rice from Trader Joe’s ($4.99 a bag). On Tuesday, turn that same beef into a ginger stir-fry with sautéed vegetables. On Wednesday, it becomes a taco salad with salsa and avocado.
To make your meat go further and boost nutrition, hide vegetables in it. This is my favorite trick. I take 1/2 cup of shredded cabbage, 1/4 cup of grated carrots, and a handful of diced bell peppers, and fold them into the hot beef before portioning. The vegetables soften and absorb the savory fat. They add volume, fiber, and extra vitamins. I even chop baby bella mushrooms so small that my husband, who hates the texture, doesn’t realize he’s eating them. It makes meals more filling and economical.
I can’t imagine going back to my old, lazy cooking methods. Putting in a bit of extra effort to sear the meat properly, drain the grease, and store it flat in the freezer has revolutionized my routine. Your lunches are going to taste so much better this week. If you found these tips helpful, please pin this article to your favorite Pinterest recipe board so you can find it again next Sunday!
Frequently Asked Questions
How long does cooked ground beef last in the fridge?
Cooked ground beef lasts 3 to 4 days in the refrigerator when stored in an airtight container. For longer storage, you should flatten it in a freezer bag and store it in the freezer for up to 4 months.
What is the best fat ratio for meal prep ground beef?
The best ratio is between 80/20 and 90/10 lean-to-fat. Anything leaner, like 99% lean turkey or beef, will dry out severely when reheated in the microwave. The fat helps insulate the meat and keep it juicy.
Why does my ground beef taste dry when reheated?
Microwaves pull moisture out of food rapidly. To prevent dry meat, always add 1 to 2 tablespoons of water or beef bone broth to your container, and cover it tightly before reheating. This traps steam and revives the beef.
Can I cook aromatics and raw beef at the same time?
You shouldn’t cook them together. The water released from onions and celery will cause the beef to steam instead of sear. Cook the beef first to get a crust, remove it, and then sauté your aromatics in the leftover fat.
