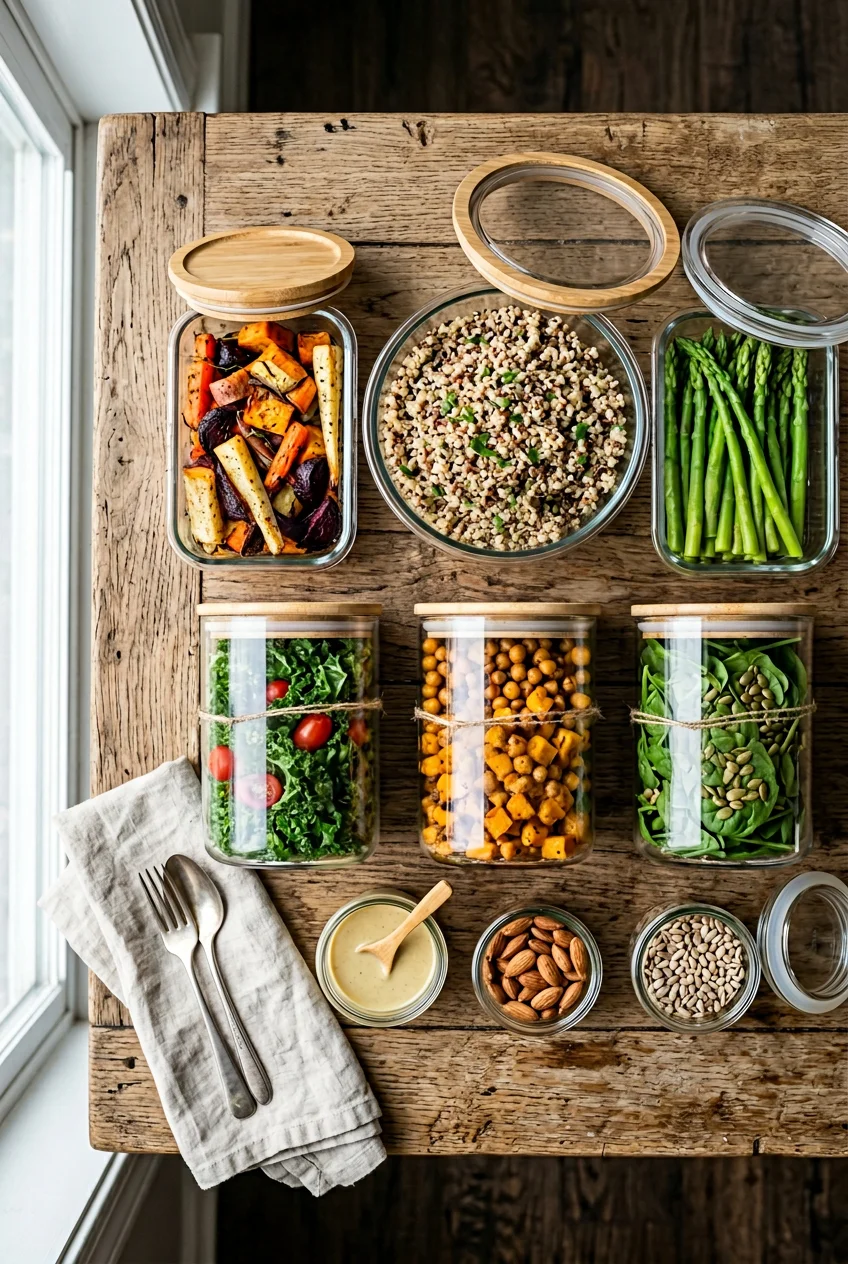
What’s Inside
- Roasted Sweet Potato Cubes with Smoked Paprika for Meal Prep Sides
- Cold Soba Noodle Salad with Sesame Dressing
- Blistered Green Beans with Garlic as Meal Prep Sides
- Spiced Oven-Roasted Chickpeas
- Marinated Cucumber and Red Onion Salad
- Quinoa with Toasted Almonds and Lemon
- Roasted Brussels Sprouts with Balsamic Glaze
- Brown Rice and Black Bean Mix
- Shredded Carrot and Cabbage Slaw
Last Tuesday at 7:30 PM, I stared at a plastic container of gray, weeping broccoli on my counter. I poked it with a fork. It smelled like sulfur and defeat. Water pooled at the bottom, mixing with leftover chicken juice. That moment changed how I prep sides. I’d been boiling vegetables until they surrendered and tossing them into cheap plastic. I trashed the broccoli. I ordered takeout. I decided right then to build a system for sides that actually survive until Thursday. This list covers the exact methods and measurements I use now. No more winging it. I measure my oil. I time my roasting. I use the right containers.
1. Roasted Sweet Potato Cubes with Smoked Paprika for Meal Prep Sides

I buy the 3-pound bag of Good & Gather sweet potatoes at Target for $3.99. I peel them and cut them into 1/2-inch cubes. Any larger and they won’t cook through before the outside burns. I toss them with 2 tablespoons of avocado oil and 1 teaspoon of smoked paprika. I roast them at 425 degrees for 25 minutes. Here’s where most people mess up. They put hot sweet potatoes into cheap plastic containers. I did this for two years. The steam gets trapped, making the potatoes soggy, and the plastic warps. Last October, I read a brief from the Harvard T.H. Chan School of Public Health about BPA and phthalates leaching from plastic when heated. I tossed my plastic. I bought Pyrex borosilicate glass containers for $24.99. Borosilicate glass is thermal shock resistant. You can take it from the freezer directly to the oven. They cost $15 to $30 upfront, but they last five times longer than plastic and don’t leach chemicals. The glass also stops that weird fridge taste from setting in by Wednesday. You know that taste. It’s like cold air and old onions. I portion 1/2 cup of roasted cubes into each glass container. They stay firm for four days. The smoked paprika adds a bitter, woody flavor that cuts through the sweetness.
2. Cold Soba Noodle Salad with Sesame Dressing

I buy Hakubaku Organic Soba noodles at Costco. It’s $9.99 for an 8-pack. Soba is tricky. I prepped these wrong for months. I used to boil, drain, and container them. By Tuesday, they were a solid, sticky gray brick. Pliers wouldn’t even pull them apart. The fix? Aggressively rinse them under freezing cold water for exactly two minutes after boiling. You have to wash the surface starch off. I use 4 ounces of dry noodles per batch. Once rinsed, I toss them with 1 tablespoon of toasted sesame oil, 2 tablespoons of soy sauce, and 1 teaspoon of rice vinegar. I use Kikkoman soy sauce from Kroger, which costs $3.49 for a 10-ounce bottle. The sesame oil creates a barrier so they don’t stick. I pack 1 cup per serving. I eat these cold. They’re nutty, earthy, and chewy. The dressing pools at the bottom, so I shake the container before eating. Don’t microwave them. They’ll turn to mush. Eat them cold. They hold up from Sunday prep until Thursday lunch. I pack these alongside chicken or eat them plain when I’m in a rush.
3. Blistered Green Beans with Garlic as Meal Prep Sides

Green beans are resilient if you cook them dry. I grab fresh beans from the bulk bins at Whole Foods for $2.49 a pound. I usually get 1.5 pounds for the week. I wash and dry them completely with paper towels. This is non-negotiable. If they hit the hot cast iron wet, they steam instead of blister. Steamed beans turn limp and squeaky in the fridge. I heat 1 tablespoon of canola oil in a large cast-iron skillet until it smokes. I drop the beans in and leave them alone for three minutes. You want a bit of char. That black crunch survives refrigeration. After three minutes, I toss them and add 3 cloves of minced garlic and 1/2 teaspoon of kosher salt. I cook for one more minute. The garlic burns if added earlier. I learned that the hard way last Thanksgiving. I let them cool on a baking sheet before putting them in glass containers. I portion out 3/4 cup per meal. They maintain a distinct snap on day four. The garlic mellows, but the charred spots keep the flavor sharp. I sometimes eat these cold, standing in front of the open fridge. No sogginess, no leaks.

buluker 4 Pack Bento Lunch Box Set 3 Compartment Food
buluker 4 Pack Bento Lunch Box Set 3 Compartment Food Storage Containe has been one of the most consistently praised picks in this category. 23 reviewers averaged 4.5/5.
4. Spiced Oven-Roasted Chickpeas

Canned chickpeas are cheap and sturdy. I buy the Great Value brand at Walmart for $0.78 a can. I prep two 15-ounce cans at once. My old mistake was not drying them. I’d rinse, oil, and roast. They always came out like wet sand. Now, I rinse and roll them between two dish towels. I rub the skins off. It takes five minutes and it’s annoying, but it matters. The skins trap moisture. Without them, the chickpeas get firm. I toss the dried chickpeas with 1 tablespoon of olive oil, 1 teaspoon of cumin, and 1/2 teaspoon of cayenne pepper. I use McCormick cumin from Target, $4.69 for a 1.5-ounce bottle. I roast at 400 degrees for 35 minutes until they’re dark golden brown. They smell like toasted nuts. I let them cool on the counter for an hour. If you pack them warm, they sweat and soften. I use 1/2 cup portions. They aren’t as crunchy on Wednesday as Sunday, but they stay firm. They add texture to salads or rice bowls. I keep a jar on my desk. They beat stale breakroom pretzels at 3 PM. You might also like: 15 Gorgeous Chicken Breast Dinner Ideas That Make a Real Difference
5. Marinated Cucumber and Red Onion Salad

I buy English cucumbers at Sprouts for $1.50 each. I need two for the week. Skip regular slicing cucumbers. Their wax is thick, and the seeds turn into watery slime by Tuesday. English cucumbers have thin skins and fewer seeds. I slice them into 1/4-inch rounds. I slice one medium red onion into paper-thin half-moons. I toss the cucumbers and onions with 1 teaspoon of salt and let them sit for 20 minutes. Salt pulls the water out. I drain that water. Skip this, and your dressing gets diluted. I mix 1/3 cup of white vinegar, 1 tablespoon of sugar, and 1/2 teaspoon of black pepper. I pour this over the drained vegetables. I use Heinz white vinegar from Kroger, $2.99 for a 32-ounce bottle. The vinegar kills the raw onion bite, leaving a bright tang. The cucumbers stay crunchy because the salt removed the excess water. I pack 1 cup per container. It’s cold, acidic, and loud when you chew it. It cuts through heavy proteins like beef. The flavor improves after two days in the fridge. The onions turn pink and lose their heat. I drain the liquid before eating so it doesn’t splash my shirt. You might also like: 20 Clever School Lunch Ideas You Can Try Today
6. Quinoa with Toasted Almonds and Lemon

I get organic white quinoa at Trader Joe’s for $4.99 a bag. Quinoa has a natural coating called saponin that tastes like dish soap. The bag says it’s pre-rinsed. I don’t trust it. I rinse 1 cup of dry quinoa in a fine-mesh sieve under cold water for two minutes. I cook it in 1.75 cups of chicken broth. I use Pacific Foods organic broth from Whole Foods, $4.49 for a 32-ounce carton. Boiling in broth pushes savory notes into the grain. While it cooks, I toast 1/4 cup of sliced almonds in a dry pan until they smell like popcorn. I take the quinoa off the heat and let it sit covered for ten minutes. I fluff it with a fork. I fold in the almonds, the juice of one lemon, and 1 tablespoon of olive oil. Lemon brightens the earthy quinoa; almonds add crunch. I portion 3/4 cup per meal. Quinoa holds its shape better than white rice, which gets gritty. The almonds soften by Thursday, but they still provide contrast. It’s a dense side that doesn’t dry out in the microwave. Sometimes I add parsley, but it’s not necessary. The lemon and almond do the work. You might also like: 11 Crockpot Meal Prep Worth Trying

Bento Box Adult Lunch Box – 4 Pack, 5
If you want something that just works, Bento Box Adult Lunch Box – 4 Pack is a safe bet (24 reviews, 4.5 stars).
7. Roasted Brussels Sprouts with Balsamic Glaze

Brussels sprouts need high heat and space. I buy a 1-pound bag at Target for $2.99. I trim the stems and cut them in half. I toss them with 2 tablespoons of olive oil, 1/2 teaspoon of salt, and 1/4 teaspoon of black pepper. I place them cut-side down on a sheet. This is critical. They need direct contact with the hot metal to caramelize. I roast at 425 degrees for 25 minutes. The flat sides turn dark brown; the outer leaves get crispy. The smell is heavy, but the browning makes them sweet. I pull them out and drizzle 1 tablespoon of Trader Joe’s balsamic glaze over the hot pan. The bottle costs $3.99 and lasts me three months. The heat makes the vinegar sticky. I toss the sprouts to coat them. I portion 5 or 6 halves into glass containers. When reheated, they lose the outer leaf crispness. That’s just the microwave. But the cut side stays meaty, and the balsamic forms a sweet, acidic lacquer. They hold up through Friday. Don’t use frozen sprouts. It’s a disaster. They turn into wet sponges. Buy them fresh.
8. Brown Rice and Black Bean Mix

This is my most utilitarian side. I use 1 cup of dry short-grain brown rice. I buy Lundberg Family Farms at Whole Foods for $5.39 a bag. Short-grain is stickier and chewier than long-grain, which matters for reheating. I cook it with 2 cups of water and a pinch of salt. It takes 45 minutes. While that cooks, I open a 15-ounce can of Kroger black beans, $0.89. I drain and rinse the beans until the water runs clear. The starchy liquid turns the dish into gray sludge if you leave it. I learned this when I took a muddy, unappetizing batch to work in 2023. I mix the hot rice with the rinsed beans, 1 teaspoon of garlic powder, and 1/2 teaspoon of dried oregano. The heat from the rice warms the beans. I pack 1 cup per container. It’s heavy, starchy, and bland on its own. I do this on purpose. It’s a neutral base that absorbs the sauce from whatever protein I pack, like salsa chicken. The beans stay intact, and the rice keeps a chewy resistance for three days. I sprinkle a little extra salt on it before microwaving.
9. Shredded Carrot and Cabbage Slaw

I don’t chop my own cabbage. I buy a 10-ounce bag of 365 Shredded Green Cabbage at Whole Foods for $2.99. I buy whole carrots for $1.49. I peel and grate two large carrots on a box grater. Pre-shredded carrots are too dry. I mix the cabbage and grated carrots in a large bowl. For the dressing, I skip mayonnaise. Mayo-based slaws separate by day three. Instead, I whisk 2 tablespoons of olive oil, 2 tablespoons of apple cider vinegar, 1 teaspoon of Dijon mustard, and 1/2 teaspoon of celery seed. I use Grey Poupon Dijon from Target, $3.79 for an 8-ounce jar. I pour the dressing over the vegetables and massage it in with my hands for thirty seconds. The cabbage squeaks. Massaging breaks down the tough fibers so it isn’t rigid. I pack 1 cup of slaw per container. This side needs a day in the fridge to taste right. The vinegar softens the cabbage, and the celery seed adds a savory note. It stays crunchy and bright all week. It doesn’t wilt like lettuce. I use this as a base for pulled pork or eat it with a turkey sandwich.
I don’t make all nine every week. I’d burn out. I usually pick two and rotate them based on my protein. My current rotation features the sweet potatoes and the cucumber salad. Building a reliable menu takes the guesswork out of Sunday afternoons. You won’t find yourself staring at sad, weeping broccoli like I did. Trust me. Stick to the measurements, don’t skip the drying steps, and get rid of your cheap plastic containers. The glass upgrade is non-negotiable if you want your food to taste like food on Thursday. If you found these helpful, pin this to your meal prep board. Start with the blistered green beans. They take the least effort and have the highest success rate.

Rubbermaid Brilliance Tritan Plastic Food Storage
Rubbermaid Brilliance Tritan Plastic Food Storage Containers BPA Free has been one of the most consistently praised picks in this category. 583 reviewers averaged 4.5/5.
Frequently Asked Questions
How long do meal prep sides usually last in the fridge?
Most vegetable and grain sides last four to five days in an airtight container. Using borosilicate glass instead of plastic helps prevent moisture buildup and stops the food from absorbing odors from the fridge.
Can I freeze my meal prep sides?
Grains like brown rice and quinoa freeze well, but high-water vegetables like cucumbers, zucchini, and roasted sweet potatoes turn to mush when thawed. Keep vegetable sides in the fridge and eat them within five days.
How do I stop roasted vegetables from getting soggy?
Let them cool completely on the baking sheet before packing them. If you put hot vegetables into a container and seal the lid, the trapped steam will make them wet and ruin the texture.
What are the best containers for meal prep?
Borosilicate glass containers are the best option. They don’t warp in the dishwasher, they don’t leach chemicals into your food when microwaved, and they don’t hold onto smells like plastic containers do.
