What’s Inside
- 1. Greek Yogurt Marinade: The Moisture Miracle
- 2. Cook to Exactly 165°F (Not a Degree Higher)
- 3. Slice Thin Before Cooking (Not After)
- 4. Parallel Cooking for 12-15 Meals in 30 Minutes
- 5. Cool Completely Before Containerizing
- 6. Chicken Thighs for Maximum Moisture
- 7. Account for 25% Weight Loss When Portioning
- 8. Broil Thin Cutlets Instead of Baking Whole Breasts
- 9. Freeze Marinated Chicken in Bags
- 10. Dice or Shred for Maximum Versatility
- 11. Add Cheese After Cooking
- 12. One-Pan Roasted Chicken and Vegetables
- 13. Use Rotisserie Chicken When Time Is Tight
- 14. Fresh Herbs and Citrus After Cooking
- 15. Meal Prep Different Flavor Profiles Each Week
Wednesday lunches used to be my low point every week. By then, my meal-prepped chicken breast had turned into a dry, flavorless disaster. After three years of testing different chicken breast dinner ideas, I finally cracked the code. These aren’t just recipes—they’re methods that keep chicken juicy, flavorful, and actually enjoyable by day five.
Most meal prep advice is useless. “Cook chicken and portion it out” doesn’t cut it. The difference between depressing dry chicken and something you look forward to eating comes down to specific techniques I’ll share below.
1. Greek Yogurt Marinade: The Moisture Miracle

I swear by marinating chicken breast in Greek yogurt for at least 2 hours before cooking. The yogurt’s natural enzymes tenderize the meat and lock in moisture, preventing that dreaded dry texture.
Here’s my go-to recipe: mix 1.5 lbs chicken breast with 1 cup Greek yogurt, juice and zest from 2 lemons, 2 tablespoons olive oil, 2 teaspoons dried oregano, and 3 minced garlic cloves. Pair it with quinoa, cucumber, cherry tomatoes, and feta for five servings at about 450 calories and 38 grams of protein each.
This works better than oil-based marinades because the yogurt coats the chicken, keeping it moist even after reheating. The tangy flavor also helps mask any “leftover” taste later in the week.
Pro tip: Don’t skip the lemon zest. The oils add brightness that makes reheated chicken taste closer to fresh. I keep a microplane grater in my prep drawer just for this.
2. Cook to Exactly 165°F (Not a Degree Higher)

People overcook chicken breast because they’re afraid of undercooking it. I get it—food safety matters. But cooking even a few degrees past 165°F sucks out moisture and ruins your week of meals.
I bought a $15 instant-read thermometer from Target three years ago, and it’s the best investment I’ve made for meal prep. Insert it into the thickest part of the breast, wait for the reading, and pull it at exactly 165°F. Then let it rest for 5 minutes before slicing.
During that resting period, I usually clean my prep dishes or make sauces. The carryover cooking will bring it up slightly, but you won’t lose the moisture that makes chicken worth eating.
Common mistake: checking temperature too early and poking multiple times. Each poke releases juices. Check once when you think it’s close, then decide.
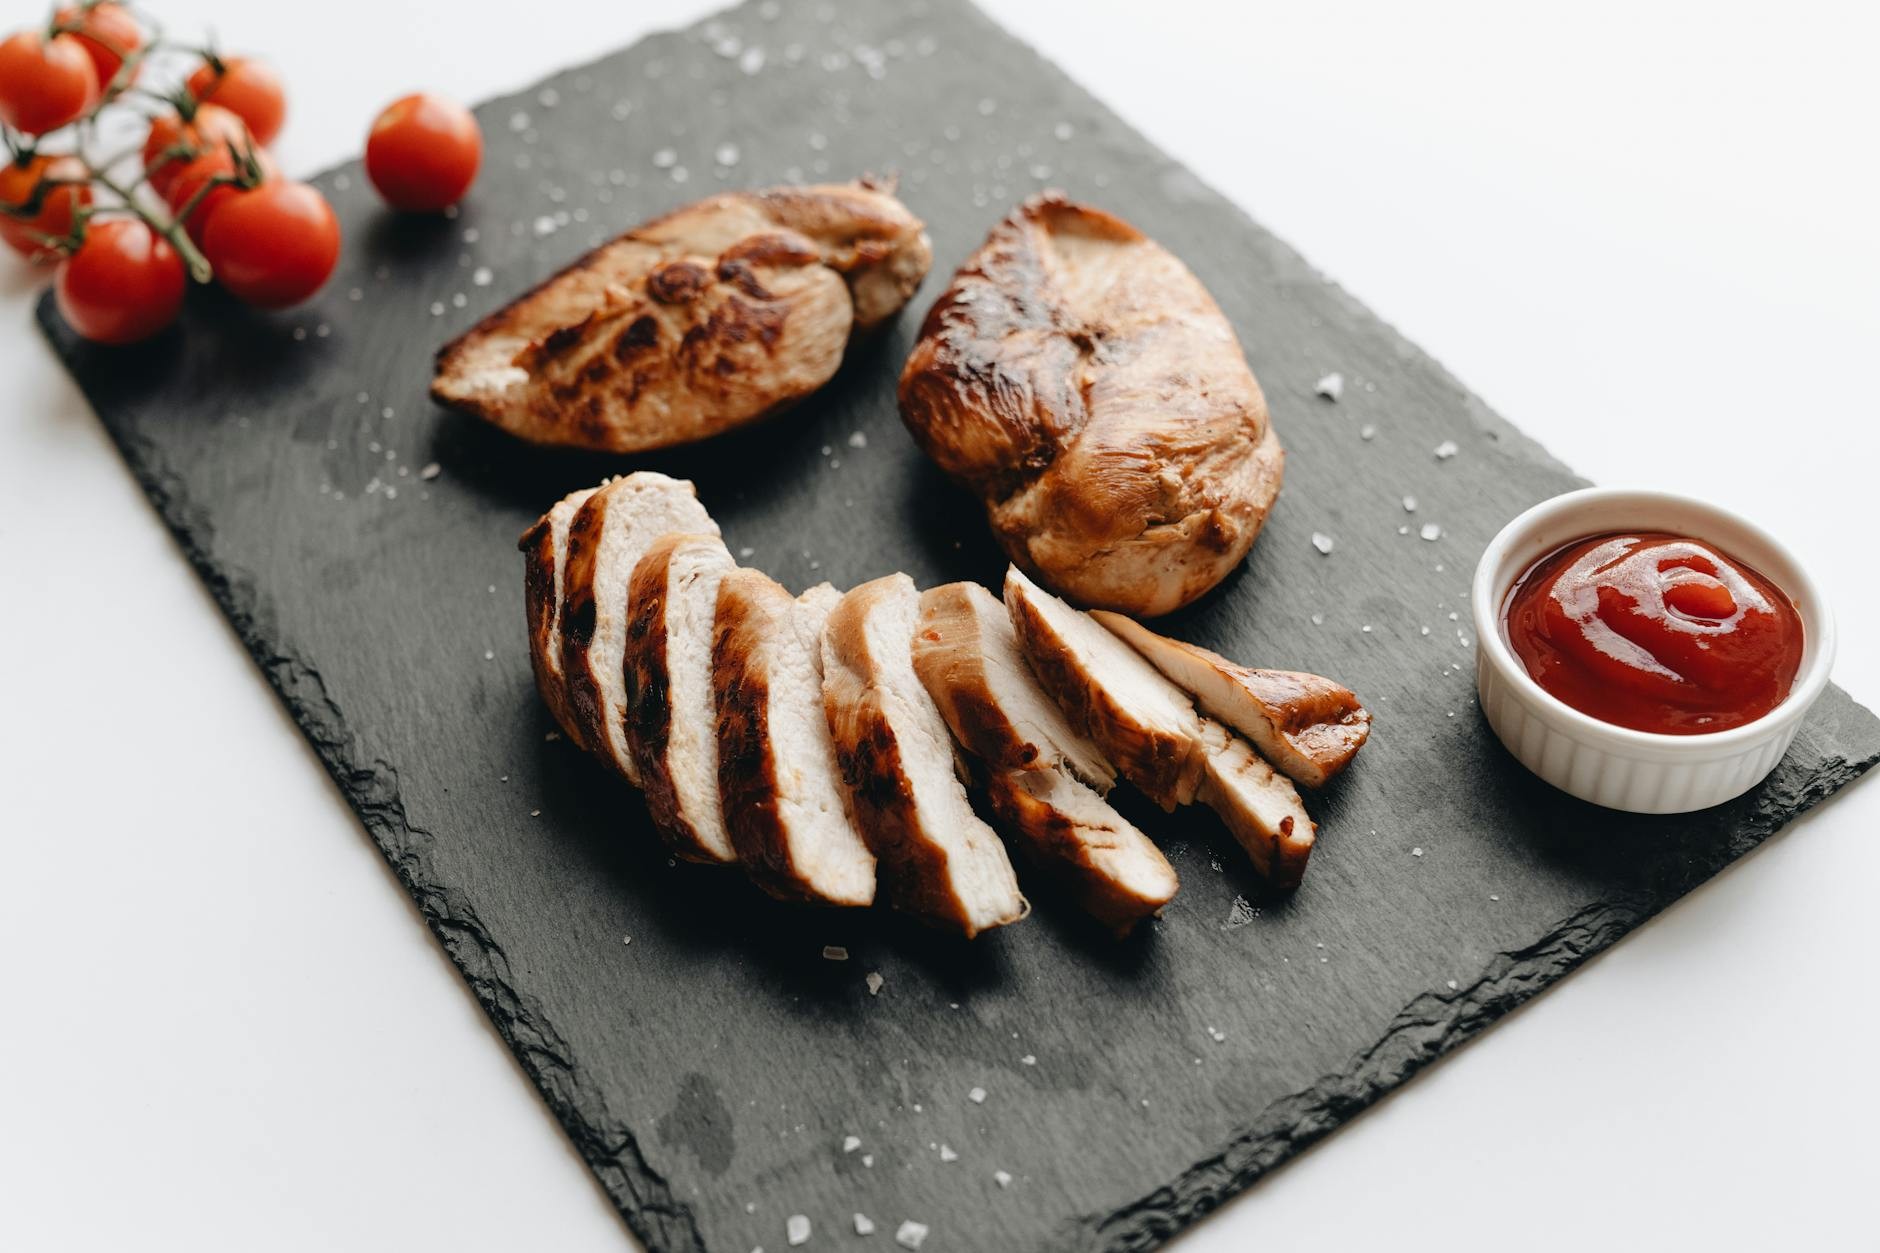
3. Slice Thin Before Cooking (Not After)

This changed everything for me. Instead of cooking whole chicken breasts, I slice each breast in half lengthwise to create thin cutlets about 1/2-inch thick. Uniform thickness means all pieces cook at the same rate, eliminating undercooked centers or overcooked edges.
Place the chicken breast flat on your cutting board, put your non-knife hand flat on top, and carefully slice horizontally through the middle. You end up with two thinner pieces that cook in half the time of a whole breast.
The faster cooking time means less opportunity for moisture loss. I can broil these thin cutlets for just 5 minutes per side (10-13 minutes total) instead of baking whole breasts for 30-35 minutes. That shorter cooking window makes a massive difference in texture.
Honestly, this technique alone solved my dry chicken problem. Even if I slightly overcook thin cutlets, they’re more forgiving than thick breasts.

VERONES 10 Pack 22 OZ Glass Meal Prep Containers
Honestly, VERONES 10 Pack 22 OZ Glass Meal Prep Containers surprised me — sturdier than it looks in the photos, and over 18 buyers gave it 4.5 stars.
4. Parallel Cooking for 12-15 Meals in 30 Minutes

I prep on Sundays, and I refuse to spend all day in the kitchen. Parallel cooking means doing multiple things simultaneously instead of one task at a time. While chicken breasts bake in the oven at 400°F for 25-30 minutes, I cook rice on the stovetop, clean prep dishes, and prepare sauces.
Here’s my Sunday timeline: 12:00pm—chicken in oven, rice on stove. 12:15pm—prep vegetables. 12:25pm—rice done, start cooling. 12:30pm—chicken done, start cooling. 12:35pm—make quick sauce. 12:45pm—portion everything into containers. Done by 1pm with 12-15 meals ready.
This efficiency approach is standard now, but when I started meal prepping in 2021, I’d cook one thing, wait for it to finish, then start the next. I wasted entire afternoons. Parallel cooking respects your time while producing the same quality results.
The key is choosing components with similar cook times. Chicken at 400°F for 25-30 minutes pairs perfectly with rice, quinoa, or roasted vegetables.
5. Cool Completely Before Containerizing

I learned this the hard way after ruining an entire week of meals. Never put hot food directly into storage containers. Hot food creates condensation that leads to soggy, deteriorated meals by Wednesday.
Spread cooked items on sheet pans for 15-20 minutes to cool completely. My chicken goes on one pan, rice on another, vegetables on a third. I’ll often stick them in front of a fan to speed things up if I’m in a hurry.
The condensation issue is real. When hot food meets a closed container, steam forms, condenses on the lid, and drips back down onto your food. By Thursday, you’ve got mushy rice and watery chicken that nobody wants to eat. I’ve thrown away so many meals before figuring this out.
Pro tip: If you’re impatient, put the sheet pans in the fridge for 10 minutes instead of waiting at room temperature. Just don’t container them while they’re still warm to the touch.
6. Chicken Thighs for Maximum Moisture

I know this article is about chicken breast dinner ideas, but I’d be lying if I didn’t mention that chicken thighs stay moist for 5 days refrigerated way easier than breasts. If moisture retention is your priority, thighs are more forgiving.
I roast thighs at 425°F for 25-30 minutes until they reach 165°F, seasoned simply with salt, pepper, and garlic powder. Thighs contain more fat, which preserves moisture during reheating. The texture on day five is nearly identical to day one.
That said, breasts have their place. They’re leaner (important if you’re tracking macros), they have a cleaner flavor that works with more cuisines, and honestly, they look better in meal prep containers. I alternate between breasts and thighs depending on my week.
When I know I’ll be eating meals cold (like salads), I always choose breast. When I know I’ll be reheating everything (like grain bowls), I lean toward thighs. Match your protein to your planned eating style.

Mueller The Real Original Pro Chopper since 2013 Vegetable
If you want something that just works, Mueller The Real Original Pro Chopper since 2013 Vegetable Chopper Man is a safe bet (385 reviews, 4.5 stars).
7. Account for 25% Weight Loss When Portioning

This confused me for months when I started meal prepping. I’d buy what I thought was enough chicken, cook it, and end up short on portions. A 4-ounce raw chicken breast weighs approximately 3 ounces after cooking due to moisture loss.
If you want 5 servings for Monday-Friday lunches with 4 ounces of cooked chicken each, you need about 26-27 ounces of raw chicken (not 20 ounces). I always buy slightly more than I think I need because running out mid-week is the worst.
I weigh everything on a cheap kitchen scale from Amazon. When I’m at Costco buying chicken, I calculate based on cooked weight. Their 3-pound pack of chicken breasts yields about 2.25 pounds cooked, which gives me roughly 9 four-ounce servings.
Common mistake: measuring portions before cooking and assuming that’s what you’ll get. Always calculate based on cooked weight, or you’ll consistently come up short.
8. Broil Thin Cutlets Instead of Baking Whole Breasts

Broiling changed my chicken game. I broil thin chicken cutlets for 5 minutes per side (10-13 minutes total) instead of baking whole breasts for 30+ minutes. The high heat cooks them faster and more evenly, reducing the window for overcooking.
My oven’s broiler runs at about 550°F, which creates a golden exterior while keeping the inside juicy. I arrange the thin cutlets on a sheet pan, spray with a tiny bit of oil, season, and broil on the top rack. Flip once halfway through.
The shorter cooking time means I can prep chicken for the whole week in under 15 minutes of actual cook time. Plus, the slightly charred edges add flavor that makes reheated chicken taste better than plain baked versions.
Watch them closely though. Broilers vary wildly between ovens. My old apartment’s broiler was weak and needed 7 minutes per side. My current one is aggressive and only needs 4 minutes per side. Check at the minimum time and adjust from there.
9. Freeze Marinated Chicken in Bags

This is my secret weapon for weeks when I don’t have time to prep. I freeze marinated chicken in freezer bags with liquid marinade for convenient future cooking. Barbecue sauce, salad dressing, or custom marinades all work effectively.
I’ll spend 15 minutes on a Sunday putting raw chicken breasts into freezer bags with different marinades—teriyaki in one, Italian dressing in another, buffalo sauce in a third. Then I freeze them flat so they stack nicely. When I need them, I thaw in the fridge overnight and cook the next day.
The marinade freezes around the chicken, so it’s essentially marinating the entire time it thaws. I’ve had chicken marinating in the freezer for 2 months that turned out incredibly tender and flavorful when finally cooked.
Pro tip: Label everything with the date and marinade type. I use a Sharpie directly on the freezer bag. Future you will appreciate knowing what’s what when you’re staring into a freezer full of chicken.
Fuzion Food Scale, 1g/0.1oz Digital Kitchen Scale – 22lb
Fuzion Food Scale has been one of the most consistently praised picks in this category. 395 reviewers averaged 4.5/5.
10. Dice or Shred for Maximum Versatility

I used to always slice chicken into neat strips, but dicing or shredding opens up way more meal options. Diced chicken works for salads, wraps, and casseroles, while shredded chicken works for tacos, bowls, and grain dishes.
After cooking and cooling, I dice chicken into roughly 1/2-inch cubes or shred it using two forks (or my stand mixer with the paddle attachment if I’m doing a large batch). Then I portion into containers immediately to prevent waste.
The smaller pieces also reheat more evenly than large slices. When you microwave a big chicken breast slice, the edges often get rubbery while the center stays cold. Smaller pieces heat through consistently.
I keep some diced and some shredded each week for variety. Monday might be a chicken Caesar wrap with diced chicken, while Wednesday is shredded chicken burrito bowls. Same protein prep, completely different meals.
11. Add Cheese After Cooking

Feta cheese, goat cheese, or parmesan added to roasted chicken and vegetable bowls creates flavor without extra cooking. Cheese adds creaminess and tanginess that makes meal-prepped chicken taste fresher throughout the week.
I crumble feta directly into my Mediterranean-style bowls—it works particularly well with the Greek yogurt marinade I mentioned earlier. The salty, tangy cheese balances the lemon and herbs perfectly. I buy the Athenos crumbled feta from Kroger because it’s pre-crumbled and stays fresh for weeks.
For Italian-inspired bowls, I shave fresh parmesan over the top right before eating. It takes 30 seconds and makes the meal feel restaurant-quality instead of meal-prepped. The key is adding cheese at the end, not cooking it with the chicken, so it stays fresh and doesn’t get weird and congealed.
Common mistake: adding cheese before reheating. Microwaved cheese gets oily and separated. Always add it after heating for the best texture and flavor.
12. One-Pan Roasted Chicken and Vegetables

Roasting chicken with uniform-sized vegetables in one pan creates complete meals with minimal cleanup. I use zucchini, grape tomatoes, bell peppers, and broccoli most often. The trick is cutting everything to similar sizes so they finish cooking simultaneously.
I slice onions thinner than other vegetables since they cook more slowly. Everything gets tossed with olive oil, salt, pepper, and whatever herbs I’m feeling that day. Then it all goes on one large sheet pan with the chicken cutlets arranged in the center.
Roast at 425°F for 20-25 minutes, and you’ve got complete meals ready to portion. The vegetables release moisture that keeps the chicken from drying out, and the chicken drippings flavor the vegetables. It’s a win-win situation.
I line my sheet pans with parchment paper for even easier cleanup. After portioning meals, the pan just needs a quick rinse instead of serious scrubbing. Small efficiency gains like this add up when you’re prepping every week.

8 Pack 36oz Large Glass Meal Prep Containers with lids
8 Pack 36oz Large Glass Meal Prep Containers with lids has been one of the most consistently praised picks in this category. 859 reviewers averaged 4.5/5.
13. Use Rotisserie Chicken When Time Is Tight

I’m not too proud to admit that some weeks I buy rotisserie chicken from Costco or Whole Foods instead of cooking from scratch. Rotisserie chicken requires zero active cooking time and can be shredded directly into meal prep containers.
A Costco rotisserie chicken costs $4.99 and yields about 3 pounds of meat, which is roughly 12 four-ounce servings. That’s cheaper per serving than buying raw chicken breasts when you factor in your time. During particularly busy weeks, this is my go-to.
The flavor is already there, so I just shred it and build bowls around it. It works especially well for Mexican-inspired bowls, Asian rice bowls, or chicken salad. The slight trade-off in freshness is worth it when the alternative is not meal prepping at all.
Pro tip: Pull the meat off while the chicken is still slightly warm. It’s way easier than trying to shred cold chicken. I do this as soon as I get home from the store.
14. Fresh Herbs and Citrus After Cooking

Adding fresh herbs like thyme, rosemary, or parsley, or citrus juice like lemon or lime immediately after cooking adds brightness that masks reheating fatigue. These additions take 2 minutes but significantly improve how meal-prepped chicken tastes on day four or five.
I keep a bunch of parsley in a glass of water in my fridge all week. Right before eating a meal, I chop a tablespoon and sprinkle it over the top. The fresh, grassy flavor makes everything taste like it was just cooked instead of reheated.
Citrus works the same way. A squeeze of fresh lemon juice over reheated chicken brings back that bright, fresh flavor that gets lost during storage. The acidity cuts through any richness and makes your taste buds think the food is fresher than it actually is.
This is especially important on Thursdays and Fridays when meal prep fatigue sets in. That little bit of fresh flavor makes the difference between eating your prepped meal or ordering takeout because you’re bored of your food.
15. Meal Prep Different Flavor Profiles Each Week

The biggest mistake I made early on was prepping the same flavor profile for all five days. By Wednesday, I was so sick of teriyaki chicken that I’d order pizza. Now I prep 2-3 different flavor profiles in smaller batches throughout the week.
I might do Greek-marinated chicken for Monday and Tuesday lunches, switch to buffalo chicken for Wednesday and Thursday, then do a simple garlic-herb version for Friday. Same base ingredient, completely different meals. This keeps me from getting bored and actually eating what I prepped.
The parallel cooking method I mentioned earlier works perfectly for this. While one batch of chicken bakes with Greek seasoning, another batch can bake with completely different seasonings on a separate pan. They cook at the same temperature for the same time.
I also vary my sides. Greek chicken gets quinoa and cucumber salad. Buffalo chicken gets ranch-dressed coleslaw and sweet potato. Garlic-herb chicken gets roasted Brussels sprouts and wild rice. Different combinations keep your palate interested all week long.
After three years of testing these chicken breast dinner ideas every single Sunday, I can confidently say these techniques actually work. The Greek yogurt marinade, precise temperature control, and thin-sliced cutlets have completely eliminated dry, sad chicken from my meal prep routine. Start with just 2-3 of these techniques and build from there. Pin this for your next prep session—you’ll thank yourself on Thursday when your chicken still tastes amazing.

Duo Plus 9-in-1 Multicooker, Pressure Cooker, Slow Cook
Duo Plus 9-in-1 Multicooker has been one of the most consistently praised picks in this category. 523 reviewers averaged 4.5/5.
Frequently Asked Questions
How do you keep chicken breast moist for meal prep?
Marinate in Greek yogurt for at least 2 hours before cooking, cook to exactly 165°F (not higher), and let it rest 5 minutes before slicing. The yogurt’s enzymes tenderize the meat while adding moisture insurance that lasts through reheating.
Can you meal prep chicken breast for 5 days?
Yes, but cool it completely on sheet pans before containerizing to prevent condensation. Store in airtight containers in the fridge. Add fresh herbs or citrus juice when reheating on days 4-5 to mask any reheating fatigue.
Should I slice chicken breast before or after cooking for meal prep?
Slice raw chicken into 1/2-inch thick cutlets before cooking for faster, more even cooking. This prevents overcooked edges and undercooked centers. You can also dice or shred after cooking for maximum versatility in different meals.
What temperature should I cook chicken breast for meal prep?
Cook to exactly 165°F internal temperature using a meat thermometer. Even a few degrees higher causes significant moisture loss. I bake thin cutlets at 400°F for 25-30 minutes or broil for 10-13 minutes total.