What’s Inside
- Choose the Right Meat for Your Turkey Meal Prep
- Stop Washing Raw Meat Before Cooking
- Buy Glass Containers for Turkey Meal Prep Storage
- Master the Air Fryer for Quick Cooking
- Batch Cook Grains to Build Better Turkey Meal Prep Bowls
- Prevent Flavor Fatigue with Bold Seasonings
- Never Reuse Marinades Without Boiling
- Reheat Gently to Maintain Moisture
Last Tuesday at Whole Foods, I stared at a sad, gray brick of leftover ground poultry in my cart and realized my turkey meal prep was failing. I’m usually pretty good at this stuff. But I stood there looking at my receipt, realizing I’d just spent forty dollars on ingredients that were going to taste like wet cardboard by Wednesday. I tried this wrong for months before figuring it out. I’d cook five pounds of meat on Sunday, shove it in cheap plastic tubs, and wonder why I couldn’t stomach my lunches by Thursday. The smell alone when I popped the lid was enough to make me order takeout. You know that weird, sulfurous fridge smell? Yeah. That one. Let’s fix that right now. Preparing your food in advance doesn’t have to mean eating chalky, flavorless dust. You can actually make food you want to eat. I’m going to walk you through exactly how I do this every single week. No complicated chef tricks. Just real, practical steps to make your food taste good and stay safe in the fridge. I spent hours reading food safety guidelines and experimenting with different storage methods until I finally cracked the code. Now, my Sunday afternoons are actually productive.
1. Choose the Right Meat for Your Turkey Meal Prep

When I first started cooking my lunches in advance, I bought the cheapest ground meat I could find at Walmart. It was an 85/15 blend for $3.49 a pound. Big mistake. When I cooked it, my hot cast iron pan filled with a massive pool of greasy, gray liquid. The meat basically boiled in its own fat. The texture was terribly squishy and gross. Skip the fat-free stuff too. The 99/1 fat-free option tastes like wet cardboard and turns to literal dust in your mouth. You want the sweet spot. I highly recommend picking up 93/7 lean ground turkey. It’s the absolute best option for your turkey meal prep. It has just enough fat to keep the meat juicy without turning your storage containers into an oil slick. I usually grab the Butterball 93/7 ground turkey at Kroger. It runs about $5.99 for a 16 oz package. If you’re buying whole breasts, look for the Jennie-O fresh turkey breast tenderloins, which usually cost around $8.99 for 24 oz. The 93/7 ratio gives you a fantastic high-protein base that absorbs sauces beautifully. When you brown it in a hot pan, you actually get those crispy, caramelized edges instead of a steamed, gray mess. I’ve found that spending that extra dollar or two per pound makes the difference between actually eating my prepped lunches and tossing them in the trash on Friday morning. Plus, the 93/7 blend reheats much better. You won’t have to worry about the meat drying out in the microwave either. The slight bump in fat content acts like a protective barrier for the protein.
2. Stop Washing Raw Meat Before Cooking

I need to confess something embarrassing. Up until about three years ago, I used to rinse my raw poultry under the kitchen sink. I thought I was cleaning it. I’d open a package of raw meat, run it under cold tap water, and pat it dry with paper towels. I’m cringing just thinking about it. Do not do this. Washing raw meat is a massive food safety hazard. You aren’t cleaning the meat. You’re actually blasting invisible drops of Salmonella and Campylobacter bacteria all over your clean dishes, your sink, and your countertops. I learned that the hard way when I got horribly sick after prepping my meals one Sunday. Now, I have a strict system. I use a dedicated plastic cutting board from Target. It’s the Room Essentials brand and cost me exactly $5.00. I only use this specific red board for raw poultry. I never let my fresh vegetables touch it. Once I’m done handling the raw meat, that board goes straight into the dishwasher on the highest heat setting. I immediately wash my hands with hot, soapy water. Dawn dish soap is my go-to. I use 2 pumps of soap and scrub for a full twenty seconds. You can’t take chances with cross-contamination when you’re cooking food that will sit in the fridge for four days. The bacteria will multiply. Just take the meat straight from the package into your hot skillet. The heat of the stove is what kills the bacteria. I keep a large bottle of antibacterial spray right next to my sink just in case any raw juices drip while I’m transferring the meat to the pan. It’s a small habit that keeps my entire kitchen sanitary.
3. Buy Glass Containers for Turkey Meal Prep Storage

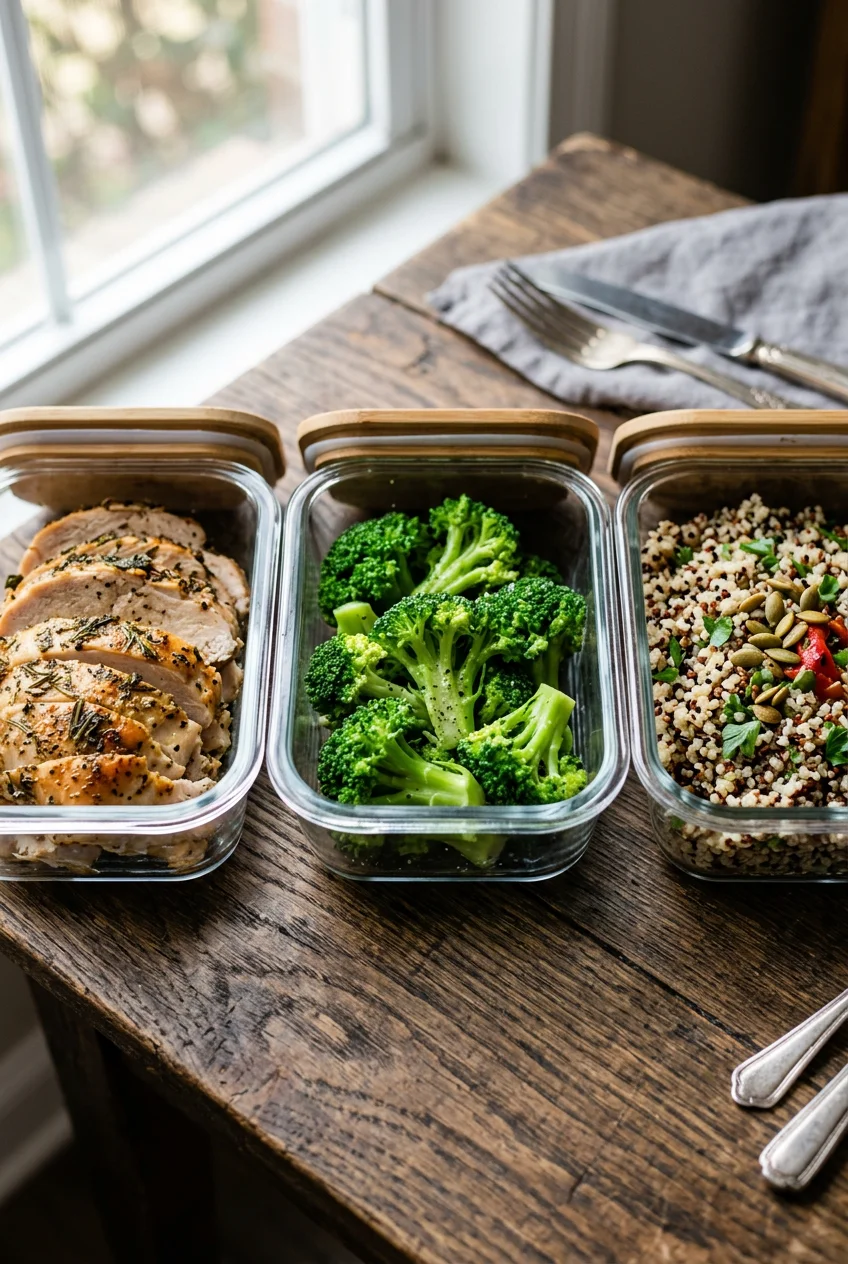
Let’s talk about storage. I ruined so many lunches by storing them in cheap plastic tubs. You know the ones. The flimsy black containers with the clear lids that you buy in a stack of fifty for ten bucks. I used those for a year. After a few weeks of holding tomato sauce and turmeric-spiced meat, they were permanently stained orange. Worse, they absorbed the smell of old garlic and onions. I couldn’t get the stink out no matter how hard I scrubbed. It made my fresh food taste like old leftovers. I finally gave up and switched to glass. Honestly, this completely changed how I view my leftovers. I bought a set of Pyrex 3-cup rectangular glass containers at Costco. A 10-piece set (5 glass bases, 5 plastic lids) cost me $24.99 on sale. They’re heavy, durable, and they never hold onto weird smells. When I pull a glass container out of the fridge, I can see exactly what’s inside. The heavy glass keeps the temperature stable. I can pop the glass base straight into the microwave or even the oven if I want to reheat something slowly. If you’re serious about your weekly lunches, you can’t skip this step. Throw away those warped plastic tubs. They aren’t doing you any favors. Glass containers also seal much tighter. I use the Rubbermaid Brilliance glass containers for soups and wet curries. They cost about $12.99 for a 3.2-cup container at Target, but the leak-proof seal means I won’t get mysterious meat juices leaking all over the inside of my tote bag. Plus, glass is naturally BPA-free, so you don’t have to worry about weird chemicals leaching into your hot meals. It’s a one-time investment that pays off for years. You might also like: 15 Brilliant Simple Meal Prep Ideas for a Fresh New Look

M MCIRCO 10-Pack,30 Oz Glass Meal Prep Containers 2
A dependable everyday pick — M MCIRCO 10-Pack pulls in 23 ratings at 4.5 stars. Not flashy, just solid.
4. Master the Air Fryer for Quick Cooking

I used to bake my poultry breasts in the oven for forty-five minutes. They always came out dry, tough, and stringy. It felt like chewing on an old shoe. Then I discovered the magic of rapid convection cooking. Air fryers are absolutely everywhere right now, and they’re perfect for cooking lean meats quickly. I personally swear by my Typhur Sync Air Fryer. It’s definitely a splurge at $299.00, but it has a built-in wireless temperature probe that guarantees perfect cooking. If you don’t want to spend that much, the Ninja 4-Quart Air Fryer from Walmart is a solid choice for $89.00. To get the juiciest meat possible, I preheat my air fryer to 360 degrees Fahrenheit. I rub a 16 oz raw breast with 1 tablespoon of olive oil, 1 teaspoon of kosher salt, and 1/2 teaspoon of black pepper. I place it in the basket and let it cook until the internal temperature hits 158 degrees Fahrenheit. Most people get this wrong. They cook it all the way to 165 degrees in the machine. If you do that, the residual heat will carry the temperature up to 175 degrees while it rests on your cutting board. It’s going to be completely ruined. Pull it at 158 degrees. Let it rest on a plate for ten full minutes. The temperature will rise to a perfectly safe 165 degrees while it rests. When you slice into it, the juices will literally run down your knife. It’s incredibly tender. You’ll never go back to baking them on a sheet pan once you see how much liquid stays trapped inside the meat. It’s honestly the best kitchen appliance I’ve ever purchased. You might also like: 20 Clever School Lunch Ideas You Can Try Today
5. Batch Cook Grains to Build Better Turkey Meal Prep Bowls

Eating plain meat and broccoli gets depressing very fast. I tried the ultra-low-carb thing a few years ago. I’d pack a container with just 6 oz of ground meat and a handful of steamed spinach. By 2 PM, I was so starving I’d end up buying a massive blueberry muffin from the coffee shop downstairs. It completely defeated the purpose of cooking at home. Now, I always batch cook complex carbohydrates alongside my protein. It gives the meal substance and keeps me full until dinner. Every Sunday, I cook a massive pot of organic brown rice or quinoa. I usually buy the 32 oz bag of Lundberg Family Farms Short Grain Brown Rice at Sprouts for $6.49. While the meat is browning in the skillet, I have a pot of rice simmering on the back burner. I use exactly 1 cup of dry rice to 2 cups of water, plus a heavy pinch of salt. Once it’s fluffy and the water is absorbed, I let it cool completely. Then I portion exactly 1/2 cup of cooked rice into each of my glass containers. The nutty smell of fresh brown rice mixed with savory roasted meat is incredible. I also roast a huge sheet pan of vegetables. I chop 2 large zucchini and 1 red bell pepper, toss them with 1 tablespoon of avocado oil, and roast them at 400 degrees Fahrenheit for twenty minutes. Having these grains and veggies ready to go means I can assemble five balanced lunches in under ten minutes. If you want to add even more volume, toss in a handful of fresh spinach right before you seal the lid. It wilts perfectly when you reheat the bowl later. You might also like: 15 Brilliant Batch Cooking Ideas That Actually Work
6. Prevent Flavor Fatigue with Bold Seasonings

I can’t eat the same exact flavor profile five days in a row. By Wednesday, my brain completely rejects the food. This is what people call flavor fatigue. It’s the number one reason people abandon their prepped lunches and order expensive takeout. To fix this, I rotate through different ethnic cuisines every single week. One week, I’ll do a Korean-inspired bowl. I brown 16 oz of ground meat in a skillet. Once it’s cooked, I pour in a sauce made from 2 tablespoons of Kikkoman Less Sodium Soy Sauce (which costs $3.29 at Kroger), 1 tablespoon of raw honey, 1 teaspoon of sesame oil, and 2 cloves of minced fresh garlic. The caramel-butter smell of the garlic and ginger hitting the hot pan is absolutely intoxicating. The sauce bubbles up and coats the meat in a dark, sticky, sweet glaze. The next week, I’ll switch to Mexican flavors. I’ll dump in 1 tablespoon of McCormick Chili Powder, 1 teaspoon of ground cumin, and 1/2 teaspoon of smoked paprika. I’ve found that using aggressive, bold spices hides the slightly gamey flavor that leftover poultry can sometimes develop after three days in the fridge. I also rely heavily on fresh herbs. A handful of chopped fresh cilantro or flat-leaf parsley stirred in right before eating completely wakes up a tired dish. Never skip the seasoning. Plain meat is a punishment, not a meal. I keep a massive spice rack organized by flavor profile just to make this step easier. It takes two extra minutes but completely saves my weekly lunch routine.

M MCIRCO 10-Pack,22 Oz Glass Meal Prep Containers
Honestly, M MCIRCO 10-Pack surprised me — sturdier than it looks in the photos, and over 86 buyers gave it 4.5 stars.
7. Never Reuse Marinades Without Boiling

I made a horrible mistake back in 2018. I was marinating some raw cutlets in a plastic zip-top bag. I used a bottle of Primal Kitchen Sesame Ginger Vinaigrette. It costs about $6.99 at Whole Foods. I let the raw meat sit in the dressing for four hours in the fridge. When I took the meat out to cook it, I looked at the leftover marinade in the bag. I thought it would make a great sauce to pour over my rice. So, I poured the raw, contaminated liquid straight out of the bag and over my cooked food. I spent the next two days shivering in bed with the worst stomach cramps of my life. I poisoned myself. You absolutely can’t reuse marinades that have touched raw meat unless you boil them aggressively. If you want to use your marinade as a sauce, you have two options. The best option is to pour half the fresh marinade into a clean jar and put it in the fridge before you ever touch the raw meat. If you forget to do that, you must pour the used marinade into a small saucepan. Bring it to a rapid, rolling boil on the stove. Let it boil vigorously for at least 1 to 2 minutes. This high heat kills the harmful bacteria. The sauce will bubble and thicken up nicely. Honestly, it’s safer to just make a fresh batch of sauce. Don’t risk your health just to save fifty cents worth of dressing. I keep a sharpie in my kitchen drawer specifically to label my marinade jars so I never mix them up again. It’s a foolproof system.
9. Reheat Gently to Maintain Moisture

The absolute worst part of eating leftovers is the reheating process. If you blast a container of cooked poultry in the microwave on high power for three minutes, you’re going to end up with hot, rubbery gravel. The microwave forces all the water molecules out of the meat. I used to do this at my office job. The edges of the meat would literally pop and explode, leaving hard, dry crusts. I couldn’t chew it. Now, I have a specific reheating method. If I have time, I reheat my food in the oven. I put the meat in a small glass dish, add exactly 2 tablespoons of Trader Joe’s Organic Chicken Broth (which costs $2.99 a carton), cover the dish tightly with aluminum foil, and bake it at 325 degrees Fahrenheit for about twenty minutes. The steam from the broth keeps the meat incredibly moist. If I’m at work and have to use the microwave, I turn the power level down to 50 percent. I take a clean paper towel, run it under the sink until it’s damp, and drape it directly over my glass container. I microwave the food in 60-second intervals. The damp paper towel creates a mini steam room inside the microwave. The moisture stays trapped in the container instead of evaporating into the air. It takes a little longer, but the texture is a hundred times better. Your food won’t taste like leftovers if you treat it gently during the reheating process. I even keep a small bottle of soy sauce or hot sauce at my desk to add a fresh splash of liquid right before eating. It makes a massive difference.
I hope these tips help you stop eating sad, dry lunches. Preparing your food ahead of time is supposed to make your life easier, not miserable. I’ve ruined enough batches of food to know exactly what doesn’t work. Stick to the 93/7 lean meat, grab a good digital thermometer, and please stop washing your raw poultry in the sink. If you follow these exact steps, you’ll actually look forward to opening your fridge on a Wednesday afternoon. I’d love to hear how your next batch turns out. If you found this helpful, pin this article to your favorite recipe board on Pinterest so you can find it next Sunday when you’re making your grocery list. Don’t let one bad batch of dry meat ruin your motivation. You’ve got this.

Vtopmart 5Pack 22oz Glass Storage Containers with Lids
A dependable everyday pick — Vtopmart 5Pack 22oz Glass Storage Containers with Lids pulls in 34 ratings at 4.5 stars. Not flashy, just solid.
Frequently Asked Questions
How long does turkey meal prep last in the fridge?
Cooked poultry is safely stored in airtight glass containers for up to four days in the refrigerator. You must keep your fridge temperature at 40 degrees Fahrenheit or below. If you can’t eat it by day four, move it to the freezer.
Can I freeze my turkey meal prep bowls?
Yes, you can freeze your prepped bowls for up to four months. I recommend using freezer-safe glass containers. Let the food cool completely in the fridge first before transferring it to the freezer to prevent ice crystals from ruining the texture.
Why is my ground turkey always dry?
You’re likely buying fat-free meat or overcooking it. I highly recommend using a 93/7 fat ratio for the best moisture. Always use a digital meat thermometer and pull the meat from the heat exactly when it hits 165 degrees Fahrenheit.
What is the best way to reheat turkey meal prep?
The best method is baking it in a 325-degree oven with two tablespoons of chicken broth covered in foil. If using a microwave, cover your glass container with a damp paper towel and heat on 50 percent power to trap the steam.
