What’s Inside
- Pick The Right Grain For Your Quinoa Meal Prep
- The Mandatory Rinse You Probably Skip
- Toast The Grains Before Adding Liquid
- Master The Precise Liquid Ratio For Quinoa Meal Prep
- Ditch Tap Water For Savory Broth
- Season The Pot Generously
- The No-Peeking Rule During Simmering
- The Crucial Post-Cook Rest And Fluff
- Cool Completely Before Packing It Away
Three years ago, I stared at a plastic container of grey, mushy sludge that smelled faintly of wet cardboard. That was my very first attempt at quinoa meal prep. It was a complete disaster. I ended up throwing the entire batch into the trash because my kitchen smelled terrible, and I literally had nothing to eat for the week. I’m telling you this humiliating story because I want you to know I wasn’t always good at this. Cooking grains in bulk seems simple until you try it and end up with a bitter, waterlogged mess that ruins your lunches for the entire week. I spent months tweaking liquid ratios, buying different grocery store brands, and ruining perfectly good pots before I finally cracked the code. Today, I’m sharing the exact methods I use every single Sunday to get perfectly fluffy, flavorful results. These aren’t just generic tips from a random blog. These are the hard-learned lessons from my own messy kitchen failures. We’re going to fix the soggy textures, kill the bitter aftertaste, and make your weekly lunches something you actually look forward to eating. Let’s make sure you never have to eat a sad, crunchy salad again.
1. Pick The Right Grain For Your Quinoa Meal Prep

I used to grab whatever bag looked prettiest on the grocery store shelf. I did this wrong for months before figuring it out. Last July, I made a delicate summer fruit salad with mint and feta, and I dumped a massive scoop of black quinoa into it. The texture was wrong. It felt like chewing on tiny hard pebbles mixed with soft peaches. It looked like a muddy mess instead of a vibrant summer dish, and I hated it. You need to match the variety to your recipe. If you want a fluffy, light base that absorbs olive oil and lemon dressings, you need white quinoa. I buy the Great Value Organic White Quinoa for exactly $3.44 for a 16 oz bag at Walmart. It’s cheap, mild, and cooks up soft. On the other hand, if you’re building a hearty winter bowl with thick tahini dressing and roasted root vegetables, that’s when you reach for the dark stuff. I like the BetterBody Foods Organic Quinoa tri-color blend. It costs around $20.56 on Amazon for a 4-pound tub. The darker red and black grains have a thicker skin that gives you a satisfying, chewy bite. They hold up under heavy sauces without turning to mush. Skip the fancy blends if you just want a simple side dish. Stick to plain white. It’s the most forgiving variety for beginners and blends into almost any flavor profile.
2. The Mandatory Rinse You Probably Skip

Let’s talk about the dreaded soapy taste. A lot of people hate this grain because they think it’s naturally bitter. I’m guilty of skipping the rinse because I was feeling lazy on a Sunday afternoon. Last Tuesday at Whole Foods, I bought a bag that said “pre-rinsed” right on the label. I trusted the packaging and cooked it straight from the bag. My lunch tasted like I washed it in dish soap. I couldn’t get the bitter taste out of my mouth all afternoon. It was awful. Quinoa has a natural outer coating called saponin. It acts as a bitter defense for the plant to keep birds and bugs away. It tastes terrible to humans. You must rinse it yourself, no matter what the bag claims. I pour 1 cup of dry grains into my OXO Good Grips Fine Mesh Strainer. It cost me $14.99 at Whole Foods and it’s worth every penny. Hold the strainer under cold running water for at least 30 to 45 seconds. Use your fingers to aggressively rub the grains together. The water will look cloudy and bubbly at first. Keep rinsing and rubbing until the water runs clear. Don’t just soak it in a bowl. Soaking makes the bitter saponins seep directly into the center of the grain. Just do a fast, aggressive rinse under the cold faucet.
3. Toast The Grains Before Adding Liquid

This step takes three extra minutes and changes the entire flavor of your food. After you rinse the grains, they’ll be wet and sticky in your strainer. Shake off the excess water and dump them into a dry skillet over medium heat. Don’t add oil or butter. I use a cheap non-stick 10-inch skillet so there’s plenty of surface area. Push the grains around constantly with a wooden spoon. At first, it sounds like wet sand scraping against metal. After about two minutes, the moisture cooks off. The grains will start to separate, dry out, and pop slightly in the pan. Suddenly, your kitchen will smell exactly like toasted pecans. It’s an incredible aroma. I burned a massive batch last month because I walked away to check my phone for two minutes. Learned that the hard way. Don’t walk away from the stove. Keep stirring until the grains are fragrant and golden brown. I swear by doing this with Trader Joe’s Organic White Quinoa. It costs $3.99 for a 16 oz bag. Toasting brings out a deep, nutty flavor you just can’t get from boiling raw grains. It removes that grassy, earthy undertone that puts off picky eaters. Once they smell toasted, pull the pan off the heat so they don’t scorch. You might also like: 15 Cozy Easy Dinner Ideas for Every Budget

Vtopmart 5Pack 22oz Glass Storage Containers with Lids
Vtopmart 5Pack 22oz Glass Storage Containers with Lids has been one of the most consistently praised picks in this category. 34 reviewers averaged 4.5/5.
4. Master The Precise Liquid Ratio For Quinoa Meal Prep

Most packages tell you to use a 1:2 ratio. They say one cup of dry grains needs two cups of boiling water. The package is lying to you. I followed those instructions for years and always ended up with a waterlogged, soggy mess. The secret to fluffy grains is using less liquid. For standard stovetop cooking, you need a 1:1.75 ratio. That means 1 cup of dry quinoa needs exactly 1 and 3/4 cups of liquid. It sounds like a tiny difference, but it changes everything. If you’re using an electric pressure cooker, the rules change. I use my Instant Pot Duo 7-in-1 for my weekly prep. The ratio for the Instant Pot is 1:1. One cup of rinsed grains to one cup of liquid. Seal the lid and cook on high pressure for 1 minute. Then let it do a natural pressure release for 12 minutes. Don’t touch the steam valve before those 12 minutes are up. I set the timer and walk away to chop my vegetables. It sounds crazy to cook something for just one minute, but the trapped pressure works every time. It’s the best way to get distinct, fluffy grains instead of a gummy paste. You might also like: 15 Stunning Easy Lunch Ideas You Need to See
5. Ditch Tap Water For Savory Broth

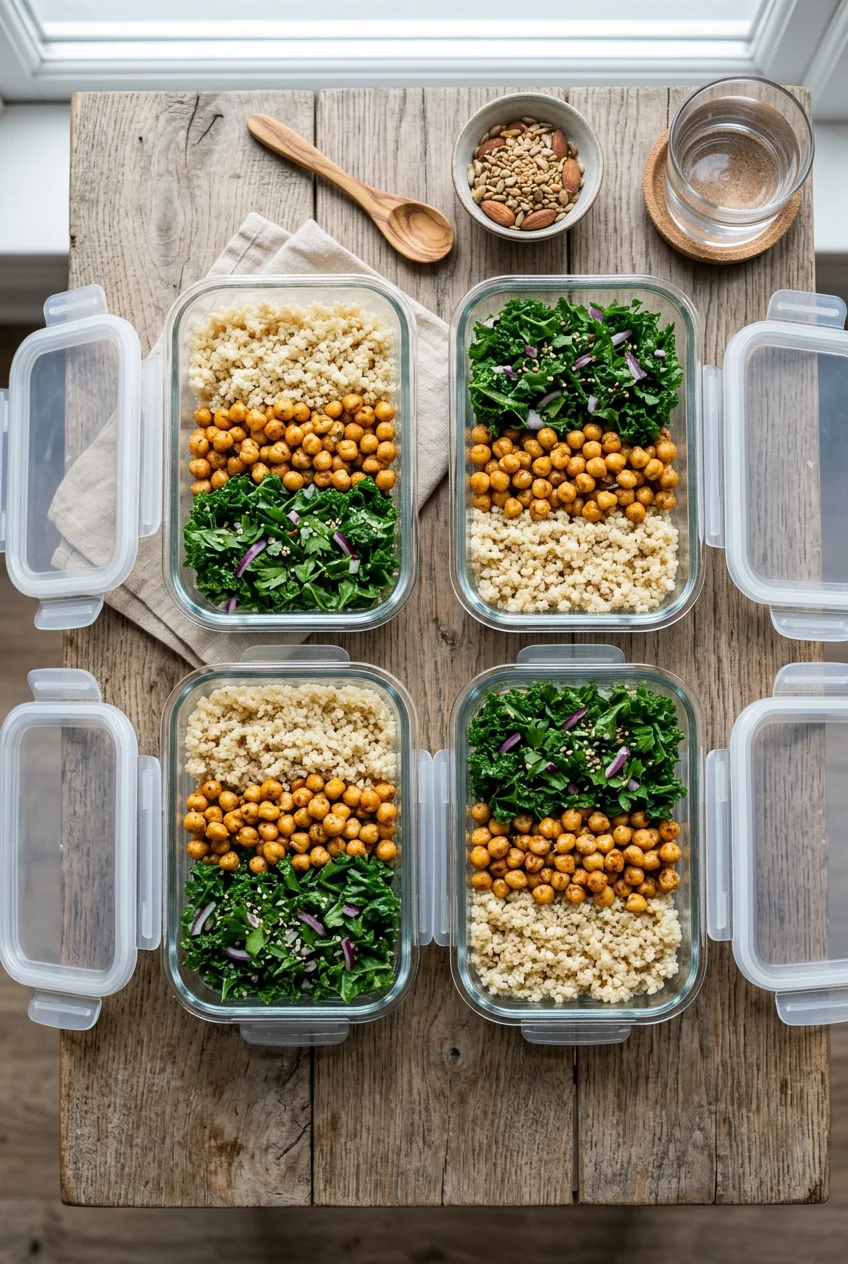
Plain tap water is boring. If you boil your grains in plain water, you’ll get boring food that you won’t want to eat by Wednesday. I learned this the hard way when I tried to eat plain water-boiled quinoa and unseasoned chicken for a week. It tasted like sadness. You need to infuse flavor from the start. I swap out plain water for a rich, low-sodium broth. I buy Pacific Foods Organic Low Sodium Vegetable Broth. It costs $4.79 for a 32 oz carton at Sprouts. The dark broth adds savory depth and rich herbal notes to every grain. If I’m making a high-protein bowl, I use chicken bone broth for extra nutrients. A huge trend right now is building these dense high-protein bowls for lunch. I mix 1 cup of my savory broth-cooked quinoa with spicy roasted chickpeas, wilted spinach, and a lemon tahini dressing. I toss the chickpeas in smoked paprika and garlic powder before roasting. That combination gives me over 25 grams of protein in one container. The savory broth makes the whole bowl taste cohesive. If you don’t keep liquid broth in the pantry, you can dissolve a chicken bouillon cube in warm water. Just watch the sodium so you don’t bloat. You might also like: 15 Brilliant Batch Cooking Ideas That Actually Work
6. Season The Pot Generously

Bland food is why people quit meal prepping. Even if you use a savory broth, you still need to add salt directly to the cooking liquid. I add 1/2 teaspoon of Morton Kosher Salt for every 1 and 3/4 cups of liquid. I buy the big blue box for $3.29 at Kroger, and it lasts me six months. You must salt the water before it boils. The grains absorb the seasoned liquid as they expand. If the liquid isn’t heavily seasoned, the inside of the grain will taste flat and earthy. You can’t just sprinkle table salt on top after it’s cooked. It won’t taste right. Now, if you’re making sweet breakfast bowls, skip the savory broth and the salt. I prep sweet versions for busy mornings because I was bored of regular rolled oats. I cook 1 cup of rinsed grains in 1 and 3/4 cups of Silk Unsweetened Almond Milk. I buy the half-gallon for $3.49 at Target. I add a tiny pinch of salt, a splash of pure vanilla extract, and a dash of cinnamon. It cooks up into a thick, creamy porridge that tastes like expensive oatmeal but has more protein.
![[8-Pack,30 oz]Glass Meal Prep Containers](https://m.media-amazon.com/images/I/713Zfdsgi4L._AC_UL320_.jpg)
[8-Pack,30 oz]Glass Meal Prep Containers
A dependable everyday pick — [8-Pack pulls in 7 ratings at 4.5 stars. Not flashy, just solid.
7. The No-Peeking Rule During Simmering

This is a frustrating mistake I see all the time. You bring your seasoned liquid to a boil. You dump in your toasted grains. You turn the stove heat down to low. You put the lid on. And then you leave it alone. I used to nervously lift the lid every three minutes to stir. I ruined so many batches doing that. Every time you lift the lid, you let a hot cloud of steam escape. That trapped steam is what cooks the top layer of grains evenly. If you let it out, the liquid evaporates too fast. You end up with a burnt, stuck bottom and crunchy, undercooked grains on top. Set a timer for 15 minutes. Step away from the stove. Don’t touch the lid. You want a gentle, quiet simmer. I move it to the smallest burner on my stove to keep the heat low. If the burner is too high, the liquid boils off before the grains can soften. I use a heavy-bottomed stainless steel saucepan with a tight-fitting clear glass lid. That way I can watch the liquid absorb without opening the pot. Trust the process. Let the steam do its job.
8. The Crucial Post-Cook Rest And Fluff

Once your 15-minute timer goes off, the cooking isn’t finished. Turn off the burner. Move the pot to a cool burner. Keep the lid on. You need to let it rest for 10 full minutes. I call this the steaming phase. The grains are screaming hot and there is residual moisture trapped inside. As it sits, the grains absorb the last drops of liquid and firm up. If you eat it immediately, it will be wet, fragile, and mushy. The grains will mash together into a paste. After the 10-minute rest, take the lid off. Take a metal dinner fork and gently scrape the surface. Don’t use a wooden spoon or spatula. A spoon will smash the grains into a paste. A fork separates them easily. You’re just tossing them lightly to let the trapped heat escape. This is the moment you’ll see those white spiral rings pop out. That means they’re cooked. They should look light, dry, and fluffy.
9. Cool Completely Before Packing It Away

Packing steaming food into plastic containers is a guaranteed way to ruin your work. I did this lazily last winter. I scooped steaming hot quinoa into my boxes, snapped the lids on, and shoved them in the fridge. The next day, I opened my lunch to find a soggy, clumped, sour mess. The trapped heat created condensation on the lid. That water dripped back into my food all night. It also spoiled faster because the warmth created a breeding ground for bacteria. You must cool your food before storing it. I take a large aluminum baking sheet and spread my grains across it in a thin, even layer. I line the sheet with parchment paper for easy cleanup. It cools to room temperature in about 15 minutes. Once it’s cold, I portion it out. I use Pyrex Glass Storage Containers. I bought an 18-piece set for $24.99 at Costco. Glass doesn’t hold weird fridge smells like plastic does. If I’m freezing a batch for later, I pack the cold grains into Souper Cubes. They cost $29.95 on Amazon. I freeze 1-cup blocks that last in my freezer for 8 months.
I’ve eaten a lot of bad, soggy lunches to figure out these steps. Once you nail the liquid ratio and stop peeking under the lid, your prep routine gets easier. You won’t have to force yourself to eat mushy, bitter sludge again. I’d rather eat plain toast than mushy quinoa, so taking these extra steps is mandatory. I recommend trying the sweet almond milk version for your breakfast prep this week. It changed my rushed morning routine and keeps me full until lunch. If you found these tips helpful, please pin this post to your favorite healthy recipe board on Pinterest so you can find it next Sunday. Let’s make this week delicious, organized, and stress-free. Happy prepping, and remember that practice makes perfect in the kitchen.

KOMUEE 10 Packs 30 oz Glass Meal Prep Containers
Honestly, KOMUEE 10 Packs 30 oz Glass Meal Prep Containers surprised me — sturdier than it looks in the photos, and over 46 buyers gave it 4.5 stars.
Frequently Asked Questions
Why does my quinoa meal prep taste bitter?
Quinoa has a natural coating called saponin that tastes incredibly bitter and soapy. You must aggressively rinse the dry grains in a fine-mesh sieve under cold water for at least 30 seconds until the water runs clear to remove this coating.
What is the best liquid ratio for fluffy quinoa?
For standard stovetop cooking, use a 1:1.75 ratio (1 cup dry grains to 1 3/4 cups liquid). If you’re using an Instant Pot for your meal prep, use a strict 1:1 ratio and cook on high pressure for exactly one minute.
How long does cooked quinoa last in the fridge?
When cooled completely before storing, cooked quinoa lasts 3 to 5 days in airtight glass containers in the refrigerator. To prevent sogginess, make sure the grains are entirely at room temperature before snapping the lid on.
Can I freeze cooked quinoa for later?
Yes, it freezes beautifully. Spread the cooked grains on a baking sheet to cool completely, then portion them into freezer-safe bags or silicone freezing trays. It will stay fresh in the freezer for up to 8 months.
