What’s Inside
- Start Small With Your Meal Prep Planner Routine
- Glass Containers Are Non-Negotiable
- The 50/25/25 Rule For Cheap, Balanced Bowls
- Batch Cook Base Ingredients, Not Full Meals
- Air Fryers and Sous Vide for Perfect Proteins
- Clean As You Go And Stop Cross-Contamination
- The 4-Day Rule And Flat Freezing Method
- Don’t Forget Snacks In Your Meal Prep Planner
Last Tuesday at Whole Foods, I stared at a $14.99 wilted salad and almost cried. I’d forgotten my lunch again. That moment standing in the fluorescent-lit aisle, smelling the faint, vinegary scent of overpriced hot bar salmon while my stomach rumbled, is why I finally built a meal prep planner that works. I tried winging my lunches for months before figuring it out. I’d buy random vegetables, shove them in the crisper drawer, and watch them turn into a slimy, brown mess by Thursday. It’s frustrating. You’re wasting money and still ending up hungry and cranky at your desk by 2 PM. I’m writing this to save you from that mid-week panic. Let’s be real. Cooking a full dinner from scratch every night is exhausting. When you’re bone-tired from working, chopping onions feels like a punishment. That’s why having a reliable system matters. I’ve spent three years testing leaky containers, burning expensive chicken breasts, and eating soggy broccoli so you don’t have to. Trust me. You’re going to learn how to keep your daily meals under five dollars a serving without eating boring, flavorless food. Skip the fat-free stuff. It tastes like wet cardboard. We’re focusing on real ingredients, smart storage, and bold flavors that taste just as good on day four as they did on day one. I’ll walk you through exactly what I do every Sunday in my kitchen.
1. Start Small With Your Meal Prep Planner Routine

I tried making twenty-one meals my first time. Complete disaster. I spent six grueling hours in my kitchen, covered in flour, sweating, and surrounded by dirty dishes. I ended up throwing away containers of soggy spinach that smelled like a swamp three days later. Don’t attempt to prep every meal for the week right away. Begin by planning just two or three meals to build your confidence and a sustainable routine. This gentle approach helps prevent beginner mistakes like over-prepping, which leads to food waste and burnout. Before you write a single item on your list, take a thorough inventory of your pantry, fridge, and freezer. I call this the shop your pantry first strategy. Last month, I dug through my cabinets and found three unopened 16 oz bags of tricolor quinoa behind a box of stale cereal. Using what you have prevents redundant purchases. You can easily save ten to twenty percent on your grocery bill just by checking your dark cabinets. Always stick to your list to avoid impulse buys. When I wander into Target without a list, I somehow leave with a $6.00 bag of fancy truffle popcorn, three candles, and no actual protein for my lunches. A good meal prep planner keeps you focused. Start with one foolproof recipe. Maybe it’s a big batch of chicken tortilla soup or a large sheet pan of roasted root vegetables. You won’t feel overwhelmed, and you’ll actually look forward to eating what you cooked.
2. Glass Containers Are Non-Negotiable

Skip the cheap plastic. They stain, warp in the dishwasher, and hold onto weird, garlicky smells forever. Last year at Costco, I bought a massive fifty-piece pack of flimsy plastic tubs because they were on sale. I put hot tomato sauce in one, and it permanently turned the plastic a cloudy orange. Worse, the lid warped in the microwave the next day and leaked sticky chicken juice all over my clean car seat. Gross. You want to invest in high-quality glass storage. Opt for airtight, stackable, microwave-safe sets. I swear by the Rubbermaid Brilliance Glass set. A ten-piece set typically costs exactly $39.99 at Walmart. They’re heavy, but they’re better than plastic because they prevent leaks, keep food fresh, and don’t absorb odors. If you’re on a budget, upcycle glass jars. Don’t discard empty jars from pasta sauce or pickles. I clean and reuse my $8.99 Rao’s marinara jars for storing vinaigrettes, peanut sauces, or overnight oats. Their tight seal maintains freshness, and they’re perfect for grab-and-go mornings. I’ve got an entire shelf in my fridge dedicated to recycled jars filled with 1/2 cup portions of rolled oats, chia seeds, and almond milk. It’s a money saver. Plus, eating a salad out of a real glass container just feels better than scraping a scratched plastic bowl with your metal fork. You might also like: 15 Brilliant Good Meal Prep Ideas That Changed Everything
3. The 50/25/25 Rule For Cheap, Balanced Bowls

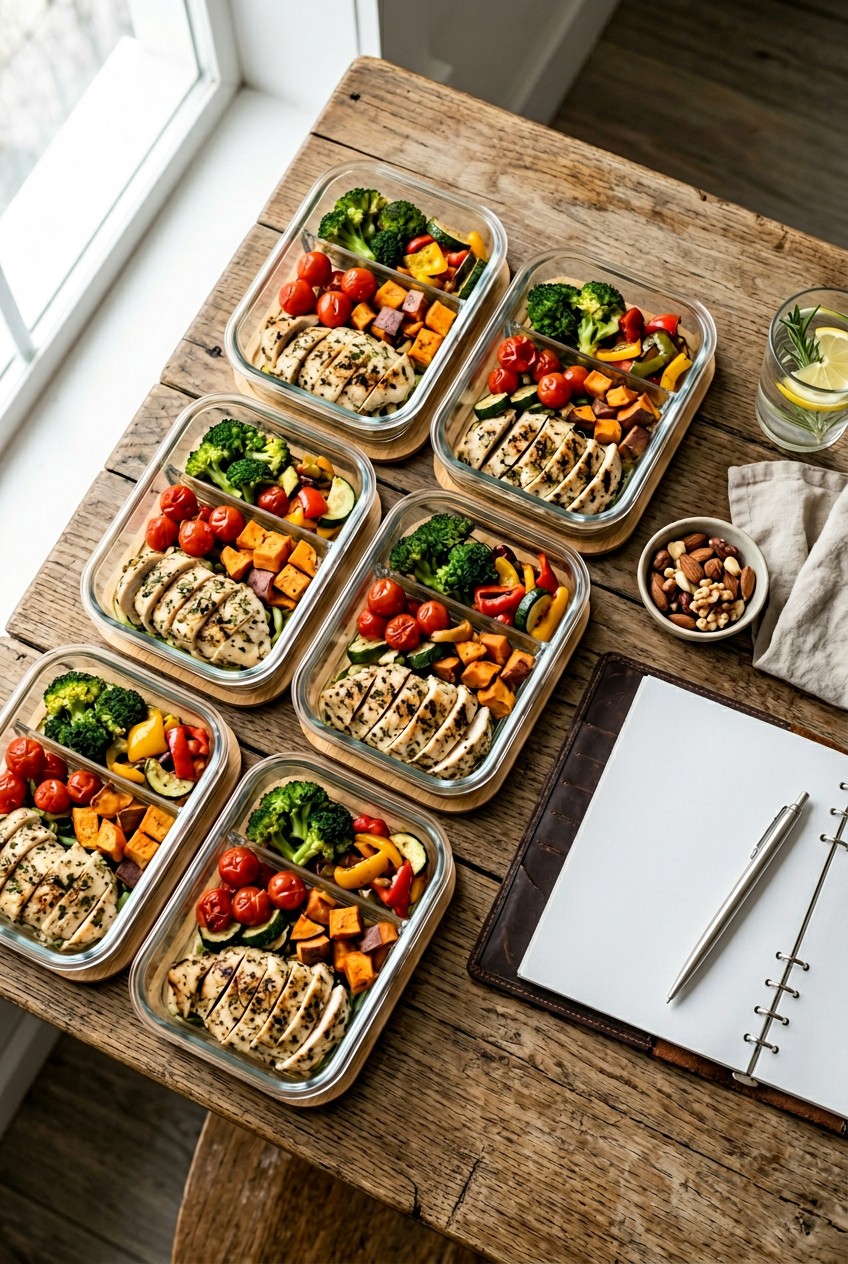
When planning, stick to the 50/25/25 rule for nutritional balance. This formula means fifty percent of your container should be fruits and vegetables, twenty-five percent lean protein, and twenty-five percent complex grains. For instance, a lunch bowl could consist of 2 cups of roasted red bell peppers and yellow zucchini, a 4 oz portion of grilled chicken breast, and 1 cup of brown rice. I buy the big 3 lb bags of frozen organic brown rice at Trader Joe’s for $4.49. It saves me so much time on Sundays. Most people get this ratio wrong and fill their bowls with mostly rice and a tiny sprinkle of meat, which leaves you crashing two hours later. A pro tip I’ve learned is to slightly undercook your vegetables and pasta. When batch cooking broccoli or penne, pull them off the heat a full two minutes early. I used to boil broccoli until it was soft. By the time I reheated it in the office microwave on Wednesday, it was a mushy, sulfur-smelling nightmare. Undercooking them during Sunday prep prevents them from becoming soggy upon reheating. You get a better, firmer texture and a brighter taste. It’s a small adjustment, but it fixes the dreaded leftover texture issue. If you aren’t doing this, you’re missing out on fresh-tasting lunches. You might also like: 15 Stunning Lunch Weekly Meal Prep Ideas You Haven’t Thought Of

KOMUEE 10 Packs 30 oz Glass Meal Prep Containers
KOMUEE 10 Packs 30 oz Glass Meal Prep Containers punches above its price — 45 buyers rated it 4.5 stars. I would buy it again.
4. Batch Cook Base Ingredients, Not Full Meals

I used to make five identical chicken and broccoli boxes every Sunday. By Wednesday, I wanted to gag at the sight of them. Instead of preparing rigid meals, focus on batch cooking versatile base components. I’ll make 4 cups of brown rice in my Instant Pot, shred 2 lbs of slow-cooked chicken thighs, and roast a huge pan of mixed vegetables. This mix-and-match approach allows for varied meals, combating flavor fatigue. You won’t get bored if you change up the flavor profiles daily. Keep a diverse collection of seasoning blends on hand to alter your plain proteins. I keep several bottles of Mrs. Dash salt-free seasonings (they run around $3.49 per bottle at Kroger) in my cabinet. I also rely on the Trader Joe’s Cheesy Seasoning Blend, which costs $2.99. I can take 1/2 cup of shredded chicken, add salsa and taco seasoning for a Mexican bowl on Monday, then use the same chicken with teriyaki sauce and sesame seeds on Tuesday. This changed how I view leftovers. You aren’t forcing yourself to eat the same meal twice. You’re using the same building blocks to create something new. It’s faster, your grocery bill shrinks, and your taste buds won’t rebel by Thursday. You might also like: 15 Brilliant Batch Cooking Ideas That Actually Work
5. Air Fryers and Sous Vide for Perfect Proteins

Air fryers are popular for a reason. They cook food quickly with a crispy texture and use minimal oil. I use my basket-style fryer constantly. You can air fry 1 lb of chicken breast seasoned with garlic powder, smoked paprika, and salt at 375 degrees for exactly 18 minutes. Just flip it halfway through. It gives you a fast protein base with crispy, golden edges. Before I bought an air fryer, I baked chicken in the oven, and it always came out dry and rubbery. If you want to take protein prep to the next level, try the sous vide method. It’s French for under vacuum, and it’s incredible for achieving tender, juicy meat. Using an Anova Culinary Sous Vide Precision Cooker ($129.00 at Target), you can cook vacuum-sealed chicken breasts in a water bath at 145 degrees for two hours. This method locks in moisture, allowing proteins to stay fresh for days. I’ve noticed an undeniable difference. The chicken doesn’t dry out when you microwave it later. It takes more time to heat the water, but the restaurant-quality results are worth it. I’m never going back to dry, chalky oven-baked chicken.
6. Clean As You Go And Stop Cross-Contamination

Cooking is fun. Staring at a sink piled high with greasy pans and sticky spatulas is not. Make it a habit to clean as you cook. This prevents a daunting, hour-long cleanup at the end of your session and keeps your workspace sanitary. I used to leave dishes until the end, and I’d be so exhausted I’d let them soak overnight. Bad idea. Cleaning as you go reduces the risk of cross-contamination, especially when handling raw meats. To avoid transferring bacteria to veggies, use separate cutting boards. I bought the Joseph Joseph NEST board set for $35.00 at Sprouts. I use the red board for raw meats and the green board for produce. The metallic smell of raw chicken on a wooden board is disgusting, and I ruined an expensive board last year because I couldn’t get the meat smell out. Wash your hands with hot soap and water for twenty seconds after handling raw ingredients. It’s basic safety, but when you’re rushing to get five meals prepped, it’s easy to get sloppy. Slow down, wipe the counters, and wash your knives. A clean kitchen makes the process feel like a hobby instead of a chore.

M MCIRCO 10-Pack,30 Oz Glass Meal Prep Containers 2
M MCIRCO 10-Pack punches above its price — 23 buyers rated it 4.5 stars. I would buy it again.
7. The 4-Day Rule And Flat Freezing Method

Most cooked meals, especially those with meat or dairy, are safe in the refrigerator for three to four days. I stick to the four-day rule to avoid food poisoning. If I cook chili on Sunday, Thursday is the last day I’ll eat it. Label your containers with the meal name and date. I use masking tape and a black Sharpie. This ensures you follow a first-in, first-out system, minimizing waste. Labeling takes five seconds but saves you from playing a guessing game on Friday. For meals intended for beyond four days, freezing is the solution. Use freezer bags like Ziploc Freezer Bags. A box costs $8.99 at Walmart. Put your cooled food in the bag, squeeze out the air, and lay them flat on a baking sheet to freeze. Once solid, store them vertically like books to maximize freezer space. I used to toss bulky Tupperware into the freezer, and it took up so much room I couldn’t fit a pizza in there. The flat freezing method is brilliant. I’ve got a library of frozen soups stacked neatly right now. For storage exceeding four months, you might want a vacuum sealer to prevent freezer burn, but for weekly prep, heavy-duty bags work perfectly.
8. Don’t Forget Snacks In Your Meal Prep Planner

Meal prep isn’t just for main meals. You must extend it to your snacks. Portion out healthy, crunchy options on Sunday so you aren’t tempted by the office vending machine on a stressful Tuesday. I like to pack grapes, berries, or pre-chopped carrots and celery. I pair the veggies with a 2 oz container of hummus. I buy the 17 oz Sabra tub for $5.99 at Whole Foods and divide it into small, reusable cups. This proactive step prevents impulse snacking and keeps you aligned with your goals. If you buy big bags of carrots, you save money compared to pre-cut sticks. I used to ignore snacks during prep. By 3 PM, I’d be starving, lose my willpower, and end up buying a $3.00 candy bar and a soda. It ruined my budget and caused my energy levels to crash. Now, I dedicate fifteen minutes at the end of my Sunday session to washing fruit and chopping celery. I put them in clear glass jars at the front of the fridge so they’re the first thing I see. When you’re hungry, you want convenience. Make the healthy choice the easiest choice.
Building a system takes patience, but it’s worth the effort. I’ve saved hundreds of dollars this month alone by bringing my own food to work instead of ordering delivery. You won’t regret taking one hour on a Sunday afternoon to set yourself up for success during a chaotic week. I recommend starting with just your weekday lunches. Pick a protein you enjoy, grab some glass containers, and give this organized method a try. Having a dedicated meal prep planner will lower your stress and keep your wallet happy. If you found this guide helpful, please pin this article to your favorite Pinterest recipe board so you can find it later when you’re writing your grocery list! Let’s make this week your most delicious and organized week yet.
Frequently Asked Questions
How long do prepped meals last in the fridge?
Most cooked meals, especially those with meat, are safe in the fridge for three to four days. I strictly follow the four-day rule and label everything with the date to prevent food waste.
What is the 50/25/25 rule in meal prep?
It’s a simple formula for balanced nutrition. Fill fifty percent of your container with fruits and vegetables, twenty-five percent with lean protein, and twenty-five percent with complex grains or starchy vegetables.
Can I freeze my prepped meals?
Yes! For meals you won’t eat within four days, freezing is ideal. Put cooled food in heavy-duty freezer bags, squeeze out the air, and freeze them flat to save space.
How do I stop my prepped vegetables from getting soggy?
Slightly undercook your vegetables and pasta during your initial prep session. Pull them off the heat a couple of minutes early so they maintain a firm texture when reheated in the microwave later.
