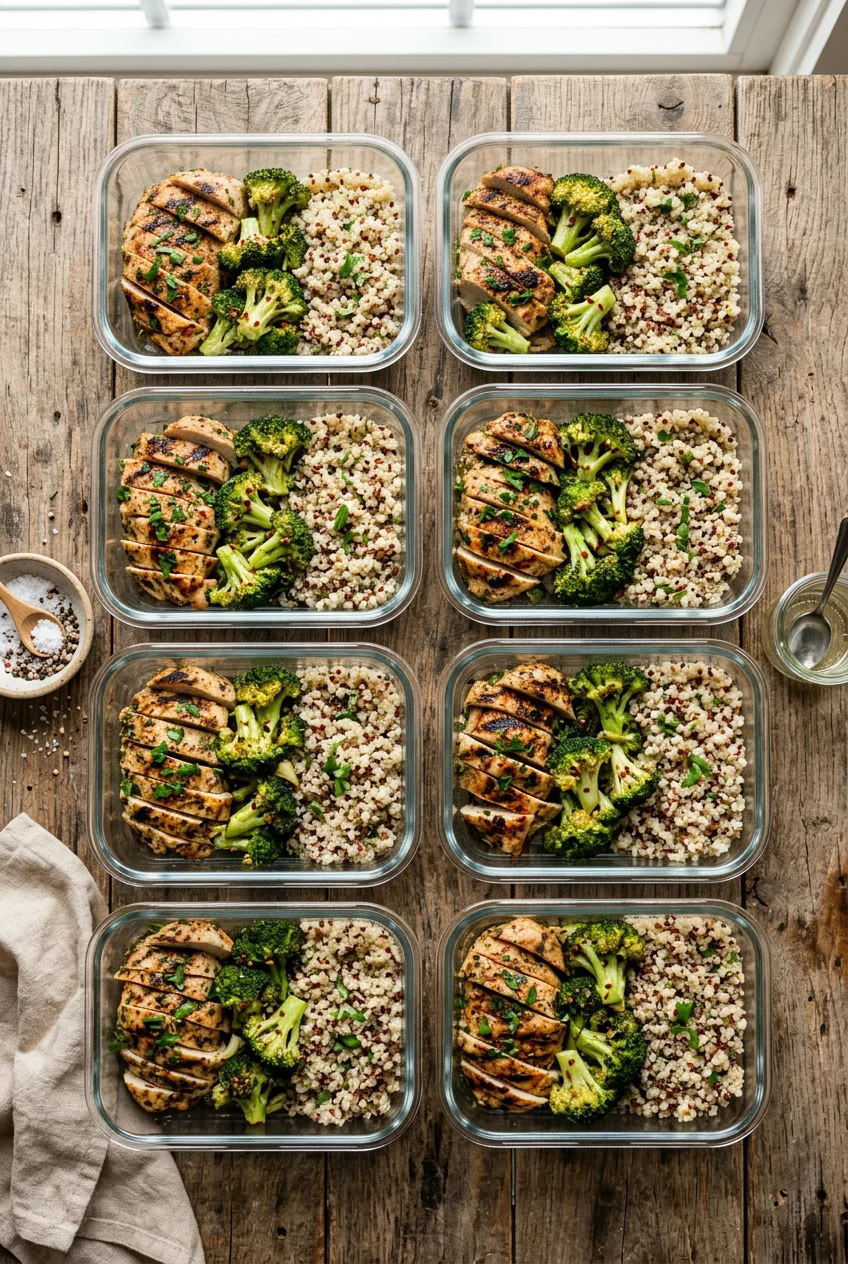
What’s Inside
- Choose Thighs Over Breasts for Juicy Meal Prep For The Week Chicken
- Stop Washing Your Raw Meat Immediately
- Master the Air Fryer for 14-Minute Crispy Cutlets
- Poach Your Meat for Shredded Salads
- Weigh Everything with the 50/25/25 Rule
- Brine in Pickle Juice for Ridiculous Tenderness
- Rotate Gourmet Seasonings to Avoid Flavor Fatigue
- Invest in Glass Containers That Actually Seal
- Reheat Your Meal Prep For The Week Chicken Safely
Three years ago, my meal prep for the week chicken looked like a grey, rubbery tragedy in a cheap plastic tub. I remember sitting at my kitchen island on a Sunday night, staring at six identical portions of boiled poultry, and wanting to cry. It smelled like wet dog. It tasted like drywall. I’m not proud of this, but I actually threw away an entire batch of food that night because I couldn’t stomach chewing it anymore. I’ve spent hundreds of hours in my tiny kitchen since then figuring out how to make affordable, delicious lunches that actually survive the fridge. If you’re tired of choking down dry meat by Wednesday afternoon, you’re in the right place. Let’s fix your Sunday routine without breaking the bank. You can absolutely eat amazing, flavorful food for under $5 a serving. You just need to stop following outdated fitness magazine advice and start using techniques that actually preserve moisture and flavor.
1. Choose Thighs Over Breasts for Juicy Meal Prep For The Week Chicken

I used to buy massive packs of boneless, skinless breasts because that’s what every diet blog told me to do. I tried this wrong for months before figuring it out. Breasts are lean. A 4 oz raw portion gives you about 26g of protein and just 120 calories. Sounds great on paper. But when you reheat a breast on Thursday that you cooked on Sunday, it’s usually dry enough to choke you. The texture turns into literal sawdust in your mouth. Learned that the hard way.
Now, I almost exclusively buy thighs for my lunches. Thighs have a higher fat content, so they stay juicy and tender even after a brutal spin in the office microwave. Last Tuesday at Costco, I grabbed a massive pack of Kirkland Signature Boneless Skinless Chicken Thighs for $14.99. That comes out to roughly $2.50 per pound. Compare that to breasts, which are hovering around $4.17 per pound right now. The visual difference is obvious when you pull them out of the hot cast iron pan. Thighs glisten and look soft, while breasts look tight and matte. If you’re on a strict budget, you can even buy bone-in drumsticks or leg quarters. Sometimes I find those for as low as $1.74 per pound at Walmart. You just have to be willing to do a little deboning work yourself. I’d highly recommend sticking to thighs if you want your food to actually taste good by the end of the week. Skip the fat-free stuff. It tastes like wet cardboard.
2. Stop Washing Your Raw Meat Immediately

My mother taught me to wash all poultry under cold running water in the kitchen sink before cooking it. I did this for years. I thought I was being clean and washing away the slime. Honestly, this changed how I view kitchen hygiene forever. Washing raw poultry is a massive food safety hazard. You aren’t washing away bacteria. You’re actually splattering harmful bugs like Salmonella up to two feet across your kitchen counters, your clean coffee mugs, and your clothes. It’s disgusting when you really think about the invisible mist of bacteria floating around your kitchen.
Instead of rinsing, you need to pat the meat completely dry. I buy Bounty Select-A-Size paper towels ($4.49 for a 2-pack at Target) specifically for this step. I lay the raw thighs on a red plastic cutting board, press a dry paper towel firmly into the surface to absorb excess moisture, and immediately throw the paper towel in the trash. Getting the surface completely dry is the secret to getting a nice crust when you cook it. Moisture is the enemy of browning in a hot pan. After handling the raw meat, I wash my hands with Dawn Ultra Dish Soap ($3.29 for a 14.6 oz bottle) and hot water for a full 20 seconds. I also use a dedicated plastic cutting board just for raw poultry to prevent cross-contamination. Don’t use a wooden board for raw meat. The juices seep deep into the wood grain and you can’t ever get it truly clean.
3. Master the Air Fryer for 14-Minute Crispy Cutlets

If you aren’t using an air fryer for your weekly cooking, you’re missing out on the best texture possible. I stubbornly refused to buy one for years because I didn’t want another bulky appliance taking up precious counter space in my apartment. I finally caved and bought a Ninja 4-Quart Air Fryer ($99.99 at Target) last month. It’s incredible. The hot circulating air creates a crispy exterior while locking the juices inside the meat.
To get the best results, you can’t just throw a massive, thick piece of meat in the basket. It won’t cook evenly. The outside will burn while the inside stays pink. You need to slice your breasts into thinner cutlets, about 1/2 inch thick. I lay them flat in the basket, making sure they aren’t touching. I set the temperature to 380 degrees Fahrenheit and cook them for 10 to 14 minutes. You have to flip them exactly halfway through the cooking time. The loud hiss and sizzle when you open the hot basket is satisfying. The outside gets this beautiful golden-brown crust that looks like it was pan-fried in heavy oil, but it’s completely dry to the touch. It’s the perfect method when you’re short on time on a Sunday afternoon. Just remember to spray the basket lightly with PAM Original Cooking Spray ($3.98 at Walmart) so the meat doesn’t stick to the metal grate. You might also like: 20 Clever Quick Lunch Ideas You Haven’t Thought Of

KOMUEE 10 Packs 30 oz Glass Meal Prep Containers
If you want something that just works, KOMUEE 10 Packs 30 oz Glass Meal Prep Containers is a safe bet (46 reviews, 4.5 stars).
4. Poach Your Meat for Shredded Salads

Most people get this wrong when they want shredded meat for cold salads or burrito bowls. They bake it in the oven until it’s tough, and then try to aggressively rip it apart with two metal forks. It’s exhausting and the results are stringy and dry. If you want meat that falls apart effortlessly, you need to poach it. This is a lesser-known trick that I learned from watching a deli worker at Whole Foods prep their famous chicken salad. You might also like: 20 Lovely Work Lunch Ideas to Inspire Your Next Project
Poaching is just gently simmering the meat in a flavorful liquid until it cooks through. I place my raw breasts in a deep stainless steel pot and cover them completely with Pacific Foods Organic Free Range Chicken Broth ($3.99 for a 32 oz carton at Sprouts). I add three smashed garlic cloves and a dried bay leaf to the pot. Bring the liquid to a very gentle boil, then immediately turn the heat down to low, cover the pot with a heavy lid, and let it simmer for about 12 to 15 minutes. The caramel-butter smell of the garlic and warm broth bubbling away makes the whole kitchen smell amazing. When you pull the meat out, it’s so tender you can literally shred it with a wooden spoon. It absorbs the savory, salty flavor of the broth, making it perfect for cold salads where dry meat is super noticeable. Plus, you can save the leftover cooking liquid in a mason jar to cook your quinoa or brown rice later in the week. You might also like: 15 Stunning Aesthetic Batch Cooking You Need to See
5. Weigh Everything with the 50/25/25 Rule

I used to eyeball all my portions. I’d just dump a massive pile of white rice and a huge chunk of meat into a glass container and call it a day. Then I wondered why I felt sluggish and bloated every afternoon at my desk at 2 PM. I was eating way too many heavy carbs and barely any vegetables. Now, I strictly follow the 50/25/25 rule for my lunches. That means 50 percent of the container is filled with roasted broccoli or fresh greens, 25 percent is lean protein, and 25 percent is complex carbohydrates like roasted sweet potatoes.
To get the protein portion right, you need an accurate kitchen scale. I personally swear by my OXO Good Grips 11-Pound Stainless Steel Food Scale ($55.95 at Whole Foods). It’s precise and easy to wipe clean. A standard portion of cooked meat is about 3 ounces. To get that, you need to weigh out exactly 4 ounces (112 grams) of raw meat, because it shrinks significantly during the cooking process. I place a square of parchment paper on the scale, zero it out, and measure my raw thighs before they go into the hot pan. It takes an extra two minutes, but it completely takes the guesswork out of my daily nutrition. When you actually measure a 3-ounce cooked portion, you’ll realize it’s roughly the size of a deck of cards. This keeps your grocery budget tight and prevents you from overeating.
6. Brine in Pickle Juice for Ridiculous Tenderness

If you’ve never brined your poultry before, you are missing out on a massive flavor upgrade. A brine is just a salty liquid solution that breaks down the tough muscle fibers and forces moisture deep into the meat. I tried making fancy salt and sugar brines from scratch, boiling water and measuring spices, but it was too much work for a lazy Sunday afternoon. Then I discovered the leftover pickle juice trick. It took me years to figure out.
Last week at Kroger, I bought a large jar of Claussen Kosher Dill Halves ($4.99 for 32 oz). After we ate all the crunchy pickles over a few days, I kept the cloudy leftover juice in the fridge. On prep day, I took my raw thighs, placed them in a large glass mixing bowl, and poured the cold pickle juice right over the top until they were submerged. I let it sit in the fridge for exactly two hours. Don’t leave it in longer than that, or the meat gets a weird, mushy texture. When you pull the meat out, it smells strongly of sharp garlic and fresh dill. You pat it completely dry with paper towels and cook it normally in a hot skillet. The salt in the pickle juice seasons the meat all the way through to the very center. It comes out ridiculously tender, with a subtle tangy flavor that pairs perfectly with a side of roasted potatoes. It’s a completely free marinade.

M MCIRCO 10-Pack,22 Oz Glass Meal Prep Containers
M MCIRCO 10-Pack has been one of the most consistently praised picks in this category. 86 reviewers averaged 4.5/5.
7. Rotate Gourmet Seasonings to Avoid Flavor Fatigue

Eating the exact same flavor profile every single day is a guaranteed way to fail at your healthy eating goals. I used to season everything with just plain table salt and basic black pepper. By Wednesday afternoon, I was so bored with my bland food that I’d cave and go buy a $15 greasy sandwich from the deli across the street. You have to rotate your spice blends weekly to keep your tastebuds interested.
I use about 1 to 2 tablespoons of seasoning per pound of raw meat. You want to coat it very generously until you can’t see the pink flesh anymore. My current obsession is Trader Joe’s Cheesy Seasoning Blend ($2.99 for a 2.1 oz bottle). It doesn’t actually contain real cheese, but it gives the meat this incredible savory, umami flavor that tastes intensely like sharp cheddar and roasted garlic. For a warming, classic flavor, I always keep a yellow tin of Old Bay Seasoning ($4.38 at Walmart) in my pantry. If I want something a little more gourmet for a special lunch, I order The Spice Lab Smoky Pecan Rub ($8.95 per jar online). It smells exactly like a sweet hickory campfire and caramelizes beautifully when you put it in the air fryer. I highly recommend buying three or four distinct blends and rotating them. Make Monday’s batch spicy, and Thursday’s batch sweet and smoky.
8. Invest in Glass Containers That Actually Seal

I’m going to save you from a very specific, very smelly disaster. Two years ago, I packed a beautiful lunch in a cheap, flimsy plastic container from the dollar store. I tossed it into my favorite canvas tote bag and got on the crowded subway. The flimsy lid popped off somewhere between 14th Street and my office, and cold garlic chicken juice leaked all over my expensive work laptop and my favorite wool sweater. I couldn’t get the awful smell out of the bag for weeks. No exaggeration.
You absolutely must invest in high-quality, airtight containers. I finally threw away all my stained, warped plastic tubs and bought a set of Pyrex 3-Cup Rectangular Glass Storage Containers ($22.99 for a 3-pack at Target). Glass is infinitely better than plastic. It doesn’t absorb weird onion smells, it doesn’t stain bright yellow when you use turmeric, and it’s safe for the microwave. The Pyrex lids have a tight silicone seal that actually locks the liquid inside where it belongs. If you prefer plastic because it’s lighter to carry in a backpack, Rubbermaid Brilliance Food Storage Containers ($15.98 for a 2-pack at Walmart) are the only ones I trust. They have thick, hard latches on the sides that click loudly into place. When you hear that loud click, you know your bag is safe from leaks. Spending $20 on good containers will save you from ruining your belongings.
9. Reheat Your Meal Prep For The Week Chicken Safely

There is a very specific art to reheating leftover poultry. If you just blast it in the depressing office breakroom microwave on high for three straight minutes, it’s going to taste like a hot rubber tire. The edges get hard and crusty, and the center stays weirdly lukewarm. I’ve ruined so many good lunches by being impatient with the microwave.
First, you need to ensure the meat reaches an internal temperature of 165 degrees Fahrenheit to kill any potential bacteria that grew while it was sitting in the fridge. I use a ThermoPro Digital Meat Thermometer ($14.99 on Amazon) to check the thickest part of the meat. Relying on visual cues alone can be incredibly misleading. If you work from home, the absolute best way to reheat your food is in the air fryer. I set it to 350 degrees Fahrenheit and heat the pieces for 5 to 7 minutes. It brings back that crispy exterior and warms the center gently without drying it out. If you have to use a microwave at an office, sprinkle a few drops of tap water over the meat, cover the glass container lightly with a damp paper towel, and heat it on 50 percent power for two minutes. The steam from the wet paper towel helps soften the meat fibers, keeping it juicy. Never reheat the same piece of meat more than once. If you don’t eat it, throw it away.
Honestly, spending an hour on Sunday sorting out my proteins has changed my weekday stress levels. I’m no longer scrambling in the kitchen to figure out what to pack for lunch at 7 AM on a frantic Tuesday morning. I know exactly what I’m eating, I know it tastes amazing, and I know it costs me less than a fancy iced coffee. If you start using the cold pickle brine trick and switch to heavy glass containers, I promise you’ll never look at sad leftovers the same way again. Pin this guide to your favorite recipe board so you can easily reference these safe temperatures and cooking times next Sunday afternoon. Let’s make this week your most delicious and organized one yet.
![C CREST [10 Pack] Glass Meal Prep Containers](https://m.media-amazon.com/images/I/81HfSfzlqUL._AC_UL320_.jpg)
C CREST [10 Pack] Glass Meal Prep Containers
If you want something that just works, C CREST [10 Pack] Glass Meal Prep Containers is a safe bet (349 reviews, 4.5 stars).
Frequently Asked Questions
How long does meal prep for the week chicken last in the fridge?
Cooked chicken safely lasts 3 to 4 days in the refrigerator when stored in airtight glass or high-quality plastic containers. If you prep on Sunday, you should eat or freeze the last portions by Thursday to ensure optimal freshness and food safety.
Is it better to use chicken breasts or thighs for meal prep?
Chicken thighs are generally better for meal prep because their slightly higher fat content prevents them from drying out when reheated. Breasts are leaner but tend to become tough and chalky after a few days in the fridge and a spin in the microwave.
How do I reheat prepped chicken without drying it out?
The best way to reheat chicken without drying it out is using an air fryer at 350°F for 5-7 minutes. If using a microwave, sprinkle a few drops of water over the meat, cover with a damp paper towel, and heat on 50% power.
Should I wash raw chicken before prepping it?
No, you should never wash raw chicken. Rinsing it under the tap splatters harmful bacteria like Salmonella across your kitchen surfaces. Instead, simply pat the raw meat completely dry with a paper towel before applying your oil and seasonings.
