What’s Inside
- Master the Overnight Oats Ratio for Perfect Breakfast Prep
- Invest in Wide-Mouth 16 oz Mason Jars
- Optimize Chia Seed Pudding with a 1:4 Ratio
- Prevent Soggy Breakfast Burritos with Proper Cooling
- Freeze Burritos for Up to 3 Months for Max Freshness
- Incorporate High-Protein Greek Yogurt for Satiety
- Utilize “Chaffles” for a Keto-Friendly Breakfast
- Boost Protein in Smoothies with Quality Powder
- Don’t Overlook Sheet Pan Eggs for Easy Batch Cooking
Last October, I sat in the driver’s seat of my Honda Civic staring at a puddle of lukewarm, watery oatmeal seeping into my jeans. I tried to eat my breakfast at a red light, the flimsy plastic container buckled, and my morning was ruined before 8:00 AM. Getting breakfast prepped right is harder than doing dinners. You’re usually eating it in a rush, standing over the sink, or sitting in traffic. If the texture is off, or if it lacks enough protein to keep you full until noon, you’ll end up buying a stale pastry from the coffee shop downstairs. No exaggeration.
I’ve spent months testing different containers, ratios, and freezing methods because I was tired of wasting groceries. Getting your breakfast locked down requires a strict focus on moisture and temperature. Hot ingredients create condensation, and condensation destroys tortillas. Wrong liquid ratios turn chia seeds into a concrete block at the bottom of your container. You can’t just throw ingredients into a bowl on Sunday and expect them to taste good on Thursday. I learned that the hard way.
I’ve documented the exact formulas, specific brands, and precise temperatures that actually work for a high-protein morning routine. These nine methods focus on stability in the fridge and freezer, ensuring your food has the same texture on day four as it did on day one. Let’s look at the mechanics of a proper morning prep routine.
1. Master the Overnight Oats Ratio for Perfect Breakfast Prep

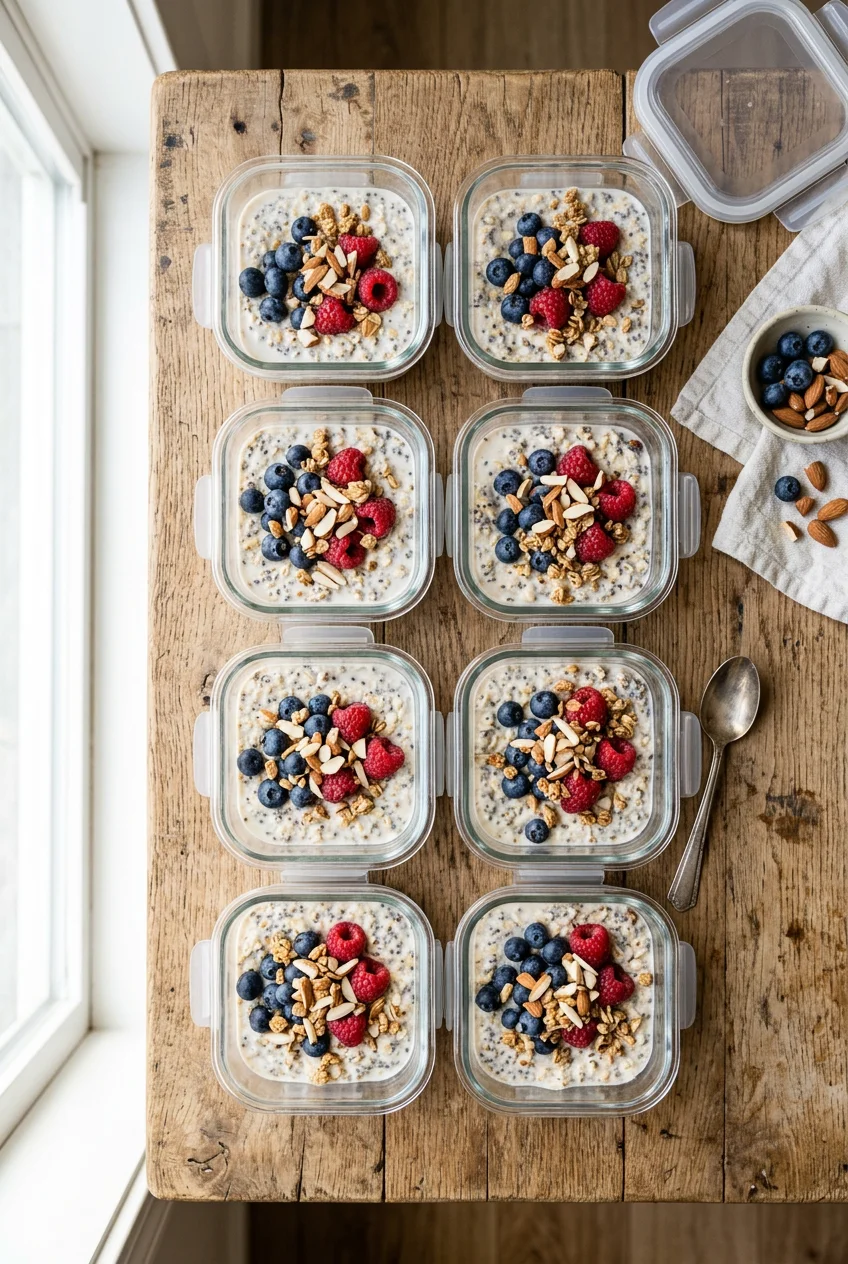
For the first six months, I ended up with a soupy, unappetizing mess. I guessed the liquid measurements, pouring milk until things looked wet enough. By Tuesday, the oats had absorbed everything, leaving a dense paste. By Thursday, the mixture separated into starchy water on top and mush on the bottom. To fix this, use a strict 1:1:0.5 ratio. That’s one part rolled oats, one part liquid, and half a part yogurt.
My base starts with 1/2 cup of Quaker Old Fashioned Rolled Oats. A 42 oz canister costs $4.98 at Walmart and lasts for weeks. Don’t buy quick oats. They disintegrate after 24 hours in liquid, turning into grainy sludge. Steel-cut oats won’t soften enough, leaving you chewing on hard pebbles. Add exactly 1/2 cup of Silk Unsweetened Almond Milk ($3.29 at Target for a 64 oz carton) and 1/4 cup of plain Greek yogurt. This combination creates a thick, creamy texture that holds up for five days.
The yogurt acts as a binder, keeping the milk from separating. If you skip it, the consistency becomes thin and watery. I mix these three base ingredients thoroughly before adding fruit or nuts. Stirring the base prevents dry pockets of oats from hiding at the bottom of the jar. This 1:1:0.5 formula guarantees consistency every single week.
2. Invest in Wide-Mouth 16 oz Mason Jars

I originally used random plastic leftover containers. The lids warped in the dishwasher, they absorbed the smell of old dinners, and they took up too much space in my fridge. Switching to glass solved the odor issue. I use Ball 16 oz wide-mouth Mason jars. You can get a 12-pack for $12.99 at Target. The wide mouth is the key.
I bought standard-mouth jars once. Trying to eat thick oats out of a narrow opening is frustrating. Worse, cleaning dried oats out of the curved shoulders requires a special brush. The wide-mouth 16 oz size gives you room to fit 1/2 cup of oats, 1/2 cup of milk, yogurt, and a handful of berries without the liquid overflowing. The metal lids latch tightly. I toss the jar into my canvas tote bag and it won’t leak, even if it tips over.
If you prefer a stackable option, Weck 12.5-ounce glass jars are excellent. A set of four costs about $24.95 on Amazon. They have glass lids with rubber gaskets and metal clips. The flat tops mean you can stack three of them vertically, saving shelf space. A great budget alternative is repurposing empty peanut butter jars. A 16 oz Jif jar, once cleaned, holds a single serving perfectly and won’t shatter if you drop it on the sidewalk. You might also like: 9 Breakfast Meal Prep For The Week That Actually Work
3. Optimize Chia Seed Pudding with a 1:4 Ratio

Chia pudding seems foolproof until you find a solid gelatinous puck sitting in a pool of almond milk. Chia seeds are highly absorbent, but they clump together instantly when they hit liquid. If the seeds stick, the ones in the center stay dry. Getting a smooth texture requires a 1:4 ratio and a two-step mixing process. You might also like: 15 Clever Family Dinner Ideas for a Fresh New Look
I use Trader Joe’s Organic Chia Seeds. A 16 oz bag costs $4.99 and lasts for months. The exact measurement is 2 tablespoons of chia seeds to 1/2 cup of milk. If you prefer a thicker texture, adjust to 3 tablespoons of seeds per 1 cup of milk. Pour the milk over the seeds and stir vigorously with a fork for thirty seconds. This breaks up the initial clumps. Here is the step most people miss: wait exactly five minutes, then stir it a second time. You might also like: 20 Clever School Lunch Ideas You Can Try Today
During those first five minutes, the seeds begin to swell. They naturally sink and pack together at the bottom. The second stir lifts them back into suspension, ensuring they absorb the liquid evenly. I learned this after throwing away three batches of clumpy, dry pudding. Once you do the second stir, cover it and leave it in the fridge overnight. The result is smooth, thick, and filling.

Bento Box Adult Lunch Box – 4 Pack, 5
A dependable everyday pick — Bento Box Adult Lunch Box – 4 Pack pulls in 24 ratings at 4.5 stars. Not flashy, just solid.
4. Prevent Soggy Breakfast Burritos with Proper Cooling

A breakfast burrito is the ultimate portable meal, but it’s easy to ruin. For a long time, I cooked my eggs, sausage, and peppers, scooped them directly onto a tortilla, and wrapped it in foil. By Wednesday, the tortilla was a gummy, wet mess. The heat from the eggs creates steam inside the foil. That steam turns into condensation, which soaks the flour tortilla.
To prevent this, let every cooked ingredient reach room temperature before assembly. I use Mission 10-inch flour tortillas, which cost $3.48 for a 10-count pack at Kroger. I scramble my eggs and spread them in a thin layer on a large baking sheet to cool quickly. I do the same with my roasted potatoes and black beans. It takes about twenty minutes for the steam to fully dissipate.
Once cool, I assemble the burritos. I skip wet ingredients entirely. Salsa and sour cream go into tiny plastic ramekins on the side. I wrap each burrito tightly in Reynolds parchment paper ($4.49 at Kroger), then add a layer of aluminum foil. The parchment paper creates a breathable barrier that absorbs residual moisture, while the foil holds the shape. This double-wrapping method eliminated the wet cardboard texture I used to get.
5. Freeze Burritos for Up to 3 Months for Max Freshness

Batch cooking thirty burritos is efficient, but storing them wrong leads to freezer burn. I used to toss foil-wrapped burritos directly onto the freezer shelf. After a month, ice crystals formed, making the eggs rubbery and watery. You need an airtight outer layer to protect the food.
After wrapping each cooled burrito in parchment and foil, I place them into Ziploc gallon-sized freezer bags. A 28-count box is $5.89 at Costco. I squeeze as much air out as possible before sealing. Writing the date and contents on the bag with a Sharpie is crucial. I once found a mystery burrito and discovered it was filled with spicy chorizo when I was expecting mild turkey sausage. They hold their quality for three months. After that, the tortillas start to crack.
Reheating them takes patience. Microwaving a frozen burrito results in a lava-hot tortilla and a frozen center. I unwrap the foil, leave the parchment paper on, and place it in the air fryer at 350°F for 10 to 12 minutes. The parchment keeps the tortilla from burning while the circulating heat thaws the center. If I’m using an oven, I leave the foil on and bake at 350°F for 15 to 20 minutes. The texture comes out perfectly crisp. Trust me on this.
6. Incorporate High-Protein Greek Yogurt for Satiety

Eating a bowl of plain fruit and oats leaves me starving by 10:00 AM. I need a significant hit of protein to stay focused. Adding protein powder to oats often makes them chalky, so I rely on dense Greek yogurt instead. I buy Fage Total Greek Yogurt. A 5.3 oz single-serve container costs between $1.47 and $2.19 at Whole Foods, but I buy the 35.3 oz tub for $7.49 to save money.
I advise skipping the fat-free, heavily flavored yogurts. They taste like artificial sweeteners and have a thin, watery consistency that ruins the texture. Fage Total 2% has 18 grams of protein and a thick, rich texture that holds up beautifully when mixed with oats or fruit. The slight fat content provides a better mouthfeel and slows down digestion, keeping you full much longer than the 0% versions.
When I prep yogurt parfaits, I layer 3/4 cup of the Fage 2% at the bottom of a jar. I add a layer of frozen blueberries (Whole Foods 365 brand, $3.99 for 12 oz) on top. As the berries thaw in the fridge, they release their juices downward, naturally sweetening the yogurt. I keep my granola in a separate container and only sprinkle it on right before eating. If you put granola inside on Sunday, it turns to mush by Monday.

Etekcity Food Kitchen Scale
Honestly, Etekcity Food Kitchen Scale surprised me — sturdier than it looks in the photos, and over 1,736 buyers gave it 4.5 stars.
7. Utilize “Chaffles” for a Keto-Friendly Breakfast

If you’re trying to lower your carbohydrate intake, traditional pancakes won’t work. I discovered chaffles—cheese waffles—last year, and they are easy to batch cook and freeze. A basic chaffle requires two ingredients: eggs and shredded cheese. I use Kraft finely shredded sharp cheddar, which is $3.29 for an 8 oz bag at Sprouts.
The standard recipe is one large egg mixed with 1/2 cup of shredded cheese. This yields two small waffles. I add 1 teaspoon of Bob’s Red Mill coconut flour ($4.69 for a 16 oz bag) to the batter. The coconut flour is a dry ingredient that absorbs excess moisture, giving the chaffle a sturdier, bread-like structure rather than tasting like a flat omelet. I cook them in a Dash Mini Waffle Maker ($9.99 at Target). Pour half the batter in, close the lid, and wait three minutes until the steam stops escaping.
Cooling is critical. If you stack hot chaffles, the cheese sweats and they stick together. I lay them flat on a wire cooling rack for twenty minutes. Once cool, I stack them with small squares of parchment paper between each waffle and freeze them in a glass container. They keep for six months. Never microwave a frozen chaffle; it turns rubbery instantly. I pop the frozen chaffle into my toaster on a medium setting for four minutes. It crisps up the cheese edges beautifully, making it the perfect low-carb base for a sandwich.
8. Boost Protein in Smoothies with Quality Powder

Smoothie prep is great, but fruit and spinach alone won’t sustain your energy. I used to buy cheap protein powders. They tasted overly sweet, clumped, and gave my smoothies a gritty texture. Investing in a high-quality powder changes the consistency entirely.
I use Naked Whey unflavored protein powder. A 1 lb tub costs around $27, and it provides 25 grams of protein per serving with only one ingredient: whey protein concentrate. Because it is unflavored, it doesn’t overpower the taste of the frozen strawberries and bananas. If you prefer a plant-based option, Nuzest Pea Protein is excellent. It costs about $1.90 per serving and delivers 20 grams of protein. It blends much smoother than brown rice protein, which feels like sand in your mouth.
My smoothie prep involves assembling all the dry and frozen ingredients into individual Stasher silicone bags ($12.99 at Target). I add one scoop of Naked Whey, 1/2 cup of frozen spinach, 1/2 cup of frozen mixed berries, and 1 tablespoon of flaxseed to each bag. I store five bags in the freezer. In the morning, I dump the contents of one bag into my Ninja blender, add 1 cup of almond milk, and blend for forty-five seconds. Keeping the protein powder in the bag prevents me from having to measure sticky powder at 6:00 AM.
9. Don’t Overlook Sheet Pan Eggs for Easy Batch Cooking

Standing over a stove scrambling eggs every morning takes too much time, and egg muffins are a nightmare to clean up. The egg always bakes into the corners of the tin. The most efficient way to batch cook eggs is using a standard half sheet pan.
I use a Nordic Ware aluminum half sheet pan, which costs $15.99 at Target. I crack 12 large eggs into a bowl, add 1/4 cup of milk, salt, pepper, and whisk. I heavily grease the pan with butter, pour the mixture in, and sprinkle 1 cup of chopped spinach and 1/2 cup of diced red bell peppers on top. I bake it at 300°F for 15 to 18 minutes. The low temperature prevents the edges from turning brown and rubbery.
Once the eggs are set, I let them cool for ten minutes. I use a plastic spatula to cut the eggs into six even squares. These fit perfectly on an English muffin or a bagel. I store the squares in a glass Pyrex container for up to five days. In the morning, I place one egg square on a toasted Thomas’ English Muffin ($3.49 at Kroger) with a slice of cheese. It’s faster than the drive-thru, and the cleanup is just one baking sheet.
Taking an hour on Sunday to organize your breakfast eliminates the daily friction of figuring out what to eat. You aren’t just saving money by avoiding the coffee shop; you’re guaranteeing a high-protein start to your day. I highly recommend starting with the sheet pan eggs if you prefer savory, or the overnight oats ratio if you prefer sweet. Pin this guide so you have the exact ratios and temperatures handy for your next grocery run.

Rubbermaid Brilliance Tritan Plastic Food Storage
Rubbermaid Brilliance Tritan Plastic Food Storage Containers BPA Free punches above its price — 583 buyers rated it 4.5 stars. I would buy it again.
Frequently Asked Questions
How long do overnight oats last in the fridge?
When stored in an airtight glass container like a Mason jar, overnight oats maintain their texture and freshness for up to five days in the refrigerator. Wait to add crunchy toppings until right before eating.
What is the best way to reheat frozen breakfast burritos?
For the best texture, leave the burrito wrapped in parchment paper but remove any foil. Heat it in an air fryer at 350°F for 10 to 12 minutes, or bake in an oven at 350°F for 15 to 20 minutes.
Can I freeze chaffles for meal prep for breakfast?
Yes, chaffles freeze incredibly well for up to six months. Let them cool completely on a wire rack, place parchment paper between each one, and store in an airtight freezer container. Reheat directly in a toaster.
Why does my chia seed pudding get clumpy?
Chia seeds clump if they aren’t stirred twice. Mix your 1:4 ratio of seeds to liquid, wait exactly five minutes for the seeds to begin swelling, and stir vigorously a second time to prevent a solid block from forming.
