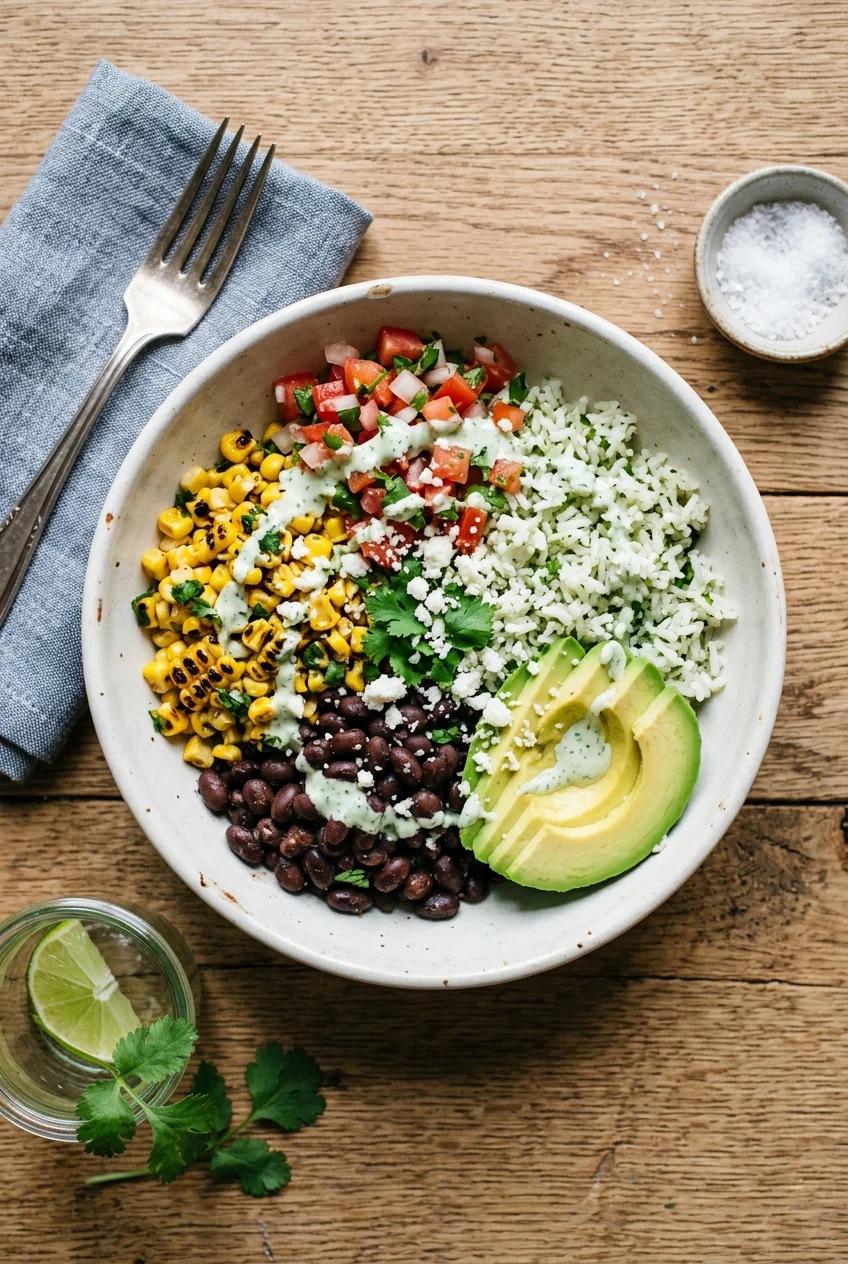
What’s Inside
- Prevent Soggy Greens with Smart Layering
- Batch Cook Grains for Your Meal Prep Burrito Bowl
- Power Up with 58 Grams of Protein
- Improve Your Base with Salsa Rice
- Master Avocado Preservation Without Browning
- Select Quality Canned Beans for Texture
- Choose Durable Greens for Your Meal Prep Burrito Bowl
- Add a Surprising Crunch with Tortilla Strips
- Utilize the Deconstructed Approach for Toppings
- Prioritize Seasoning with the Right Blends
- Incorporate Gut-Healthy Fermented Foods
- Embrace Sustainable and Personalized Nutrition
Last Tuesday at Whole Foods, I watched a woman drop a flimsy plastic container in the parking lot. A week’s worth of sad, watery rice and grey avocado spilled onto the asphalt. It reminded me of my own meal prep burrito bowl disasters from three years ago. Back then, I’d end up with a soggy, unappetizing mess by Wednesday because I didn’t get how moisture works in a sealed box. Most people get this wrong when they start packing lunches. They throw everything together and hope for the best. A properly planned meal prep burrito bowl fixes your weekly routine, offering a nutritious option that actually tastes fresh on day four. I sat down and did the math recently. A well-planned batch for four servings costs as little as $9.05 total. That breaks down to $2.26 per serving by using bulk purchases and versatile ingredients. I’m sharing the exact methods I use to keep lettuce crisp, rice flavorful, and avocados green. Let’s get into the specifics of making this work in your own kitchen.
1. Prevent Soggy Greens with Smart Layering

I used to put my lettuce right at the bottom of my glass containers. I thought it made a nice bed for the meat and beans. That was a massive mistake. By Tuesday, the heat from the cooked ingredients and the liquid from the salsa turned the greens into a wilted, slimy layer that smelled faintly of a compost bin. You have to pack wet ingredients like salsa, dressing, cooked beans, and corn at the very bottom of your container. You place sturdy greens on top, far away from the moisture. I use the Pyrex 3-cup rectangular glass containers. They cost $22.99 for a 4-pack at Target. I bought this set in October after my old plastic ones started holding onto the smell of raw onions. The glass is thick, and the lids snap on tight without trapping unnecessary condensation. When you layer the wet stuff on the bottom, the liquid stays contained. The crisp greens sit high and dry on top. You only mix them together right before eating. This simple structural change keeps the textures distinct. You won’t end up chewing on wet paper when you want a crisp bite of salad. Trust me.
2. Batch Cook Grains for Your Meal Prep Burrito Bowl

Standing over a hot stove every single night is why people quit packing their lunches. You need to prepare a large quantity of your chosen grain at the start of your meal prep session. I usually measure out exactly 1.5 cups of uncooked brown rice. Once you simmer it with the lid tightly closed for forty minutes, it yields approximately 4 cups of cooked rice. This gives you exactly one cup per container for four days. I buy the Lundberg Family Farms organic short grain brown rice. It runs $4.99 a bag at Sprouts. I switched to this brand last year because the generic store brand I was buying always cooked up mushy and split open in the boiling water. The short grain variety holds its shape in the fridge. When you take the lid off the pot, the steam smells nutty and earthy. It provides a solid, chewy base that won’t disintegrate when you pour salsa over it. Cooking your grains in one big batch on Sunday afternoon cuts your daily cooking time down to zero. You just scoop, portion, and move on.
3. Power Up with 58 Grams of Protein

A bowl of rice and beans leaves you hungry by two in the afternoon. You need a dense protein source to make this a functional meal. I cook 1 pound of lean ground meat for four servings. You can use beef, turkey, or chicken. I prefer ground beef for the texture. I pick up the Kirkland Signature organic ground beef. It costs $19.99 for a 3-pound package at Costco. I freeze two pounds and brown the remaining pound in a heavy cast iron skillet. You want the pan smoking hot before the meat hits it. The loud sizzle and the smell of rendering fat fill the kitchen immediately. I break it apart with a wooden spoon until it gets crispy brown edges. A typical serving of this beef, combined with the beans and rice, can contribute around 58 grams of protein per bowl. If you don’t eat meat, you can use plant-based proteins like lentils, extra firm tofu, or roasted chickpeas. I tried the tofu route for a month. The mistake I made was not pressing the water out first. The tofu acted like a sponge and leaked water into my rice. Always press your tofu for at least twenty minutes if you go the plant-based route.

Food Scale -33lb Digital Kitchen Scale for Food Ounces
A dependable everyday pick — Food Scale -33lb Digital Kitchen Scale for Food Ounces Grams Rechargea pulls in 78 ratings at 4.5 stars. Not flashy, just solid.
4. Improve Your Base with Salsa Rice

Plain white or brown rice gets dry in the refrigerator. After two days, it tastes like wet cardboard and clumps together in a solid brick. You can fix this by cooking your rice directly with flavor add-ins. Instead of plain water, I enhance the base by stirring in about 1/3 cup of my favorite salsa, a tablespoon of minced garlic, and a handful of chopped fresh cilantro right after the rice finishes cooking. I use Pace Chunky Medium Salsa. It costs $3.48 at Walmart. I like it because the chunks of tomatoes and jalapeños don’t turn into liquid mush when mixed with the hot grains. The heat from the freshly cooked rice lightly cooks the raw garlic, taking away the sharp bite but leaving a deep, savory aroma. The cilantro wilts just enough to release its oils. This creates a much more aromatic and flavorful foundation for your bowl. I tried mixing the salsa in before boiling the rice once. That was a disaster. The acid in the tomatoes kept the rice grains from softening, and I ended up with crunchy, undercooked rice after forty-five minutes on the stove. Always fold the salsa in after the grains are fully cooked and tender. You might also like: 9 Cheap High Protein Meal Prep Worth Trying
5. Master Avocado Preservation Without Browning

Avocados are the most frustrating ingredient to meal prep. You cut into a perfect, creamy green avocado on Sunday, and by Monday afternoon, it looks like brown sludge. To combat browning, you have to control the oxygen exposure. I store cut avocado with the pit still securely intact in the flesh. I brush the exposed green fruit with a little fresh lemon or lime juice. Then, I cover it tightly with plastic wrap. I use Glad Press’n Seal. It costs $4.59 a roll at Kroger. Regular plastic wrap doesn’t cling tightly enough to the bumpy avocado skin, allowing air to slip in. The Press’n Seal actually sticks. Alternatively, you can place the avocado half in an airtight container with a large piece of cut-up raw onion. The sulfur gases from the onion prevent the oxidation process. This method can keep the avocado fresh and bright green for up to three days. I learned the onion trick from a line cook at a local diner. I was skeptical, but it actually works. Just keep the onion chunk large so you don’t accidentally scoop it up and eat it with your avocado. The texture of a perfectly preserved avocado is buttery and rich. It provides the necessary fat to keep you full. Skipping it because you’re afraid of browning means you miss out on the best part of the bowl. You might also like: 10 High Protein Lunch Meal Prep You Need to See
6. Select Quality Canned Beans for Texture

Cooking dried beans from scratch takes hours. Canned beans are the only way you keep this prep under thirty minutes. When using canned beans, you must thoroughly rinse and drain them in a mesh sieve. The starchy liquid inside the can is thick, salty, and causes digestive issues for a lot of people. I hold the sieve under cold running water until the water runs completely clear and the beans look matte instead of shiny. For pinto beans, I buy Simple Truth Organic Pinto Beans. They cost $1.29 a can at Kroger. The skins on these beans stay intact. Cheaper brands often give you a can full of mushy, split beans that turn into paste when you stir them. If you prefer a mashed texture, you need a high-fiber choice. I buy La Preferida Organic Authentic Refried Black Beans. They run about $2.19 a can. They carry a rich, earthy flavor and don’t contain the heavy lard found in traditional refried beans. I used to just dump the whole can of unrinsed black beans into my prep bowls. The dark liquid stained the rice grey and made the whole dish taste metallic. Rinsing them is a non-negotiable step. You might also like: 8 Meal Prep Lunches You Need to See

Rubbermaid Brilliance Tritan Plastic Food Storage
A dependable everyday pick — Rubbermaid Brilliance Tritan Plastic Food Storage Containers BPA Free pulls in 583 ratings at 4.5 stars. Not flashy, just solid.
7. Choose Durable Greens for Your Meal Prep Burrito Bowl

The type of lettuce you buy dictates whether your lunch survives until Thursday. You’ve got to opt for durable greens like Romaine, Kale, or shredded Iceberg lettuce. These varieties carry thick, water-dense ribs that are less prone to wilting. They can stay fresh in the refrigerator for up to four days. Delicate greens like butter lettuce or baby spring mix won’t survive. I buy the Taylor Farms chopped romaine bags. They cost $2.99 at Target. I like buying the pre-chopped bags to save time, but I always inspect the bottom of the bag for brown water before putting it in my cart. If you see pink or brown liquid in the corners, the lettuce is already rotting. Last year, I tried using a leftover plastic clamshell of baby spinach for my bowls. By day two, the spinach absorbed the ambient humidity in the fridge and turned into a dark green slime that coated the chicken. It was completely inedible. Stick to lettuce that audibly crunches when you bite into it. Iceberg lettuce often gets a bad reputation for lacking nutrients, but it provides a massive textural crunch that mimics a restaurant-style taco salad. Kale is even better if you massage it with a little olive oil first to break down the tough fibers.
8. Add a Surprising Crunch with Tortilla Strips

Eating out of a glass container four days in a row gets monotonous. You need an unexpected textural contrast and a flavor boost to keep things interesting. I pack a small portion of fried tortilla strips separately to add just before eating. This simple addition completely changes the meal prep experience. I buy the Fresh Gourmet Tri-Color Tortilla Strips. You can find them in the salad aisle for $3.49 at Whole Foods. They carry a salty, toasted corn flavor and a sharp crunch. You absolutely can’t put these strips inside the main glass container. I made this mistake with regular tortilla chips during my first month of meal prepping. The moisture from the rice and the condensation in the fridge turned the chips into a wet, chewy paste that stuck to the roof of my mouth. It was gross. You have to portion the strips into little plastic zip bags or tiny dry containers. You sprinkle them over the top right after you pull the bowl out of the microwave. The contrast between the hot, savory meat and the cold, salty crunch of the strips makes it taste like a fresh restaurant meal instead of leftovers.
9. Utilize the Deconstructed Approach for Toppings

If you want to maintain peak freshness, you have to separate your temperatures. You can’t heat up sour cream and guacamole in the microwave with your beef and rice. The sour cream curdles and separates into clear liquid and white clumps. The guacamole turns grey and tastes bitter when heated. You have to store delicate ingredients like guacamole, sour cream, or fresh herbs like cilantro in small, separate condiment containers. You add them to your bowl right before serving. I use the Sistema To Go dressing containers. They cost $5.99 for a 4-pack at Target. They hold exactly 1.18 ounces, which is the perfect portion size for a heavy condiment. The screw-top lids never leak in my lunch bag. I keep the main glass bowl in one hand and my little stack of condiment containers in the other. I heat the glass bowl for two minutes until the beef is steaming. Then I take it out, unscrew the Sistema containers, and dollop the cold sour cream and fresh cilantro right on top. This deconstructed method mimics how a line cook builds a fresh order at a fast-casual restaurant. It takes an extra sixty seconds of prep on Sunday, but it saves your lunch from becoming a lukewarm, muddy soup.

Bento Box Adult Lunch Box – 4 Pack, 5
Bento Box Adult Lunch Box – 4 Pack punches above its price — 24 buyers rated it 4.5 stars. I would buy it again.
10. Prioritize Seasoning with the Right Blends

Dietitians and chefs emphasize that effective seasoning is the only way you’ll actually look forward to eating your prepped food. Unseasoned ground beef and plain black beans taste bland and depressing. You need a concentrated spice blend to flavor your proteins and beans. I use a homemade taco seasoning blend. I mix two tablespoons of chili powder, one tablespoon of ground cumin, one teaspoon of smoked paprika, one teaspoon of onion powder, and one teaspoon of garlic powder. I toast these dry spices in the hot skillet for thirty seconds before adding the meat. The heat releases the essential oils in the cumin, filling the room with a deep, smoky aroma. If I’m rushing and don’t want to measure individual spices, I use a quality store-bought option. McCormick’s Original Taco Seasoning Mix works perfectly. It costs $1.19 a packet at Walmart. I tried buying a massive bulk container of generic taco seasoning from a warehouse store once. It was a mistake. The blend was mostly salt and barely contained any chili flavor. I ended up ruining a whole batch of chicken because it was too salty to swallow. Stick to a balanced blend and make sure you coat the meat thoroughly while it cooks.
11. Incorporate Gut-Healthy Fermented Foods

Digestive health is a priority for me now. Eating heavy rice and meat dishes every day leaves you feeling sluggish if you don’t balance it out. You can boost your gut microbiome by adding fermented ingredients to your finished bowl. I skip the traditional sour cream entirely. Instead, I use a large dollop of high-protein plain Greek yogurt. It serves as a healthier alternative that provides the exact same creamy texture and cooling effect. I buy Fage Total 2% Greek Yogurt. It costs $7.49 for a 32-ounce tub at Costco. The 2% milk fat gives it a rich mouthfeel without separating when it hits the hot rice. The natural tanginess cuts through the heavy, savory flavors of the taco meat. I also like to add a small forkful of raw sauerkraut or fermented pickles on the side. The sharp, acidic bite acts like a palate cleanser. I used to buy the shelf-stable pickles in the center aisles of the grocery store. I didn’t realize that the pasteurization process kills all the beneficial bacteria. You’ve got to buy the fermented items from the refrigerated section if you want the probiotic benefits. The cold crunch of a fermented pickle slice next to hot spicy beef is incredible.
12. Embrace Sustainable and Personalized Nutrition

The future of meal prep is increasingly personalized and environmentally conscious. A growing trend in 2026 focuses heavily on sustainability. You can reduce your kitchen waste by purchasing ingredients in bulk and prioritizing seasonal produce. Consistently using reusable glass containers instead of disposable plastic bags lowers your environmental footprint significantly. You also need to tailor your lunches to your specific dietary preferences and health goals. If you’re aiming for a keto or low-carb approach, you swap out the brown rice entirely. I use Green Giant Riced Cauliflower as a low-carb alternative. It costs $2.79 a bag at Sprouts. You steam it in the microwave for four minutes, squeeze the excess water out with a paper towel, and toss it in a dry skillet to toast the edges. If you skip the squeezing step, the cauliflower releases water into your bowl and turns everything into a swamp. I learned that the hard way last February when my lunch looked like a bowl of cereal milk. Whether you need gluten-free, high-fiber, or plant-based options, you build the bowl to serve your specific body. You don’t have to follow a rigid recipe. You just follow the structural rules of moisture control and temperature separation.
I’ve been packing these lunches for years, and sticking to these specific rules completely fixed my midday slump. No exaggeration. You won’t regret taking thirty minutes on a Sunday to get this right. If you found these structural tips helpful, save this post to your favorite Pinterest board so you can reference the exact layering methods and spice blends next time you’re standing in the grocery store aisle.

buluker 4 Pack Bento Lunch Box Set 3 Compartment Food
Honestly, buluker 4 Pack Bento Lunch Box Set 3 Compartment Food Storage Containe surprised me — sturdier than it looks in the photos, and over 23 buyers gave it 4.5 stars.
Frequently Asked Questions
How long does a meal prep burrito bowl last in the fridge?
When stored in an airtight glass container, a meal prep burrito bowl lasts up to four days. You must keep wet ingredients at the bottom and crisp greens at the top to maintain the proper texture.
Can I freeze a meal prep burrito bowl?
You can freeze the cooked rice, beans, and meat for up to three months. However, you can’t freeze fresh lettuce, salsa, or avocado. Thaw the cooked base overnight and add the fresh toppings right before eating.
How do I keep the avocado from turning brown in my bowl?
Store the cut avocado with the pit intact, brush the exposed flesh with lemon or lime juice, and wrap it tightly in plastic wrap. You can also store it in a container with a piece of raw onion.
What is the best way to reheat a meal prep burrito bowl?
Remove any cold toppings like lettuce, sour cream, and guacamole first. Microwave the glass container with the rice, beans, and meat for about two minutes until steaming, then add your cold ingredients back on top.
