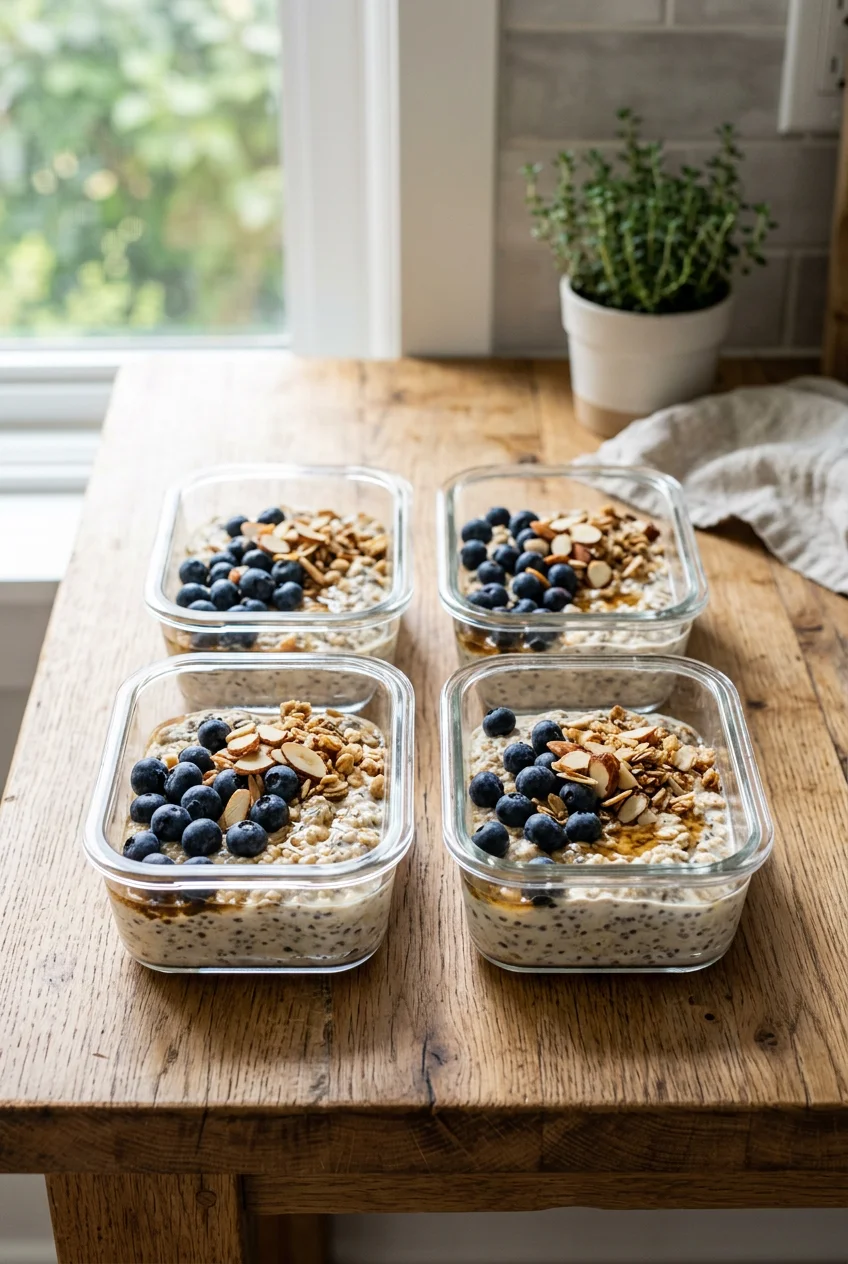
What’s Inside
- Choose the Right Oats for Your Meal Prep Breakfast Bowls
- Master the Chia Pudding Ratio for Perfect Consistency
- Prevent Clumpy Chia Pudding with a Double Stir
- Prioritize High-Protein, Low-Sugar Yogurt
- Opt for 100% No-Added-Sugar Nut Butters
- Embrace Savory Breakfast Bowls for 2026
- Blend Cottage Cheese for Surprisingly Fluffy Eggs
- Invest in Glass Containers for Health and Durability
- Store Toppings Separately to Prevent Soggy Disasters
- Roast Sweet Potatoes for a Filling Base
- Build Your Meal Prep Breakfast Bowls with Frozen Berries
Last Tuesday at Trader Joe’s, I stared at a sad, pre-packaged oatmeal cup priced at $6.49, realizing my homemade meal prep breakfast bowls were infinitely better. The store-bought oats looked like gray sludge in a puddle of watery milk. That visual failure reminded me why I started cooking in the first place. You can’t rely on overpriced grocery store grabs when making your own food is so cheap and easy. I’ve spent three years perfecting my morning routine. I’m telling you right now, taking thirty minutes on a Sunday afternoon saves me from the chaotic Monday morning scramble. I used to skip breakfast because I was too lazy to cook at 7 AM. My stomach would growl during morning meetings. It was embarrassing. No exaggeration. Now, I just grab a glass container from the fridge and eat. Here are the exact formulas I use. I promise you’re going to love these methods. They actually taste good. Unlike the soggy messes I used to make.
1. Choose the Right Oats for Your Meal Prep Breakfast Bowls

I tried this wrong for months before figuring it out. I used to buy cheap quick oats, and by Wednesday, my bowls tasted like wet wallpaper paste. The texture was ruined. You must use old-fashioned rolled oats for your meal prep breakfast bowls. I personally swear by Bob’s Red Mill Organic Old-Fashioned Rolled Oats. A 32 oz bag costs exactly $5.99 at Whole Foods. These oats absorb liquid to create a creamy texture without becoming mushy or excessively chewy. That chewy texture is a massive issue with instant or steel-cut oats. I made the mistake of using steel-cut oats once for an overnight recipe. I nearly chipped a tooth because they were so hard. Learned that the hard way. You need exactly 1/2 cup of rolled oats as your base. Pour them into your container and listen to that satisfying dry rattle against the glass. Then add your liquid. They soften up perfectly while sitting in the fridge. I’m always shocked when people try to use the flavored packet oats for this. Skip the fat-free, artificially flavored stuff. It tastes like wet cardboard. Stick to the plain rolled oats. You won’t regret it. It’s the only way to get that thick, satisfying bite.
2. Master the Chia Pudding Ratio for Perfect Consistency

Chia seeds are magical, but they’re also finicky. If you mess up the liquid ratio, you end up with a watery soup or a brick of seeds. For a classic, creamy chia pudding base, aim for a strict 1:4 ratio of chia seeds to liquid. I use exactly 1/4 cup of Navitas Organics Chia Seeds mixed with 1 cup of almond milk. An 8 oz bag of these seeds runs about $6.99 at Sprouts. If you desire a thicker, spoon-set consistency, increase the chia seeds to 3 tablespoons per 1 cup of milk. I learned this the hard way last summer. I poured half a cup of seeds into a jar with barely any milk. The next morning, it was so dense I couldn’t get my spoon through it. It looked like a solid gray block of cement. You want the texture to be gel-like and smooth, sliding off the spoon easily. Measure your ingredients carefully. Don’t just eyeball it. I’d highly recommend using proper measuring cups. It makes a massive difference in how your breakfast feels. You’re going to appreciate the exact measurements when you take that first creamy bite. The seeds swell up beautifully when given the right amount of liquid.
3. Prevent Clumpy Chia Pudding with a Double Stir

Most people get this wrong. They dump the seeds and milk into a jar, shake it once, and throw it in the fridge. I did this for a whole year. I would dig my spoon in the next morning and hit a giant gelatinous rock of dry seeds at the bottom. It was disgusting. To prevent clumpy chia pudding, you absolutely need to do a double stir. After initially mixing your chia seeds with liquid, let the mixture sit on the counter for 10 to 15 minutes. Then give it a second thorough stir. This breaks up any clumps that may have settled. It ensures even hydration and a smooth pudding. I use Blue Diamond Almond Breeze Unsweetened Vanilla milk. A 64 oz carton is $3.49 at Target. The vanilla adds a nice sweet smell without any sugar. When you do that second stir, you’ll literally feel the clumps breaking apart under your spoon. It’s so satisfying. If you skip this step, your breakfast bowls won’t have that luxurious pudding texture. Take the extra ten minutes. You can wipe down your kitchen counters while you wait. The texture upgrade is mandatory. You might also like: 20 Inspiring Carnivore Meal Prep Ideas That Are Totally Worth It

M MCIRCO 10-Pack,30 Oz Glass Meal Prep Containers 2
M MCIRCO 10-Pack punches above its price — 23 buyers rated it 4.5 stars. I would buy it again.
4. Prioritize High-Protein, Low-Sugar Yogurt

Yogurt is the easiest way to add creaminess to your bowls, but the dairy aisle is a minefield of sugar. I used to buy those little fruit-on-the-bottom cups. They smelled like fake candy and left me starving an hour later. You need to select high-protein, low-sugar yogurt brands. I always buy FAGE Total 0% Greek Yogurt. A 35.3 oz tub costs $6.49 at Walmart. You can also use Siggi’s Icelandic Skyr or Oikos Triple Zero Greek Yogurt. These options typically offer 15 to 20 grams of protein per serving and minimal added sugar. This protein hit helps to keep you satiated and balances your blood sugar levels all morning. I use exactly 3/4 cup of the FAGE yogurt in my bowls. It is incredibly thick. It coats the back of the spoon and has a sharp, tart flavor that cuts through sweet toppings. Skip the fat-free stuff that compensates with artificial syrups. It tastes like wet cardboard. You want a dense, rich base that holds up in the fridge for four days without separating into a watery mess. I’ve tried cheaper store brands, and they always get runny by Wednesday. Spend the extra two dollars on the good stuff. You might also like: 20 Clever Quick Lunch Ideas You Haven’t Thought Of
5. Opt for 100% No-Added-Sugar Nut Butters

Nut butter is my favorite part of the morning. I love opening a fresh jar and smelling those rich, roasted peanuts. But you have to read the labels carefully. I used to buy the commercial peanut butters loaded with palm oil and sugar. They tasted great, but they totally defeated the purpose of a healthy meal prep. Now, I only choose nut butters with a pure ingredient list. I buy Spread The Love NAKED Organic Peanut Butter. A 16 oz jar is $11.99 on Amazon or at Whole Foods. It is made solely from dry-roasted organic peanuts. You can also look for MaraNatha Organic Creamy Peanut Butter. These pure options typically range from $0.50 to $1.20 per ounce. They provide healthy fats without unnecessary sugars. I drizzle exactly 2 tablespoons over my oats. Because there are no stabilizers, you have to stir the oil back in. I know it’s annoying. I used to spill peanut oil all over my hands. Took me years to figure out how to stir it without making a mess. But that sticky, dripping texture is so worth it. The pure peanut flavor is intense. It won’t make your teeth ache from fake sweetness. A good nut butter binds the whole bowl together perfectly. You might also like: 15 Creative Healthy Meal Prep Ideas That Make a Real Difference
6. Embrace Savory Breakfast Bowls for 2026

If you are sick of sweet oatmeal, you need to try this. A significant trend for 2026 is the massive shift towards savory breakfast options. I honestly hated the idea of savory oats until I tried it last month. Now I am hooked. You can prep savory bowls just as easily as sweet ones. I incorporate ingredients like scrambled eggs, roasted vegetables, and lean protein. I use exactly 2 large eggs per bowl. I chop up 1/2 cup of fresh red bell peppers and yellow onions. Then I add Jennie-O Turkey Sausage. A 16 oz roll costs $4.49 at Kroger. I cook up 1/4 cup of the sausage until it gets those crispy, browned edges. The smell of sizzling sausage and sweet caramelized onions in the morning is incredible. You pack this all into your container over a base of quinoa or savory oats. When you microwave it at work, everyone will be jealous of how good your food smells. Savory bowls give you a balanced and satisfying start to your day. They won’t give you a sugar crash at 10 AM. You will stay full until lunch without a problem.

KOMUEE 10 Packs 30 oz Glass Meal Prep Containers
Honestly, KOMUEE 10 Packs 30 oz Glass Meal Prep Containers surprised me — sturdier than it looks in the photos, and over 46 buyers gave it 4.5 stars.
7. Blend Cottage Cheese for Surprisingly Fluffy Eggs

I know cottage cheese is controversial. My sister gags just looking at the curds. But this trick is brilliant. For an expert-approved tip to create exceptionally fluffy and protein-rich scrambled eggs in your savory bowls, you need to blend them. Dietitian Nicole Addison recommends blending 1 cup of cottage cheese with 8 eggs before cooking. This technique significantly enhances both texture and protein content. I buy Good Culture Low Fat Cottage Cheese. A 16 oz tub is $4.99 at Target. I throw the eggs and the cottage cheese into my blender and hit pulse. The blender totally destroys the curds. You are left with a smooth, pale yellow liquid. When you pour it into a hot skillet, the eggs puff up like little clouds. They are incredibly rich and soft. I’ve tried making prep bowls with regular scrambled eggs, and they always turn into dry, rubbery sponges after three days in the fridge. The blended cottage cheese keeps them moist and tender all week long. Even if you hate cottage cheese, I’m begging you to try this. You can’t taste the cheese at all. It just tastes like a gourmet, restaurant-quality breakfast.
8. Invest in Glass Containers for Health and Durability

Your containers matter just as much as your food. I used to use cheap plastic tubs I hoarded from takeout restaurants. Last year, I microwaved one of my oatmeal bowls, and the plastic literally melted into the side of my oats. It smelled like burning chemicals. I threw the whole thing in the trash. Experts like Dietitian Sarah Krieger advocate for glass meal prep containers due to their superior safety. They don’t leach harmful chemicals like BPA or phthalates into your food, especially when heated. Glass containers are also far more durable. They are resistant to odors and stains, and they can safely transition from the freezer directly to the microwave. I bought a set of Pyrex 3-Cup Rectangular Glass Containers. A set of four costs $22.99 at Walmart. This is a quality investment. They typically cost between $15 and $30. The glass feels heavy and substantial in your hands. The lids snap on tightly with a satisfying click. You won’t have to worry about turmeric staining the plastic bright yellow anymore. I’d never go back to cheap plastic. The glass keeps the food tasting fresher for much longer.
9. Store Toppings Separately to Prevent Soggy Disasters

Texture is everything when it comes to a good breakfast. There is nothing worse than looking forward to a crunchy topping and getting a mouthful of mush. I used to dump my granola directly onto my yogurt on Sunday nights. By Tuesday, the granola had absorbed all the moisture. It tasted exactly like wet sand. It was a complete textural nightmare. You must store your toppings separately. I bought a 4-pack of Sistema To Go Mini Dressing Pots for $5.99 at Target. They hold exactly 1.18 oz. I measure out exactly 1/4 cup of my favorite almond granola into these tiny containers. I keep them in my pantry until I am ready to eat. Right before I dig into my bowl, I pop the lid off and sprinkle the dry granola over the wet base. You get that loud, satisfying crunch with every single bite. It is a tiny extra step that completely saves the meal. Don’t ruin perfectly good pecans or coconut flakes by letting them drown in milk for four days. Keep them dry. You will thank yourself when you hear that crunch on a Thursday morning.
![C CREST [10 Pack] Glass Meal Prep Containers](https://m.media-amazon.com/images/I/81HfSfzlqUL._AC_UL320_.jpg)
C CREST [10 Pack] Glass Meal Prep Containers
C CREST [10 Pack] Glass Meal Prep Containers has been one of the most consistently praised picks in this category. 349 reviewers averaged 4.5/5.
10. Roast Sweet Potatoes for a Filling Base

Sweet potatoes are an incredibly cheap and filling base for your bowls. I started using them when I got tired of oats. I buy a massive bag of sweet potatoes at Costco for about $6.99. I peel them, chop them into small cubes, and toss them with olive oil and Simply Nature Organic Cinnamon. A 2.5 oz jar of that cinnamon is $2.19 at Aldi. I roast exactly 1 cup of cubed sweet potatoes per bowl. I bake them at 400 degrees until the edges get dark and caramelized. The smell of cinnamon and roasting sugar fills the entire kitchen. It smells like a bakery. The centers get incredibly soft and buttery. I put the roasted cubes at the bottom of my glass containers and top them with Greek yogurt and a scoop of peanut butter. The contrast between the cold, tart yogurt and the dense, sweet potato is amazing. I’ve tried boiling the potatoes to save time, but they just turn into watery mush. Roasting them is mandatory. It brings out all their natural sugars. You’re going to crave this combination once you try it. It completely replaces heavy pastries.
11. Build Your Meal Prep Breakfast Bowls with Frozen Berries

Fresh berries are great, but they are expensive and go bad so quickly. I used to buy fresh raspberries for my meal prep. Half the carton would be covered in white fuzz before I even finished chopping my vegetables. Now, I exclusively use frozen fruit. I buy the Kirkland Signature Organic Blueberries. A massive 3 lb bag is $10.99 at Costco. I measure exactly 1/2 cup of frozen berries and dump them straight into my containers on top of my oats or yogurt. As the bowls sit in the fridge overnight, the berries slowly thaw. They release this incredible, bright purple juice that bleeds down into the yogurt. It creates a natural, beautiful syrup without any added sugar. When you take a bite, the berries are still slightly icy and pop in your mouth. It is so refreshing. Frozen fruit is picked at peak ripeness, so it honestly tastes better than the out-of-season fresh stuff anyway. Plus, it saves me a ton of money. I won’t ever waste cash on fresh berries for meal prep again. The frozen ones are vastly superior for this exact purpose.
Honestly, getting your breakfast sorted out on a Sunday changes your entire week. You aren’t rushing around trying to find something to eat, and you avoid spending ten dollars on a mediocre coffee shop muffin. I personally swear by these methods because they actually work. Take an hour this weekend, grab your glass containers, and try out the savory eggs or the sweet potato bowls. I’d love to know which combination ends up being your favorite. Make sure you pin this post or save it so you have all the exact measurements and ratios ready when you hit the grocery store! Prepping ahead is the kindest thing you can do for your future self.
Frequently Asked Questions
How long do meal prep breakfast bowls last in the fridge?
Most meal prep breakfast bowls stay fresh in the fridge for four to five days. If you use glass containers and store crunchy toppings separately, the texture holds up perfectly from Monday through Friday without getting soggy.
Can I freeze my meal prep breakfast bowls?
You can freeze baked oatmeal or savory egg bowls for up to three months. However, avoid freezing chia pudding or fresh yogurt bowls, as the dairy and seeds separate and become watery when thawed.
Do I eat meal prep breakfast bowls cold or hot?
It depends entirely on the base. Overnight oats, chia pudding, and yogurt bowls are meant to be eaten cold straight from the fridge. Savory egg bowls and roasted sweet potato bowls should be microwaved for two minutes.
What is the best container for meal prep breakfast bowls?
Glass containers are the absolute best choice. They do not hold onto weird food odors, they are microwave safe, and they won’t leach chemicals into your food. A three-cup rectangular glass container is the perfect size.
