What’s Inside
- Invest in High-Quality Glass Meal Prep Containers
- Achieve Macro Precision with a Smart Food Scale
- Leverage AI Meal Planning Apps
- Embrace Reverse Meal Planning for Cost Savings
- Batch Cook Components, Not Just Full Meals
- Prioritize Lean Protein Sources for Satiety
- Master Freezer Meal Prep to Extend Shelf Life
- Prevent Soggy Meals by Storing Dressings Separately
- Utilize Vegetable Choppers for Rapid Prep
- Incorporate Sustainable Practices
- Don’t Overlook Spices and Sauces for Flavor Variety
- Establish a Consistent Macro Meal Prep Routine
I remember sitting at my desk last Tuesday, staring into a scratched plastic container of what used to be chicken and rice. It smelled faintly of wet dog and looked like gray mush. That was the exact moment I realized my approach to macro meal prep was completely broken. If you’re tired of eating sad desk lunches that ruin your appetite, you’re in the right place. I tried doing this wrong for months before figuring it out. I’d cook 14 identical meals on Sunday, shove them in cheap plastic tubs, and pray they wouldn’t taste like refrigerator lint by Thursday. They always did. The texture was horrible, the flavors were bland, and I ended up throwing away half the food I spent hours making. Let’s fix that right now. We’re going to build a system that actually works for your lifestyle, saves you a ton of money, and keeps your food tasting incredibly fresh all week long.
1. Invest in High-Quality Glass Meal Prep Containers

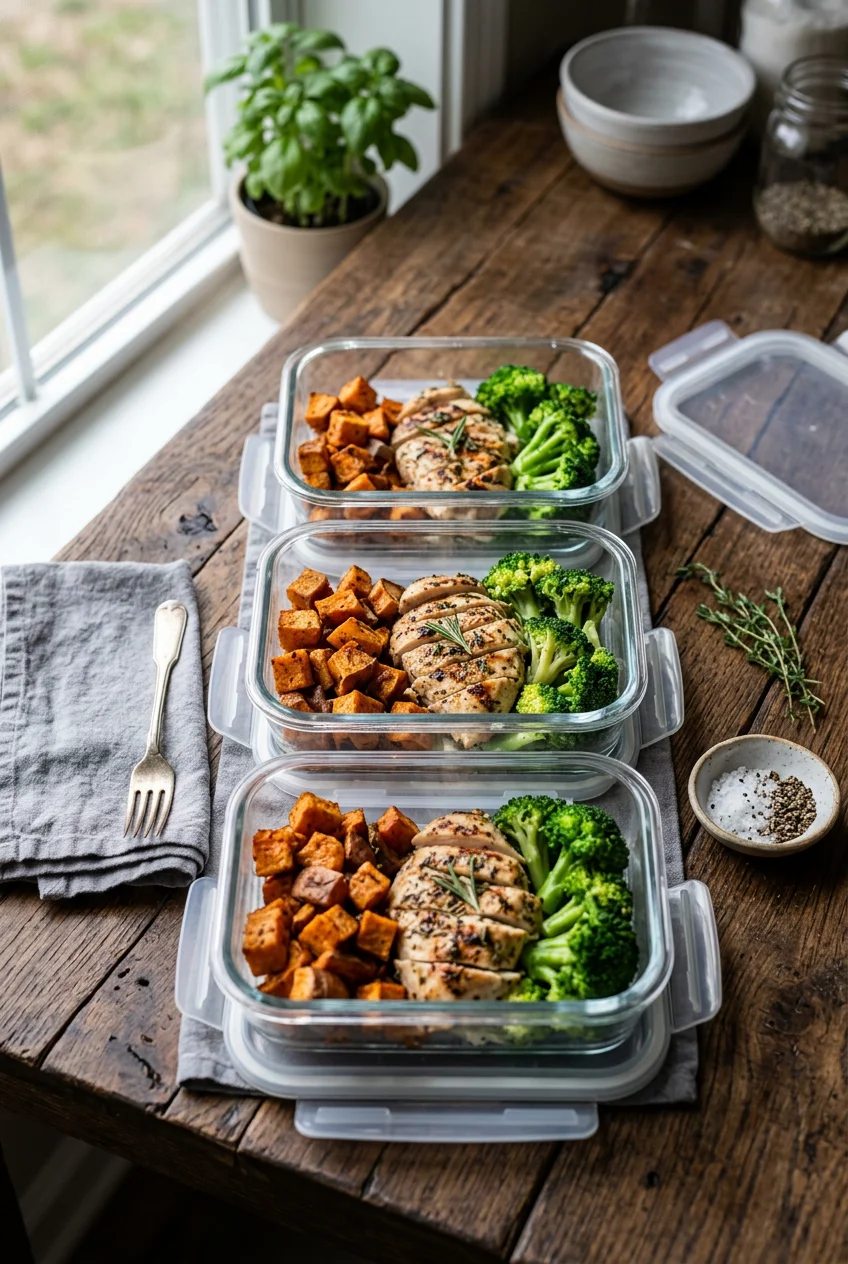
I’m obsessed with proper food storage. You need to upgrade your life and buy borosilicate glass snap-lock sets immediately. A 10-piece set usually costs between $25 and $40 on Amazon or at Target. I bought the Bayco 10-piece glass set for $32.99 last month. They hold exactly 30 oz, which is about 3.5 cups of food. This is the perfect size for a 4 oz chicken breast, 1/2 cup of brown rice, and a heaping cup of roasted broccoli. The cheap tempered soda-lime glass sets at Walmart (around $15 for an 8-piece set) are okay for beginners, but I shattered one last year. I took it out of the freezer and microwaved it too fast. There was hot glass and frozen chili everywhere. Learned that the hard way. Borosilicate glass is oven-safe up to 450 degrees Fahrenheit. It goes straight from the deep freeze to the microwave without cracking. Skip the flimsy plastic containers entirely. They warp in the dishwasher, stain easily, and hold onto weird garlic smells forever. You’re going to use these containers every single day. The heavy feel of real glass and the loud snap of the locking lids makes the whole process feel so much cleaner.
2. Achieve Macro Precision with a Smart Food Scale

You can’t guess your macros. Eyeballing a tablespoon of peanut butter is exactly how you accidentally eat 400 calories of fat in one sitting. You need a digital food scale with 1-gram precision. I personally swear by the Etekcity ESN00 Smart Nutrition Scale. I picked mine up at Best Buy for $39.99, but you can usually find it online for around $25 to $50. It syncs directly with the VeSync app on my phone via Bluetooth. When I drop exactly 150 grams of raw sweet potato onto the glass surface, it automatically logs the carbohydrates for me. No math required. If you hate using apps, grab the Greater Goods Digital Kitchen Scale for $25. It has a bright little screen that displays nutrition data for over 2,000 foods right there on the device. I used a cheap $10 plastic scale from a random grocery store aisle for a year. The buttons got sticky from a spilled 1/4 cup of soy sauce and it completely stopped zeroing out. A smart scale saves you from the tedious manual entry that makes most people quit tracking entirely. It’s a non-negotiable tool.
3. Leverage AI Meal Planning Apps

We’re moving into a time where technology does the heavy lifting for us. I’m talking about AI-powered meal planning apps, which is a massive trend for 2026. I started using FoodiePrep last month. It costs $7.99 a month for the premium version. You plug in your exact macro goals (like 150g protein, 200g carbs, 55g fat). The app spits out a personalized weekly meal plan and a highly specific grocery list. It even optimizes ingredient overlap so you aren’t buying a $4.99 bunch of fresh cilantro just to use 2 tablespoons and throw the rest in the trash. Another great option is Eat This Much, which runs about $8.99 a month. I tried planning my macros with a messy, color-coded Excel spreadsheet for three years. I’d spend two hours every Saturday morning staring at a screen, frustrated and hungry. Now, I tap a button while drinking my morning coffee. It generates a perfect list. I walk into Whole Foods knowing exactly what I need, right down to the last ounce of turkey.

M MCIRCO 10-Pack,22 Oz Glass Meal Prep Containers
A dependable everyday pick — M MCIRCO 10-Pack pulls in 86 ratings at 4.5 stars. Not flashy, just solid.
4. Embrace Reverse Meal Planning for Cost Savings

Most people get this wrong. They write a fancy menu, go to the store, and spend $150 on random ingredients they’ll only use once. Let’s adopt reverse meal planning instead. You start by digging through your pantry, fridge, and freezer. Last Sunday, I found a half-empty bag of quinoa, 3 cups of frozen peas, and a $6.99 jar of Rao’s Marinara Sauce shoved in the back of my cabinet. I built my entire week of lunches around those specific items. I only had to buy 2 pounds of ground turkey at Sprouts for $5.99 a pound to finish the meals. This method slashes your grocery bill instantly. It also stops you from hoarding five open boxes of penne pasta. I used to buy fresh spinach every single week, forget about it, and throw away a slimy, dark green bag every Friday. It felt like burning money. Now, I check my inventory first. You’re going to save at least $40 a week just by eating what you already own. It forces you to be creative. You might also like: 20 Clever School Lunch Ideas You Can Try Today
5. Batch Cook Components, Not Just Full Meals

Stop making complete meals. Batch cook individual components instead. Preparing 10 identical portions of chicken, rice, and broccoli is a guaranteed way to get meal fatigue. By Wednesday, you’ll be ordering a $25 pizza because you can’t stomach another identical plastic tub. I cook 3 pounds of lean protein, usually boneless skinless chicken thighs from Costco ($14.99 for a massive pack). I roast a massive sheet pan of mixed veggies. We’re talking 2 large zucchini, 3 red bell peppers, and 1 head of broccoli tossed in 2 tablespoons of olive oil. Then I make 4 cups of cooked brown rice. I store all these components in separate large glass containers in the fridge. On Tuesday, I might toss 4 oz of chicken and 1 cup of veggies into a hot pan with 2 tablespoons of teriyaki sauce. On Wednesday, I’ll mix that same chicken with 1/2 cup of black beans and 1/4 cup of salsa for a quick burrito bowl. It keeps things incredibly fresh and prevents boredom. You might also like: 20 Brilliant Quick Dinner Ideas You’ll Want to Bookmark
6. Prioritize Lean Protein Sources for Satiety

Protein is the anchor of your entire day. If you skimp on it, you’re going to be starving by 3 PM and reaching for a $3 candy bar from the vending machine. For effective macro meal prep, you need high-quality, lean protein sources. Aim for at least 25 to 30 grams of protein per meal. My weekly rotation always includes 2 pounds of 93/7 lean ground turkey. I buy the Jennie-O brand at Kroger for $5.49 a pound. It browns beautifully in a skillet and absorbs taco seasoning like a sponge. I also rely heavily on wild-caught salmon fillets, usually $12.99 a pound at Trader Joe’s. I bake them at 400 degrees for exactly 12 minutes. Don’t overcook your fish. I used to bake salmon for 25 minutes until it was dry, chalky, and tasted like cat food. It was terrible. Other great options are extra firm tofu ($2.99 a block), lentils, and Fage 0% Greek Yogurt ($6.99 for the large 32 oz tub). Skip the fat-free cheese though. It tastes like wet cardboard and absolutely won’t melt. You might also like: 15 Inspiring Chicken Meal Prep Ideas You Haven’t Thought Of

M MCIRCO 10-Pack,30 Oz Glass Meal Prep Containers 2
M MCIRCO 10-Pack has been one of the most consistently praised picks in this category. 23 reviewers averaged 4.5/5.
7. Master Freezer Meal Prep to Extend Shelf Life

You need to master your freezer. It’s the only way to prep massive quantities of food without it spoiling before Friday. I use a FoodSaver Vacuum Sealer. I bought the FM2000 model at Target for $119.99. It sucks all the air out of the heavy plastic bags and seals them tight. I can freeze 4 oz portions of cooked pulled pork for six months without a single ice crystal forming. If you don’t have a vacuum sealer, you must let your cooked food cool completely to room temperature before sealing it. I learned this the hard way. I once shoved a steaming hot container of turkey chili directly into the freezer. The condensation turned into a thick, solid layer of ice on the lid. When I microwaved it two weeks later, it turned into a watery, flavorless soup. Let your food rest on the counter for about 45 minutes. Once it hits room temperature, seal it up. This simple step preserves the texture of your meat and veggies perfectly.
8. Prevent Soggy Meals by Storing Dressings Separately

Nothing ruins a lunch faster than soggy greens. I packed a beautiful spinach and strawberry salad for work once. I dumped 3 tablespoons of balsamic vinaigrette right on top before I left the house. By noon, the spinach was wilted, dark green, and incredibly slimy. It was completely inedible. You must store your dressings and sauces separately. I bought a set of 6 stainless steel salad dressing containers on Amazon for $12.99. The brand is WeeSprout. They hold exactly 2.5 oz of liquid and have these amazing leak-proof silicone lids. I fill them with my homemade dressing (1 tablespoon olive oil, 1 tablespoon apple cider vinegar, 1 teaspoon Dijon mustard). I also use them for crunchy toppings. I’ll put 1/4 cup of sliced almonds or 1/2 cup of garlic croutons in a separate little tin. When you sit down to eat, you pour the dressing and toss the crunchies in. Your salad tastes like you just made it five minutes ago.
9. Utilize Vegetable Choppers for Rapid Prep

Chopping vegetables used to take up half my Sunday. I’d stand at the kitchen island for an hour, crying over onions and trying to dice sweet potatoes into perfectly uniform cubes. It was exhausting. Then I bought the Fullstar 4-in-1 Vegetable Chopper. It costs $24.99 on Amazon. You just place a half an onion on the steel grate and push the heavy plastic lid down. Smack. Perfectly diced onions fall into the clear plastic catch tray. I can chop 2 whole bell peppers, 1 large red onion, and 3 medium zucchini in under four minutes. It completely changed my prep routine. One warning though. Don’t try to force a rock-hard, massive raw sweet potato through the smallest dicing blade. I did that last year and permanently bent the metal grid. Cut the really dense root vegetables into smaller 1-inch thick slices first. This little gadget will shave at least 45 minutes off your weekly prep time.
![C CREST [10 Pack] Glass Meal Prep Containers](https://m.media-amazon.com/images/I/81HfSfzlqUL._AC_UL320_.jpg)
C CREST [10 Pack] Glass Meal Prep Containers
C CREST [10 Pack] Glass Meal Prep Containers punches above its price — 349 buyers rated it 4.5 stars. I would buy it again.
10. Incorporate Sustainable Practices

Sustainability is a massive focus right now. We produce way too much plastic waste in the kitchen. I try to buy my staples from the bulk bins at Whole Foods whenever possible. I bring my own reusable cotton produce bags (a 5-pack of Earthwise bags costs $11.99). I fill them with 2 pounds of raw almonds, 1 pound of chia seeds, and 3 pounds of jasmine rice. You only pay for the exact weight of the food, and you skip the plastic packaging. I also use an app called SummitPlate. It costs $4.99 a month and is specifically designed to reduce food waste. It looks at the random half-bunches of celery and open cans of black beans in your fridge and generates recipes to use them up before they rot. If you absolutely must use disposable containers for a busy week, buy the 50-pack of EcoProducts compostable clamshells for $22.99. They are made from sugarcane and break down naturally. We can’t keep throwing hundreds of plastic baggies into the trash every year.
11. Don’t Overlook Spices and Sauces for Flavor Variety

Plain boiled chicken and steamed broccoli is a punishment, not a meal. A lack of flavor is the number one reason people quit tracking their macros. You need a massive arsenal of spices and sauces. I dedicate an entire shelf in my fridge to high-quality condiments. I love the Primal Kitchen Avocado Oil Mayo. It’s pricey at $9.99 a jar at Sprouts, but the ingredients are spotless and the creamy texture is incredible. I also hoard Trader Joe’s Green Goddess seasoning ($2.99 a bottle). It has dried chives, onion, and garlic. I sprinkle a heavy teaspoon of it on my roasted carrots and it tastes amazing. Don’t be afraid of salt. I use Diamond Crystal Kosher Salt ($8.49 for a big 3-pound box). The coarse grains stick to meat better than regular table salt. I used to eat totally unseasoned food because I was terrified of sodium. My meals were so bland I had to force them down with gulps of water. Season your food aggressively. Trust me on this.
12. Establish a Consistent Macro Meal Prep Routine

You need a dedicated routine. I do my macro meal prep every single Sunday morning without fail. I wake up at 7 AM, drink a huge mug of black coffee, and head straight to Trader Joe’s. Getting there right when they open at 8 AM is crucial. The aisles are empty, the produce is fully stocked, and you don’t have to fight anyone for the last bag of frozen edamame ($2.29). I get home by 9 AM, put on a true crime podcast, and start chopping. I run my Fullstar chopper, get my 3 pounds of chicken in the oven, and start a massive pot of rice. By 11:30 AM, my kitchen is clean and my fridge is stacked with neatly labeled glass containers. I use a roll of blue painter’s tape ($4.99 at Home Depot) and a black Sharpie to write the date and the exact macros on every lid. This routine keeps me sane. When Wednesday night hits and I’m exhausted from work, dinner is already done. No exaggeration.
I hope these tips help you finally get a grip on your weekly food routine. Prepping your food doesn’t have to mean eating soggy, flavorless mush out of stained plastic bowls. Invest in the right tools, season your food properly, and stop cooking full meals you’ll be sick of by Tuesday. I highly recommend starting with the glass containers and a good food scale. Those two things alone will completely change your experience. Save this post for your next grocery run, and pin it to your favorite Pinterest board so you don’t lose these brand recommendations. Let’s make this week delicious.
![[8-Pack,30 oz]Glass Meal Prep Containers](https://m.media-amazon.com/images/I/713Zfdsgi4L._AC_UL320_.jpg)
[8-Pack,30 oz]Glass Meal Prep Containers
[8-Pack has been one of the most consistently praised picks in this category. 7 reviewers averaged 4.5/5.
Frequently Asked Questions
What is the best container for macro meal prep?
Borosilicate glass containers are the absolute best choice. They are oven-safe, microwave-safe, and won’t absorb food odors or stains like cheap plastic containers do.
How long does macro meal prep last in the fridge?
Most cooked proteins, grains, and roasted vegetables will last 3 to 4 days in an airtight glass container in the refrigerator. For longer storage, freeze your meals.
Do I need a food scale to track macros?
Yes, a digital food scale is essential. Eyeballing portions often leads to wildly inaccurate macro counts, especially with calorie-dense foods like peanut butter, oils, and nuts.
How do I stop my meal prep salads from getting soggy?
Always store your dressings and wet ingredients in separate, small containers. Only mix the dressing into the greens right before you sit down to eat.
