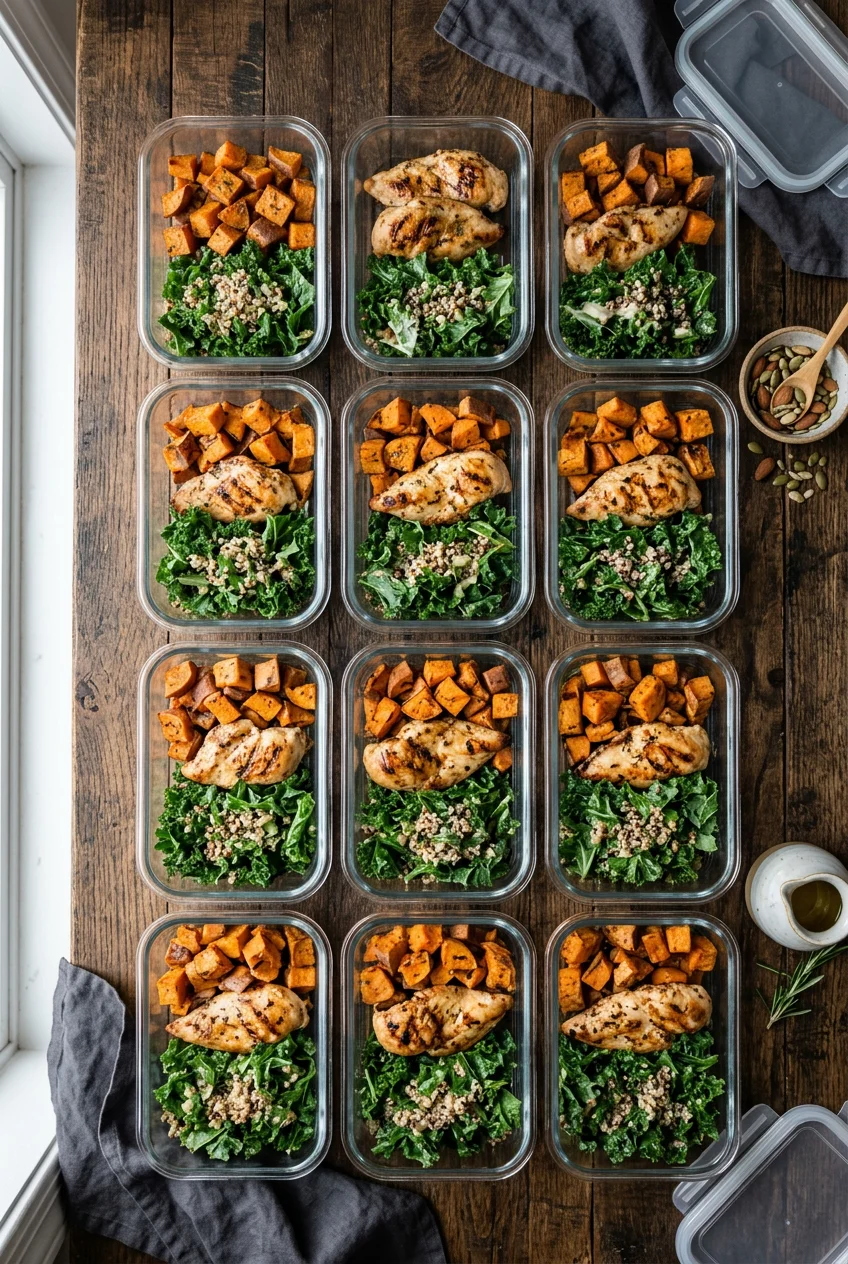
What’s Inside
- Start Your Easy Cheap Meal Prep With A Pantry Audit
- Buy Bulk Proteins Like Chicken Thighs
- Lean Heavily on Eggs and Canned Tuna
- Prep Components Instead of Full Meals
- Batch Cook Grains and Freeze Them Flat
- Pick Hearty Vegetables That Actually Last
- Use Heavy-Duty Appliances for Hands-Free Cooking
- Incorporate Plant-Based Proteins Like Black Beans
- Invest in the Right Storage Containers
- Master Food Safety for Easy Cheap Meal Prep
Last Tuesday at Whole Foods, I stared at a $14 pre-made salad that consisted of wilted spinach and three sad cherry tomatoes. That was the exact moment I realized my lunch budget was bleeding me dry. Figuring out easy cheap meal prep didn’t happen overnight for me. I spent months eating soggy cucumbers and rubbery chicken breasts before I learned how to actually plan a menu. I’d cook a massive batch of pasta on Sunday, leave it in one giant bowl, and by Wednesday it was a glued-together block of starch. You don’t need to suffer through wet cardboard textures just to save a few dollars. The trick is treating your kitchen like a mini assembly line and knowing exactly which ingredients hold up in the fridge. Let’s walk through exactly how I stock my fridge for the week without spending my entire paycheck.
1. Start Your Easy Cheap Meal Prep With A Pantry Audit

Before you even think about grabbing your car keys, open your cabinets. Most people skip this step, but conducting a pantry audit is the literal foundation of saving money. I used to buy new bags of rice every week because I forgot what I already owned. Last month, I dug through the back of my dark bottom shelf and found four cans of chickpeas I bought at Sprouts back in October. You’d be surprised what’s hiding behind the cereal boxes. Pull out your canned beans, half-empty bags of pasta, and dry grains. Plan your meals around these existing ingredients to slash your grocery bill.
If you need to restock, skip the name brands. Aldi’s Happy Harvest diced tomatoes cost just $0.95 per 14.5-ounce can. The name brands usually sit right next to them for over $3. It’s the exact same crushed tomato sitting in a slightly prettier can. I also grab Dakota’s Pride canned beans while I’m there since they run less than $1 per can. You aren’t compromising on quality by choosing the store brand for single-ingredient staples. You’re just refusing to pay a premium for marketing. Write down everything you have, group the proteins and carbs, and only buy the fresh produce needed to tie those items together.
2. Buy Bulk Proteins Like Chicken Thighs

Chicken breasts are the default choice for most fitness plans, but they dry out horribly in the microwave. By day three, you’re chewing on something that resembles an old shoe insert. I switched to chicken thighs two years ago and haven’t looked back. The slightly higher fat content means the meat stays juicy and tender even after three days in a plastic container. The sizzle of fat rendering in the hot cast iron pan also builds a much better pan sauce. Learned that the hard way.
You’ll find the best deals by purchasing larger packs at warehouse stores. Kirkland Signature boneless, skinless chicken thighs at Costco usually run between $1.49 and $2.49 per pound when you buy the 10-pound packs. I divide the massive package into 2-pound portions as soon as I get home. I freeze four bags and keep one out for my Sunday cooking session. If you don’t have a Costco membership, check the family-sized packs at Kroger or Walmart. A common mistake is under-seasoning bulk meat because you’re intimidated by the volume. Measure out 1 tablespoon of kosher salt per 3 pounds of meat to start, then adjust. Your wallet will thank you when you calculate the cost per serving.
3. Lean Heavily on Eggs and Canned Tuna

You don’t need to buy expensive cuts of beef or fresh salmon to hit your protein goals. Focus on cost-effective proteins that offer dense nutritional value. Eggs are arguably the cheapest high-quality protein you can get your hands on. A dozen eggs typically costs around $2 to $4. I hard-boil six eggs every Sunday. The smell of boiling eggs isn’t glamorous, but having a 70-calorie, 6-gram protein snack ready to grab is worth the temporary sulfur scent in my kitchen.
Canned tuna is another quiet workhorse. A 5-ounce can costs around $1 and provides 22 grams of protein per 3-ounce serving. I keep a stack of Chicken of the Sea chunk light tuna in my pantry. I tried the fat-free mayonnaise route for tuna salad for a few months. Skip the fat-free stuff. It tastes like wet cardboard and separates into a watery mess by Tuesday. Use 2 tablespoons of real mayonnaise, a squeeze of fresh lemon juice, and lots of cracked black pepper. Mix it up on Sunday, but don’t assemble your sandwiches until the morning you plan to eat them. Bread turns to mush if it sits against tuna salad for 48 hours. Store the salad in a sealed glass container to keep the fishy smell from taking over your fridge. You might also like: 15 Stunning Easy Lunch Ideas You Need to See

Skroam 10 Pack Glass Meal Prep Containers
If you want something that just works, Skroam 10 Pack Glass Meal Prep Containers is a safe bet (57 reviews, 4.5 stars).
4. Prep Components Instead of Full Meals

Most beginners try to cook five identical portions of chicken, rice, and broccoli, packing them neatly into five identical containers. By Wednesday, meal fatigue sets in hard. You end up staring at that plastic box with pure resentment and ordering a $20 pizza instead. Culinary school instructors advocate for prepping an array of components instead of complete meals. I roast two large sheet pans of vegetables, cook a massive batch of grains, and bake a tray of protein. I store them all in separate, large containers. You might also like: 15 Brilliant Good Meal Prep Ideas That Changed Everything
On Monday, I might toss the roasted carrots and chicken over a bed of spinach with a vinaigrette. On Tuesday, I’ll mix the same chicken and carrots into a bowl of warm quinoa with a peanut sauce. This component method prevents boredom and drastically reduces food waste. I buy different spice blends from Trader Joe’s (their Citrus Garlic seasoning is $1.99 for a 2.2-ounce jar) to change the flavor profile of the same base ingredients. The key is keeping the components relatively neutral during the initial cooking phase. Don’t drown your Sunday chicken in barbecue sauce if you might want to use it in a Greek wrap on Thursday. Keep the seasoning simple with salt, pepper, and 2 tablespoons of olive oil, then add your specific sauces on the day you actually eat the meal. You might also like: 20 Beautiful High Protein Meal Prep Ideas That Are Totally Worth It
5. Batch Cook Grains and Freeze Them Flat

Preparing large quantities of versatile grains like brown rice, quinoa, or oats is a mandatory step for keeping your grocery bill low. Target’s Good & Gather Organic Long Grain White Rice comes in a 30-ounce bag for around $4.99. I usually cook 4 to 5 cups of dry rice at once. Cooking rice in small batches every single night is a waste of electricity and time.
Here’s a crucial tip for managing that much rice. I used to dump all eight cups of cooked rice into one giant Tupperware container and shove it in the fridge. By mid-week, it’s a rock-hard block that requires an ice pick to break apart. Instead, freeze cooked grains in flat zip-top bags. Let the rice cool slightly, scoop it into a gallon-sized Ziploc, press all the air out, and flatten it into a thin sheet. Stack these sheets in your freezer. They freeze solid in an hour and reheat beautifully. When you need a portion, you just snap off a chunk of the frozen rice sheet, place it in a bowl with a splash of water, and microwave it for two minutes. The steam brings the texture right back to fluffy perfection. This method saves massive amounts of space in your freezer compared to bulky plastic containers.
6. Pick Hearty Vegetables That Actually Last

Buying cheap produce only saves you money if you actually eat it before it rots. Delicate, water-heavy vegetables are the enemy of Sunday cooking sessions. I learned this the hard way after prepping a beautiful cucumber and cherry tomato salad for a Monday-through-Friday lunch rotation. By Wednesday, the tomatoes had burst, the cucumbers were translucent, and a pool of sour-smelling liquid covered the bottom of my container. Avoid pre-slicing delicate items like avocados, cucumbers, and tomatoes.
Instead, choose hearty vegetables that hold up well after cooking. Broccoli, carrots, bell peppers, and cauliflower will retain their firm texture and roasted flavor for up to five days in the refrigerator. I buy massive 5-pound bags of whole carrots at Walmart for under $4. Peeling and chopping them yourself takes an extra ten minutes, but you save a fortune compared to buying those tiny bags of baby carrots. Frozen vegetables are also a highly cost-effective option. They’re flash-frozen at peak ripeness, making them cheaper and often more flavorful than out-of-season fresh produce. I keep bags of frozen broccoli florets on hand. You don’t even need to thaw them. Toss the frozen florets directly onto a hot baking sheet with 2 tablespoons of olive oil and roast at 400 degrees. They crisp up perfectly on the edges.
![[8-Pack,30 oz]Glass Meal Prep Containers](https://m.media-amazon.com/images/I/713Zfdsgi4L._AC_UL320_.jpg)
[8-Pack,30 oz]Glass Meal Prep Containers
Honestly, [8-Pack surprised me — sturdier than it looks in the photos, and over 7 buyers gave it 4.5 stars.
7. Use Heavy-Duty Appliances for Hands-Free Cooking

Standing over a hot stove for four hours on a Sunday afternoon is a quick way to burn out on this entire process. I’ve got to maximize my efficiency by utilizing appliances like slow cookers, rice cookers, and pressure cookers. These tools cook large batches of food hands-free, which frees you up to chop vegetables or wash dishes.
I rely heavily on my Instant Pot for the dense, annoying vegetables that take forever to roast. Last Sunday, I threw a whole 3-pound spaghetti squash into the Instant Pot insert with 1 cup of water. I set it to high pressure for 15 minutes. It came out perfectly tender, and I didn’t have to risk slicing my fingers off trying to cut a raw, rock-hard squash in half with a chef’s knife. You can do the exact same thing with a whole head of cauliflower. Core the bottom, add 1 cup of water, and steam it under pressure for three minutes. You get perfectly tender cauliflower ready to be mashed or chopped into a casserole. Using these appliances dramatically cuts down your active time in the kitchen. If you don’t own a pressure cooker, a basic $15 rice cooker from Target does the exact same hands-free work for grains. Put the machine to work so you aren’t doing the heavy lifting.
8. Incorporate Plant-Based Proteins Like Black Beans

Meat is consistently the most expensive line item on any grocery receipt. You don’t have to go fully vegan, but incorporating inexpensive plant-based proteins into your weekly menu will drastically lower your costs. Lentils, black beans, and chickpeas are incredibly cheap and filling. A 15-ounce can of black beans costs around $1 and offers approximately 7.6 grams of protein per half-cup serving, plus a heavy dose of dietary fiber.
I drain and rinse two cans of black beans, then simmer them on the stove with 1 teaspoon of cumin, a pinch of salt, and half a diced yellow onion. It takes ten minutes and costs less than $3 for a massive batch of protein that lasts for days. Plant-based proteins continue to be a dominant approach for budget-conscious cooks because the math simply makes sense. I used to think I needed chicken in every single meal to feel full. I was completely wrong. A bowl of brown rice topped with heavily spiced black beans, a scoop of salsa, and a sprinkle of cheddar cheese keeps me full for hours. The texture of simmered beans is creamy and rich, entirely replacing the need for an expensive cut of meat. Keep your pantry stocked with dried or canned legumes to stretch your budget further at the end of the month.
9. Invest in the Right Storage Containers

Your food is only as good as the container holding it. Storing your carefully cooked meals in flimsy, warped plastic tubs with missing lids will ruin your hard work. You need durable, stackable, and leak-proof containers. Glass options like Pyrex are excellent for durability. A standard 18-piece set typically runs between $30 and $50. I prefer glass because I can pull it directly from the fridge and safely reheat it in the microwave or oven without worrying about plastic chemicals melting into my food.
The tradeoff is that glass is heavy. If you commute on the subway or carry a heavy gym bag, lugging three glass bowls around gets old fast. For lightweight, budget-friendly options, look into BPA-free plastic containers. Bentgo Prep sells a set of 10 for around $20, and Freshware offers a set of 15 for about $18. Here’s a lesser-known trick I learned from working in a kitchen: plastic deli containers. You can buy a sleeve of 50 heavy-duty plastic deli cups from a restaurant supply store for $15. They’re uniform, stack perfectly, and the lids are universal. I use the 32-ounce size for soups and the 16-ounce size for chopped vegetables. They’re freezer-safe and cheap enough that I don’t cry if I accidentally leave one in the office fridge for a month and have to throw it away. Trust me on this.

M MCIRCO 10-Pack,30 Oz Glass Meal Prep Containers 2
M MCIRCO 10-Pack punches above its price — 23 buyers rated it 4.5 stars. I would buy it again.
10. Master Food Safety for Easy Cheap Meal Prep

The fastest way to ruin your budget is throwing away spoiled food on Thursday because you didn’t store it properly on Sunday. A massive mistake. I used to take a giant, steaming pot of chili straight off the stove and shove it directly into the refrigerator. That traps the heat in the center of the pot, keeping the food in the danger zone (between 40 and 140 degrees Fahrenheit) for way too long. Bacteria thrive in that warm middle layer.
After cooking, you must divide your hot food into shallow containers. The food should sit no more than 2 inches deep. Spread these shallow containers out on your counter to cool rapidly. The goal is to drop the temperature from 140 degrees to 70 degrees within 2 hours, and then down to 40 degrees within 4 hours in the fridge. Always label all prepped meals with their contents and the specific date they were prepared. I use a roll of blue painter’s tape and a black Sharpie. Cooked meat and starches are generally safe for 3 to 4 days in the fridge when stored at or below 40 degrees. If you plan to eat a meal on day five or six, it should go into the freezer on day one. Don’t wait until it starts smelling questionable to freeze it. No exaggeration.
Getting your Sunday cooking routine locked down takes a little bit of trial and error, but the financial payoff is massive. You don’t need a perfectly aesthetic, color-coordinated fridge to be successful at this. You just need a solid plan, a few reliable ingredients, and the discipline to actually eat what you cook. I highly recommend starting with just two or three components this weekend. Roast a tray of broccoli, boil some eggs, and cook a batch of rice. See how much easier your Tuesday morning feels when you aren’t scrambling to pack a lunch. If you found these tips helpful, pin this article to your favorite recipe board so you can reference the temperature guidelines and container brands next time you’re at the store. Let’s make this the week you finally stop overpaying for sad desk salads.
Frequently Asked Questions
How long does meal prepped food last in the fridge?
Cooked meat and starches are generally safe for 3 to 4 days when stored at or below 40 degrees Fahrenheit. If you plan to eat a meal on day five, freeze it on day one.
What are the cheapest proteins for meal prep?
Eggs, canned tuna, and plant-based options like black beans and lentils offer the best value. For fresh meat, bulk packs of chicken thighs are significantly cheaper than chicken breasts.
Can I freeze cooked rice?
Yes. Let the cooked rice cool slightly, scoop it into a gallon-sized zip-top bag, press the air out, and flatten it into a thin sheet. It freezes solid quickly and reheats perfectly in the microwave.
What vegetables are best for weekly meal prep?
Hearty vegetables like broccoli, carrots, bell peppers, and cauliflower hold up best in the fridge. Avoid pre-slicing delicate, water-heavy vegetables like cucumbers and tomatoes, as they turn soggy within a couple of days.
