What’s Inside
- Carnivore Diet Meal Prep Starts With Fatty Cuts
- Batch Cook Ground Beef and Pre-Season Everything
- Master the Slow Cooker Chuck Roast
- Incorporate Organ Meats for Nutrient Density
- Manage Electrolytes and Make Your Own Mix
- Invest in Glass Containers for Carnivore Diet Meal Prep
- Portion Control, Dairy Limits, and Eating Protein First
- Dry-Aging Steaks and Avoiding the Charcuterie Trap
- Final Thoughts on Carnivore Prep
Last February, I stood in my kitchen on a Sunday afternoon staring at three pounds of cold, grey ground beef sitting in a warped plastic container. I was three weeks into my carnivore diet meal prep, and I felt completely exhausted. The cold fat had congealed into a thick white rim around the edges of the cheap plastic. The smell of unseasoned, boiled-looking beef made my stomach turn instantly. I realized right then that cooking cheap cuts of lean meat and tossing them into generic Tupperware wasn’t a sustainable long-term plan. Effective carnivore diet meal prep requires actual strategy, especially if you’re trying to get a week of food ready in under 30 minutes of active kitchen time. I spent the next eight months figuring out exactly how to batch cook animal proteins without destroying my grocery budget or ending up with a fridge full of unappetizing leftovers. I did this wrong for months before finally figuring it out. I’d under-salt everything, buy the wrong fat ratios, and rely entirely on processed bacon when I got tired of chewing dry steak. (Took me years to figure that out.) Here is exactly how I handle my weekly meat preparation now. I’ve included the specific cuts I buy, the exact storage containers that prevent freezer burn, and the harsh lessons I learned along the way so you don’t repeat my mistakes.
1. Carnivore Diet Meal Prep Starts With Fatty Cuts

Don’t fear fat on the carnivore diet. It’s your primary fuel source, and cutting corners here will leave you exhausted. When I first started, influenced by years of traditional diet culture, I inadvertently under-ate fat. I bought 93/7 ground beef at Whole Foods and baked plain chicken breasts in the oven. By 2 PM every day at work, I felt like I was walking through wet cement. I learned quickly that you need 70 to 80 percent of your daily calories to come from fat. Now, I exclusively purchase 80/20 or 73/27 ground beef blends. I buy the Kirkland Signature 80/20 ground beef at Costco, which typically costs around $4.99 per pound. These fattier cuts provide around 33 to 39 grams of fat per 100 grams. This specific ratio keeps you satiated and actually gives you sustained energy throughout the day. Skip the lean stuff entirely. It tastes like wet cardboard when reheated on a Tuesday afternoon anyway. If I do end up with a leaner cut like a sirloin steak, I always add one to two tablespoons of Kerrygold grass-fed butter right on top while the meat rests on my cutting board. You can get an 8-ounce block of Kerrygold for $4.48 at Walmart. I also keep a large glass jar of rendered beef tallow sitting on my kitchen counter. I use South Chicago Packing Wagyu Beef Tallow, which runs $21.99 for a 42-ounce tub. Adding that extra fat to your carnivore diet meal prep is the difference between thriving and feeling miserable by Wednesday morning.
2. Batch Cook Ground Beef and Pre-Season Everything

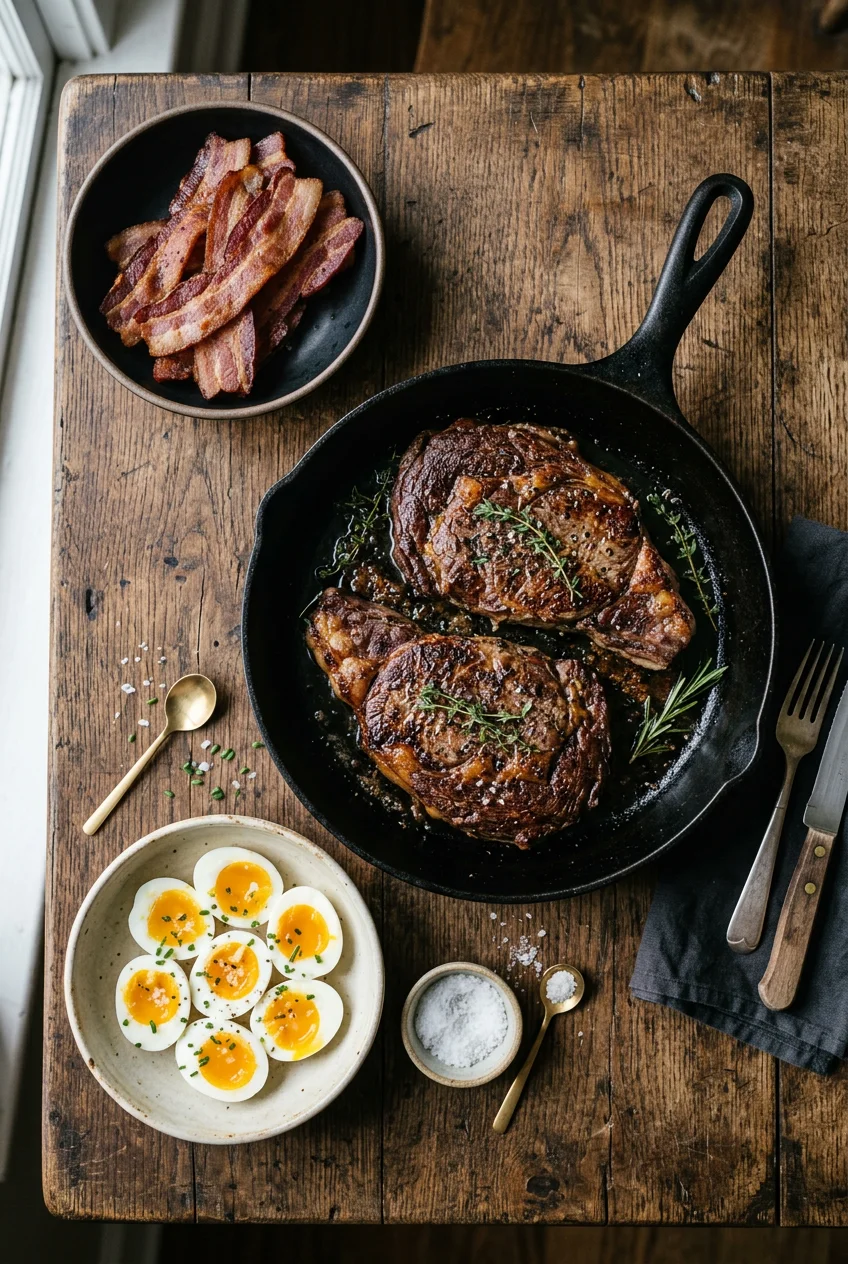
Dedicate just thirty minutes once a week to cook large quantities of meat. The most efficient way I’ve found to do this is cooking five to seven pounds of 80/20 ground beef in one massive batch. I used to cook one single pound at a time every single night. That meant I was constantly washing greasy pans and wiping down my stove before bed. Now, I use a massive 12-inch Lodge cast iron skillet (which I bought for $29.90 at Target) and cook it all on Sunday afternoon. A common mistake here is crowding the pan too much. If you dump five pounds of cold meat into a skillet, it boils the meat in its own juices instead of browning it. I cook it in two separate batches, leaving the rendered fat in the pan for the second round. I season simply but aggressively with Redmond Real Salt. I buy the 26-ounce refill pouch for $16.99 because I go through so much of it every month. Pre-seasoning your meats in advance is another crucial step for saving time. If I buy steaks for the week, I rub them with salt and store them in the fridge immediately. This acts as a dry brine and allows the flavors to penetrate the muscle fibers. Last Tuesday at Trader Joe’s, I bought four ribeyes, salted them immediately when I got home, and left them uncovered on a wire rack. By Thursday, the surface was perfectly dry. That dryness resulted in a massive, crispy crust when I finally seared them in the hot, shimmering tallow.
3. Master the Slow Cooker Chuck Roast

Utilize a slow cooker for tender, fall-off-the-bone meats with zero active effort. This is the ultimate 30-minute prep hack because the active time is literally five minutes of unwrapping and salting. You just drop the meat in the ceramic pot and walk away. I buy a three to four-pound chuck roast from Kroger, which usually runs me about $10 to $12 depending on their weekly sales cycle. I place it in my Crock-Pot 6-Quart slow cooker (which costs $34.99 at Target), cover it heavily in coarse salt, and set it on low for six to eight hours. I tried to rush this process once at my old apartment by setting it on ‘high’ for three hours because I forgot to start it in the morning. The resulting meat was tough, rubbery, and completely unchewable. (Learned that the hard way.) Slow and low is the only way to break down the tough connective tissues in a thick chuck roast. The best part about this method is the rich, gelatinous broth it creates at the bottom of the pot. I save every single drop of that liquid. I pour it into a glass mason jar and let it solidify in the fridge overnight. I use that resulting beef jelly to cook my eggs the next morning. It adds an incredible depth of flavor that you won’t get from standard cooking oils, and it costs absolutely nothing extra since it comes right from the roast you already bought.

Food Scale, 11lb Digital Kitchen Scale with 6 Units LCD
A dependable everyday pick — Food Scale pulls in 21 ratings at 4.5 stars. Not flashy, just solid.
4. Incorporate Organ Meats for Nutrient Density

Organ meats are nutritional powerhouses, but they’re also the most intimidating part of this lifestyle. A common mistake beginners make is completely neglecting them because of the strong taste and texture. I avoided liver entirely for my first six months on the diet. When I finally tried cooking beef liver straight from the fridge, I just tossed it into a hot pan without any prep. It smelled strongly of hot pennies and tasted incredibly bitter. I couldn’t even swallow the first bite. I learned shortly after that you have to soak beef liver in salted water or milk for one to two hours before cooking. This simple step draws out that harsh metallic flavor. After soaking, I pat it completely dry with paper towels and pan-sear it very quickly in beef tallow for no more than ninety seconds per side. If you overcook it, it turns into dry chalk. If you still can’t stomach the texture of whole organs, buying pre-mixed ground beef solves the problem. I purchase the Primal Blend from US Wellness Meats. It costs $11.50 per pound and contains 80 percent ground beef mixed with 20 percent beef heart, liver, and kidney. You cook it exactly like regular ground beef. The organ flavor is completely masked by the muscle meat and the rendered fat. I make burger patties out of this blend every single week. It’s the easiest way to ensure I’m getting those essential vitamins without forcing myself to eat something I hate. You might also like: 15 Stunning Easy Lunch Ideas You Need to See
5. Manage Electrolytes and Make Your Own Mix

The carnivore diet dramatically lowers your insulin levels, which causes your kidneys to excrete sodium at a rapid rate. If you don’t replace those electrolytes, you’ll experience severe headaches and muscle cramps within days. You need to aim for 3,000 to 5,000mg of sodium daily. I used to rely entirely on commercial electrolyte packets like LMNT. While they taste great, they cost up to $4.50 per day if you’re drinking multiple packets during a workout day. That adds up to over $130 a month just on salt water. I switched to Redmond Re-Lyte unflavored powder, which brings the cost down to about $2.78 per day. It provides 810mg of sodium and 400mg of potassium per serving. Hydrate Pro is another solid option I’ve used. It’s even cheaper at $2.34 per day for a massive 3,000mg sodium dose. However, the most cost-effective method is creating your own electrolyte solution at home. I mix potassium chloride, which is sold as NoSalt for $6.49 at Sprouts, with magnesium malate powder and Redmond Real Salt in a large glass of water. It doesn’t taste like a tropical fruit punch, but it instantly cures the brain fog that hits when my sodium drops. Don’t skip this step during your weekly prep. I measure out my dry salt mixtures into tiny glass spice jars on Sundays. Then I can just dump them into my water bottle before heading to the gym without thinking about measurements. You might also like: 15 Stunning Healthy Dinner Ideas to Steal Right Now
6. Invest in Glass Containers for Carnivore Diet Meal Prep

Proper storage prevents spoilage and freezer burn, which is critical when you’re spending a significant portion of your budget on high-quality meat. When I first started, I used cheap plastic containers I bought at a local discount store. After a few trips through the dishwasher, the plastic lids warped completely out of shape. I packed a beautiful ribeye for lunch one Tuesday. Because the lid didn’t seal properly, the meat oxidized and tasted exactly like the inside of my office refrigerator. I threw the entire plastic set into the recycling bin that same afternoon. Now, I strictly use glass containers for all my carnivore diet meal prep. I bought a 3-pack of Pyrex 6-cup rectangular glass containers for $24.99 at Target. The glass doesn’t absorb odors from the beef fat. The silicone lids latch tightly one-handed, which matters when I’m trying to pack lunches quickly in the morning while holding my coffee. For long-term storage, I use a vacuum sealer because it prevents ice crystals from forming. Cooked ground beef or slow-cooked roasts can be frozen for up to three months without losing any texture if they are vacuum-sealed properly. I use the FoodSaver Compact Vacuum Sealer, which I picked up for $79.99 at Walmart. When I find a massive sale on pork shoulder or steaks, I buy ten pounds, cook half, and vacuum seal the raw remainder for the freezer.

Etekcity Food Kitchen Scale
If you want something that just works, Etekcity Food Kitchen Scale is a safe bet (1,736 reviews, 4.5 stars).
7. Portion Control, Dairy Limits, and Eating Protein First

While the general rule of this lifestyle is to eat until you’re comfortably stuffed, having pre-portioned meals helps manage your intake and ensures you actually have enough food to last the week. A typical meat portion for me is 200 to 300 grams (about 7 to 10.5 ounces) per meal, or three to six eggs. I buy Vital Farms Pasture-Raised Eggs for $6.99 a dozen at Whole Foods. For protein, you should aim for one to two grams per kilogram of body weight daily. To prevent overeating the wrong things, make protein the first thing you eat during a meal. I always start with a 6-ounce steak, which provides roughly 55 grams of protein, before I touch any extra fats or side items. This helps signal fullness to your brain much more effectively. Another massive trap I fell into early on was over-consuming dairy. Because I missed different textures, I started melting heavy amounts of cheese over my ground beef every night. I was easily eating eight ounces of sharp cheddar a day. My weight loss completely stalled, and my digestion suffered terribly. While some dairy is allowed in a relaxed approach, too much can hinder your progress. I cut out dairy entirely for three weeks, relying strictly on beef and water. The inflammation immediately vanished. If you’re struggling to see results, drop the cheese and focus strictly on muscle meat.
8. Dry-Aging Steaks and Avoiding the Charcuterie Trap

For a surprising flavor boost without any extra cost, I started dry-aging my larger cuts of meat at home. I learned this technique from watching experts like Dr. Shawn Baker. You just pat the meat completely dry with paper towels, rub it generously with coarse salt, and place it on a wire cooling rack (which costs $12.99 at Target) in the refrigerator overnight or for up to three days. The circulating air dries out the exterior, concentrating the flavor and ensuring a perfect crust when you finally sear it in a hot pan. It completely changes the texture of a standard grocery store steak. On the flip side, a common mistake is relying too heavily on processed meats. I call this the charcuterie diet mistake. When you’re busy, it’s incredibly tempting to just eat a package of bacon, pepperoni, and deli turkey instead of cooking. While convenient, these processed options often contain hidden sugars, nitrates, and cheap fillers. I bought a pack of Applegate Naturals Prosciutto ($6.99 for 3 ounces at Trader Joe’s) last month as a quick snack. While it’s a cleaner brand, eating three ounces of prosciutto doesn’t provide the same deep satiety as eating a fresh steak, and it costs significantly more per ounce. Stick to whole, unprocessed muscle meats for your core meals. If you tolerate it, you might explore the trending animal-based carnivore approach, which includes fruit and honey. For strict carnivore results, whole meats are your best investment.
Final Thoughts on Carnivore Prep
Getting your carnivore diet meal prep down to 30 minutes takes a little bit of trial and error, but it’s entirely possible once you stop overcomplicating the process. Stick to the basics. Buy the fattiest ground beef you can find, utilize your slow cooker for tough roasts, and invest in glass containers that actually seal properly. Don’t let the simplicity of the diet trick you into thinking you don’t need a plan. Walking into a busy week with a fridge full of pre-cooked, properly salted meat is the only way I’ve managed to stay consistent without feeling deprived or exhausted. Skip the expensive processed snacks and focus your budget on high-quality salt, good tallow, and bulk muscle meats. If you found this breakdown helpful, save it for your next Sunday prep session so you don’t end up staring at cold, unseasoned ground beef like I did.
Frequently Asked Questions
How long does cooked ground beef last in the fridge on a carnivore diet?
Cooked ground beef typically lasts 3 to 4 days in the refrigerator when stored in an airtight glass container. If you aren’t going to eat it within that timeframe, I suggest vacuum sealing and freezing it to prevent oxidation and freezer burn.
Can I do carnivore diet meal prep without a microwave?
Yes. I reheat my prepped steaks and ground beef in a cast iron skillet over medium heat with a tablespoon of beef tallow. It takes about five minutes and completely prevents the rubbery texture that microwaves often cause.
Is it cheaper to buy whole roasts or ground beef for meal prep?
Ground beef is generally the most cost-effective option, especially 80/20 blends which run around $4 to $7 per pound. However, buying large chuck roasts on sale for slow cooking is a close second and provides excellent variety.
How do I stop my prepped meat from tasting dry by Thursday?
Stop buying lean cuts. You need 80/20 ground beef or heavily marbled steaks. Also, always store your cooked meat with its rendered fat, and add a tablespoon of grass-fed butter when reheating to restore moisture.
