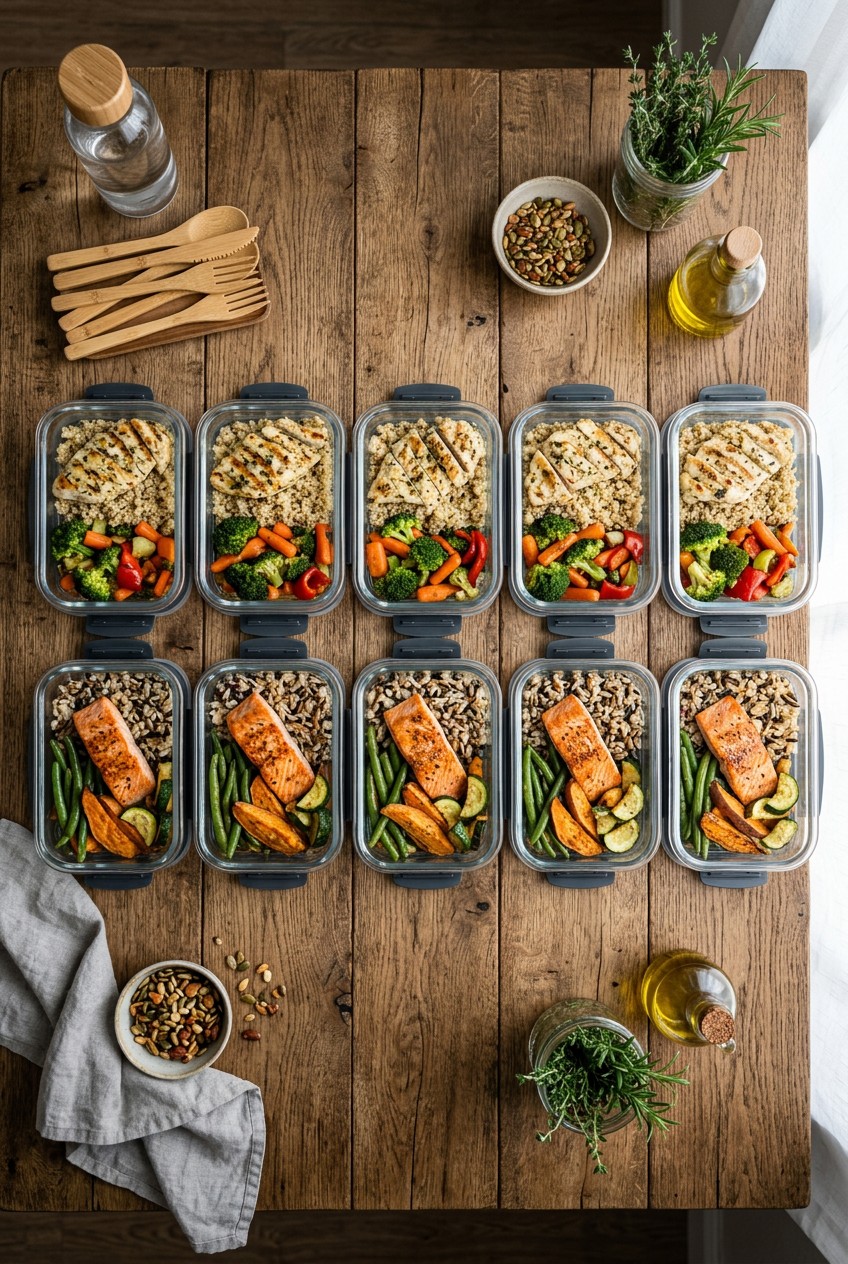
What’s Inside
- How To Meal Prep With Glass Containers
- Master The Meal Component Method
- How To Meal Prep Using The 333 Method
- Cool Food Fast To Avoid Food Poisoning
- Batch Cook With An Instant Pot
- Chop Everything First Before Cooking
- Plant-Based Proteins Save You Money
- Freeze Meals For Exhausting Days
- Don’t Forget To Prep Your Breakfasts
Last Tuesday at Whole Foods, I dropped a flimsy plastic container of leftover spaghetti sauce right in the parking lot. Figuring out exactly how to meal prep is the only thing standing between you and these kinds of messy disasters. Red sauce splattered across my white sneakers, and it smelled like cold garlic and defeat. If you want to learn how to meal prep without losing your mind, you’re in the right place.
Figuring out this process took me three years of soggy broccoli, sad desk lunches, and a lot of wasted money. I used to spend my entire Sunday standing over a hot stove until my back ached, only to end up with food I hated by Wednesday. My kitchen would smell like a humid swamp of boiling chicken, and I’d be too exhausted to even eat what I cooked. I’m sharing my exact strategies with you today. No fluffy chef talk. Just real, practical advice from someone who has ruined more batches of rice than I care to admit. I’ve broken down my routine into eleven specific steps. Let’s get into the details so you can reclaim your Sunday afternoons.
1. How To Meal Prep With Glass Containers

Start with the absolute basics. I tried this wrong for months before figuring it out. I originally bought cheap plastic tubs from the dollar store to save money. After just one week of storing turmeric chicken curry, those plastic containers turned a radioactive yellow. They retained a foul, lingering odor of old onions that heavy dish soap can’t wash away. Skip the cheap plastic completely. It’s a massive waste of your hard-earned money and ruins the taste of your food. Learned that the hard way.
Invest in durable borosilicate glass containers immediately. I personally swear by the Pyrex Simply Store 34 oz rectangular containers. A 5-pack set typically ranges from $22 to $30 at Target. That averages out to about $4 to $6 per container. They’re the absolute perfect size for a single serving. I also love the IKEA 365+ 34 oz glass containers for larger leafy green salads. Glass is microwave, dishwasher, and oven-safe. You won’t get those weird, white, bubbly melted stains on the inside when you microwave hot chili. I drop my glass containers occasionally on my linoleum floor, but they hold up incredibly well. When I opened my fridge yesterday morning, seeing neatly stacked, crystal-clear glass containers actually made me smile. The visual clarity helps you know exactly what food you have left to eat. The heavy snap of the plastic lids gives you confidence that your soup won’t leak all over your canvas tote bag.
2. Master The Meal Component Method

Most people get this completely wrong when they first start. They cook five identical containers of chicken, rice, and steamed broccoli on Sunday afternoon. By Wednesday, that chicken smells weirdly metallic, the broccoli is mushy, and you’re desperately ordering expensive takeout. I actually gagged on day four of eating the exact same lemon pepper chicken breast last year. Instead, you need to master the meal component method. Batch cook your ingredients separately so you can mix and match.
For example, boil 3 cups of dry white quinoa. That yields about 9 cups of cooked grains. Always rinse your dry quinoa in a fine mesh strainer for sixty seconds first. If you skip this, the natural saponins make it taste like bitter soap. Then, roast 2 lbs of mixed seasonal vegetables. I usually grab fresh broccoli, red bell peppers, and large carrots from Sprouts. Toss those raw veggies with exactly 1 tablespoon of extra virgin olive oil, a heavy pinch of kosher salt, and cracked black pepper. Roast them on a metal sheet pan at 400 degrees Fahrenheit for 20 to 25 minutes until the edges turn dark brown and crispy. Store these cooked components in separate glass containers in your fridge. On Monday, mix the nutty quinoa with the roasted veggies and top it with a fried egg. On Tuesday, throw those same veggies into a flour tortilla wrap with 2 tablespoons of hummus. This prevents awful meal fatigue. You aren’t locked into one single flavor profile for the entire week.
3. How To Meal Prep Using The 333 Method

This is a massive trend right now for 2026, and honestly this changed how I view my weekly grocery shopping. The 333 method involves choosing exactly 3 proteins, 3 carbohydrates, and 3 vegetables to rotate throughout your week. Last Sunday, I prepped 1.5 lbs of baked chicken breast, 1.5 lbs of seasoned black beans, and 1 block of baked tofu for my three proteins. I season the black beans with 1 teaspoon of ground cumin and 1/2 teaspoon of smoked paprika. You might also like: 15 Clever Family Dinner Ideas for a Fresh New Look
For my carbs, I made 4 cups of cooked brown rice, 4 cups of cooked quinoa, and 1 box of whole wheat penne pasta. My three veggies were roasted broccoli, chopped raw bell peppers, and a bag of fresh spinach. I bought all of this at Kroger for under $40. The textures mix and match perfectly together. Crunchy raw peppers go incredibly well with soft black beans and warm rice. Chewy whole wheat pasta works beautifully with the baked chicken and wilted spinach. You can mix these up endlessly depending on what you crave that specific day. My biggest mistake in the past was making too much of one single thing. I used to buy random ingredients without a clear plan. Half my expensive produce would rot and turn into green slime in the crisper drawer. The 333 method gives you rigid boundaries at the grocery store but flexible eating at home. You won’t waste food when you stick to this exact formula. You might also like: 20 Inspiring Meal Prep Ideas for Any Style

KOMUEE 10 Packs 30 oz Glass Meal Prep Containers
KOMUEE 10 Packs 30 oz Glass Meal Prep Containers punches above its price — 45 buyers rated it 4.5 stars. I would buy it again.
4. Cool Food Fast To Avoid Food Poisoning

Let’s talk about serious food safety for a minute. Two years ago, I made a massive 8-quart pot of spicy turkey chili. I left it sitting out on the warm stove for five hours to cool down before putting it in the fridge. I ate it the next day and was violently sick for three days. It was an absolute nightmare of cold sweats and stomach cramps. Never do that. You must prioritize rapid cooling to prevent dangerous bacterial growth. You might also like: 15 Stunning Easy Lunch Ideas You Need to See
The World Health Organization strictly warns about the temperature danger zone in their Golden Rules for safe food preparation. Your cooked food shouldn’t sit between 40 and 140 degrees Fahrenheit for more than two hours. Now, I divide my large batches immediately into shallow glass containers. I use the Pyrex 3-cup or 4-cup rectangular sizes. The shallow depth helps the hot food cool rapidly once it hits the cold air in the fridge. Don’t put a massive stockpot directly into your refrigerator. It radiates heat and warms up everything else around it. Your expensive dairy will spoil rapidly. I learned that the hard way, too. My $6 gallon of organic whole milk from Whole Foods went completely sour overnight because it sat next to a hot pot of soup. Portion your steaming hot food, leave the plastic lids off for about 20 minutes in the fridge so the steam escapes, and then seal them tight.
5. Batch Cook With An Instant Pot

I used to stand over the hot stove for three hours on Sundays, constantly stirring pots and sweating through my shirt. It was miserable. My kitchen smelled like a humid swamp of boiling chicken and steamed cabbage. Then I finally bought a 6-quart Instant Pot Duo 7-in-1 from Walmart for $99.95. It completely altered my Sunday routine. Now, I cook 2 to 3 lbs of raw chicken breast with exactly 1 cup of low-sodium chicken broth.
I lock the lid and set it on high pressure for 10 to 12 minutes. It comes out perfectly tender every single time. I use two metal forks to pull the hot chicken apart right inside the metal insert pot. It soaks up all the leftover savory broth. While the chicken cooks completely hands-off, I use my stovetop for other things. You can also make a massive batch of steel-cut oats for your breakfasts. I use 1 cup of Bob’s Red Mill Steel Cut Oats. A 24 oz bag costs $4.39. I mix the oats with 3 cups of water and cook for three minutes on high pressure. Be extremely careful with the fill line, though. I once overfilled the metal insert with oats and water. When I released the pressure, thick starchy foam shot out of the steam valve like a boiling geyser. It crusted onto my white kitchen ceiling and took me an hour to scrub off. Always respect the maximum fill line.
6. Chop Everything First Before Cooking

Don’t underestimate the sheer power of mise en place. That’s a fancy French culinary term for having all your ingredients prepped, chopped, and measured before you turn on the heat. Chef Dan Marek, director of plant-based culinary development, says fifteen minutes of prep can buy you an hour of ease. He’s absolutely right. I used to frantically chop yellow onions on a slippery cutting board while my minced garlic was actively burning in a hot pan.
The bitter, acrid smell of scorched garlic is awful and ruins the whole dish. Now, before I even look at my stove knobs, I chop everything. I dice 2 medium yellow onions, slice 3 red bell peppers, and chop 1 large head of broccoli into bite-sized florets. I measure out my dry spices into tiny glass prep bowls. I use a Victorinox 8-inch Fibrox Pro Chef’s Knife. It costs exactly $39.95 on Amazon and cuts through dense sweet potatoes like soft butter. Having all your fresh ingredients sitting in neat little piles on your wooden cutting board physically lowers your heart rate. You aren’t rushing around the kitchen looking for the salt shaker. You’re just calmly assembling the meal. It makes the actual cooking process feel peaceful instead of chaotic. When the oil is hot, you just dump the pre-measured bowls into the pan.
![[8-Pack,30 oz]Glass Meal Prep Containers](https://m.media-amazon.com/images/I/713Zfdsgi4L._AC_UL320_.jpg)
[8-Pack,30 oz]Glass Meal Prep Containers
A dependable everyday pick — [8-Pack pulls in 7 ratings at 4.5 stars. Not flashy, just solid.
7. Plant-Based Proteins Save You Money

Raw meat is incredibly expensive right now. A single pound of grass-fed ground beef at Whole Foods sets me back $8.99. I can’t afford to eat that every single day of the week. Incorporating trending plant-based proteins is much cheaper and offers great nutritional variety. Reflecting 2026 trends, I focus heavily on ingredients like brown lentils, canned black beans, tofu, tempeh, farro, and forbidden black rice.
Last week, I made a massive pan of Curry Tofu Scramble. I used two blocks of Nasoya Extra Firm Tofu. They cost $2.99 each for a 14 oz package at Target. I crumbled the white tofu directly into a hot pan with 1 tablespoon of coconut oil, 2 cups of fresh green spinach, and 1 diced red bell pepper. I added 1 tablespoon of bright yellow curry powder and 1/2 teaspoon of salt. It is a delicious and quick option ready in exactly 30 minutes. It tastes earthy, deeply savory, and keeps exceptionally well in the cold fridge. Tofu acts like a sponge and absorbs whatever flavor you throw at it. Just make absolutely sure you press the water out of it first. I ruined so many tofu dishes in my twenties by skipping that crucial step. Wet, unpressed tofu turns into a spongy, flavorless mess that releases gray water into your nice glass containers. Squeeze it dry first.
8. Freeze Meals For Exhausting Days

We all have those terrible days where cooking is absolutely not happening. You come home exhausted from work, your feet ache, and the living room couch is loudly calling your name. That’s exactly when freezer meals save you from ordering a greasy $30 pepperoni pizza. Cooked liquid meals like soups, heavy stews, and baked casseroles freeze exceptionally well. I regularly make a huge batch of spicy black bean chili and freeze it for long-term convenience.
But you have to freeze it correctly. I used to fill tall glass mason jars to the very top rim and put them straight into the deep freezer. The liquid expanded as it froze, the thick glass shattered completely, and I had to throw away three days worth of meals. Cleaning sharp, frozen glass shards out of my bottom freezer drawer was infuriating. Always leave about 3/4 inch of empty headspace at the top of your container for ice expansion. Label the container with the exact date using a piece of masking tape. Lately, I’ve been using Souper Cubes. They are heavy-duty 1-cup silicone freezing trays. A 2-pack costs $29.95 at Target. You freeze the hot soup in perfect 1-cup rectangular bricks, pop them out of the flexible silicone, and store them loose in a large plastic freezer bag. When you’re ready to eat, just drop the frozen soup brick into a ceramic bowl and microwave it.
11. Don’t Forget To Prep Your Breakfasts

Don’t just prep your lunches and dinners. Breakfast is usually the most chaotic and stressful time of the day. I used to skip breakfast entirely, drink three cups of bitter black coffee on an empty stomach, and feel dizzy and nauseous by 10 AM. Now, I strictly prep cold overnight oats in small 8 oz glass Mason jars. A 12-pack of Ball Mason Jars costs $12.59 at Target.
In each glass jar, I put exactly 1/2 cup of Quaker Old Fashioned Rolled Oats. A giant 42 oz cardboard canister costs $4.98 at Walmart. I pour in 1/2 cup of unsweetened Almond Breeze almond milk, add 1 tablespoon of black chia seeds, and drop in 1/4 cup of frozen wild blueberries. I shake the glass jar vigorously and leave it in the cold fridge overnight. The dry chia seeds absorb the almond milk and create this amazing, thick, pudding-like texture by morning. It’s ice cold, slightly sweet, and incredibly filling. You can grab a jar with a spoon as you sprint out the front door. Just remember to screw the metal lids on tight. I dropped an unsealed jar in my hot car last month. Scraping sticky, dried oats out of my carpeted car floor mats was a miserable, hour-long experience.
That’s my complete system. It’s not always Instagram-perfect, but it keeps me fed and sane. I highly recommend starting with just the glass containers and the 333 method this Sunday. Don’t try to do all eleven steps at once or you’ll burn out. Pin this article to your favorite Pinterest board so you can find these exact measurements and prices when you’re standing confused in the grocery store aisle. You’ve got this. Let me know in the comments which tip saved your Sunday!
Frequently Asked Questions
How long does meal prep last in the fridge?
Most cooked meal prep lasts four to five days in the fridge when stored in airtight glass containers. Always cool your food rapidly before sealing the lids to prevent bacterial growth and maintain the best texture.
What is the 333 method for meal prep?
The 333 method involves choosing three proteins, three carbohydrates, and three vegetables to batch cook on Sunday. You rotate and mix these individual components throughout the week to create different flavor combinations and prevent meal fatigue.
Can I freeze my meal prep containers?
Yes, you can freeze soups, stews, and casseroles. Always leave about three-quarters of an inch of empty space at the top of your container to allow the liquid to expand as it freezes, preventing cracked glass.
How do I keep meal prep chicken from drying out?
Store your cooked chicken in airtight glass containers and avoid overcooking it initially. Reheat it gently in the microwave with a damp paper towel over the top, and always add a high-quality sauce after reheating for moisture.
