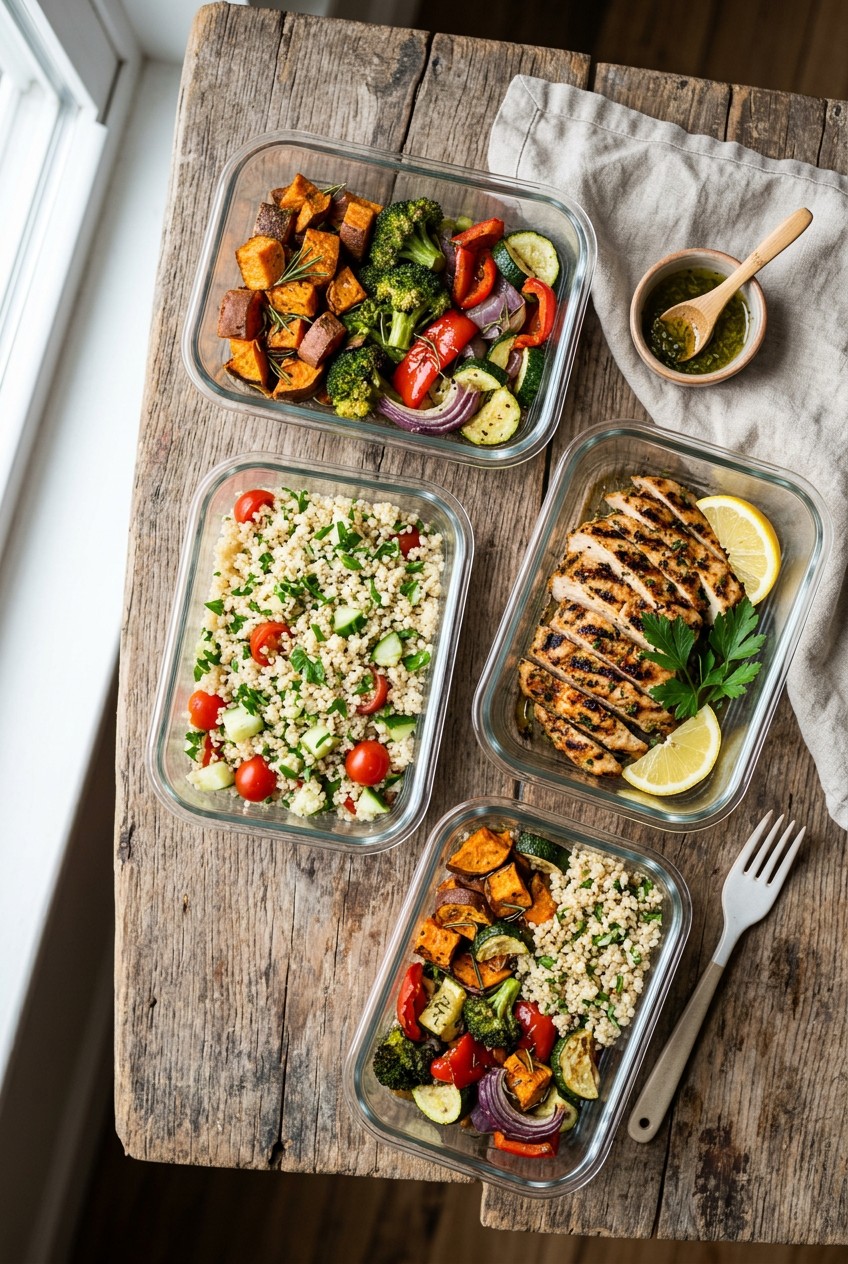
What’s Inside
- Start Small With 2-3 Meals (How To Meal Prep For Beginners)
- Invest In Heavy Duty Glass Containers
- Master The 50/25/25 Rule And Portion Cues
- Try Ingredient Prep Instead Of Full Meals
- Use Your Freezer Properly (How To Meal Prep For Beginners)
- Use Convenience Foods Without Guilt
- The 333 Method For Ultimate Variety
- Invest In Smart Kitchen Tools And Food Safety
- The Mason Jar Salad Hack
Last Tuesday at Whole Foods, I found myself staring at a bag of slimy, rotting spinach in the back of my fridge, totally defeated. If you want to know how to meal prep for beginners, you’ve got to learn from my massive, expensive failures. I tried doing it wrong for months before figuring it out. I thought I had to cook twenty-one perfect meals on a Sunday afternoon. Instead, I ended up crying over a mountain of dirty dishes while my dog licked spilled quinoa off the kitchen floor. Skip the fat-free stuff and the crazy complicated recipes. It tastes like wet cardboard anyway. I’m Esperanza Eliza, and I’m here to show you exactly what works. I’m going to walk you through my process, complete with the specific brands I buy, the exact prices I pay, and the mistakes you absolutely must avoid. Let’s get into the messy, beautiful reality of making your week easier. It’s a lifesaver, trust me on this.
1. Start Small With 2-3 Meals (How To Meal Prep For Beginners)

Let’s talk about the biggest mistake I see. Most people try to cook for the entire week on their very first try. I did this exactly three years ago in my tiny apartment kitchen. I bought groceries at Kroger, including four pounds of raw chicken breast and three heads of broccoli. I spent six hours chopping, roasting, and packing twenty-one meals. By Wednesday, the broccoli smelled like sulfur. By Friday, the chicken was dry and rubbery. I threw half of it away. Please don’t do this. Erin Palinski-Wade, a registered dietitian, actually recommends prepping just two or three meals for your busiest days when you’re just starting. Focus on lunches or dinners for Monday through Wednesday. That’s it. You don’t need a massive, overwhelming marathon session. I buy a 16 oz package of Trader Joe’s Organic Brown Rice for $3.49 and a 14 oz block of extra firm tofu for $1.99. I cook just enough for three days. It takes me maybe forty-five minutes total. Building consistency matters way more than having a fridge full of food you won’t actually eat. Once you get comfortable making three solid meals, you can slowly increase your numbers. But right now, give yourself permission to be a beginner. Your sanity and your grocery budget will thank you. Plus, you won’t end up hating the smell of your own kitchen by Sunday night. Keep your menu incredibly simple. I like to make a basic ground turkey chili. I use a 16 oz package of 93% lean ground turkey that costs $5.99 at Target. It’s cheap, it’s easy, and it reheats beautifully for those first few days of the week.
2. Invest In Heavy Duty Glass Containers

I can’t stress this enough. Stop buying cheap, flimsy plastic containers that warp in the microwave and stain red the second you put tomato sauce in them. I ruined so many cheap plastic bins from Walmart before I finally woke up. The lids would pop off in my work bag, leaking oily vinaigrette all over my laptop charger. It was a nightmare. For true durability and food safety, you absolutely need glass meal prep containers. I swear by the Pyrex 4-pack of 32 oz, 2-compartment glass containers. They cost exactly $27.99 on Amazon or at Target. They are freezer-safe, dishwasher-safe, and microwave-safe. The glass doesn’t hold onto weird garlic smells from last week’s dinner. If you care about how things look in your fridge, the Verel glass set with bamboo lids is gorgeous. A four-pack of those costs around $39.00. The bamboo lids stack beautifully, making your fridge look like a professional organized it. If you’re on a super tight budget and really must buy plastic, Kitch’nMore offers a 30-pack for about $26.99. But honestly, I’d save up for the glass. It’s worth every single penny. I once dropped a Pyrex container on my kitchen tile. The lid cracked, but the glass survived completely intact. When you use glass, your food just tastes fresher. You aren’t getting that weird, chemical plastic aftertaste when you heat up a 4 oz portion of salmon. Just remember to take the bamboo lids off before you microwave anything. I warped a beautiful wooden lid once because I wasn’t paying attention. Learn from my silly mistakes and treat your good containers with respect.
3. Master The 50/25/25 Rule And Portion Cues

You don’t need to count every single calorie or weigh every single almond to eat well. That kind of obsessive tracking is exhausting. I tried using a digital food scale for a month, and it completely ruined the joy of eating for me. Instead, I use the 50/25/25 rule. It’s the easiest visual trick for balanced meals. When you open your 32 oz Pyrex container, fill 50% of the space with non-starchy vegetables. I usually do 2 cups of raw spinach or 1 cup of roasted zucchini. Then, fill 25% with lean protein. Think of a palm-sized portion, which is usually about 3 to 4 oz of chicken breast, ground beef, or tofu. The last 25% gets filled with complex carbohydrates. A cupped hand, or about 1/2 cup to 1 cup, of cooked quinoa, brown rice, or sweet potatoes fits perfectly here. It’s so simple. I buy a 3 lb bag of sweet potatoes at Sprouts for $4.99 and roast them with 1 tablespoon of olive oil. By the way, a thumb-tip is the perfect visual cue for 1 tablespoon of healthy fats like olive oil or peanut butter. I used to pour olive oil straight from the bottle until my broccoli was swimming in grease. Don’t do that. Measure your fats visually. This 50/25/25 method ensures you’re getting enough fiber and protein without needing a calculator. It takes all the guesswork out of plating. I just scoop, visually check my fractions, and snap the lid on. When I look down at my lunch on a busy Tuesday, I know I’m getting exactly what my body needs to function, no math required. You might also like: 15 Creative Cold Lunch Ideas to Transform Your Space

Skroam 10 Pack Glass Meal Prep Containers
If you want something that just works, Skroam 10 Pack Glass Meal Prep Containers is a safe bet (56 reviews, 4.5 stars).
4. Try Ingredient Prep Instead Of Full Meals

If eating the exact same meal four days straight makes you scream, try ingredient prep. This is a massive trend for 2026, and it completely changed my routine. Instead of assembling full, rigid meals, you just prepare large batches of individual components. Last Sunday, I went to Costco and bought a massive 2.5 lb bag of broccoli florets for $5.99. I roasted the entire bag on two metal sheet pans with 2 tablespoons of avocado oil, salt, and pepper. Then, I cooked 2 cups of dry farro in my rice cooker. Finally, I baked six boneless, skinless chicken thighs. I didn’t mix anything together. I just stored the roasted broccoli, the cooked farro, and the chicken in three separate large glass bowls in my fridge. On Monday, I grabbed a 1/2 cup of farro, 4 oz of chicken, and a handful of broccoli, and tossed it with a spicy peanut dressing. On Tuesday, I wrapped the chicken and broccoli in a flour tortilla with some shredded cheese. The flexibility is incredible. You aren’t locked into one flavor profile for the entire week. It prevents meal fatigue perfectly. I used to force myself to eat soggy, pre-mixed salads on Thursdays just because I made them on Sunday. Now, I mix and match my prepped ingredients based on what I actually crave that day. You can buy a 32 oz container of organic chicken broth at Whole Foods for $2.79 to cook your grains in. It adds so much flavor to basic rice or quinoa. Keep your components plain and simple, and use different sauces each day to keep things interesting. You might also like: 15 Inspiring Chicken Meal Prep Ideas You Haven’t Thought Of
5. Use Your Freezer Properly (How To Meal Prep For Beginners)

Most cooked meals are only safe in the refrigerator for three to four days. If you’re prepping food for Friday on a Sunday, you’re playing a dangerous game with your stomach. I learned this the hard way after eating five-day-old shrimp. I missed two days of work. If you want to know how to meal prep for beginners safely, you have to utilize your freezer. Cooked meals freeze beautifully in airtight containers and last up to two or three months without losing much quality. But there’s a catch. You can’t freeze everything. Foods with high moisture content, like fresh tomatoes, cucumbers, or salad greens, turn into a disgusting, mushy puddle when you thaw them. Stick to freezing soups, stews, cooked grains, and sturdy proteins. A common beginner mistake is throwing things in the freezer without labeling them. I used to have a freezer full of frosted, mysterious plastic blocks. I’d pull out what I thought was frozen chili, only to discover it was pureed pumpkin from Thanksgiving. Always label your containers. I buy a roll of plain masking tape for $2.99 at Target and a black Sharpie. Write the exact name of the dish and the date you cooked it. It takes five seconds. This helps you follow the “first in, first out” rule for food safety. Also, make sure you let your cooked food cool completely on the counter before putting the lid on and freezing it. If you trap that steam inside, it turns into ice crystals, which ruins the texture of your food when you reheat it. You might also like: 20 Inspiring Meal Prep Ideas for Any Style
6. Use Convenience Foods Without Guilt

There is a toxic idea online that you must chop every vegetable by hand to be a real cook. That is complete nonsense. I work a full-time job, and I don’t have three hours to peel butternut squash. Don’t shy away from convenience foods. They are massive time-savers. I regularly buy the 12 oz bags of pre-cut broccoli and cauliflower from Trader Joe’s for $2.99. Yes, it costs a little more than buying whole heads, but it saves me twenty minutes of chopping and cleaning up tiny green crumbles from my counter. Frozen fruits and vegetables are actually a secret weapon. Because they are flash-frozen at peak ripeness, they are often more nutrient-dense than the sad, wilted fresh produce sitting under the grocery store misters. I buy a giant 4 lb bag of frozen mixed berries from Costco for $10.99. I scoop 1 cup of frozen berries directly into my overnight oats. As they thaw in the fridge overnight, they release their juices and naturally sweeten the oats. It’s brilliant. Canned goods are also fantastic. I always keep a few 15 oz cans of black beans from the Whole Foods 365 Organic line in my pantry. They cost just $1.19 each. The only rule with canned beans is that you must rinse them thoroughly in a colander under cold water. This washes away the starchy, murky liquid and drastically reduces the sodium content. Using a pre-made simmer sauce or a bag of pre-washed spinach doesn’t make you lazy. It makes you smart. Use the shortcuts. They keep you from giving up and ordering a twenty-five dollar pizza on a Wednesday night.

M MCIRCO 10-Pack,30 Oz Glass Meal Prep Containers 2
Honestly, M MCIRCO 10-Pack surprised me — sturdier than it looks in the photos, and over 23 buyers gave it 4.5 stars.
7. The 333 Method For Ultimate Variety

If you feel paralyzed by Pinterest recipes, try the 333 Method. It’s a trending framework for 2026, and it’s brilliant for beginners. Here is how it works. You pick exactly three proteins, three carbohydrates, and three vegetables for the week. That’s your entire grocery list. Chef Candice Kumai advises beginners to stick to practical, familiar ingredients, and this method forces you to do exactly that. Last week, my three proteins were a 16 oz pack of ground turkey ($5.99 at Target), a dozen eggs ($3.29 at Aldi), and a 14 oz block of firm tofu ($1.99 at Trader Joe’s). My three carbs were a loaf of sourdough bread, a box of whole wheat pasta, and a bag of sweet potatoes. My three veggies were fresh spinach, frozen broccoli, and bell peppers. With just those nine items, I made turkey meatballs with pasta and broccoli, tofu scrambles with spinach and toast, and stuffed sweet potatoes with ground turkey and peppers. It stops you from buying twenty random ingredients that end up rotting in your crisper drawer. Trying to cook five completely different, complex recipes in one day leads directly to burnout. I used to buy weird, expensive ingredients like fresh lemongrass and specialized curry pastes, only to use one teaspoon and let the rest expire. The 333 Method limits your choices in the best way possible. It forces creativity without the stress of a massive grocery bill. You rotate these simple components, keep the flavors familiar, and actually eat the food you buy.
8. Invest In Smart Kitchen Tools And Food Safety

A few smart tools will save your sanity. An Instant Pot is my number one recommendation. I bought the 6-quart Instant Pot Duo at Walmart for $99.00, and it changed my life. I can cook 2 cups of tough, dry brown rice perfectly in twenty-two minutes without watching a pot boil over on the stove. It’s also incredible for quickly cooking a 3 lb pork shoulder or a big batch of lentils. While the Instant Pot does its thing, I use heavy-duty aluminum sheet pans for roasting. I bought a Nordic Ware half-sheet pan for $18.00 on Amazon. It doesn’t warp when the oven gets to 425 degrees. I line it with parchment paper, toss on 2 cups of chopped bell peppers, and let them roast hands-free. You also absolutely need a decent knife. You don’t need a three-hundred-dollar Japanese blade. A simple Victorinox 8-inch chef’s knife costs around $30.00 and slices through sweet potatoes like butter. Using a dull knife is dangerous and frustrating. Now, let’s talk food safety. You have to chill and reheat your food properly. Cool your cooked food completely before putting it in the fridge. If you snap a lid on hot rice, condensation builds up, dripping water back into your food and making it soggy. Refrigerate your perishables within two hours of cooking. If your kitchen is hotter than 90 degrees in the summer, get it in the fridge within one hour. When you reheat your meals, make sure the internal temperature reaches 165 degrees Fahrenheit to kill any harmful bacteria. Nobody wants food poisoning from a lukewarm chicken breast.
9. The Mason Jar Salad Hack

Let’s finish with my trick for crisp lunches. Bringing a salad to work used to mean eating sad, wilted lettuce that tasted like a wet sponge. Then I discovered the mason jar hack. You need wide-mouth 32 oz glass mason jars. You can buy a 12-pack of Ball wide-mouth jars at Target for about $14.99. The secret is entirely in the layering process. You must put the wettest ingredients at the very bottom and the driest, most delicate ingredients at the top. I pour 2 tablespoons of balsamic vinaigrette straight into the bottom of the empty jar. Next, I add hard, sturdy ingredients that won’t absorb the dressing and get mushy. I usually drop in 1/2 cup of cherry tomatoes, 1/2 cup of diced cucumbers, or 1/2 cup of rinsed chickpeas. Then, I add my grains or proteins, like 4 oz of diced grilled chicken or 1/2 cup of cooked quinoa. Finally, I pack the top half of the jar completely full of dry, leafy greens like arugula or romaine lettuce. Because the greens are suspended at the top, far away from the dressing at the bottom, they stay perfectly crisp in the fridge for up to four days. When you’re ready to eat, you just unscrew the lid, shake the jar vigorously, and dump it into a bowl. The dressing coats everything perfectly on the way out. It’s honestly brilliant. Ellie Lopez, a nutrition expert, suggests involving your household in picking the salad ingredients. If your partner hates arugula, let them layer spinach in their jar. Getting everyone involved reduces complaints and makes the whole routine so much more sustainable.
I really hope these tips help you stop throwing away expired food and start enjoying your Sundays again. Meal prep shouldn’t feel like a punishment. It’s just a tool to buy back your time during a chaotic week. I highly recommend starting this weekend with just three simple lunches. Go buy some good glass containers, grab a few convenience items, and keep it easy. You don’t have to be perfect, you just have to start. I’ve ruined so many dinners and wasted so much money figuring this out, so you don’t have to. You’ve got this. If you found this helpful, please pin this article to your favorite Pinterest board or save it so you can reference the 50/25/25 rule the next time you’re staring blankly at the grocery store shelves. No exaggeration.
![[8-Pack,30 oz]Glass Meal Prep Containers](https://m.media-amazon.com/images/I/713Zfdsgi4L._AC_UL320_.jpg)
[8-Pack,30 oz]Glass Meal Prep Containers
[8-Pack has been one of the most consistently praised picks in this category. 7 reviewers averaged 4.5/5.
Frequently Asked Questions
How many days in advance should I meal prep?
Most cooked meals are safe in the fridge for three to four days. If you prep on Sunday, your food will last through Wednesday or Thursday. For anything beyond that, you’ll need to freeze your portions immediately to maintain food safety and flavor.
What are the best containers for meal prep?
Heavy-duty glass containers are the absolute best choice. They don’t absorb odors, they won’t warp in the microwave, and they are completely dishwasher safe. Brands like Pyrex offer durable 32 oz glass options that keep your food tasting fresh without chemical aftertastes.
Can I freeze my prepped meals?
Yes, you can freeze most cooked meals for up to three months. Foods like soups, stews, and cooked grains freeze beautifully. Just avoid freezing high-moisture items like fresh lettuce or cucumbers, because they turn mushy and gross when thawed.
How do I avoid eating soggy salads?
Use the mason jar hack. Pour your dressing at the very bottom of a 32 oz glass jar, layer hard vegetables and proteins in the middle, and pack dry leafy greens at the top. The greens stay crisp because they never touch the wet dressing until you shake it.
