What’s Inside
- Start Small: Prep 2-3 Days Of Easy Lunch Meal Prep For The Week
- Invest In Quality Segmented Containers
- Embrace Buffet Style Prep For Constant Variety
- Prioritize Freezer-Friendly Soups And Portions
- Master Component Batch Cooking To Save Hours
- Pre-Chop And Store Your Produce Strategically
- Buy Smart Convenience Foods (Seriously, Do It)
- Prep Dressings Separately For Easy Lunch Meal Prep For The Week
- Follow Food Safety Rules For Storage And Reheating
- Plan For No-Cook Assembly-Only Lunches
Last Tuesday at Whole Foods, I stared at a $14 sad, wilted salad in the grab-and-go section. My fridge at home was full of rotting spinach and a block of tofu I forgot about. I realized my attempt at easy lunch meal prep for the week had completely failed again. I’m Esperanza Eliza, and I’ve messed this up more times than I can count. I used to spend my entire Sunday chained to the stove. I’d cook seven identical portions of chicken and broccoli. By Thursday, I was gagging at the smell. The chicken tasted like wet cardboard. Skip the fat-free stuff. It’s flavorless. I’m here to text you all my secrets like a good friend. Let’s fix your lunch routine.
1. Start Small: Prep 2-3 Days Of Easy Lunch Meal Prep For The Week

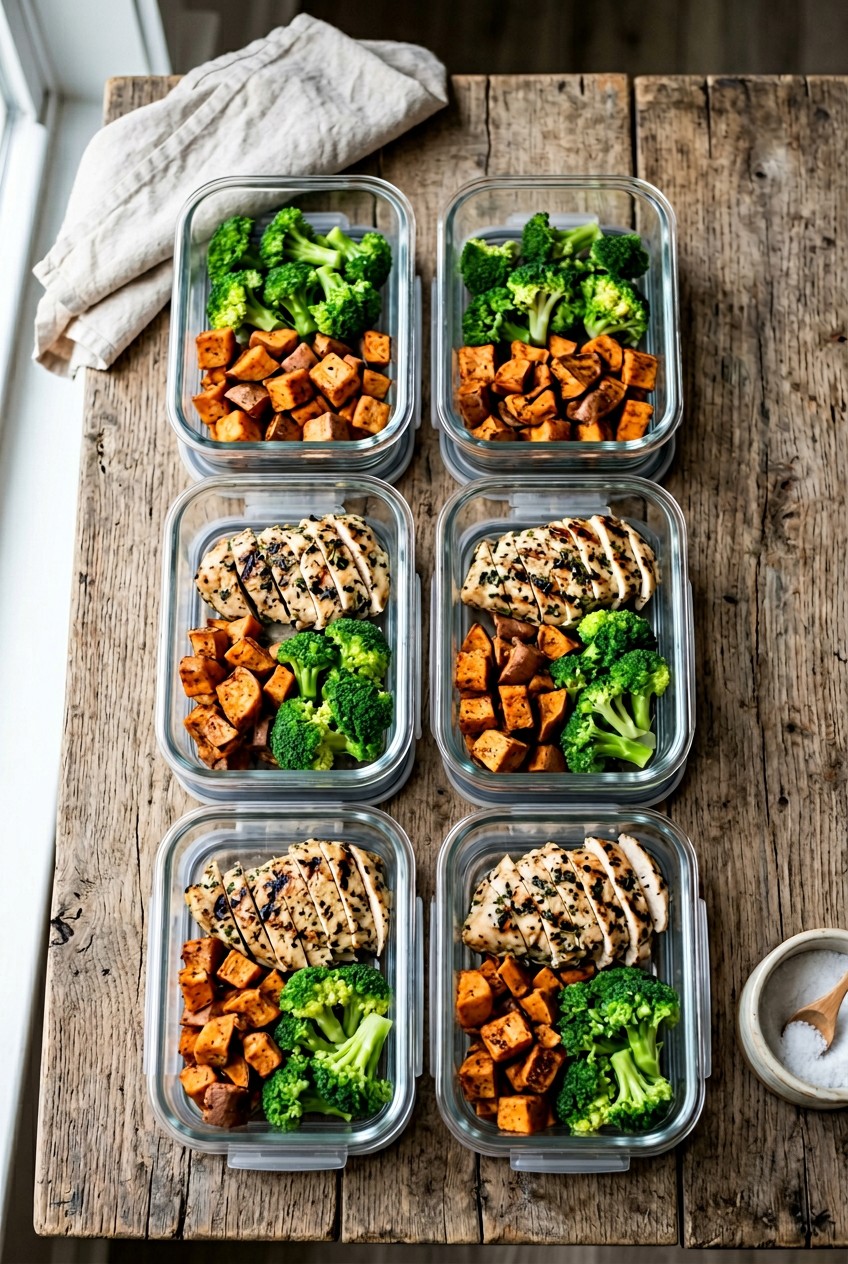
Don’t overwhelm yourself by trying to cook five or seven days of food right away. I tried this the wrong way for months before figuring it out. I’d make a huge batch of food on Sunday, and by Friday, the leftovers smelled like a damp basement. Registered dietitian Samantha Nimmons actually advises starting with just two or three days. This approach reduces food waste. It keeps your meals fresher. It makes the habit way more sustainable. Once you’re comfortable, you can gradually increase the quantity. I personally swear by prepping just Monday through Wednesday on Sunday afternoon. Then I do a mini prep on Wednesday night. Last month, I bought a massive 3 lb pack of Trader Joe’s Organic Chicken Breasts for $14.99. I cooked the whole thing at once. Big mistake. The texture got terribly rubbery after day four. Now, I only cook 1.5 lbs at a time (about $7.99 worth). I use exactly 1 tablespoon of olive oil and 1 teaspoon of smoked paprika. I slice the chicken thin so it cooks faster. The paprika gives it a beautiful dark red crust. When you open your container at work, it actually smells appetizing instead of like old poultry. It takes twenty minutes. The chicken stays juicy. You aren’t forcing yourself to eat sad, dry meat at your desk. Start small. Your tastebuds will thank you.
2. Invest In Quality Segmented Containers

Good containers are crucial. I can’t stress this enough. Two years ago, I bought a cheap pack of flimsy plastic tubs from a dollar store. I microwaved my lunch at work. The plastic literally melted into my meatballs. The whole breakroom smelled like burnt tires. It was embarrassing. You need durable, microwave-safe options. I recommend the Rubbermaid Brilliance 10-piece set. They cost exactly $26.99 at Target. They’re leak-proof and stain-resistant. Even tomato sauce won’t stain them. If you prefer glass, get the Prep Naturals Glass Containers. A 5-pack runs $24.99 on Amazon. Glass doesn’t retain those gross garlic odors. I pack them with a damp paper towel over the food to keep moisture in when microwaving. The glass is heavy, but it’s worth the weight in your tote bag. For portion control and keeping wet and dry components separate, Bentgo Prep 3-Compartment containers are my absolute favorite. You can grab a 10-pack for $22.99 at Walmart. I put 4 oz of grilled chicken in the main slot. I put 1/2 cup of cherry tomatoes in one small slot. I put 1/4 cup of almonds in the other. Nothing touches. Nothing gets soggy. It’s brilliant. Don’t skimp on your containers. You’re just throwing money in the trash when they warp in the dishwasher. Learned that the hard way.
3. Embrace Buffet Style Prep For Constant Variety

Instead of making five full, identical meals, prepare individual components in bulk. I call this buffet style. You cook a large batch of protein, a grain, and several types of roasted or raw vegetables. This allows you to mix and match throughout the week. It prevents meal fatigue. You aren’t stuck eating the exact same flavor profile every single day. I usually make a big batch of shredded chicken. I’ll roast two 15 oz cans of Goya Chickpeas ($1.29 each at Kroger). I toss them with 1/2 teaspoon of cumin and 1 tablespoon of avocado oil. I also cook 2 cups of dry quinoa. I chop a whole head of broccoli. I store all these components in separate large containers in the fridge. On Monday, I’ll make a bowl with 1/2 cup of quinoa, 4 oz of chicken, and a handful of raw spinach. On Tuesday, I’ll mix 1/2 cup of roasted chickpeas with the broccoli and a drizzle of tahini. The tahini adds a rich, nutty flavor that coats the broccoli perfectly. I squeeze fresh lemon juice over the top. The acid cuts through the heavy roasted flavors. You’ll actually look forward to your lunch hour. The textures stay distinct. The chickpeas keep their crunch. You won’t get bored. This changed how I look at my fridge on a Wednesday morning. You might also like: 15 Brilliant Batch Cooking Ideas That Actually Work
![[8-Pack,30 oz]Glass Meal Prep Containers](https://m.media-amazon.com/images/I/713Zfdsgi4L._AC_UL320_.jpg)
[8-Pack,30 oz]Glass Meal Prep Containers
[8-Pack punches above its price — 7 buyers rated it 4.5 stars. I would buy it again.
4. Prioritize Freezer-Friendly Soups And Portions

You need to combat meal monotony and extend freshness by utilizing your freezer. I used to make a massive pot of turkey chili and freeze the entire thing in one giant plastic tub. When I wanted a single portion, I literally had to chisel it apart with a butter knife. It was dangerous and stupid. Now, I prepare double batches of soups or stews and freeze them in single-serving portions. You need Souper Cubes. I buy the 1-Cup Silicone Trays for $19.95 at Target. They’re incredible. You pour your hot soup into the silicone molds. You freeze them overnight. The next day, you pop out perfect 1-cup bricks of soup. The silicone material is thick and sturdy. You don’t have to wrestle with it. The cubes pop out smoothly. I label the bag with a thick black sharpie so I know exactly what’s inside. It’s the ultimate lazy day hack. I transfer the frozen bricks into a large zip-top bag. When you’re rushing out the door, you just grab one brick. Throw it in a microwave-safe bowl. By lunch, it’s slightly thawed and takes two minutes to heat up. Last week, I made a huge batch of lentil soup using 1 cup of dry green lentils and 4 cups of vegetable broth. I froze six portions. I didn’t cook lunch once this week. It’s a relief. You might also like: 15 Cozy Freezer Meals Ideas to Transform Your Space
5. Master Component Batch Cooking To Save Hours

Component batch cooking means cooking staple ingredients in much larger quantities. You roast 2 to 3 pounds of chicken breast seasoned simply with salt and pepper. You cook 4 to 6 cups of brown rice. You chop a week’s worth of hearty vegetables like carrots and bell peppers. This significantly reduces your daily cooking time. I used to try cooking a fresh side dish every single night. I was exhausted. My kitchen was a constant disaster zone of dirty pots and pans. Now, I dedicate one hour on Sunday to bulk cooking. I buy a 32 oz bag of Lundberg Family Farms Short Grain Brown Rice for $4.99 at Whole Foods. I cook 2 cups of dry rice in my rice cooker. I roast 2 lbs of sweet potatoes. I peel them and chop them into 1-inch cubes. I toss them with 2 tablespoons of Kirkland Signature Olive Oil ($18.99 for a 2-liter bottle at Costco) and 1 teaspoon of sea salt. I roast them at 400 degrees for 30 minutes. The edges get perfectly caramelized and crispy. The kitchen smells like warm garlic and roasted vegetables. I play my favorite podcast while I chop. It turns a chore into a relaxing Sunday ritual. You won’t feel rushed during your busy workdays. I keep these staples in my fridge. When I’m hungry, I just scoop out 1 cup of rice and 1/2 cup of sweet potatoes. Heat and eat. You might also like: 15 Stunning Lunch Weekly Meal Prep Ideas You Haven’t Thought Of
6. Pre-Chop And Store Your Produce Strategically

Wash and chop all your vegetables at the very beginning of the week. Do not wait until you’re hungry to chop a bell pepper. You won’t do it. You’ll reach for a bag of chips instead. I know this because I did it for years. Store your chopped veggies in airtight containers. If you struggle with slimy spinach, you need specialized produce saver containers. I recommend the Rubbermaid FreshWorks Produce Saver Containers. A 4-piece set costs $36.99 at Sprouts. They have a special vent at the top that regulates airflow. They keep moisture away from your greens. Last summer, I bought a beautiful $4 head of organic butter lettuce. I washed it, shoved it in a regular plastic bag, and tossed it in the crisper drawer. Three days later, it was a disgusting, brown puddle of slime. The smell was awful. Now, I chop 2 cups of carrots, 2 cups of celery, and 1 large red onion on Sunday. I put them straight into my FreshWorks containers. The plastic is crystal clear, so you can see exactly what you’ve prepped. No more mystery bags rotting in the back of the fridge. The celery stays loud and crunchy. I dip the carrots in hummus for a quick snack. They stay perfectly crisp for a full week. The crunch of a fresh carrot stick at 2 PM is exactly what I need to avoid the office candy bowl.

M MCIRCO 10-Pack,22 Oz Glass Meal Prep Containers
A dependable everyday pick — M MCIRCO 10-Pack pulls in 86 ratings at 4.5 stars. Not flashy, just solid.
7. Buy Smart Convenience Foods (Seriously, Do It)

Don’t shy away from smart shortcuts. I used to think I had to chop every single onion and soak every single dry bean to be a real meal prepper. That’s nonsense. Pre-cut vegetables, canned beans, and frozen fruits can save you significant prep time. While they’re sometimes slightly more expensive, the time saved is worth the cost. I’m a busy person. You’re a busy person. We don’t have time to shell fresh peas. I always keep my pantry stocked with Bush’s Black Beans. They cost exactly $1.48 for a 15 oz can at Walmart. I rinse them under cold water to remove the excess sodium. I mix 1/2 cup of beans with 1/4 cup of pre-made pico de gallo. The pico de gallo adds instant acidity and heat without any chopping. I also grab the 10 oz bags of shredded red cabbage. It adds an intense purple color and a bitter crunch to any bowl. Stop overcomplicating your grocery list. I also buy the 12 oz bags of Trader Joe’s Frozen Organic Broccoli Florets for $2.29. I don’t even thaw them. I just toss 1 cup of frozen broccoli directly into my glass prep container. By the time I microwave it at work, it steams perfectly. It’s bright green and tender. Stop feeling guilty about buying pre-chopped butternut squash. It’s the only way you’ll actually eat it.
8. Prep Dressings Separately For Easy Lunch Meal Prep For The Week

To avoid soggy salads or mushy grain bowls, you must always store your dressings and sauces in separate, small containers. Do not pour vinaigrette over your greens on Sunday. Just don’t. I made this mistake last month. I packed a gorgeous kale salad with a heavy lemon tahini dressing. By Tuesday, the kale had dissolved into a sad, dark green mush. It smelled heavily of vinegar and despair. I threw it straight into the trash. You need to keep things separated until just before eating. Tiny glass jars are excellent for this. I use the Ball 4 oz Mini Mason Jars. You can get a 4-pack for $11.99 at Target. They’re the perfect size for a single portion of dressing. The glass is thick and won’t shatter if you drop it on your desk. The metal lids screw on perfectly tight. I’ve never had a single leak in my purse. The vinaigrette emulsifies beautifully when you shake it. I usually mix 2 tablespoons of olive oil, 1 tablespoon of balsamic vinegar, and 1/2 teaspoon of Dijon mustard right in the little jar. I screw the lid on tight and shake it vigorously. I pack the little jar next to my dry salad. When I sit down at my desk, I pour it over the fresh greens. The lettuce stays loud and crunchy. The dressing tastes bright and acidic. It takes two extra seconds and saves your entire meal. Trust me on this.
9. Follow Food Safety Rules For Storage And Reheating

You can’t mess around with food safety. Cooked foods should be refrigerated within two hours of cooking. They’re generally safe in the fridge for 3 to 4 days. You must reheat your meals to an internal temperature of 165 degrees Fahrenheit. I learned this the hard way. A few years ago, I left a batch of cooked chicken thighs sitting on the counter for four hours while I watched Netflix. I ate them the next day and got terrible food poisoning. I was shivering in bed for 48 hours. It was miserable. Always label your containers with the meal name and the date you cooked it. I use a roll of plain blue painter’s tape ($4.98 at Home Depot) and a sharpie. I stick a piece of tape on the lid and write the date. It peels right off before washing. To ensure your meat is safely reheated, I suggest keeping a small thermometer at work. The ThermoPro Digital Meat Thermometer is only $14.99 on Amazon. The thermometer has a long metal probe and gives a reading in three seconds. It takes away all the guesswork. You won’t have to cut your chicken open to check if it’s hot. It’s a tiny investment for your health. I actually keep one in my desk drawer. I poke my reheated chicken breast to make sure it hits 165 degrees. Nobody wants a cold, rubbery center.

KOMUEE 10 Packs 30 oz Glass Meal Prep Containers
Honestly, KOMUEE 10 Packs 30 oz Glass Meal Prep Containers surprised me — sturdier than it looks in the photos, and over 45 buyers gave it 4.5 stars.
12. Plan For No-Cook Assembly-Only Lunches

Some days, you just need to assemble your food without turning on a single burner. Keep ingredients on hand for quick no-cook options. Chickpea salad wraps and protein-packed overnight oats are lifesavers. This reduces cooking fatigue. Last Thursday, I was completely exhausted. I hadn’t prepped anything. I almost ordered a $20 delivery sandwich. Instead, I opened my pantry. I grabbed a can of chickpeas. I mashed them with 2 tablespoons of Sir Kensington’s Classic Mayonnaise ($6.49 for 12 oz at Whole Foods) and 1 tablespoon of Dijon mustard. I folded in 1/4 cup of diced celery for crunch. I scooped the mixture onto a Mission Whole Wheat Tortilla ($3.48 for an 8-count at Kroger). I added a handful of fresh spinach and rolled it up tight. The whole wheat tortilla is soft and doesn’t crack when you fold it. The spinach adds a bright, earthy bite. You don’t need a microwave. You can eat it cold right out of your lunch bag. It took exactly four minutes. The creamy mayo mixed with the sharp mustard was delicious. The celery gave it a loud, satisfying crunch. You don’t always have to cook a hot meal. Having a few dependable assembly-only recipes in your brain will save your budget. No exaggeration. Keep a stash of whole wheat wraps and canned fish or beans in your kitchen. You’ll thank me later.
I honestly hope these tips help you stop eating sad desk lunches. I’ve ruined enough tupperware and eaten enough soggy kale to know what actually works. Grab some good containers, start with just three days of food, and don’t be afraid to buy the pre-chopped onions. If you found this helpful, please pin this post to your favorite Pinterest board so you can find it next Sunday. Let’s conquer the week together.

8 Pack 36oz Large Glass Meal Prep Containers with lids
A dependable everyday pick — 8 Pack 36oz Large Glass Meal Prep Containers with lids pulls in 866 ratings at 4.5 stars. Not flashy, just solid.
Frequently Asked Questions
How long does meal prepped chicken last in the fridge?
Cooked chicken is generally safe in the fridge for 3 to 4 days. Always store it in airtight containers and refrigerate it within two hours of cooking to prevent bacterial growth.
Can I freeze my meal prep lunches?
Absolutely. Soups, stews, and chili freeze beautifully. I recommend using silicone freezer trays like Souper Cubes to freeze individual portions, making it easy to thaw exactly what you need.
What are the best containers for meal prep?
I highly recommend glass containers like Prep Naturals or high-quality, stain-resistant plastic like Rubbermaid Brilliance. Compartment containers like Bentgo are also excellent for keeping wet and dry ingredients separate.
How do I stop my prepped salads from getting soggy?
Never dress your greens ahead of time. Always store your vinaigrettes or creamy dressings in small, separate containers like mini mason jars, and pour them over your salad right before eating.
