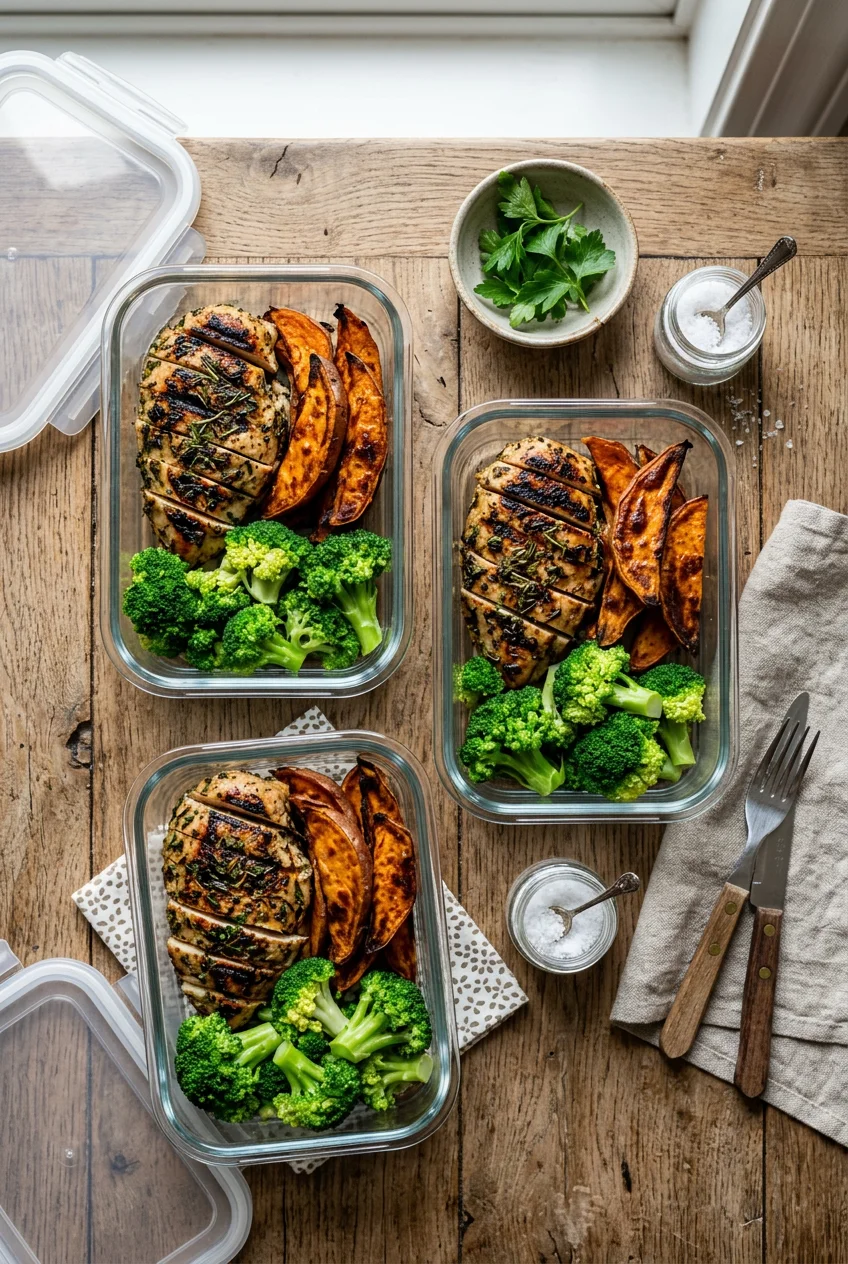
What’s Inside
- Prioritize Bulk Buying for Cost-Effectiveness
- Master the Art of Brining for Unbeatable Juiciness
- Embrace Sous Vide for Consistent High Protein Chicken Meal Prep
- Utilize Your Air Fryer for Quick, Crispy Results
- Don’t Skip the Marinade for Flavor and Tenderness
- Portion Smartly: Aim for 20-40g of Protein Per Meal
- Shred Your Chicken for Enhanced Moisture Retention
- Poach Chicken for Unrivaled Tenderness
- Cook from Room Temperature to Avoid Dryness
- Separate Sauces and Dressings Until Serving
- Invest in High-Quality, Versatile Containers
- Rotate Flavors for Long-Term High Protein Chicken Meal Prep
I stared at the sad, gray, rubbery block of meat in my plastic container last Tuesday at Whole Foods while my coworkers ate fresh, vibrant salads from the hot bar. That was the exact moment I realized my high protein chicken meal prep routine was completely broken. I’m writing this because eating dry, chalky chicken breasts out of obligation isn’t sustainable. Figuring out high protein chicken meal prep took me three years of throwing away spoiled leftovers and choking down flavorless meat. I tried forcing myself to eat unseasoned boiled chicken for months before figuring it out, and it’s a miserable way to live. No exaggeration. Skip the fat-free, flavorless approach entirely. It tastes like wet cardboard.
Instead, I’m sharing the exact methods, measurements, and tools that actually keep your poultry moist and flavorful from Monday through Friday. When you’re standing in your kitchen at 8 PM on a Sunday, you need a system that works predictably. I’ve ruined enough expensive groceries to know exactly what fails by Wednesday afternoon. Let’s fix your Sunday prep routine so you aren’t dreading your lunch break. Here are the specific strategies that changed how I handle my weekly cooking.
1. Prioritize Bulk Buying for Cost-Effectiveness

Buying meat in small, individual packages is the fastest way to drain your grocery budget. As of March 2026, standard U.S. chicken breast prices average around $4.17 per pound at standard grocery stores. I buy my meat in massive quantities at Costco because their Kirkland Signature bulk packs often drop the price down to $1.99 per pound. The heavy, oversized yellow trays take up half my shopping cart, but the savings are undeniable.
However, you need to read the fine print on the label. I tried buying the absolute cheapest bags of frozen breasts for months before I realized they were pumped full of a 15% saltwater solution. You put a huge piece of meat in the hot cast iron pan, and it immediately dumps half a cup of dirty water into the skillet, shrinking down to nothing. It’s infuriating. If you want quality air fryer chicken, look for fresh, non-injected options. Brands like Springer Mountain Farms sell for about $6.99 per pound at Whole Foods, which is steeper, but the meat actually sears instead of boiling in its own artificial juices. I usually compromise by buying the fresh organic bulk packs at Costco. They require a bit of trimming when you get home, but you aren’t paying for injected water.
2. Master the Art of Brining for Unbeatable Juiciness

A simple saltwater brine changes the protein at a cellular level, ensuring it retains moisture even after sitting in a cold fridge for three days. I ignored this step for years because it sounded like too much work. That was a mistake. Unbrined cooked chicken breast turns into sawdust by day three.
For a standard 1.5-pound batch of boneless, skinless breasts, I mix exactly 1/4 cup of Morton Kosher Salt (which costs $3.49 for a 3 lb box) and 2 tablespoons of dark brown sugar into 4 cups of cold tap water. I throw in a dried bay leaf and a pinch of whole black peppercorns if I have them. You submerge the meat fully and leave it in the refrigerator for 2 to 6 hours. If you’re using thinner cutlets, 30 to 60 minutes at room temperature works fine. Don’t leave it in the brine overnight. I did that once, and the texture turned into a salty, mushy disaster that I had to throw straight into the trash. Learned that the hard way. Rinse the meat thoroughly under cold water and pat it completely dry with paper towels before cooking. The resulting texture is incredibly succulent, making it crucial for meals that need to last until Thursday.
3. Embrace Sous Vide for Consistent High Protein Chicken Meal Prep

Cooking on a stovetop requires constant attention, and looking away for two minutes usually results in overcooked, chalky meat. I bought an Anova Culinary Sous Vide Precision Cooker for $129.00 last October, and it completely removed the guesswork from my high protein chicken meal prep. The device looks like a thick metal wand that clips to the side of a large pot, circulating and heating the water to an exact temperature.
I portion out 4 raw breasts into a Ziploc freezer-safe bag (a box of 30 costs about $5.49). I add a tablespoon of olive oil, push all the air out using the water displacement method, and drop the bag into a 145°F water bath for exactly 1.5 hours. The machine hums quietly on the counter while I chop vegetables or fold laundry. Because the water never exceeds 145°F, the meat physically can’t overcook. It comes out looking a bit pale, so I usually pat it dry and sear it in a screaming hot skillet for 45 seconds per side just to get a golden crust. This method locks in the moisture so effectively that you can reheat the slices in the office microwave on Wednesday without them drying out. You might also like: 10 Dinner Meal Prep for Every Budget

Food Scale -33lb Digital Kitchen Scale for Food Ounces
Honestly, Food Scale -33lb Digital Kitchen Scale for Food Ounces Grams Rechargea surprised me — sturdier than it looks in the photos, and over 78 buyers gave it 4.5 stars.
4. Utilize Your Air Fryer for Quick, Crispy Results

When I don’t have time to set up a water bath, the air fryer is my default appliance. It cooks rapidly and creates a lightly crisped exterior that holds up well in grain bowls. I use a Ninja AF101 Air Fryer, which runs about $89.99, because the basket is perfectly sized for a one-pound batch of meat.
I take 1 pound of raw chicken breast and coat it lightly with Pompeian Olive Oil spray ($4.98 at the grocery store). Then I aggressively rub it with a mix of smoked paprika, garlic powder, and coarse salt. I set the machine to 375°F and cook for 12 to 15 minutes, flipping the pieces halfway through using silicone tongs. You’re looking for an internal temperature of 165°F. The heavy fan inside the machine creates a dry, circulating heat that crisps the spices into a beautiful crust while the inside stays juicy. A common mistake is crowding the basket. If you overlap the pieces, they steam instead of roasting, leaving you with pale, rubbery edges. Always leave a little space between the cuts. I slice the finished meat thickly and lay it over a bed of quinoa and roasted peppers. You might also like: 8 Vegetarian Meal Prep for Every Budget
5. Don’t Skip the Marinade for Flavor and Tenderness

Dry rubs are great for a quick crust, but wet marinades actively tenderize the meat while infusing flavor deep into the muscle fibers. Dietitians consistently recommend yogurt-based marinades to prevent dryness. I buy a 32-ounce tub of Fage Total 0% Plain Greek Yogurt for $7.49 at Sprouts specifically for this purpose. You might also like: 8 Meal Prep Lunches You Need to See
For 1.5 pounds of raw thighs, I mix 1/2 cup of the plain Greek yogurt, the juice of half a fresh lemon, 3 tablespoons of extra virgin olive oil, and a heavy spoonful of cumin and paprika in a glass bowl. The thick yogurt clings to the meat perfectly. The lactic acid in the dairy gently breaks down the tough proteins without turning the exterior to mush, which is what happens if you use too much vinegar or lime juice. I let it sit in the fridge for at least 30 minutes, though 12 hours yields the deepest flavor. When you bake or grill this, the yogurt creates a charred, tangy crust that tastes incredible. A serving of this yields roughly 46 grams of protein. It’s messy to handle, and your hands will be covered in orange yogurt, but the resulting tenderness is worth the cleanup.
6. Portion Smartly: Aim for 20-40g of Protein Per Meal

Eyeballing your portions usually leads to under-eating protein and feeling ravenously hungry by 3 PM. Registered Dietitians recommend aiming for 20 to 40 grams of quality protein per meal to maximize muscle building and satiety. I stopped guessing and bought an Escali Primo Digital Scale for $24.95. It sits permanently on my kitchen counter.
The math is straightforward but often misunderstood. A 3-ounce serving of cooked breast meat provides approximately 26 grams of protein. However, meat shrinks significantly during the cooking process as water evaporates. A typical serving size to aim for when you’re packing your containers is 4 ounces of raw meat, which reduces down to about 3 ounces once cooked. I used to weigh my meat after cooking, which resulted in me eating way more than I intended and running out of food by Thursday. Now, I weigh the raw meat on a piece of parchment paper before it hits the pan. I portion exactly 4.5 ounces of raw meat per container, ensuring I hit that 30-gram protein sweet spot for every single lunch. It takes an extra two minutes on Sunday but keeps my macros perfectly aligned all week.
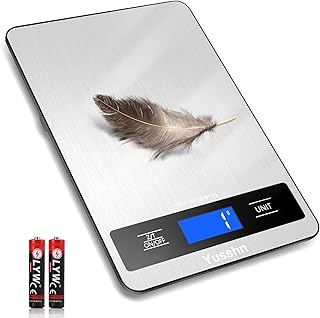
Food Scale, 11lb Kitchen Scale with 0.05oz/1g Precision
A dependable everyday pick — Food Scale pulls in 15 ratings at 4.5 stars. Not flashy, just solid.
7. Shred Your Chicken for Enhanced Moisture Retention

If you’re prepping food for 4 or 5 days, slicing your meat into thick cubes is a tactical error. Large chunks dry out rapidly in the fridge and develop a tough, rubbery texture when microwaved. A technique I learned from a fitness forum is to shred the cooked meat instead. Shredded fibers clump together, holding onto natural juices and whatever sauce you mix them with.
I refuse to use two forks to shred meat because it makes my hands cramp. Instead, I throw the warm, cooked breasts into a deep glass bowl and use my KitchenAid Hand Mixer ($59.99 at Target). I turn it on the lowest speed and press the beaters directly into the meat. It shreds three pounds of poultry into perfect, uniform strings in about 45 seconds. You have to use a deep bowl, or the beaters will fling hot chicken pieces across your kitchen counters. I learned that the hard way. Once shredded, I toss the meat with a little bit of leftover cooking liquid or a splash of chicken broth. The shredded texture reheats beautifully on day four, remaining soft and easy to chew, completely avoiding that dreaded meal-prep rubberiness.
8. Poach Chicken for Unrivaled Tenderness

Poaching is a highly underrated method for preparing meat for cold salads or wraps. Boiling meat sounds terrible, but gentle poaching is completely different. I tried this last week when I was tired of roasted flavors, and my kitchen smelled like a fancy French restaurant. It was glorious.
I place raw breasts in a wide, shallow pan and cover them by about an inch with Swanson Chicken Broth ($2.89 for a 32oz carton) and a splash of dry white wine. I add a smashed garlic clove and a few sprigs of fresh thyme. You bring the liquid to a bare simmer over medium heat, then turn the dial down to low, cover the pan tightly, and let it gently cook for 10 to 14 minutes. The liquid should never reach a rolling boil. Boiling violently seizes the muscle fibers, turning the meat into tough little rocks. Gentle poaching results in an exceptionally tender, pale piece of meat that practically melts in your mouth. Once cooled, it’s the absolute best texture for chopping up into a Greek yogurt chicken salad. Plus, you can strain the leftover poaching liquid and use it as a highly flavorful broth for cooking rice.
9. Cook from Room Temperature to Avoid Dryness

Taking a freezing cold piece of meat directly from the refrigerator and throwing it into a 400°F skillet is a guaranteed way to ruin your dinner. I did this for years because I was impatient. The extreme temperature shock causes the muscle fibers to contract violently, squeezing out all the moisture.
Furthermore, the outside of the cold meat will sear and burn before the center even begins to warm up. You end up with a piece of meat that is scorched on the exterior and dangerously raw in the middle. Now, I always pull my meat out of the fridge and let it sit on a clean cutting board for 15 to 20 minutes before it hits the heat. It doesn’t need to be fully room temperature, just enough to take the chill off. I use a ThermoPro Digital Meat Thermometer ($14.99) to check the internal temperature while cooking. When the meat starts closer to room temperature, it cooks evenly from edge to edge, allowing the center to reach a safe 165°F without the outside turning into shoe leather. It requires a tiny bit of planning, but it completely eliminates the burnt-outside, raw-inside problem.

Food Scale, 11lb Digital Kitchen Scale with 6 Units LCD
If you want something that just works, Food Scale is a safe bet (21 reviews, 4.5 stars).
10. Separate Sauces and Dressings Until Serving

There is nothing more depressing than opening your lunch container on Wednesday to find pink, soggy meat sitting in a puddle of separated vinaigrette. Highly acidic dressings break down the texture of the meat and turn crisp vegetables into slimy mush. You must store your wet ingredients separately.
I buy Sistema To Go Dressing Containers, which cost about $6.99 for a 4-pack at Kroger. They are tiny, leak-proof plastic pots that hold exactly 1.5 ounces of liquid. I portion my lemon tahini dressing or hot sauce into these little containers and tuck them inside my main lunchbox. The chicken, roasted sweet potatoes, and spinach stay completely dry and crisp in the main compartment. When I sit down at my desk to eat, I pop the lid off the tiny container, drizzle the sauce over the top, and mix it fresh. It takes five extra seconds of assembly at your desk, but it preserves the structural integrity of your entire meal. If you pour teriyaki sauce over your meat on Sunday, by Thursday, it will taste like a salty, gelatinous sponge.
11. Invest in High-Quality, Versatile Containers

Your storage vessels dictate how long your food actually lasts. Cheap, flimsy plastic containers warp in the microwave, leak meat juice into your gym bag, and permanently absorb the smell of old garlic. I threw out all my mismatched plastic tubs last year and upgraded my system.
I exclusively use Pyrex 3-Cup Rectangular Glass Containers, which cost about $22.99 for a 4-pack at Walmart. The thick glass is heavy to carry to the office, but it’s entirely non-porous. It doesn’t stain orange when I use heavy turmeric or smoked paprika, and it doesn’t leach weird chemical tastes into my food when I microwave it for three minutes. The silicone-lined lids snap down securely on all four sides, creating a genuinely airtight seal. This tight seal prevents oxygen from degrading the food, keeping my meals fresh for a full four days. If you prefer plastic because it’s lighter, look for BPA-free brands like Bentgo that offer compartmentalized trays. Expect to pay $20 to $40 for a good set of 3 to 5 containers. Don’t skimp here; bad containers ruin good food.
12. Rotate Flavors for Long-Term High Protein Chicken Meal Prep

Even if you perfectly execute your high protein chicken meal prep and the meat is incredibly juicy, eating the exact same flavor profile five days in a row leads to severe burnout. By Thursday, your brain will reject the idea of eating another lemon-herb breast, and you’ll end up ordering a $18 sandwich on DoorDash instead.
To combat this, I cook a massive batch of plainly seasoned meat on Sunday. I use just a little olive oil, salt, and pepper. After it’s cooked and portioned into five containers, I add different spice rubs or sauces to each individual box. I’ll shake McCormick Grill Mates Montreal Chicken seasoning ($3.98) over Monday and Tuesday’s portions. For Wednesday, I’ll dust it heavily with Trader Joe’s 21 Seasoning Salute ($1.99). For Thursday and Friday, I’ll toss the plain meat in a tablespoon of buffalo sauce and a sprinkle of blue cheese. As fitness experts emphasize, seasoning doesn’t ruin your diet; excess calories do. Using calorie-free spices like onion powder, cayenne pepper, or Old Bay keeps your palate engaged without altering your macros. It tricks your brain into thinking you’re eating a completely different meal every day.
If you’re tired of throwing away spoiled food on Friday afternoons, try implementing just two or three of these methods this weekend. I highly recommend starting with the digital meat thermometer and the glass Pyrex containers; those two changes alone fixed 80% of my kitchen disasters. Pin this guide for your next Sunday cooking session, and let’s make dry lunches a thing of the past.

Etekcity Food Kitchen Scale
Etekcity Food Kitchen Scale has been one of the most consistently praised picks in this category. 1,736 reviewers averaged 4.5/5.
Frequently Asked Questions
How long does high protein chicken meal prep last in the fridge?
For optimal taste and safety, cooked chicken lasts 3 to 4 days in the refrigerator. Quality declines rapidly after day four, resulting in a dry, rubbery texture. For longer storage, freeze your prepped portions for up to 3 months.
What is the best way to reheat meal prep chicken without drying it out?
To prevent dryness, sprinkle a few drops of water or chicken broth over the meat before microwaving. Cover the container with a damp paper towel and reheat on 50% power for 2 minutes, checking frequently so the muscle fibers don’t seize.
How many grams of protein are in a standard meal prep portion of chicken?
A standard 3-ounce serving of cooked chicken breast provides approximately 26 grams of high-quality protein. To yield a 3-ounce cooked portion, you should start by weighing out about 4 to 4.5 ounces of raw meat.
Does shredding chicken make it better for meal prep?
Yes, shredding cooked chicken helps it retain moisture significantly better than slicing it into cubes. The shredded fibers clump together, holding onto natural juices and sauces, which prevents the meat from becoming tough when reheated days later.
