What’s Inside
- Prioritize Quality Frozen Shrimp for Value and Convenience
- Master Proper Thawing to Prevent Rubberiness
- Utilize Baking Soda for Enhanced Tenderness
- Air Fry for Quick Shrimp Meal Prep Ideas
- Prep a Versatile Lemon Garlic Marinade
- Cook Shrimp Just Until “C” Shaped
- Batch Cook Separately for Shrimp Meal Prep Ideas
- Embrace Sheet Pan Meals for Minimal Effort
- Create Flavorful Shrimp Taco Bowls
- Consider Shrimp and Grits for a Hearty Prep
I chewed on a piece of reheated shrimp last Tuesday at my desk, and it squeaked against my teeth like a rubber dog toy. If you’re hunting for shrimp meal prep ideas that don’t taste like cardboard by Thursday, stop treating seafood like it’s chicken. I ruined pounds of groceries before I figured out the right temperatures, storage, and reheating tricks to keep shrimp tender. The office microwave is usually a death sentence for seafood. I learned the hard way that you can’t just toss a container in for two minutes and expect a good lunch. You need a strategy. Trust me.
Most people avoid prepping seafood because they’re afraid of the smell or the mushy texture by day three. I get it. I threw away an entire batch of lemon garlic shrimp last year because I used a cheap plastic container that didn’t seal right. The whole fridge smelled like a bait shop. After testing dozens of methods, I finally nailed down a system. Here are the exact techniques and recipes I use every Sunday to prep shrimp that stays juicy, firm, and safe to eat all week long.
1. Prioritize Quality Frozen Shrimp for Value and Convenience

I used to buy raw shrimp from the seafood counter at Kroger, thinking it was fresher. I’d pay $11.99 a pound and rush home. Then a butcher told me that almost all grocery store shrimp is previously frozen and just thawed for display. You’re paying a premium for someone else to thaw your food, and you have no idea how long it’s been sitting behind that glass. It’s a waste of money.
Now, I strictly buy high-quality frozen raw shrimp. My standard purchase is the Kirkland Signature Farm-Raised Raw Shrimp from Costco. I buy the 21-25 count bag, which comes in a 2 lb size for exactly $14.99 at my local warehouse. These are flash-frozen at peak freshness right after harvesting. They retain their firm texture and sweet flavor way better than the limp, gray shrimp in the display case. Buying frozen also means I don’t have to cook them the day I shop. I keep a bag in the freezer for weeks and pull out exactly what I need for my Sunday prep. Skip the pre-cooked frozen shrimp. They taste like wet cardboard and turn to dust when you reheat them.
2. Master Proper Thawing to Prevent Rubberiness

The way you thaw your shrimp dictates the texture of your entire meal. I tried this wrong for months. I used to dump a pound of frozen shrimp into a bowl of warm tap water because I was impatient. The warm water started cooking the edges prematurely. By the time I put them in the hot cast iron pan, the outsides were rubbery and the insides were still icy. It ruined the texture.
The only correct way to thaw shrimp quickly is with cold water. I place my frozen Costco shrimp into a stainless steel colander (I bought a 3-quart one at Target for $12.99) and submerge the whole thing in a large bowl of cold tap water. It takes 15 to 20 minutes for them to thaw. Once they’re thawed, the most critical step is drying them. If you skip this, they’ll steam in the pan instead of searing. I lay down three sheets of Bounty paper towels, spread the shrimp out, and press another three sheets on top. I press down hard to extract all the moisture. You want them bone dry before they hit the heat.
3. Utilize Baking Soda for Enhanced Tenderness

This sounds like a weird science experiment, but treating your shrimp with baking soda is the best way to keep them plump. I picked up this trick from the Fit Men Cook blog, and it changed how my shrimp holds up in the fridge. Before I did this, my meal-prepped shrimp would shrink down to half their size and get stringy by Wednesday. You might also like: 12 Low Carb Meal Prep Worth Trying
After I thaw and dry 1 lb of raw shrimp, I place them in a glass mixing bowl. I sprinkle 1/4 teaspoon of Arm & Hammer baking soda (which costs $1.29 at Trader Joe’s) and 1/2 teaspoon of kosher salt over them. I toss them until every piece is coated, then I let them sit on the counter for 15 minutes. The baking soda alters the pH of the shrimp. This prevents the proteins from tightening up too much in a hot pan. They retain their moisture, they stay their original size, and they have a snappy texture. You don’t rinse the baking soda off. You just cook them right after the 15 minutes are up. It doesn’t alter the flavor, but the texture difference is massive. You might also like: 20 Inspiring Meal Prep Ideas for Any Style

Rubbermaid Brilliance Tritan Plastic Food Storage
If you want something that just works, Rubbermaid Brilliance Tritan Plastic Food Storage Containers BPA Free is a safe bet (583 reviews, 4.5 stars).
4. Air Fry for Quick Shrimp Meal Prep Ideas

If you need fast shrimp meal prep ideas, the air fryer is the most efficient tool in your kitchen. I bought a Ninja 4-Quart Air Fryer at Walmart for $89.00 last October, and it eliminated the mess of cooking seafood on the stove. No oil splattering on my backsplash, and my kitchen doesn’t smell like a fish market for two days.
For a standard prep, I take 2 lbs of extra jumbo shrimp (the 16-20 count size). I toss them in a bowl with 1 tablespoon of avocado oil and my dry rub. I preheat the air fryer to 400°F (200°C) for three minutes. The biggest mistake you can make here is overcrowding. I tried dumping all 2 lbs in at once last month, and they just steamed into a mushy gray pile. You have to cook them in a single layer. I do this in two batches. I air fry them for 5 to 6 minutes, pulling the basket out halfway through to shake them. They come out perfectly pink with crispy edges. The high heat cooks them so fast they don’t have time to dry out. You might also like: 10 Dinner Meal Prep for Every Budget
5. Prep a Versatile Lemon Garlic Marinade

A good marinade does the heavy lifting, but shrimp is delicate. You can’t treat it like a flank steak. I learned this the hard way when I left a batch in a heavy citrus marinade for 48 hours. The acid in the lemon juice ‘cooked’ the raw shrimp, turning it into a mushy ceviche texture before it even hit the stove. It was disgusting.
My standard lemon garlic marinade uses precise measurements to prevent that mushy breakdown. In a small glass jar, I combine 1/3 cup of 365 Everyday Value Extra Virgin Olive Oil ($7.49 at Whole Foods), 2 tablespoons of freshly squeezed lemon juice, 1 tablespoon of jarred minced garlic, 1/2 teaspoon of red pepper flakes, and 1 tablespoon of fresh chopped parsley. This makes enough for 1 lb of shrimp. I pour this over the dried shrimp in a Ziploc bag and massage it in. I set a timer for 30 minutes. That’s the sweet spot. You get the bright, acidic punch of the lemon and the sharp garlic flavor without degrading the protein. Never let it marinate for more than 24 hours.
6. Cook Shrimp Just Until “C” Shaped

Overcooking is the number one reason meal-prepped shrimp tastes awful. Shrimp cooks faster than almost any other protein, and the window between perfectly tender and ruined is about 45 seconds. I used to leave them in the skillet until they were tightly curled into little balls, thinking I was making sure they were safe. I was actually destroying them.
I follow the visual cue method I learned from What’s Gaby Cooking. You’re watching for the shape to change. When raw, they’re straight. As they cook, they begin to curl. You want to pull them off the heat the second they form a loose “C” shape. If they curl into a tight “O” shape, they’re overcooked and rubbery. When I cook my 16-20 count wild-caught shrimp (which I get at Sprouts for $12.99/lb when on sale), it takes 3 to 5 minutes total in a hot skillet. I sear them for 2 minutes on the first side, flip them, and let them go for 1 to 2 minutes on the second side. The moment they hit that “C” shape and turn opaque pink, I immediately slide them onto a cool plate so the residual heat doesn’t keep cooking them.
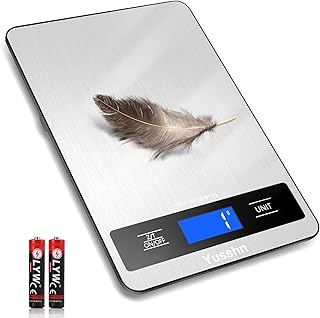
Food Scale, 11lb Kitchen Scale with 0.05oz/1g Precision
Food Scale punches above its price — 15 buyers rated it 4.5 stars. I would buy it again.
7. Batch Cook Separately for Shrimp Meal Prep Ideas

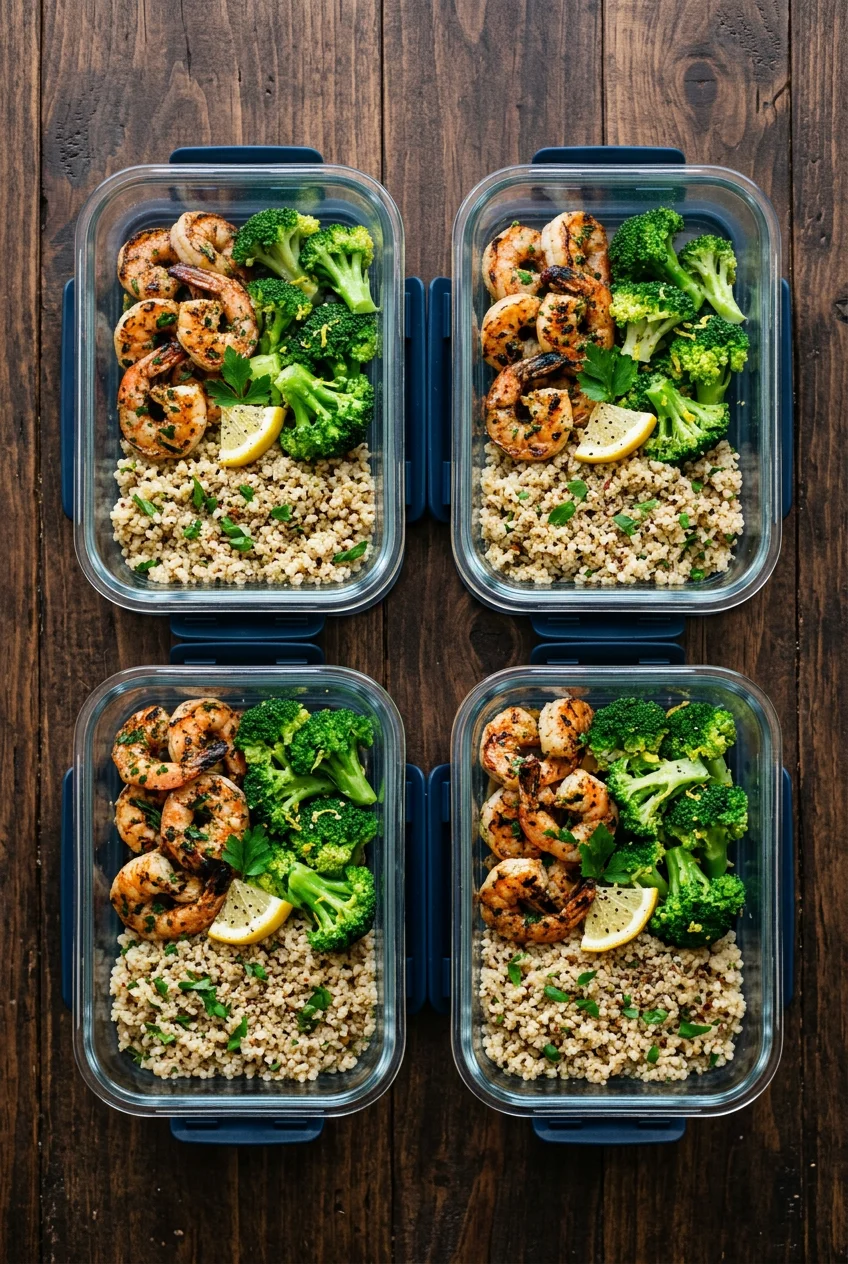
When you’re looking up shrimp meal prep ideas, you’ll see photos showing shrimp packed into the same compartment as rice and broccoli. Do not do this. If you store them together, the moisture from the vegetables makes the shrimp soggy, and you’re forced to microwave everything for the same amount of time. Microwaving shrimp for two and a half minutes alongside a dense block of cold rice is a guaranteed way to ruin your lunch.
I batch cook my shrimp slightly underdone (pulling them just before they hit the full “C” shape) and store them in a separate container. I use the Pyrex 3-cup rectangular glass containers with the blue plastic lids, which cost $6.99 each at Target. Glass is non-porous, so it won’t hold onto seafood odors like plastic. When I’m at work, I put my rice and vegetables on a plate and microwave them for two minutes until they’re hot. Then, I place the cold shrimp on top of the steaming rice and let the residual heat warm the shrimp for about 60 seconds. If they need more warmth, I microwave the whole plate for no more than 15 seconds. This keeps the shrimp tender.
8. Embrace Sheet Pan Meals for Minimal Effort

Sheet pan meals are the easiest way to prep a massive amount of food with only one pan to wash. I rely on this when I’m exhausted on a Sunday. I line an aluminum baking sheet with Reynolds Kitchens Parchment Paper ($4.49 at Kroger) to prevent sticking and to make cleanup take ten seconds.
For my spicy shrimp and vegetable prep, I use 1.5 lbs of X-Large shrimp (the 26–30 count size). I place them in a large bowl and add 2 tablespoons of olive oil, 1 tablespoon of smoked paprika, 1 teaspoon of Cajun seasoning, and 1/2 tablespoon of coarse black pepper. I toss them until they’re coated in this red paste. Then, I spread them out evenly on the parchment-lined pan. I bake them at 350°F (177°C) for 10 to 15 minutes. The lower oven temperature cooks them gently, which is great for meal prep because it keeps them juicy. I pull the pan out the minute they turn pink. The spices toast in the oven, creating a deep, smoky flavor that holds up well in the fridge for three days.
9. Create Flavorful Shrimp Taco Bowls

Taco bowls are my favorite way to portion out lunches because the flavors get better as they sit in the fridge. I use the Bentgo Prep 3-Compartment plastic containers for this. I bought a 10-pack at Target for $14.99. They’re leakproof, which matters when you’re dealing with juicy tomatoes and lime wedges in your work bag.
I take 20 medium shrimp and toss them with 1 tablespoon of olive oil, 1/2 teaspoon of ground cumin, 1/2 teaspoon of chili powder, and 1/4 teaspoon of kosher salt. I sauté them in a skillet for 5 minutes until pink. To build the bowls, I place 1/2 cup of cooked brown rice in the large compartment. In the smaller compartments, I add 1/4 cup of canned black beans (rinsed), 1/4 cup of frozen corn (thawed), and 1/4 cup of diced Roma tomatoes. I divide the 20 cooked shrimp evenly among the containers, placing them right on top of the rice. I also tuck a fresh lime wedge into the corner of each box. Squeezing fresh lime juice over the bowl right before eating brightens up the whole meal and masks any slight fridge taste. No exaggeration.

Etekcity Food Kitchen Scale
If you want something that just works, Etekcity Food Kitchen Scale is a safe bet (1,736 reviews, 4.5 stars).
10. Consider Shrimp and Grits for a Hearty Prep

Most people think shrimp and grits has to be eaten immediately at a restaurant, but it reheats beautifully if you make the grits thick enough. I tried prepping this with instant grits once, and it turned into a watery, separated soup by Tuesday. You’ve got to use the real stuff.
I buy Bob’s Red Mill Coarse Ground Cornmeal Polenta ($4.29 at Whole Foods) for the base. I boil 2 cups of whole milk and slowly whisk in 1 cup of the polenta. I lower the heat and stir it constantly for 20 minutes until it’s thick and creamy. Then I stir in 4 oz of shredded sharp cheddar cheese (the Kroger brand block, which I grate myself so it melts smoothly). For the protein, I take 1 lb of large shrimp and sauté them in a pan with 2 tablespoons of olive oil, 2 finely diced shallots, and 1 teaspoon of Tony Chachere’s Original Creole Seasoning. I cook them for 4 minutes until opaque. I spoon the cheesy grits into my glass meal prep containers and let them cool completely so they set up into a firm base. Then I place the cooked shrimp on top. When you microwave this, the grits soften back into a creamy texture, and the spicy oil from the shrimp melts down into the cheese. It’s filling.
Meal prepping seafood doesn’t have to be intimidating if you control the temperature and store it correctly. I recommend starting with the sheet pan method or the air fryer if you’re new to cooking shrimp, as they offer the most consistent results. Pin this guide for your next Sunday prep session, and let me know which seasoning blend ends up being your favorite.
Frequently Asked Questions
How long does meal-prepped shrimp last in the fridge?
Cooked shrimp can be safely stored in an airtight glass or high-quality plastic container in the refrigerator for 3 to 4 days. Ensure your fridge temperature is kept below 40°F (4°C) to maintain freshness and prevent bacterial growth.
How do you reheat meal-prepped shrimp without it getting rubbery?
Store the shrimp separately from your side dishes. Microwave your rice or vegetables first until piping hot. Then, place the cold shrimp on top and let the residual heat warm them gently for 60 seconds, or microwave everything together for just 15 seconds.
Can I freeze cooked shrimp for meal prep?
Yes, you can freeze cooked shrimp for up to 3 months. Freeze individual portions in a single layer on a baking sheet first to prevent them from clumping together, then transfer them to an airtight freezer bag.
Why do you put baking soda on shrimp before cooking?
Sprinkling a small amount of baking soda on raw shrimp and letting it sit for 15 minutes alters the pH of the meat. This prevents the proteins from tightening up during cooking, keeping the shrimp plump, juicy, and tender.
