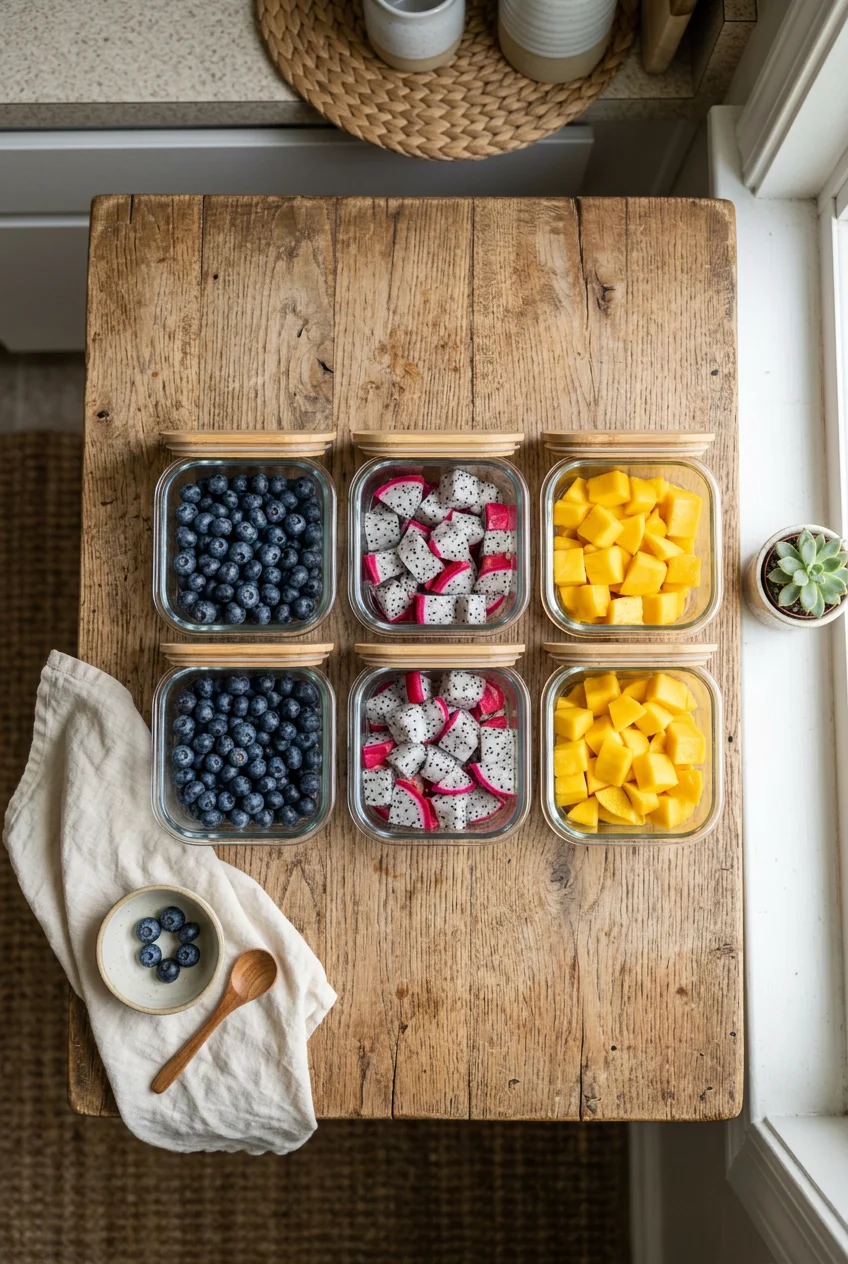
What’s Inside
- Prioritize Hearty Options For Your Fruit Meal Prep
- Master The Vinegar Wash For Berries
- Dry Produce Completely Before Storage
- Switch To Glass Containers With Silicone Seals
- Keep Ethylene Producers Separate In Fruit Meal Prep
- Portion Out Citrus In Advance
- Pre-Chop Melons But Drain The Juice
- Freeze The Soft Fruits For Smoothies
- Add A Paper Towel To Absorb Residual Moisture
Last Tuesday, I opened my fridge to find a sticky, dark red puddle of fermented raspberry juice dripping from the top shelf straight onto my leftover roasted chicken. My early attempts at fruit meal prep were a complete disaster. I tried to just toss wet, unwashed berries into cheap plastic tubs and hope for the best. It cost me $6.99 in ruined produce and twenty minutes of scrubbing sticky glass shelves with a sponge before I could even make my morning coffee. Fruit meal prep requires actual methodical strategy, not just blind optimism. If you just throw a clamshell of strawberries into the crisper drawer, they’ll turn into fuzzy gray science experiments by Thursday.
I started approaching my Sunday prep with the same analytical precision I use for cooking raw meats. Produce has specific moisture, temperature, and airflow requirements. When you ignore these variables, your food rots. When you control them, a batch of washed grapes or sliced apples will easily last from Sunday afternoon until Friday lunch. I’ve spent the last three years testing exactly which containers leak, which washing methods actually kill mold spores, and which fruits simply refuse to survive a knife cut. Learned that the hard way. Here’s exactly how I process my produce for the week without wasting money or ending up with a fridge full of mush.
1. Prioritize Hearty Options For Your Fruit Meal Prep

Your weekly fruit meal prep needs to rely heavily on produce that can actually survive being sliced and stored for five days. Soft fruits like raspberries and overripe bananas turn into a textured paste within forty-eight hours of peeling. Instead, I build the bulk of my weekly prep around apples, citrus, and thick melons. I buy the 3 lb bag of Honeycrisp apples for $7.99 at Costco every Saturday morning. They have a dense, crisp cellular structure that holds up well in a glass container.
Common mistake: most people slice apples, throw them in a bag, and complain when they turn brown by Monday. Oxidation happens when the cut flesh hits the air. To stop this, I soak my apple slices in a specific solution. I mix 2 cups of cold filtered water with 1 tablespoon of ReaLemon 100% Lemon Juice ($2.49 for the 8 oz bottle at Target). I submerge the slices for exactly five minutes, drain them, and pat them completely dry. The citric acid halts the enzymatic browning process. I tried this wrong for months by just squeezing raw lemon juice directly onto the apples. That just makes them taste like sour lemon candy and degrades the texture. The diluted water bath is the only method that preserves the crisp snap of the apple without ruining the natural flavor profile.
2. Master The Vinegar Wash For Berries

Berries carry natural mold spores from the field. If you just rinse them under cold tap water, those spores activate the second you put them in the fridge. I learned this the hard way last October when a $5.99 carton of organic strawberries from Trader Joe’s grew a thick coat of white fuzz in exactly two days. You have to kill the spores before storage. I use a strict vinegar wash protocol for all thin-skinned berries.
I buy the Heinz Distilled White Vinegar in the 1-gallon jug for $4.98 at Walmart. I measure exactly 1 cup of vinegar and 3 cups of cool water into a large metal mixing bowl. I drop the berries in and set a timer on my phone for exactly five minutes. Don’t leave them in longer than five minutes, or the acid will start to break down the cell walls and you’ll end up with pickled blueberries. When the timer goes off, I dump the berries into a colander and rinse them under running cold water for sixty seconds to remove the vinegar smell. If you look at the water left in the mixing bowl, it’ll be gray and filled with dirt, tiny bugs, and grit. Seeing that dirty water once is enough to ensure you never eat unwashed produce again. This simple chemical bath extends the life of my strawberries by at least four days.
3. Dry Produce Completely Before Storage

Moisture is the absolute enemy of stored produce. If you put wet blueberries into a sealed container, the trapped water creates a humid microclimate that accelerates rotting. After the vinegar wash, drying is mandatory. I used to just dump wet grapes onto a paper towel and immediately pack them away. They were slimy by Wednesday. You might also like: 15 Stunning Healthy Dinner Ideas to Steal Right Now
Now, I use the OXO Good Grips Salad Spinner ($29.99 at Target) for any sturdy berries or grapes. I spin them gently in small batches to knock off the heavy water droplets. For delicate items like raspberries, the spinner is too rough and will crush them. Instead, I lay out a clean, dry flour sack cotton towel on my kitchen island. I spread the berries out in a single layer so they aren’t touching each other. I leave them sitting under the ceiling fan for two full hours. It takes up counter space, but it guarantees the skins are bone dry to the touch. Pro tip: if you lack counter space, use a Nordic Ware Baker’s Half Sheet Pan ($18.99 at Whole Foods). Line the aluminum pan with paper towels, spread the fruit, and slide it onto a fridge shelf to dry in the cold, circulating air for a few hours before sealing it in a container. You might also like: 10 Dinner Meal Prep for Every Budget

KOMUEE 10 Packs 30 oz Glass Meal Prep Containers
A dependable everyday pick — KOMUEE 10 Packs 30 oz Glass Meal Prep Containers pulls in 46 ratings at 4.5 stars. Not flashy, just solid.
4. Switch To Glass Containers With Silicone Seals

Stop storing your cut cantaloupe in cheap plastic takeout containers. Plastic is porous. It absorbs odors from your fridge and holds onto them forever. Last year, I packed fresh pineapple into an old plastic tub that previously held my meal-prepped garlic salmon. The pineapple absorbed the residual garlic oils, and it tasted like sulfur and fish. I threw the entire batch in the trash. You might also like: 20 Clever Aesthetic Food Prep That Actually Work
I switched my entire system to Pyrex 3-cup rectangular glass containers, which I buy in a 4-pack for $19.99 at Kroger. Glass is non-porous, meaning it won’t absorb smells or stains. More importantly, these specific containers have lids with a thick silicone gasket that creates an airtight seal. When you press the lid down, you can hear a distinct snap as the air is pushed out. This airtight environment slows down the ripening process. The glass is heavy, and it takes up more weight in my work tote, but the tradeoff is worth it. My cut fruit stays cold, crisp, and tastes exactly like fruit, not like last week’s leftover onions. Skip the fat-free, flimsy plastic stuff. It ruins the flavor of expensive produce.
5. Keep Ethylene Producers Separate In Fruit Meal Prep

Certain fruits release ethylene gas as they ripen. This gas is a ripening agent that will cause any sensitive produce nearby to rapidly soften and decay. I ruined a beautiful $7.99 personal watermelon from Whole Foods because I stored the cubes in a large container right next to a pile of freshly cut apples. The apples off-gassed ethylene, and the watermelon turned into a mealy, watery soup within twenty-four hours. No exaggeration.
Apples, bananas, kiwis, and pears are high ethylene producers. You must quarantine them. I store my cut apples in their own dedicated Pyrex container, completely sealed. I keep my sensitive fruits, like watermelon, strawberries, and grapes, on the opposite side of the fridge shelf. To further manage the gas in my crisper drawers, I use the Rubbermaid FreshWorks Produce Saver containers ($14.99 at Target). They have a built-in vent on the lid that regulates the flow of oxygen and carbon dioxide, allowing trapped ethylene to escape rather than suffocating the fruit. Understanding this basic chemical reaction prevents you from accidentally turning your expensive grocery haul into compost before Wednesday.
6. Portion Out Citrus In Advance

Peeling an orange takes exactly two minutes, but on a busy Tuesday morning when I’m running late for work, those two minutes feel like an hour. I usually end up leaving the orange on the counter and buying a $5 pastry at the coffee shop instead. To fix this behavioral roadblock, I process all my citrus on Sunday afternoon.
I buy the 3 lb bag of Halos Mandarins for $5.99 at Sprouts. I stand at the counter and peel the entire bag at once. I pull the segments apart and remove as much of the stringy white pith as possible, as the pith turns bitter when exposed to air for several days. I use a small Kuhn Rikon paring knife ($12.99 at Amazon) to scrape off the stubborn white pieces. I divide the segments into 1-cup portions using small 8 oz Mason jars ($11.99 for a 12-pack at Walmart). The glass jars keep the citrus oils contained, and the tight metal lids prevent the segments from drying out and turning leathery. Having them pre-peeled and portioned means I can just grab a jar and throw it in my bag. The upfront labor on Sunday saves me daily frustration.

M MCIRCO 10-Pack,22 Oz Glass Meal Prep Containers
A dependable everyday pick — M MCIRCO 10-Pack pulls in 86 ratings at 4.5 stars. Not flashy, just solid.
7. Pre-Chop Melons But Drain The Juice

Melons are incredibly cost-effective for volume eating, but they present a unique storage problem: they leak water continuously after being cut. If you chop a cantaloupe and put it in a flat container, the bottom layer of fruit will sit in a pool of its own juice. By day three, those bottom pieces will be soggy, translucent, and texturally disgusting.
To solve this, I use a container with an elevated drainage grate. I specifically use the OXO Greensaver Produce Keeper 1.5 Qt size, which costs $15.99 at Target. It has a removable plastic basket inside the main container. I chop my watermelon or honeydew into 1-inch cubes using a heavy Victorinox 8-inch chef’s knife ($39.99 at Target) on a plastic cutting board, then transfer the cubes into the basket. As the melon releases water over the week, the liquid drips down through the holes and collects safely at the bottom of the outer container, keeping the fruit elevated and dry. I usually empty the collected juice into the sink every two days. If you don’t want to buy a specialized container, you can mimic this setup by placing a small, inverted ceramic saucer at the bottom of a large glass bowl before adding your chopped melon.
8. Freeze The Soft Fruits For Smoothies

You can’t meal prep sliced bananas or diced mangoes for the fridge. They oxidize rapidly, turn brown, and develop a slimy texture that is completely unappetizing. Instead of fighting their natural biology, I prep these soft fruits exclusively for the freezer to use in daily smoothies.
I buy a large bunch of bananas and a few mangoes from Kroger. I peel the bananas completely. Don’t freeze bananas in their skins, or you’re going to spend ten minutes trying to hack a frozen, blackened peel off with a butter knife while your hands freeze. I slice the fruit into uniform 1-inch chunks. I line a Nordic Ware baking sheet with parchment paper and arrange the pieces so they aren’t touching. I flash-freeze them for two hours. Once they are solid, I transfer them into a Stasher Stand-Up Mid Bag ($21.99 at Whole Foods). Because I flash-froze them first, they remain as individual chunks in the silicone bag rather than freezing into a giant, unusable brick of fruit. I measure out 1/2 cup portions straight from the bag into my blender every morning.
9. Add A Paper Towel To Absorb Residual Moisture

Even if you thoroughly dry your grapes and blueberries after the vinegar wash, temperature fluctuations in your fridge will cause condensation to form on the inside of your storage containers. Every time you open the fridge door, warm air rushes in, hits the cold glass, and creates tiny water droplets that rain back down onto your produce.
My final step in fruit meal prep is the paper towel trick. I fold one single square of Bounty Select-A-Size paper towels ($22.99 for 8 rolls at Costco) and place it flat against the bottom of my Pyrex container before adding the dry fruit. I specifically use Bounty because cheap store-brand paper towels tend to disintegrate when damp, leaving wet paper lint stuck to your grapes. The paper towel acts as a sponge, absorbing any ambient condensation that forms during the week. If I notice the paper towel is completely saturated by Wednesday, I simply pull it out and replace it with a dry one. This single physical barrier prevents the bottom layer of fruit from sitting in microscopic puddles of water, extending the crispness of the batch all the way to Friday afternoon.
Fruit meal prep doesn’t have to end in a sticky, moldy mess at the bottom of your crisper drawer. By controlling moisture with paper towels, managing ethylene gas, and using the right glass containers, you can make your grocery haul last the entire work week. Trust me on this. I highly recommend starting with the vinegar wash this Sunday. Pin this guide to your meal prep board so you have the exact ratios and storage times handy before your next grocery run.

Vtopmart 5Pack 22oz Glass Storage Containers with Lids
If you want something that just works, Vtopmart 5Pack 22oz Glass Storage Containers with Lids is a safe bet (34 reviews, 4.5 stars).
Frequently Asked Questions
How long does fruit meal prep last in the fridge?
When properly washed in a vinegar bath and stored in airtight glass containers, hearty fruits like apples, grapes, and melons will last four to five days. Soft berries typically last three to four days if kept completely dry.
Does the vinegar wash make the fruit taste sour?
No. As long as you stick to the ratio of one cup of white vinegar to three cups of water and rinse the fruit thoroughly under cold tap water afterward, there is zero residual vinegar taste or smell.
Can I prep bananas ahead of time?
Sliced bananas turn brown and mushy in the fridge within hours due to oxidation. The only effective way to prep bananas is to peel them, slice them into chunks, and freeze them in a silicone bag for smoothies.
Why does my cut watermelon get soggy?
Watermelon constantly leaks juice after being cut. If stored in a flat container, the bottom pieces sit in water and rot. You must use a container with an elevated drainage grate so the liquid drips away from the flesh.
