What’s Inside
- 1. The Triple Sheet Pan Method Changes Everything
- 2. Cool Your Food Properly or Ruin Everything
- 3. Sous-Vide for Protein That Doesn’t Dry Out
- 4. Weigh Your Protein Like a Professional
- 5. Label Everything or Lose Track Fast
- 6. Color Before Calories Creates Instagram-Worthy Meals
- 7. Roast Fruit for Unexpected Pops of Color
- 8. Stop Overcrowding Your Sheet Pans
- 9. Add Croutons for Shattering Texture Contrast
- 10. Freeze Thursday and Friday Meals Strategically
- 11. Master Mise en Place in 15 Minutes
- 12. Quick-Pickle Red Onions for Tangy Color Pops
- 13. Add Fresh Herbs Right Before Eating
- 14. Roast Cabbage Wedges for Budget-Friendly Elegance
- 15. Use Glass Containers for Visual Appeal
- 16. Create Gradient Bowls for Maximum Impact
- 17. Invest in One Really Good Knife
- 18. Add Microgreens at the Last Second
- 19. Use Silicone Dividers for Clean Sections
- 20. Photograph Your Best Work for Motivation
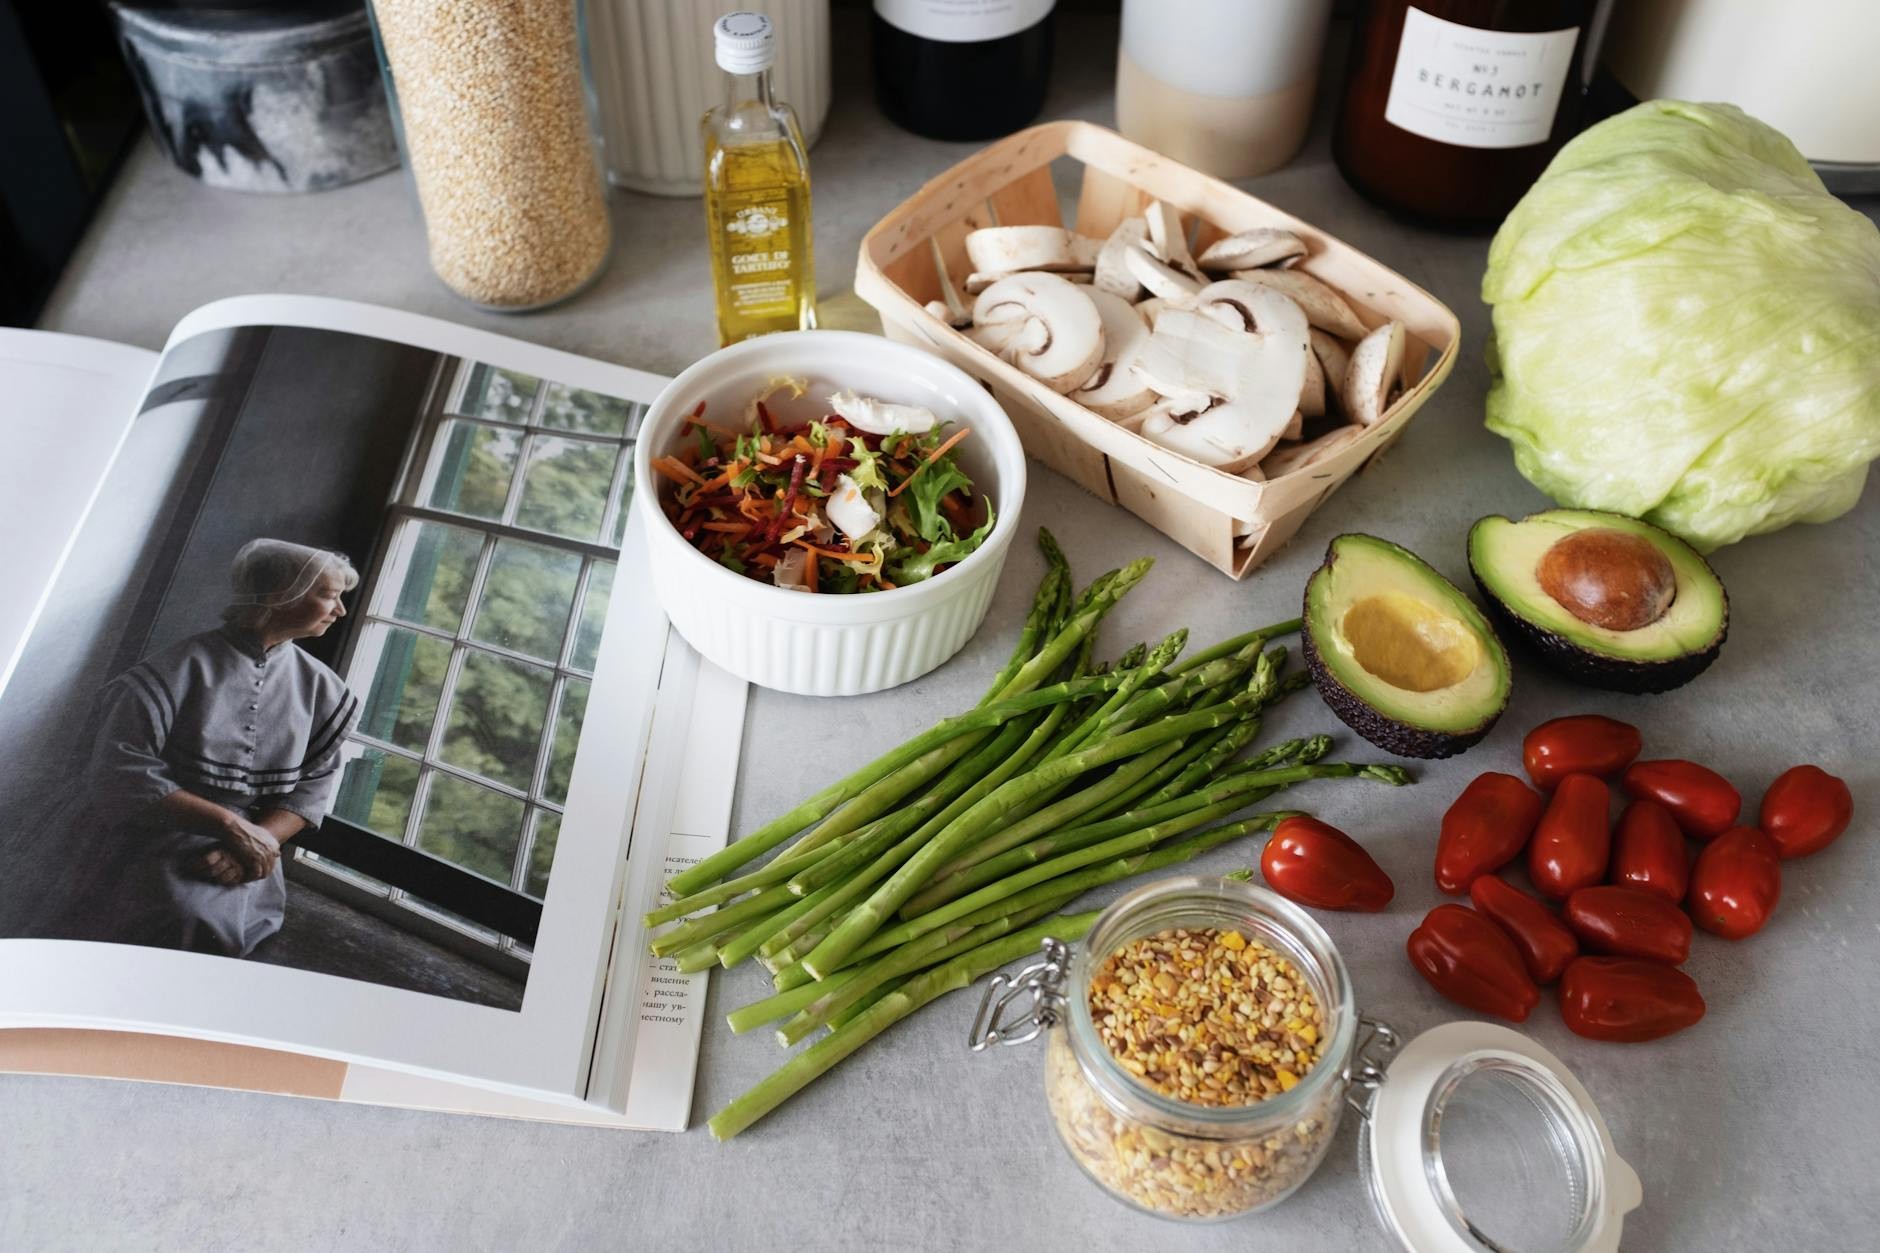
I used to think aesthetic food prep was just for Instagram influencers with too much time on their hands. Then I realized that making my meal prep actually beautiful wasn’t about vanity—it was about eating the food I spent hours making instead of letting it rot in the back of my fridge. Turns out, when your chicken and veggies look restaurant-quality instead of sad cafeteria leftovers, you actually want to eat them on Thursday night.
The secret? It’s not fancy ingredients or culinary school techniques. It’s about smart color combinations, proper cooling methods, and knowing which shortcuts actually work. I’ve tested dozens of methods, wasted plenty of money on containers that leaked, and learned the hard way that overcrowded sheet pans create mushy disasters instead of crispy edges.
These 20 tips combine real functionality with visual appeal. I’m talking about meals that look good enough to photograph but practical enough to eat five days straight without getting bored. No unicorn smoothie bowls or elaborate bento art required.
1. The Triple Sheet Pan Method Changes Everything

I personally swear by using three Nordic Ware Natural Aluminum Commercial Sheet Pans at 400°F simultaneously. This isn’t just about speed—it’s about creating those vibrant color contrasts that make meal prep actually appetizing. I roast chicken thighs (1.5 lbs) on one pan, carrots (2 lbs halved lengthwise) on another, and baby potatoes (2 lbs quartered) on the third. The active time is maybe 30 minutes, and I get 12-15 meals from one cooking session.
The magic happens with those caramelized edges. The Maillard reaction creates deep golden-brown color that signals flavor to your brain before you even take a bite. I learned this after years of cramming everything onto one pan and wondering why my food looked pale and sad. The Nordic Ware pans cost about $15 each at Target, and they’re worth every penny because they conduct heat evenly without hot spots.
Here’s what most people get wrong: they pull everything out at the same time. Chicken thighs need 35-40 minutes, carrots need 30, potatoes need 25. I set three separate timers on my phone and pull each pan as it’s done. The result? Everything is perfectly cooked with those gorgeous crispy edges instead of some things burnt and others undercooked.
2. Cool Your Food Properly or Ruin Everything

This is where I messed up for years. I’d pack hot food straight into containers because I was impatient, then wonder why everything was soggy and gross by day three. The condensation issue is real, and it completely destroys the aesthetic appeal you worked so hard to create. Those beautiful roasted vegetables turn into a watery mess.
Now I spread hot roasted items on clean sheet pans to cool for 15-20 minutes at room temperature. The max is 60 minutes total before you hit the danger zone (40-140°F) where bacteria multiply like crazy. I use this cooling time to clean up my kitchen, which makes the whole process feel less chaotic. The food stays within safe temperature ranges while excess moisture evaporates instead of creating that gross condensation film.
I portion everything into my Glasslock 18-Piece Assorted Oven Safe Container Set (costs $25-35 at Costco) once it’s cooled. The glass doesn’t stain or hold odors like plastic, and honestly, food just looks better in glass. You can see all those pretty colors through the sides, which makes grabbing lunch from the fridge way more appealing than mystery containers you can’t see through.
3. Sous-Vide for Protein That Doesn’t Dry Out

I resisted sous-vide for years because it seemed fussy and unnecessary. Then I tried cooking chicken breasts at 150°F for 1.5 hours with my Anova Precision Cooker (starts at $100), and I finally understood the hype. The chicken stays incredibly moist and doesn’t develop that weird warmed-over flavor that happens with traditional cooking methods. That flavor comes from lipid oxidation, which sous-vide minimizes by cooking in a sealed, oxygen-free environment.
My go-to marinade is 2 tablespoons olive oil and 1 tablespoon lemon zest per pound of chicken. I seal it in bags before cooking, and the marinade penetrates way deeper than it ever did with regular methods. The chicken comes out looking pale, which I’ll admit isn’t gorgeous, so I finish it with a quick sear in a screaming-hot cast iron pan. That gives you those beautiful grill marks and golden color that make the protein look restaurant-quality.
The 2026 trend reports show sous-vide is finally hitting mainstream meal prep, and I get why. You can cook 3-4 pounds of protein at once with zero attention required. I start it before my Sunday morning coffee and forget about it while I prep everything else. The texture stays perfect even after reheating, which is rare with chicken breast.

M MCIRCO 10-Pack,30 Oz Glass Meal Prep Containers 2
A dependable everyday pick — M MCIRCO 10-Pack pulls in 23 ratings at 4.5 stars. Not flashy, just solid.
4. Weigh Your Protein Like a Professional

I bought an Ozeri Pronto Digital Multifunction Kitchen Scale after eyeballing portions for months and wondering why some meals left me starving while others felt too heavy. Turns out I’m terrible at estimating 4 ounces of chicken by sight. The scale costs about $12 on Amazon and has completely changed how consistent my meals feel throughout the week.
I aim for minimum 30 grams of protein per container, which usually means 4 ounces of cooked chicken plus a half cup of quinoa. Macro-focused nutritionists recommend this amount for sustained palatability over 4-5 days. When your protein is consistent, your hunger levels stay predictable, which means you actually eat your prep instead of ordering takeout on Wednesday.
The aesthetic benefit? Consistent portions look intentional and professional. When every container has the same amount of protein centered on one side, it creates visual balance that’s genuinely pleasing to look at. I arrange mine with protein on the left, grains in the middle, and vegetables on the right. It sounds silly, but this simple system makes me actually excited to open my lunch.
5. Label Everything or Lose Track Fast

I spent $45 on a Brother P-Touch Label Maker after the third time I opened a container and couldn’t remember if it was four days old or six days old. Now I label every Pyrex Simply Store Meal Prep Container with the meal name, prep date, and use-by date. For example: “Chicken Veggie – 4/12/26 – Use by 4/17/26.” It takes an extra five minutes during prep, but professionals in the industry note this cuts food waste by 30% through clear FIFO rotation.
The labels also make your fridge look incredibly organized and intentional. When friends open my fridge, they’re always impressed by how neat everything looks. It’s not about being obsessive—it’s about respecting the time and money you invested in prep. Those labels remind you to eat the oldest meals first instead of always grabbing whatever looks most appealing.
I use white labels with black text because they’re easiest to read at a glance. Some people get fancy with color-coding by meal type, but honestly, that feels like overkill to me. The simple approach works better because you can read it in two seconds when you’re rushing out the door in the morning.
6. Color Before Calories Creates Instagram-Worthy Meals

This is my favorite aesthetic food prep trick because it works every single time. I pair 1 pound of ground turkey sausage with 2 pounds of shredded purple cabbage and 1.5 pounds of fingerling potatoes on one sheet pan at 425°F. The purple cabbage turns this gorgeous deep magenta, the potatoes get golden brown, and the sausage adds rich brown tones. It looks like something from a fancy restaurant, but it’s just smart color pairing.
The “color before calories” philosophy means choosing ingredients based on visual contrast first, then making sure the nutrition works. Purple cabbage, orange carrots, white cauliflower, and green broccoli together signal nutrient density to your brain. We eat with our eyes first, and colorful food genuinely tastes better because your brain expects it to be fresh and flavorful.
I shop specifically for colorful varieties now. Instead of regular potatoes, I grab fingerlings or purple potatoes. Instead of green cabbage, I choose purple or red. The cost difference is minimal—maybe 50 cents more per pound at Trader Joe’s—but the visual impact is massive. These rainbow layers make meal prep feel like an accomplishment instead of a chore.

Vtopmart 5Pack 22oz Glass Storage Containers with Lids
If you want something that just works, Vtopmart 5Pack 22oz Glass Storage Containers with Lids is a safe bet (32 reviews, 4.5 stars).
7. Roast Fruit for Unexpected Pops of Color

I started doing quarterly big-batch roasting of fruit after seeing the 2026 trend reports, and it’s become one of my favorite prep shortcuts. I roast 1 pound of cranberries with 2 tablespoons of honey and the zest of one orange at 375°F for 20 minutes. They turn into this jammy, jewel-toned topping that transforms boring salads and plain yogurt into something that looks genuinely special.
I store the roasted fruit in 32-ounce Deli Square Containers (about $1.50 each at restaurant supply stores) and use them all week for versatility. A spoonful on top of grain bowls adds visual interest and a sweet-tart flavor that breaks up savory monotony. The deep burgundy color against green vegetables or white rice creates natural contrast without any effort.
Most people never think to prep fruit, but honestly, this changed how I approach meal prep entirely. The roasted cranberries last about 10 days in the fridge, so I make them once and use them across multiple weeks of prep. Roasted peaches in summer and apples in fall work the same way. It’s a small detail that makes your meals look intentional and thoughtful.
8. Stop Overcrowding Your Sheet Pans

This is the most common mistake I see in meal prep groups, and it completely ruins the aesthetic appeal of your food. When you overcrowd a sheet pan, everything steams instead of roasts. You end up with pale, soggy vegetables instead of those gorgeous caramelized edges that make food look appetizing. I limit my pans to a single layer with 1-inch spacing between pieces.
For 12 ounces of salmon fillets, 1.5 pounds of asparagus, and 1 pound of halved baby potatoes, I use two full sheet pans. Yes, it means more dishes, but the result is worth it. The asparagus gets crispy tips, the potatoes develop golden crusts, and the salmon gets that beautiful flaky texture with slightly charred edges. Everything looks and tastes like it came from a restaurant instead of a meal prep container.
I learned this the hard way after months of cramming everything together to save time on cleanup. The food looked terrible—all pale and mushy—and I couldn’t figure out why my meal prep never looked like the photos I saw online. Proper spacing is the difference between amateur and professional-looking results. Give your food room to breathe, and it’ll reward you with gorgeous color and texture.
9. Add Croutons for Shattering Texture Contrast

I make homemade croutons every single prep session now because they completely change the eating experience. I cube 4 slices of sourdough bread, toss them in 2 tablespoons of olive oil and 1 teaspoon of garlic powder, then bake at 375°F for 10 minutes. They turn golden brown with crispy edges and stay crunchy for days when stored separately in a small container.
I sprinkle about a quarter cup over reheated bowls right before eating. Sensory cooking experts say texture contrast is crucial for palatability, and these croutons provide that satisfying crunch against soft proteins and vegetables. They also add visual interest—those golden cubes scattered on top make even the simplest grain bowl look intentional and composed.
The key is storing them separately from your main prep. If you add them to containers before storage, they’ll get soggy from moisture. I keep mine in a small OXO container on the counter and grab a handful each morning. This tiny extra step takes 30 seconds but makes reheated food feel fresh and restaurant-quality instead of like sad leftovers.

Ultrean Food Scale, Digital Kitchen Scale with LCD Display
Ultrean Food Scale punches above its price — 203 buyers rated it 4.5 stars. I would buy it again.
10. Freeze Thursday and Friday Meals Strategically

I freeze Thursday and Friday meals in Ziploc Freezer Bags and thaw them Wednesday night in the coldest zone of my fridge at 35°F. This extends safety beyond the typical 5-day window for bulk preps like one-pot chili. I make 8 servings from 1 pound of ground beef stretched with 2 cans of beans, and it costs under $2 per serving while lasting two full weeks.
The freezing trick also helps with aesthetic appeal because frozen meals stay fresher-looking than refrigerated meals at day 5. By Thursday, refrigerated food starts looking tired—the colors dull, the textures change. Frozen meals maintain that just-cooked appearance because the freezing process locks everything in place. When you thaw them properly, they look almost identical to freshly prepped food.
I learned this from meal prep professionals who do 10-day rotations. They freeze half their batch immediately after cooling and thaw as needed. It sounds more complicated than it is. I just grab frozen bags on Wednesday evening and move them to the fridge. By Thursday morning, they’re perfectly thawed and ready to reheat. The texture and appearance are noticeably better than meals that sat in the fridge all week.
11. Master Mise en Place in 15 Minutes

Clean eating guides always talk about mise en place, and I used to roll my eyes at the fancy French term. Then I tried pre-chopping all my vegetables in 15 minutes before cooking, and my entire prep process got smoother and faster. I cut vegetables larger for roasting—broccoli florets in 2-inch pieces because they shrink about 30% during cooking. For stir-fry, I cut them medium-sized.
I organize everything in my OXO Good Grips 3-Piece Pop Container Set (costs $20-30 at Target) during this staging phase. Having all ingredients prepped and visible means I can work efficiently without stopping to chop more carrots or hunt for garlic. The containers stack neatly on my counter, and I can see exactly what I have ready to go.
The aesthetic benefit is consistency. When you chop everything before you start cooking, all your pieces are the same size. That means even cooking and uniform appearance in your final containers. Nobody wants meal prep where some broccoli pieces are tiny and burnt while others are huge and undercooked. Consistent sizing creates that professional look that makes your food actually appetizing.
12. Quick-Pickle Red Onions for Tangy Color Pops

This 2026 hack surprised me with how much visual impact it creates for minimal effort. I slice one red onion and submerge it in 1 cup of vinegar, half a cup of water, and 1 tablespoon of sugar. After 30 minutes in the fridge, they turn this brilliant fuchsia color that looks almost artificial. I add them on top of tofu, Brussels sprouts, and sweet potato sheet pan meals for a tangy pop of color.
The pickled onions also serve a food safety purpose—the acidic pH creates an inhospitable environment for bacteria, which extends the shelf life of your meals slightly. They add visual zing that breaks up monochromatic meals. A plain brown bowl of roasted vegetables suddenly looks vibrant and intentional with those bright pink onions scattered on top.
I keep a jar of pickled onions in my fridge at all times now. They last about three weeks and work on literally everything—grain bowls, tacos, salads, sandwiches. The investment is one onion and basic pantry ingredients, but the visual return is massive. It’s the easiest way to make meal prep look professional without any actual cooking skills required.

Rubbermaid Brilliance Tritan Plastic Food Storage
A dependable everyday pick — Rubbermaid Brilliance Tritan Plastic Food Storage Containers BPA Free pulls in 581 ratings at 4.5 stars. Not flashy, just solid.
13. Add Fresh Herbs Right Before Eating

I learned this trick from nutritionists who study warmed-over flavor in reheated proteins. Adding 1 tablespoon of chopped cilantro or parsley plus 1 teaspoon of lime zest per portion right before eating completely refreshes oxidized proteins. The bright green color and fresh aroma trick your brain into thinking the food is freshly made instead of several days old.
I prep small containers of chopped herbs on Sunday and keep them in the fridge for the week. It takes maybe 10 minutes to wash and chop a bunch of cilantro, but that small effort transforms every single meal. The visual impact is immediate—that pop of green against roasted vegetables and brown proteins makes everything look restaurant-quality instead of reheated leftovers.
The herbs also add actual nutritional value and fresh flavor that fades during storage. Cilantro and parsley are cheap at any grocery store—usually under $2 per bunch—and a little goes a long way. This is one of those details that separates mediocre meal prep from prep that you actually look forward to eating all week long.
14. Roast Cabbage Wedges for Budget-Friendly Elegance

This is my favorite budget aesthetic win. I use store-brand olive oil (about $5 for 16 ounces at Aldi) sparingly—just 1 teaspoon per serving—on cabbage wedges roasted at 400°F for 25 minutes. The edges get crispy and charred, mimicking fine dining presentations without $10+ specialty oils. A head of cabbage costs maybe $2 and yields 6-8 servings of gorgeous, caramelized wedges.
The char marks on roasted cabbage look incredibly impressive. Those dark brown, almost black edges against the pale green interior create natural contrast that photographs beautifully. I’ve posted photos of my cabbage wedges on Instagram, and people always ask what restaurant I ordered from. It’s literally the cheapest vegetable at the store, but it looks expensive when you roast it properly.
I cut the cabbage into wedges through the core so they hold together during roasting. Each wedge gets a light brush of oil and a sprinkle of salt. That’s it. The high heat does all the work, creating those gorgeous crispy edges that make meal prep feel special instead of boring. It’s proof that aesthetic food prep doesn’t require expensive ingredients—just smart techniques.
15. Use Glass Containers for Visual Appeal

I switched to glass containers three years ago and never looked back. My Glasslock and Pyrex Simply Store containers show off all the pretty colors and layers I work hard to create. When you can see your food through the container sides, you’re more likely to actually eat it. Those opaque plastic containers hide everything, and I’d forget what was even in them until they went bad.
Glass also doesn’t stain or hold odors like plastic does. After months of turmeric-stained plastic containers that smelled vaguely like last week’s curry, I invested about $60 in a full set of glass containers. They’re heavier and more fragile, yes, but they make my meal prep look intentional and professional. Food genuinely looks better in glass—the colors stay true instead of looking dingy through cloudy plastic.
The aesthetic impact is worth the extra cost. When I open my fridge and see neat rows of glass containers with visible layers of colorful food, I feel accomplished. It’s visual proof that I invested time in taking care of myself. That psychological boost is real, and it makes me more likely to stick with meal prep long-term instead of giving up after a few weeks.

Skroam 10 Pack Glass Meal Prep Containers
Honestly, Skroam 10 Pack Glass Meal Prep Containers surprised me — sturdier than it looks in the photos, and over 56 buyers gave it 4.5 stars.
16. Create Gradient Bowls for Maximum Impact

I arrange my containers with color gradients—darkest to lightest or warm to cool tones. For example, I’ll place black beans at one end, then brown rice, then orange sweet potato, then green broccoli, then white cauliflower. The gradient effect creates visual interest that makes even simple ingredients look thoughtfully composed and restaurant-quality.
This arrangement style comes from Japanese bento traditions, where visual balance is as important as nutritional balance. I’m not making elaborate bento art with food shaped like animals, but I am thinking about how colors interact with each other. Complementary colors like purple cabbage next to yellow squash create more visual pop than similar colors grouped together.
The gradient approach also helps with portion control because you can see exactly how much of each ingredient you’re including. When everything is mixed together, it’s hard to tell if you have enough vegetables or too much grain. Separated gradients let you adjust ratios visually, which makes your nutrition more consistent across the week. Plus, it just looks really pretty, which matters more than people want to admit.
17. Invest in One Really Good Knife

I used to struggle through prep with dull knives from a $20 block set, and my vegetables looked hacked and uneven. Then I bought a single Victorinox 8-inch chef’s knife for about $45, and my entire prep aesthetic improved. Clean cuts mean uniform pieces that cook evenly and look professional in containers. Ragged cuts make everything look sloppy and amateur.
The knife makes prep faster too, which means I’m less likely to cut corners or give up halfway through. When chopping carrots takes five minutes instead of fifteen frustrating minutes of sawing with a dull blade, the whole process feels manageable. Speed matters for sustainability—if prep takes three hours, you won’t stick with it. If it takes one hour, you will.
I sharpen my knife every month with a simple $15 sharpener from Williams-Sonoma. The maintenance takes maybe five minutes, but it keeps my cuts clean and my prep looking professional. This is one of those investments that pays dividends every single week. Good knife skills aren’t about fancy techniques—they’re about having a sharp blade that does what you need it to do.
18. Add Microgreens at the Last Second

I keep a container of microgreens from Trader Joe’s (about $4) in my fridge and add a small handful to meals right before eating. Those delicate greens wilt immediately if you add them during prep, but they create gorgeous visual impact when sprinkled fresh. The tiny leaves add texture, color, and a fresh flavor that makes reheated food feel current instead of days old.
Microgreens photograph incredibly well because of their delicate structure and vibrant green color. If you’re someone who likes to document your meals or share them online, microgreens make everything look more sophisticated and intentional. They’re the garnish that separates home cooking from restaurant presentation—that final touch that shows attention to detail.
The nutritional density of microgreens is also impressive for their size. They’re packed with vitamins and antioxidants in those tiny leaves. I’m not adding them purely for aesthetics—they genuinely boost the nutritional value of my meals. But honestly, the visual impact is reason enough. That pop of fresh green transforms even the most basic chicken and rice bowl into something that looks special.
19. Use Silicone Dividers for Clean Sections

I bought silicone container dividers after getting tired of food mixing together during transport. They cost about $12 for a set of six on Amazon, and they keep sauces from bleeding into grains and proteins from touching vegetables. The clean separation creates visual order that makes meals look more appealing and intentional.
The dividers also help with portion control because they create defined spaces for each component. I use one section for protein, one for grain, one for vegetables, and a small one for sauce or dressing. This system ensures balanced nutrition across every meal without having to think too hard about it. The visual separation also makes it easier to see what you’re eating, which helps with mindful eating habits.
Some people think dividers are unnecessary fussiness, but I disagree. When your food stays separated and looks neat, you’re more likely to enjoy eating it. Mixed-up food might taste the same, but it doesn’t look as good, and that affects your perception of the meal. We eat with our eyes first, and neat presentation matters for sustained meal prep success.
20. Photograph Your Best Work for Motivation

I take photos of my best meal prep sessions and keep them in a dedicated album on my phone. When I’m feeling unmotivated on Sunday morning, I scroll through those photos and remember how good it feels to have beautiful, ready-to-eat meals in my fridge. The visual reminder of past success motivates me to do it again, even when I’d rather order pizza and skip prep entirely.
The photos also help me track what worked and what didn’t. I can look back and see which color combinations looked most appealing, which portions kept me satisfied, and which meals I actually ate versus which ones I avoided. This visual record is more useful than any written meal prep journal because I can see exactly what the food looked like.
Sharing photos with friends or in meal prep groups creates accountability and community. When people comment on your beautiful containers and ask for recipes, it reinforces the effort you put in. That external validation might seem silly, but it genuinely helps with consistency. Meal prep is hard work, and having people notice and appreciate that work makes it feel worthwhile.
These 20 strategies have completely transformed my relationship with meal prep. I went from dreading it every Sunday to actually looking forward to creating beautiful, functional meals for the week. The key is remembering that aesthetics aren’t just about vanity—they’re about making food you’ll actually want to eat five days later.
Start with three or four of these tips that resonate most with you. Maybe it’s the triple sheet pan method or the pickled onions or the glass containers. You don’t need to implement everything at once. Build your system gradually, and pay attention to which changes make the biggest difference in your consistency and enjoyment.
Save this guide and come back to it when you’re ready to level up your prep game. Pin it for those Sunday mornings when you need inspiration to get started. Gorgeous aesthetic food prep isn’t about perfection—it’s about creating meals that respect your time, your budget, and your desire to eat food that actually looks appetizing all week long.
Frequently Asked Questions
How do I keep aesthetic food prep from getting soggy?
Cool roasted items on clean sheet pans for 15-20 minutes before portioning into containers. This prevents condensation that creates sogginess. Store sauces and crunchy toppings like croutons separately, adding them right before eating to maintain texture and visual appeal.
What containers are best for aesthetic food prep?
Glass containers like Glasslock or Pyrex Simply Store show off your colorful food layers and don’t stain or hold odors. They cost $25-60 for a full set and make meal prep look professional. Use silicone dividers to keep components separated for clean presentation.
How long does aesthetic food prep stay fresh?
Properly cooled and stored meal prep lasts 4-5 days in the refrigerator. Freeze Thursday and Friday meals immediately after prep, then thaw Wednesday night for extended freshness. Label everything with prep and use-by dates to track rotation and prevent waste.
Does aesthetic food prep cost more than regular meal prep?
Not necessarily. Budget-friendly ingredients like cabbage wedges, purple cabbage, and seasonal vegetables create gorgeous color contrasts for under $2 per serving. The key is smart color pairing and proper roasting techniques, not expensive specialty ingredients or oils.