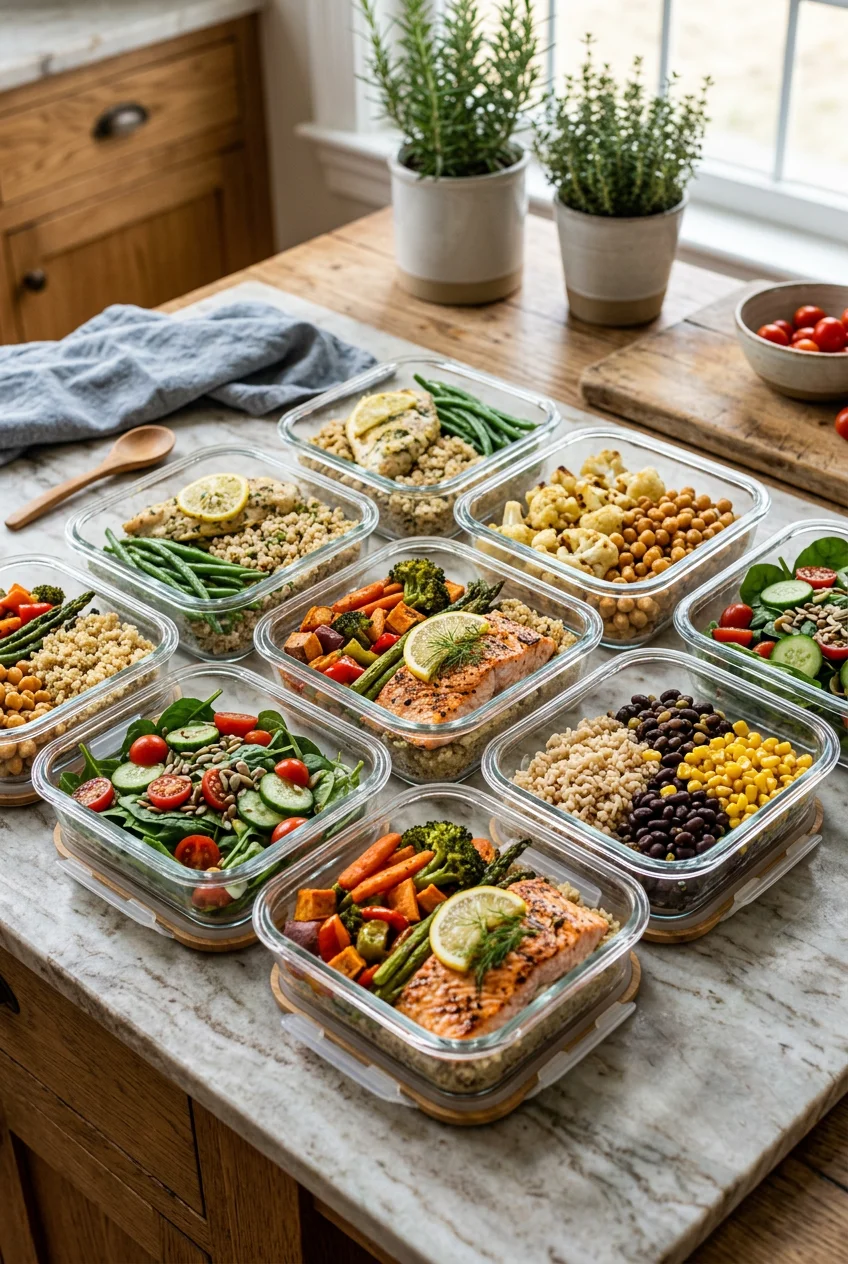
What’s Inside
- Meal Prep For Postpartum: Prioritize Protein for Healing and Energy
- Embrace Freezer-Friendly Batch Cooking
- Invest in Quality Freezer-Safe Containers
- Maximize Your Slow Cooker or Instant Pot
- Stock Up on Nutrient-Dense Staples
- Incorporate Healing Bone Broth Daily
- Pre-Portion Smoothie Ingredients
- Set Up Hydration Stations with Electrolytes
- Don’t Forget One-Handed Snacks in Your Meal Prep For Postpartum
Standing in my kitchen at 3 AM, sobbing because I dropped a frozen, rock-hard block of generic lasagna on my toe. That was my reality exactly three days after my first baby arrived. Doing meal prep for postpartum correctly means avoiding the trap of buying randomly boxed frozen meals that taste like wet cardboard. Let’s fix this right now. The sheer exhaustion you feel after giving birth is impossible to explain until you’re in it. Your body feels hollowed out, your brain is foggy, and the absolute last thing you want to do is chop an onion. I spent months before my due date pinning perfectly aesthetic fridge organization photos, but I failed to prep food that actually nourished my healing body. I ended up sending my husband to Target at midnight to buy overpriced frozen pizzas. Learned that the hard way. Preparing for postpartum is a marathon, not a sprint. Nourishing your body is critical for physical recovery, stabilizing your crashing hormones, and, if you’re breastfeeding, maintaining your milk production. Meal prepping prevents potential mealtime chaos and provides consistent, nutrient-dense support. I’ve spent the last three years perfecting a system that costs under $5 per serving and actually tastes good when reheated. Here are nine specific, factual, and actionable tips to optimize your postpartum meal prep, complete with the exact products I use and the mistakes I’ve made along the way.
1. Meal Prep For Postpartum: Prioritize Protein for Healing and Energy

When you’re planning your meals, prioritizing protein is non-negotiable. Registered Dietitian Lily Nichols suggests aiming for up to a gram of protein per pound of body weight postpartum. This supports tissue repair, rebuilds your blood supply, and keeps your energy from crashing. If you weigh 150 pounds, you’re targeting 150 grams of protein daily. I tried ignoring this advice with my first baby. I ate mostly bagels and oatmeal for the first two weeks. I felt constantly hollow, shaky, and exhausted. Last Tuesday at Whole Foods, I grabbed my current standard: Fage Total 0% Milkfat Plain Greek Yogurt ($1.99 per 5.3oz cup). I skip the heavily sweetened yogurts. They leave you crashing an hour later and taste like artificial syrup. Instead, I buy the plain version and mix in exactly 1/2 cup of fresh raspberries and 2 tablespoons of hemp hearts. This adds crunch and healthy fats. You can’t heal on empty carbohydrates alone. I’ve learned that keeping cooked, lean meats ready in the fridge prevents the desperate 4 PM snack binge. I roast 2 pounds of chicken breast on Sundays. I place the chicken on a baking sheet, drizzle with 1 tablespoon of olive oil, and bake at 400 degrees for 25 minutes. Then, I chop it into 1/2-inch cubes and store it in a glass container. When I’m holding a sleeping baby, I can easily grab a handful of chicken cubes with one hand. It’s not glamorous, but it works. Trust me on this. You won’t regret having pure protein ready to eat straight from the fridge.
2. Embrace Freezer-Friendly Batch Cooking

I used to think freezing meals meant making a massive, unseasoned casserole that tasted like sadness. Then I actually needed to eat them. Dedicate a specific power prep day about three weeks before your due date. Your goal is to make 10 to 15 freezer-friendly meals that actually taste good reheated. Focus on recipes like slow cooker stews, chili, and heavy soups. For instance, I make a massive batch of slow cooker pot roast. I use a 3-pound beef chuck roast from Costco ($24.99 per pack), 4 large chopped carrots, 3 yellow onions, 2 stalks of celery, and 4 cups of low-sodium beef broth. I cook it on low for 8 hours until the meat literally falls apart when you touch it with a fork. I portion it into individual freezer bags, squeezing out every ounce of air to prevent freezer burn. Here is a massive mistake I made: I tried freezing cooked pasta in my chicken noodle soup. When I thawed it in the microwave, the noodles turned into a slimy, dissolving mush that ruined the entire batch. The texture was revolting. Now, I freeze the soup base alone. I boil 1/2 cup of fresh noodles in a separate pot when I’m ready to eat. It takes five extra minutes and saves the texture entirely. You’re going to want meals that require zero brain power. Label every single bag with the date, the exact contents, and reheating instructions using a thick black Sharpie. When you’re running on two hours of sleep, you won’t remember if that red frozen block is marinara sauce or chili.
3. Invest in Quality Freezer-Safe Containers

You can’t just throw hot soup into a cheap plastic tub and expect it to survive the freezer. I learned this the hard way last October. I poured hot chili into a flimsy plastic takeout container, shoved it in the freezer, and it cracked straight down the middle. I spent twenty minutes chipping frozen chili off the bottom of my freezer drawer. Opt for durable, oven-safe, and freezer-safe containers. Borosilicate glass containers, like the Pyrex Cook & Freeze sets, are excellent because they resist thermal shock. This means they can go from the freezer to the oven without shattering. For individual portions, I use 28-ounce rectangular glass containers. They hold exactly 3.5 cups of food, which is the perfect postpartum portion size. For larger batches of soup or stew, Souper Cubes are the only way to go. I bought the 2-cup size tray at Target for $34.95. You pour your hot soup into the thick silicone compartments, freeze them overnight, and pop out perfect rectangular blocks. I transfer these blocks into a gallon-sized freezer bag. This saves an incredible amount of space in your freezer drawer. Silicone food containers are popular right now because they’re flexible and non-toxic. I recently bought the Anydeli Silicone Containers (a mixed set of 3 for $51.00 on Amazon). They’re excellent for storing, freezing, and reheating. They feature measurement indicators on the side for easy portioning, which is brilliant when you need exactly 1 cup of broth. Don’t waste your money on cheap plastic that warps in the dishwasher. You might also like: 10 High Protein Lunch Meal Prep You Need to See

M MCIRCO 10-Pack,30 Oz Glass Meal Prep Containers 2
Honestly, M MCIRCO 10-Pack surprised me — sturdier than it looks in the photos, and over 23 buyers gave it 4.5 stars.
4. Maximize Your Slow Cooker or Instant Pot

These two appliances are the actual heroes of my kitchen. You need to plan for at least five to seven dump-and-go recipes that require absolutely zero chopping on the day you cook them. I prep all the ingredients raw, dump them into Ziploc Gallon Freezer Bags ($6.49 for a 30-count box at Kroger), and freeze them flat. If you’re using an Instant Pot, here is a crucial detail: freeze your meals in a round container first so the frozen block actually fits into the circular Instant Pot insert. I tried shoving a square frozen block of pulled pork into my Instant Pot last year. It didn’t fit. The corners hit the stainless steel sides. I had to sit there hacking at frozen raw pork with a heavy butter knife while my newborn screamed in the living room. It was miserable and incredibly unsafe. Now, I freeze the Ziploc bags inside a round bowl. Once frozen solid, I remove the bowl. Also, only add your liquid (like 1 cup of chicken broth or 1/2 cup of water) on the day of cooking. Freezing the liquid just takes up unnecessary space in your freezer and dilutes the flavor of the spices. The Ziploc bags hold up perfectly in the freezer and prevent freezer burn if you squeeze all the air out before sealing. I’d highly recommend double-bagging anything with a heavy tomato sauce, just in case of microscopic leaks. There is nothing worse than scrubbing frozen, sticky tomato paste off the bottom of your freezer. You might also like: 11 Meal Prep Ideas High Protein for Every Budget
5. Stock Up on Nutrient-Dense Staples

Your pantry and freezer need to be filled with foods rich in iron, healthy fats, and vitamins. You aren’t just feeding yourself. You’re rebuilding your body from a massive medical event. I keep my kitchen stocked with wild salmon for omega-3s, pasture-raised eggs for choline, and massive amounts of oats. Fresh produce is great, but it rots quickly when you forget it exists. I bought six clamshells of fresh spinach right before I gave birth. They turned into a black, slimy liquid in my crisper drawer because I never had the energy to make a salad. Now, I rely heavily on frozen fruit and root vegetables. I buy the Kirkland Signature Organic Mixed Berries from Costco ($13.99 for a 4-pound bag). I pour exactly 1 cup of these frozen berries into my morning oatmeal. They thaw quickly and add a tart flavor that cuts through the heavy, bland oats. You also need to prep your pantry for quick add-ins. I roast a massive tray of sweet potatoes on Sundays. I peel 4 large sweet potatoes, chop them into 1-inch cubes, toss them in 1 tablespoon of avocado oil, and roast at 400 degrees. I store them in an airtight glass container. They are rich in vitamins A and C, and I easily toss them into scrambled eggs or eat them cold as a snack. I also keep pre-cooked grains on hand. I buy the Seeds of Change Organic Quinoa & Brown Rice pouches ($3.49 each at Sprouts). You literally tear the top open and microwave it for 90 seconds. It takes three minutes to make and provides complex carbohydrates. You might also like: 9 Cheap High Protein Meal Prep Worth Trying
6. Incorporate Healing Bone Broth Daily

Let’s talk about bone broth. It’s rich in collagen, amino acids, and minerals, which directly support tissue repair and gut health. A common mistake is buying the cheap, boxed chicken broth from the baking aisle and expecting it to do anything. That stuff is basically just salty water. It tastes terrible on its own. I tried drinking a mug of cheap generic broth once and poured it down the sink after one sip. You want actual, gelatinous bone broth. I buy FOND Regenerative Bone Broth ($11.99 per 14-ounce jar at Sprouts). Yes, it’s expensive. But the flavor is incredibly deep, savory, and rich, and it has 18 grams of protein per jar. I heat up exactly 1 cup of this broth in a small saucepan, add a pinch of sea salt, and sip it from a coffee mug at 10 AM every day. It warms you from the inside out. I also recently tried Loewenzahn Organic Bone Broth (around $14 for a 390ml jar). It’s specifically formulated for postpartum recovery, infused with fennel, aniseed, and caraway to promote milk production. The fennel gives it a slight licorice scent that is actually very soothing. Expert opinion suggests that warm, cooked foods are much easier to digest for a postpartum body than cold, raw salads. Your digestive system is sluggish after birth. Flooding it with raw, rough kale is a terrible idea and will leave you bloated. You also need to plan for postpartum-specific nutrients. Iron-rich foods like lean red meat and lentils help combat the severe fatigue from blood loss.

Skroam 10 Pack Glass Meal Prep Containers
Honestly, Skroam 10 Pack Glass Meal Prep Containers surprised me — sturdier than it looks in the photos, and over 57 buyers gave it 4.5 stars.
7. Pre-Portion Smoothie Ingredients

Smoothies are the ultimate quick, nutrient-packed meal when you literally have zero time to chew. But making a smoothie from scratch when you’re exhausted is surprisingly annoying. Pulling out five different bags of ingredients, measuring them, and putting them away takes too long. I assemble individual smoothie packs in quart-sized freezer bags on Sundays. Each bag gets 1 cup of frozen banana slices, 1 cup of tightly packed fresh spinach, 1/2 cup of frozen mango chunks, and 1 scoop of vanilla whey protein powder. When I’m hungry, I dump the bag into my blender, add exactly 1 cup of unsweetened almond milk, and hit blend. The blender you use actually matters here. I used a cheap $30 blender for years. It left massive, stringy chunks of frozen spinach in my cup. Chewing frozen, bitter leaves in your drink is disgusting and completely ruins the experience. I finally bought the Ninja Professional Blender BN751 ($149.99 at Walmart). I chose this specific model because the lid locks into place with a loud, secure click. This matters because I can turn it on and walk away to grab a clean burp cloth without worrying the lid will fly off and paint my kitchen ceiling green. I’ve used this blender daily for eight months. The heavy-duty blades are sharp enough to pulverize frozen fruit and fibrous greens into a perfectly smooth, creamy texture in under 45 seconds. Keep your assembled smoothie packs at the very front of the freezer drawer so you don’t have to dig for them.
8. Set Up Hydration Stations with Electrolytes

Staying hydrated is critical, especially if you’re breastfeeding. Your body is producing ounces of milk daily, and water alone won’t cut it. I learned this on day four postpartum. I was drinking gallons of plain water but still felt dizzy, exhausted, and completely parched. My midwife told me I was flushing out all my minerals. You need electrolytes. I keep a 32-ounce insulated water bottle and a few packets of LMNT Recharge ($20.00 for a 12-pack at Trader Joe’s) at various points around my house. I have a station on my nightstand, one next to the nursery glider, and one on the kitchen counter. I bought LMNT specifically because it has 1000mg of sodium, 200mg of potassium, and zero sugar. The watermelon salt flavor is incredibly strong and tart, so I only use 1/2 a packet per 32 ounces of water. The high sodium content fixed my dizziness within a single day. Don’t rely on generic sugary sports drinks. They coat your teeth in thick sugar, taste like melted candy, and give you a massive energy crash an hour later. Having the water bottles already filled and stationed around the house means I never have to get up and walk to the kitchen when I’m trapped under a sleeping, nursing baby. It sounds ridiculous to have three large water bottles going at once, but it’s a survival tactic that actually works. If managing your own hydration and food becomes entirely overwhelming, consider postpartum meal delivery services like Mama Meals or Chiyo.
9. Don’t Forget One-Handed Snacks in Your Meal Prep For Postpartum

When you’re holding a newborn, your left arm is essentially out of commission for months. You need snacks that require absolutely no assembly and can be opened and eaten with one hand. I tried eating a crumbly granola bar over my son once. I dropped sticky oat crumbs directly into his eyeball. He screamed for ten minutes. I felt like the worst mother on earth. After that, I strictly prepped solid, non-crumbly snacks. I buy the Tillamook Medium Cheddar Snack Portions ($4.50 for a 10-count bag at Target). I can rip the plastic wrapper open with my teeth and eat the sharp, creamy cheese with one hand while pacing the hallway. I also make a massive batch of dense energy bites on Sunday afternoons. I mix 1 cup of old-fashioned rolled oats, 1/2 cup of creamy natural peanut butter, 1/3 cup of raw honey, 2 tablespoons of ground flaxseeds, and 1/4 cup of mini dark chocolate chips. I roll them into 1-inch balls, place them on a parchment-lined baking sheet, and store them in a glass container in the fridge. They firm up beautifully, taste like cookie dough, and don’t drop crumbs at all. I eat three of these at 2 AM while nursing in the dark. They provide immediate calories and healthy fats to keep me awake. Pre-washing and cutting fruit is also vital. I slice 2 large Honeycrisp apples and store them in a container of cold water with a squeeze of fresh lemon juice so they don’t oxidize and turn brown. No exaggeration.
Navigating the fourth trimester is chaotic enough without staring blankly into an empty fridge at noon. Implementing these strategies completely shifted my recovery experience from desperate survival mode to feeling genuinely nourished. You don’t need to do all of this perfectly. Even having just one batch of slow cooker soup and a few bags of energy bites waiting in the freezer will save you on your hardest days. Start small, buy the good glass containers, and don’t be afraid to ask for help from your village. If you found this guide helpful, please pin it to your pregnancy or postpartum Pinterest boards so you can easily find the recipes and product links when you’re ready to start your power prep day. Let me know in the comments which freezer meal you’re planning to make first. You’ve got this.
![[8-Pack,30 oz]Glass Meal Prep Containers](https://m.media-amazon.com/images/I/713Zfdsgi4L._AC_UL320_.jpg)
[8-Pack,30 oz]Glass Meal Prep Containers
[8-Pack punches above its price — 7 buyers rated it 4.5 stars. I would buy it again.
Frequently Asked Questions
When should I start meal prep for postpartum?
Aim to start your “power prep” day around 36 weeks pregnant. This gives you enough time to batch cook and freeze meals without the immediate pressure of going into labor, ensuring your freezer is fully stocked before the baby arrives.
What are the best containers for freezing postpartum meals?
Borosilicate glass containers, like Pyrex Cook & Freeze, are ideal because they resist thermal shock and can go from freezer to oven. For soups and broths, thick silicone trays like Souper Cubes allow you to freeze and pop out perfect rectangular portions.
How much protein do I need postpartum?
Registered dietitians suggest consuming up to 1 gram of protein per pound of body weight during postpartum recovery. This high protein intake supports tissue repair, rebuilds blood supply, and helps maintain energy levels while healing.
Can I freeze fully cooked pasta in my soups?
No, freezing fully cooked pasta in soup is a common mistake. The noodles absorb liquid and turn into a slimy mush when thawed. Instead, freeze the soup base and boil fresh noodles when you are ready to eat.
