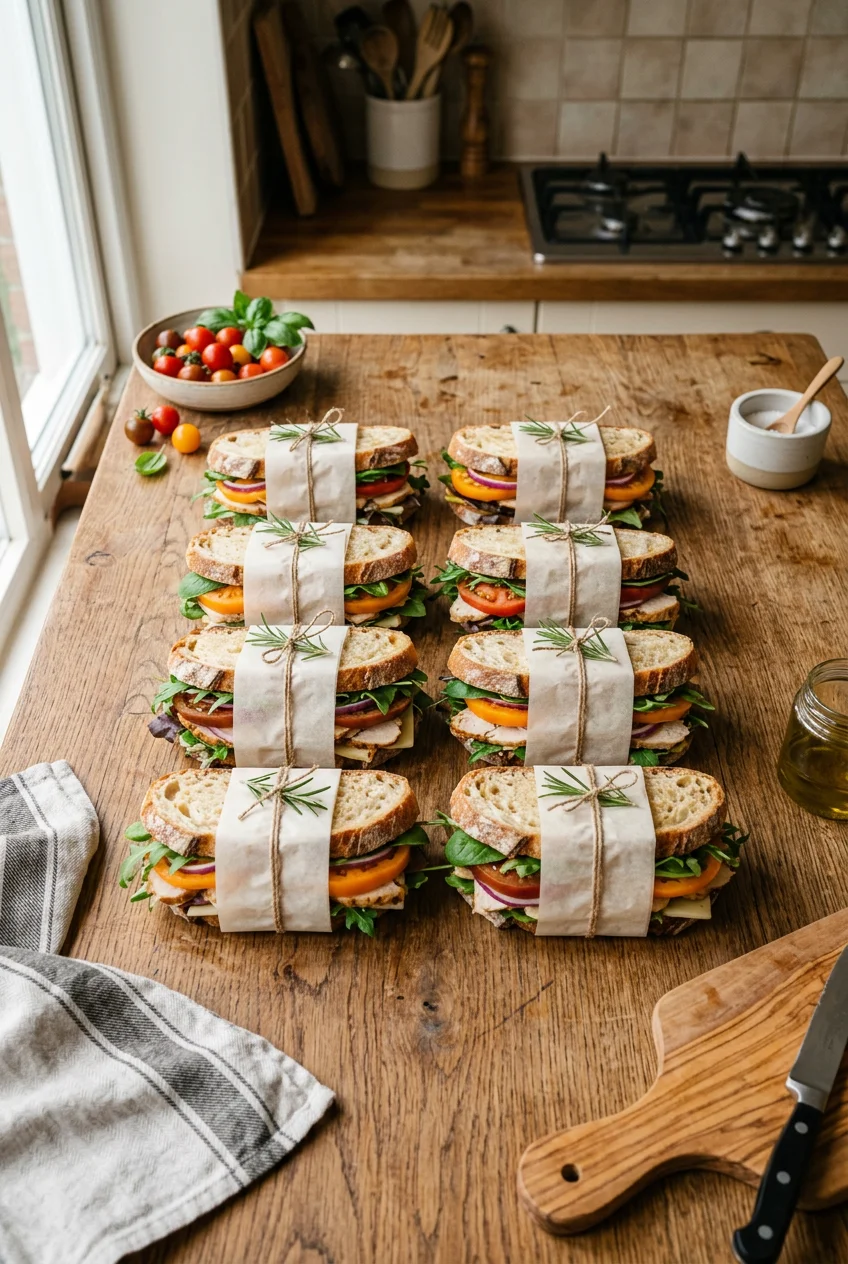
What’s Inside
- The Moisture Barrier Rule for Meal Prep Sandwiches
- Pick Sturdy Whole Grain Breads
- The Pre-Toasting Trick for Meal Prep Sandwiches
- Drying Wet Ingredients Completely
- Strategic Layering Techniques
- Cooling Cooked Fillings Before Assembly
- Greek Yogurt Tuna Salad
- Sheet Pan Eggs for Breakfast
- Proper Storage Containers are Mandatory
- Wrapping Techniques to Lock in Freshness
Last Tuesday at Whole Foods, I sat in my car and opened my lunch container only to find a gray, soggy disaster. I tried to pick up my meal prep sandwiches and my fingers literally pushed right through the wet, mushy bread. It’s safe to say my early attempts at packing lunches were a complete failure. I ended up throwing the whole thing in the trash and buying an overpriced salad. I tried this wrong for months before figuring it out. If you’re tired of eating wet cardboard at your desk, you’re in the right place. I’ve spent the last two years perfecting the art of the make-ahead lunch. You don’t have to settle for sad desk lunches anymore. I’m going to share exactly how I keep my bread perfectly dry and my fillings packed with protein. Let’s fix your lunch routine.
1. The Moisture Barrier Rule for Meal Prep Sandwiches

I used to skip mayo because I thought it was unhealthy. Big mistake. Without a fat barrier, wet ingredients soak right into the bread. You need a generous layer of fat on both slices. I’m obsessed with Hellmann’s Real Mayonnaise ($5.49 for a 30 oz jar at Kroger). I spread exactly 1 tablespoon on the top slice and 1 tablespoon on the bottom slice. If you hate mayo, try pesto. I often grab Barilla Pesto ($3.99 for a 6.3 oz jar at Target). The oil in these spreads literally repels water. Your bread stays perfectly dry for three to four days in the fridge. Skip the fat-free stuff. It tastes like wet cardboard. The fat creates the hydrophobic seal. I learned that the hard way after eating mushy lunches for a straight week last October. Trust me on this, you can’t skip this step. The caramel-butter smell of fresh basil pesto hitting toasted bread is incredible. The texture of the mayo creates a creamy, rich bite that contrasts with crunchy lettuce. You won’t regret using the real stuff.
2. Pick Sturdy Whole Grain Breads

Soft white bread is your worst enemy. I bought a cheap loaf of white bread at Walmart last year and my sandwiches dissolved by Tuesday. You’re going to need something much denser. I always reach for Dave’s Killer Bread 21 Whole Grains ($6.49 for a 27 oz loaf at Sprouts). The thick crust and heavy seed texture hold up beautifully to heavy fillings. Dietitians actually recommend whole grains because the fiber keeps you full. But I just love how the seeds crunch when you bite into them. The hearty, nutty smell of whole wheat bread is so much better than the artificial sweetness of white bread. You need 2 thick slices per sandwich. Don’t try to save calories by buying thin-sliced bread. The thin stuff just won’t hold 4 oz of meat without tearing. I’ve ruined so many lunches trying to use flimsy bread. Buy the thick, sturdy loaves and your lunches will survive the fridge. I remember sitting in the breakroom at work, peeling apart a white bread sandwich that basically fused into a single paste. It was disgusting. Now, I only use dense sourdough or seeded rye. The structural integrity is unmatched.
3. The Pre-Toasting Trick for Meal Prep Sandwiches

This is a step I ignored for a long time. I thought toasting bread for a cold sandwich was pointless. I tried this wrong for months before figuring it out. If you pop your 2 slices of bread in the toaster just until they turn light golden brown, it dries out the surface. This creates a slightly rough, crispy texture that resists moisture absorption. While the crunch won’t last until Thursday, the structural benefits absolutely will. I do this every Sunday morning in my kitchen. The smell of toasted bread fills the house. Once the bread is toasted, I let it cool completely on a wire rack. If you put warm toast in a container, the trapped steam makes it soggy immediately. I learned that lesson after ruining a batch of egg salad sandwiches last spring. I use a cheap Hamilton Beach 2-Slice Toaster ($24.99 for 1 unit at Target) and set it to a medium level. You aren’t trying to make croutons. You just want a dry surface to hold your spreads. I highly recommend doing this for any sandwich holding wet veggies. The dry, toasted surface catches the mayo or mustard perfectly. It’s a small extra step that saves your lunch from becoming a damp sponge. You might also like: 15 Gorgeous Chicken Breast Dinner Ideas That Make a Real Difference

M MCIRCO 10-Pack,30 Oz Glass Meal Prep Containers 2
If you want something that just works, M MCIRCO 10-Pack is a safe bet (23 reviews, 4.5 stars).
4. Drying Wet Ingredients Completely

Excess water is the absolute worst thing for your lunch. I used to slice tomatoes and throw them straight onto my bread. By Wednesday, my lunch container looked like a puddle. Now, I always pat my wet ingredients dry. I take 1/4 cup of sliced cucumbers or 2 thick slices of tomato and lay them flat on a piece of Bounty Select-A-Size Paper Towels ($12.49 for a 4-pack at Costco). I press another paper towel firmly on top to soak up all the surface juice. The visual difference is huge. The tomatoes go from glossy and dripping to matte and dry. The texture of the sandwich improves drastically because you aren’t biting into a water balloon. You’re just getting the fresh, acidic snap of the vegetable. I also do this with pickles. I grab 3 slices of Vlasic Kosher Dill Pickles ($3.29 for a 24 oz jar at Kroger) and dry them thoroughly. It seems tedious, but I promise it’s worth the thirty seconds. If you skip this, you can’t complain when your bread turns to mush. I actually prefer to keep my tomatoes in a tiny separate container and add them right before eating. But if you stack them, drying them is mandatory. The crisp, clean snap of a dry pickle is so much better anyway. You might also like: 20 Inspiring Sunday Dinner Ideas You Need to See
5. Strategic Layering Techniques

How you stack your ingredients matters just as much as what you buy. Experts say you must layer intelligently. I used to put my lettuce right next to the mayo. The lettuce wilted instantly and turned slimy. It was gross. Now, I build a protective shield. I place 1 slice of cheese or 2 oz of deli meat directly against the bottom bread. I’m a huge fan of Boar’s Head Oven Roasted Turkey Breast ($9.99 per lb at Sprouts). The meat blocks the wet veggies from reaching the bread. Then I add my dry tomatoes, 1/4 cup of shredded carrots, and finally my leafy greens on top. The greens create a tiny air pocket under the top slice of bread. The visual layers look like a beautiful rainbow when you cut the sandwich in half. The texture stays perfectly distinct. You get the soft bread, the dense meat, and the crisp veggies all in one bite. I’ve been doing this for two years and it’s completely fixed my soggy lunch problem. Always put the wettest ingredient right in the middle. Think of your sandwich like a fortress. The bread is the outer wall, the meat is the guard, and the tomato is the prisoner in the center. It’s a foolproof system. You might also like: 15 Cozy Easy Dinner Ideas for Every Budget
6. Cooling Cooked Fillings Before Assembly

You can’t put warm chicken on cold bread and expect it to survive. I made this mistake last summer. I grilled some chicken breasts, sliced them up while they were steaming, and packed my lunches. When I opened my container on Monday, the condensation basically steamed my bread into a wet pulp. It smelled like damp socks. You must let all cooked ingredients cool to room temperature. I usually cook 1 lb of chicken breast on Sunday night. I let it sit on a cutting board for at least forty-five minutes before I slice it. The meat should feel completely cool to the touch. The same goes for roasted vegetables or scrambled eggs. If I’m in a rush, I’ll put my 4 oz of cooked chicken in the fridge for twenty minutes before assembling. I use a simple Taylor Digital Instant Read Thermometer ($14.99 for 1 unit at Walmart) to check my chicken, but you can just use your hands. Cold ingredients don’t release moisture. Warm ingredients ruin your lunch every single time. The texture of properly cooled chicken is also much firmer, which makes it easier to slice thin. Thin slices stack better and don’t slide out the back of the sandwich when you take a bite. It’s a win for both texture and structural integrity.
![C CREST [10 Pack] Glass Meal Prep Containers](https://m.media-amazon.com/images/I/81HfSfzlqUL._AC_UL320_.jpg)
C CREST [10 Pack] Glass Meal Prep Containers
Honestly, C CREST [10 Pack] Glass Meal Prep Containers surprised me — sturdier than it looks in the photos, and over 349 buyers gave it 4.5 stars.
7. Greek Yogurt Tuna Salad

I used to hate tuna salad because the heavy mayo made me feel sluggish. Plus, it always smelled a little too fishy in the office microwave area. Now, I swap the mayo for Greek yogurt to bump up the protein. I’m currently buying Fage Total 0% Milkfat Plain Greek Yogurt ($6.49 for a 35.3 oz tub at Whole Foods). I mix 1/2 cup of the thick yogurt with one 5 oz can of Starkist Chunk Light Tuna in Water ($1.29 at Target). I add 1 tablespoon of Dijon mustard, 1/4 cup of diced celery, and a pinch of black pepper. The texture is incredibly creamy, and the yogurt adds a sharp, tangy bite that cuts through the rich fish. The crunch of the fresh celery is so satisfying. This filling packs a massive amount of protein to keep you full during those long afternoon meetings. I usually scoop about 1/2 cup of the mixture onto my toasted rye bread. It’s cool, refreshing, and doesn’t leave you feeling heavy. Just remember to drain the tuna really well first. I literally squeeze the tuna in a mesh strainer until it’s bone dry. If you leave water in the tuna, the yogurt mixture turns into a runny soup. A dry, tight tuna salad is the secret to a sandwich that stays together in your lunchbox.
8. Sheet Pan Eggs for Breakfast

Breakfast sandwiches are my favorite thing to prep, but frying individual eggs takes forever. I stood at the stove for an hour one Sunday flipping eggs and swore I’d never do it again. Now, I use the sheet pan method. I crack 8 large eggs into a bowl, whisk them with 1/4 cup of fairlife Skim Milk ($4.59 for 52 oz at Kroger), and pour the mixture into a greased 9×13 baking dish. I bake it at 350 degrees for fifteen minutes until the center is firm. The eggs puff up beautifully and turn a bright, sunny yellow. Once they cool, I cut them into 6 perfect squares. I place 1 egg square, 1 slice of Tillamook Sharp Cheddar Cheese ($4.99 for 8 oz), and 2 slices of cooked bacon onto a toasted Thomas’ English Muffin ($3.99 for a 6-pack at Walmart). This gives you around 26g of protein per sandwich. The texture of the baked egg is soft and velvety, unlike the rubbery edges you get from frying. It’s the fastest way to stock your freezer with high-protein breakfasts. I wrap each assembled sandwich tightly in foil and freeze them. In the morning, I just microwave one for two minutes. The cheese melts perfectly into the hot egg, creating this gooey, savory bite that makes waking up early almost bearable.
9. Proper Storage Containers are Mandatory

You can make the perfect sandwich, but if you throw it in a flimsy plastic bag, it’s going to get crushed. I used to use cheap sandwich bags, and my lunch always ended up looking like a flattened pancake at the bottom of my tote bag. You must invest in rigid, airtight containers. I personally swear by Pyrex 3-Cup Rectangular Glass Containers ($34.99 for a 6-piece set at Target). The glass doesn’t absorb weird smells like plastic does, and the snap-on lids create a perfect airtight seal. Air exposure makes bread stale faster than anything else. When I open my Pyrex container on Thursday, the bread is still soft and fresh. The glass is also heavy and cold, which helps keep the sandwich chilled on my commute. If you prefer plastic, the Rubbermaid Brilliance Food Storage Containers ($22.99 for a 5-piece set at Costco) are incredibly durable and crystal clear. Don’t cheap out on storage. A good container protects your hard work from getting smashed by your laptop or gym shoes. Plus, matching containers stacked neatly in the fridge just looks visually pleasing. It makes me feel like my life is actually together on a Monday morning. The clear lids let me see exactly which sandwich I’m grabbing without opening them.

M MCIRCO 10-Pack,22 Oz Glass Meal Prep Containers
M MCIRCO 10-Pack punches above its price — 86 buyers rated it 4.5 stars. I would buy it again.
12. Wrapping Techniques to Lock in Freshness

How you wrap your sandwich before putting it in the container makes a huge difference. I used to just toss the bare sandwich into my glass bowl. The edges of the bread got hard and stale from the dry air in the fridge. Now, I wrap every single sandwich tightly. I tear off a 12-inch sheet of Reynolds Wrap Heavy Duty Aluminum Foil ($5.49 for 50 sq ft at Walmart) or a square of unbleached parchment paper. I place the sandwich in the center and fold the edges over tightly, tucking the ends underneath. Wrapping compresses the sandwich slightly, forcing the ingredients to meld together. It makes the sandwich feel dense and substantial, like you bought it from a fancy deli. The crinkling sound of opening the foil at my desk makes me feel like I’m unwrapping a present. The foil blocks out all air and light, preserving the moisture inside the crust. You can even slice the sandwich in half straight through the foil. It holds everything together while you eat. I prefer parchment paper for sandwiches with wet sauces, as foil can sometimes stick to the bread if it gets damp. Either way, the tight wrap is the final step to ensuring your lunch survives the perilous trip from your fridge to your office.
I hope these tips help you stop eating sad, wet lunches. I’ve ruined enough bread over the years to know exactly what doesn’t work. If you stick to sturdy bread, use a fat barrier, and wrap everything tightly, you’re going to have amazing lunches all week. Meal prep sandwiches don’t have to be boring or mushy. You can pack them with protein and fresh flavors that actually make you excited for your lunch break. I’m telling you, that Greek yogurt tuna salad is going to change your afternoons. I’d love to hear how your prep goes this Sunday. Save this guide to your favorite recipe board, and definitely pin it for later so you can reference the layering tricks. Let’s make this week’s lunches the best ones yet.

Vtopmart 5Pack 22oz Glass Storage Containers with Lids
Honestly, Vtopmart 5Pack 22oz Glass Storage Containers with Lids surprised me — sturdier than it looks in the photos, and over 34 buyers gave it 4.5 stars.
Frequently Asked Questions
How long do meal prep sandwiches last in the fridge?
When properly layered with a fat barrier like mayonnaise or butter, and stored in an airtight glass container, meal prep sandwiches can easily last three to four days in the fridge without the bread becoming soggy.
How do you keep bread from getting soggy?
The secret is creating a hydrophobic seal. Spread a generous layer of fat, such as mayonnaise or pesto, on both slices of bread. Additionally, always pat wet vegetables dry with a paper towel and place cheese or meat directly against the bread.
Can you freeze meal prep sandwiches?
Yes, but it depends on the ingredients. Breakfast sandwiches with cooked eggs, meat, and cheese freeze beautifully when wrapped tightly in foil. However, sandwiches with fresh vegetables like lettuce, cucumbers, or tomatoes will become mushy when thawed and should not be frozen.
What is the best bread for meal prep?
Dense, sturdy breads are the best choice. Opt for thick-sliced sourdough, seeded rye, or heavy 100% whole wheat loaves. Avoid soft white bread, as it lacks the structural integrity to hold up to moisture and heavy fillings over multiple days.
