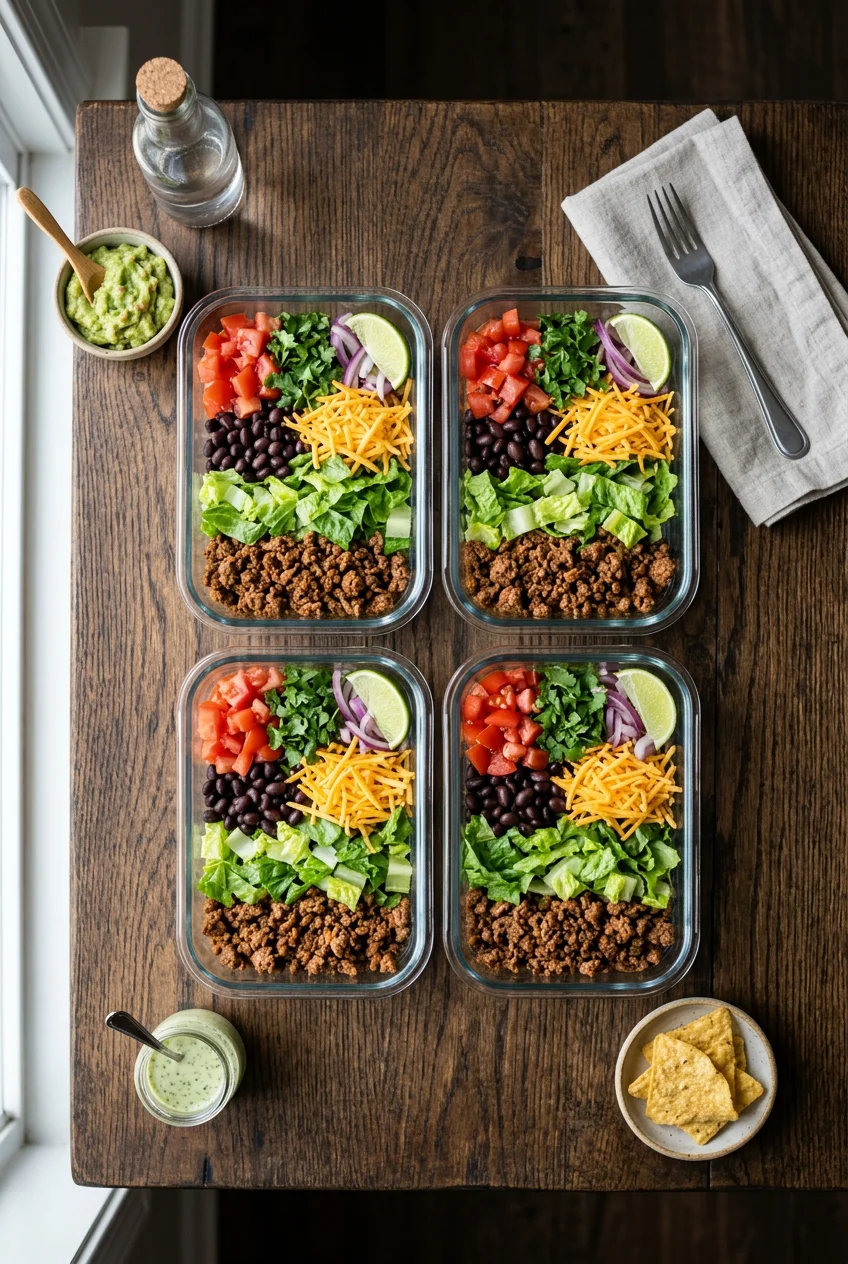
What’s Inside
- Master the Mason Jar Layering Technique for Taco Salad Meal Prep
- Choose Sturdy Greens (And Dry Them Like Your Life Depends On It)
- Strategize Your Protein and Cool It Down Completely
- Ditch the Packets and Make a Low-Sodium Seasoning Blend
- Build a Dense Bean Base for a More Filling Salad
- Keep Your Cheese and Wet Toppings Strictly Separated
- The Avocado Longevity Hack You Actually Need
- Pre-Portion the Crunch (Because Nobody Likes Soggy Chips)
Last Tuesday at Whole Foods, I stared down a sad, wilted pile of greens in the hot bar and immediately remembered my own early kitchen disasters. Nailing taco salad meal prep is totally possible, but you’ve got to stop treating it like a standard side dish. I’m talking about avoiding that brown, mushy mess of lettuce that smells vaguely like a wet dog by Wednesday afternoon. I tried this wrong for months before figuring it out. I’d prep five identical plastic containers on Sunday, dump everything together, and by Tuesday I was eating literal garbage. The dressing would seep into the meat. The chips would dissolve into a gritty paste. The avocado looked like something you’d find at the bottom of a swamp. It was a textural nightmare that made me want to order takeout every single day. Let’s fix that right now. I’m going to walk you through exactly how I keep my ingredients perfectly crisp for five full days. You aren’t going to eat another soggy, depressing desk lunch ever again. I’ve spent years perfecting this method, making every mistake in the book so you don’t have to. We’re going to cover the exact containers you need, the specific brands that hold up best in the fridge, and the layering secrets that keep the wet ingredients far away from your delicate greens. Grab your grocery list, because we’re getting highly specific.
1. Master the Mason Jar Layering Technique for Taco Salad Meal Prep

I’m a huge advocate for the mason jar method, and it’s a trend that isn’t going anywhere. You absolutely need wide-mouth jars for this to work. I buy the wide-mouth quart Ball jars in a 12-pack at Target for exactly $14.99. The wide mouth is non-negotiable. If you try to use the regular mouth jars, you’ll get your hand stuck, and getting the food out is a messy, frustrating disaster. I’ve spilled dressing all over my kitchen counter trying to shake a narrow jar. Start with 2 to 3 tablespoons of your favorite dressing right at the very bottom. I’m currently obsessed with Badia Cilantro Lime & Garlic Dressing, which is $4.48 at Walmart. It has the perfect acidic bite. The layering technique is what saves the whole operation. Put your dressing in first. Then, add hard, non-absorbent vegetables. I chop up half a cup of red bell peppers and half a cup of cucumbers and drop them straight into the dressing. They marinate in the liquid without getting soggy or losing their crunch. Next goes your cooked protein, then your beans, then softer veggies like diced tomatoes. The delicate greens go at the very top, as far away from the liquid as physically possible. I ruined so many lunches by putting the lettuce at the bottom. The dressing just saturates the leaves until they’re translucent. It tastes like wet cardboard. Keep the wet stuff trapped at the bottom. When you’re ready to eat, you just shake the jar vigorously and dump it into a large bowl. The dressing coats everything perfectly at the last second. I’ve actually dropped a glass jar on my garage floor before because I didn’t screw the lid on tight enough, so make sure you seal them properly. The airtight seal is what keeps the ingredients from oxidizing and spoiling prematurely.
2. Choose Sturdy Greens (And Dry Them Like Your Life Depends On It)

I’m extremely picky about lettuce. You need sturdy greens for a taco salad meal prep to survive the week. I’m talking about chopped romaine or classic iceberg. Stop using spring mix for this. I bought a huge plastic tub of organic spring mix at Costco for $4.99 last month thinking I’d be super healthy. By Wednesday, it was literal slime in my glass containers. It smelled awful and looked like swamp water. Skip the delicate stuff. You want leaves that have some real structural integrity. Once you bring your romaine home, wash it thoroughly in cold water. Then, you absolutely must use a salad spinner. I’ve got a cheap plastic one I bought years ago, and it works perfectly. Spin the greens until no more water comes out. Excess moisture is the primary culprit behind wilted greens. After spinning, I take it a step further. I pat the leaves dry with paper towels. I’m not joking. Dry them thoroughly. If you leave water on the leaves, they’ll rot in the fridge. For an extra layer of protection, place a small folded square of paper towel at the very bottom of your greens container if you aren’t using the mason jar method. It absorbs any residual condensation that builds up during the week. I tried skipping this once because I was feeling lazy on a Sunday afternoon. Big mistake. The condensation dripped down the sides of the plastic and pooled at the bottom, turning my carefully chopped romaine into a soggy, unchewable mess. Just take the extra three minutes to dry your produce. You won’t regret it when you’re eating a perfectly crisp salad on a Thursday afternoon.
3. Strategize Your Protein and Cool It Down Completely

Your protein choice makes or breaks the meal. For a classic flavor, I cook 1 pound of 90% lean ground beef or turkey. If you’re leaning toward a plant-forward approach, store-bought vegan crumbles are amazing. I buy the Gardein Beefless Ground for $5.49 at Sprouts. It absorbs taco seasoning beautifully. But here is the most critical rule: you must let the cooked components cool completely before assembly. Hot ingredients generate steam. The biggest mistake I’ve made is putting hot meat directly onto lettuce or sealing it in a container while it’s still warm. Last year, I cooked my beef on a Sunday night, rushed the cooling process because I wanted to go to bed, and sealed the lids while the beef was still steaming. The condensation rained down on the lettuce overnight. It created a bacterial breeding ground and smelled like a warm trash can on Monday at the office. I had to throw the whole batch away. Spread your cooked meat out on a large baking sheet and leave it on the counter until it reaches room temperature. It takes about thirty minutes. If you want warm meat for your lunch, that’s fine. A trending approach is to incorporate warm elements into cold salads. Just keep your seasoned ground meat or plant-based crumbles in a completely separate, small container. When lunchtime rolls around, pop that small container in the microwave for forty-five seconds, then dump the warm meat over your cold salad base. The temperature contrast is amazing, and your lettuce stays perfectly crisp. You might also like: 20 Beautiful Food Prep Ideas for a Fresh New Look

M MCIRCO 10-Pack,30 Oz Glass Meal Prep Containers 2
If you want something that just works, M MCIRCO 10-Pack is a safe bet (23 reviews, 4.5 stars).
4. Ditch the Packets and Make a Low-Sodium Seasoning Blend

Those pre-packaged seasoning mixes at the grocery store cost between $0.54 and $0.99 per ounce, and they’re loaded with salt and weird preservatives. I’m obsessed with making my own blend from scratch. It’s cheaper, tastes infinitely better, and you control exactly what goes into your body. To make a perfect batch, combine 1 tablespoon of chili powder, 1 tablespoon of cumin, 1 tablespoon of smoked paprika, 1 teaspoon of garlic powder, and 1 teaspoon of onion powder. Toast the spices in the hot cast iron pan with your meat for about sixty seconds before adding water. The smell of the cumin toasting is incredible. If you’re feeling lazy, you can buy a premium low-sodium option. I highly recommend MySalt low-sodium taco seasoning. It has only 20mg of sodium per serving and costs about $6.99 online. I used to buy the cheap generic packets at Kroger for $0.89 because I thought I was saving money. They made me so bloated I couldn’t button my jeans by the end of the day. The sodium content was astronomical, and it honestly just tasted like flavored salt rather than actual spices. When you make your own blend, the flavors of the meat and the fresh vegetables actually shine through. Plus, keeping a little jar of homemade taco seasoning in your pantry means you’re always ready for prep Sunday without an extra trip to the store. Trust me, skip the cheap packets. Your taste buds and your waistline will thank you. You might also like: 20 Lovely Work Lunch Ideas to Inspire Your Next Project
5. Build a Dense Bean Base for a More Filling Salad

The dense bean salad trend is everywhere right now, and it’s the perfect concept to apply to your taco salad. Adding a generous portion of beans and grains transforms a flimsy side salad into a hearty, energy-sustaining meal. I always add a 15.5 oz can of Good & Gather Low Sodium Black Beans, which are usually just $0.99 at Target. I rinse them thoroughly in a colander until the water runs completely clear to remove the starchy canning liquid. Kidney beans also hold up exceptionally well in the fridge. I also strongly recommend batch cooking grains. I cook 1 cup of dry organic white quinoa (I get mine at Trader Joe’s for $3.99 for a 16 oz bag) or brown rice. These grains provide a base that aligns with the Mediterranean grain bowl style. I used to just eat lettuce, meat, and a little cheese. I’d be absolutely starving by 2 PM, rummaging through the office breakroom for stale donuts or spending money on vending machine snacks. Don’t do that. The beans and quinoa add massive amounts of fiber and protein, contributing to a much more satisfying meal. The best part is that cooked quinoa and rinsed black beans hold up perfectly in the fridge for 4 to 5 days without getting mushy. They actually absorb the flavors of your dressing and taco seasoning as they sit, making them taste even better by Wednesday. Just make sure your grains are fully cooled before adding them to your prep containers, just like the meat. You might also like: 15 Brilliant Simple Meal Prep Ideas for a Fresh New Look
6. Keep Your Cheese and Wet Toppings Strictly Separated

Not all cheeses perform equally well when sitting in a fridge for five days. You need a low-moisture option. Shredded cheddar or a Mexican blend cheese are your best bets. I personally swear by the Organic Valley 3 Cheese Mexican blend, which is $5.49 at Whole Foods. If you’re eating vegan, the Good Planet Plant Based Mozzarella ($4.99) melts fairly well if you heat it up with your protein. Store your cheese in a separate compartment or sprinkle it on top of heartier ingredients to prevent it from getting wet. Now, let’s talk about the most important rule of meal prep: separate your wet toppings until serving. To maintain the integrity of your salad, you must store salsa, sour cream, guacamole, and any other wet toppings in separate, small airtight containers. I use these tiny 2 oz reusable toddler snack containers I found at Walmart for $3.98. They are the perfect portion size. I put 2 tablespoons of sour cream and 2 tablespoons of chunky salsa into them. If you pour salsa directly on the salad on Sunday, the acid in the tomatoes breaks down the vegetables. It turns into a soup. I learned that the hard way a few years ago when I tried to save container space by mixing the salsa right into the ground beef and lettuce. By Tuesday, the acid had essentially cooked the lettuce into a slimy, brown mess. Keep the wet ingredients isolated. Add them in right before you eat. It takes ten seconds at your desk and saves your entire meal.

Vtopmart 5Pack 22oz Glass Storage Containers with Lids
If you want something that just works, Vtopmart 5Pack 22oz Glass Storage Containers with Lids is a safe bet (34 reviews, 4.5 stars).
7. The Avocado Longevity Hack You Actually Need

Avocados are delicious, but they are a notorious nightmare for meal prep. They brown so incredibly fast. I’ve opened my lunchbox on a Wednesday to find brown, stringy avocado that looks like oxidized mush. It’s so unappetizing that I usually just end up picking it out and throwing it in the trash. If you absolutely must prep your avocado ahead of time, dice it up and toss it generously with 1 tablespoon of fresh lime juice. The citric acid significantly slows down the oxidation process, keeping it mostly green for a day or two. However, honestly, this changed how I handle my lunches: I prefer to just bring a whole, uncut avocado and a plastic knife to work. I buy the bag of Teeny Tiny Avocados at Trader Joe’s for $4.49. One tiny avocado is the exact perfect portion for a single salad. You just slice it open at your desk, scoop it out, and you have perfectly fresh, bright green avocado every single time. You won’t have to deal with half-eaten avocados turning black in your fridge at home. If you’re making a large batch of guacamole instead of using sliced avocado, press a piece of plastic wrap directly onto the surface of the guacamole before putting the lid on the container. You have to eliminate all contact with oxygen. But seriously, the tiny whole avocado trick is the only foolproof way to guarantee perfect texture and flavor.
8. Pre-Portion the Crunch (Because Nobody Likes Soggy Chips)

The satisfying crunch of tortilla chips is the soul of a good taco salad. To prevent them from becoming soggy, you have to store them properly. I buy a bag of Mission Tortilla Strips, which run about $3.29 at Kroger. They are thicker than standard chips and hold up beautifully to heavy toppings. A popular approach right now is the deconstructed salad trend, which offers maximum flexibility and freshness. Instead of fully assembling everything, you prep individual components. This is especially vital for your crunchy elements. I portion out about 1/2 cup of tortilla strips into a separate, airtight Ziploc bag or a dry compartment in a bento box. Do not put them in the main container with the salad, not even resting on the very top layer. The ambient moisture trapped inside the fridge container will ruin them overnight. I tried leaving them on top of the dry lettuce once, thinking they’d be fine. They weren’t. They absorbed the moisture from the cold air and tasted exactly like wet cardboard. I’m serious, it ruins the entire eating experience. Keep your portioned bags of chips in your dry pantry at home, and just grab one baggie on your way out the door in the morning. When you sit down to eat, crush the chips slightly in the bag and sprinkle them over the top of your freshly tossed salad. The crunch contrasts perfectly with the soft beans and the crisp lettuce. It’s the best part of the meal, so don’t let a little fridge humidity ruin it for you.
Taco salad meal prep doesn’t have to end in a soggy, depressing lunch. If you utilize the mason jar layering technique, dry your sturdy greens properly, and keep your wet ingredients and crunchy chips strictly separated, you’re going to have vibrant, delicious meals all week long. I’ve eaten this exact meal for lunch almost every single week this year, and I’m still not sick of it. The key is in the preparation details. Take the extra five minutes on Sunday to dry your lettuce and portion your salsa into tiny containers. I promise it’s worth the effort. If you found these tips helpful, please pin this article to your favorite meal prep board on Pinterest so you can reference the grocery list and seasoning recipe later. Happy prepping!
Frequently Asked Questions
How long does taco salad meal prep last in the fridge?
If you use sturdy greens like romaine, dry your ingredients completely, and store wet toppings separately, your taco salad meal prep will easily stay crisp and fresh in the fridge for 4 to 5 days.
How do you keep tortilla chips crunchy in meal prep?
Never store tortilla chips inside the fridge with your salad. Portion them into separate airtight bags or containers and keep them in your pantry at room temperature. Add them to your salad right before eating.
Can I heat up the meat in a taco salad?
Yes! Store your cooked ground beef or plant-based crumbles in a small, separate container. Microwave the meat for 45 seconds right before lunch, then pour it over your cold lettuce and veggies for a great temperature contrast.
What is the best container for taco salad meal prep?
Wide-mouth quart-sized mason jars are excellent for layering ingredients to prevent sogginess. Alternatively, use a bento-style glass container with separate compartments to keep wet toppings like salsa and sour cream away from the greens.
