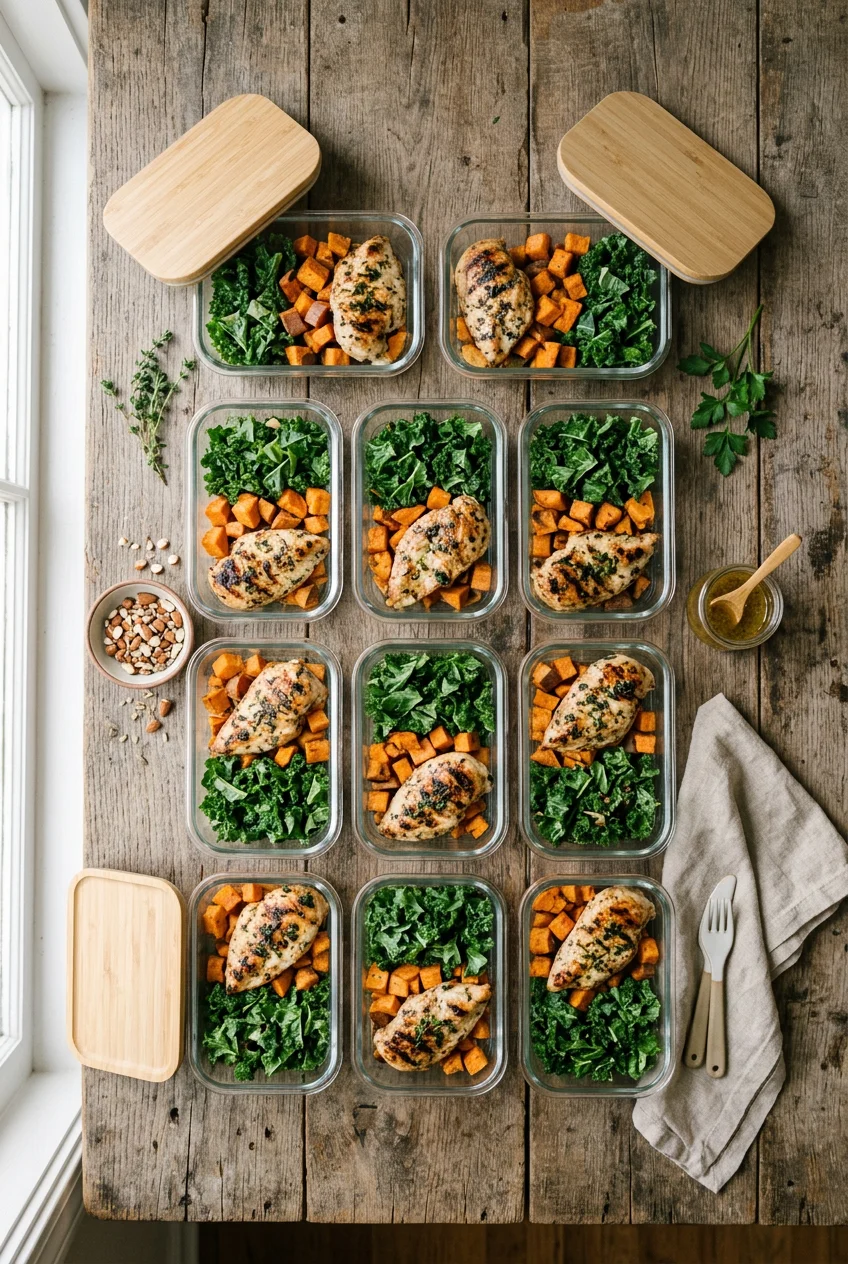
What’s Inside
- Invest In Glass Containers For Your Meal Prep Healthy Lunch
- Master The Pasta Method For Fluffy Grains
- Buy Budget Proteins Like Chicken Thighs And Lentils
- Submerge Your Carrots For Maximum Shelf Life
- Stop Soggy Salads With A Layered Meal Prep Healthy Lunch
- Try Component Prepping Instead Of Full Meals
- Freeze Tofu For A Meatier Texture
- Spin Your Greens Completely Dry
- Respect The Danger Zone With Food Safety
- Label Every Single Container With Dates
- Let Your Instant Pot Do The Heavy Lifting
- Start Small And Mix Up Your Textures
Last Tuesday at Whole Foods, I watched a woman buy $45 worth of sad, pre-packaged salads and I wanted to shake her. I used to be that person before I figured out how to tackle a meal prep healthy lunch routine that didn’t taste like wet cardboard by Wednesday. My kitchen floor was covered in wilted spinach and leaking plastic containers back in 2022 when I first tried this. I was completely overwhelmed. You don’t need to spend your entire Sunday chained to a hot stove to eat clean. I’m going to show you exactly how I prep my meals now, including the massive mistakes I made along the way. If you’re tired of eating mushy rice and slimy carrots, you’re in the right place. Let’s fix your fridge.
1. Invest In Glass Containers For Your Meal Prep Healthy Lunch

I’m starting with my biggest mistake. For my first year, I used cheap plastic bins. Last Tuesday at Target, I saw a girl buying those exact flimsy plastic tubs and I almost stopped her. I’ve ruined so many plastic containers with turmeric and tomato sauce. They hold onto weird garlic smells forever. Skip the cheap stuff. It tastes like wet cardboard when you microwave it anyway. You need to invest in a 4-piece Pyrex glass storage set. They cost around $24.99 at Target. I swear by the 3-cup sizes for my side dishes and the 6-cup sizes for main meals. Glass is freezer, dishwasher, and microwave-safe. It won’t leach chemicals into your food. I’ve dropped my Pyrex on my kitchen tile and it didn’t even chip. Plus, seeing exactly what you have in the fridge makes you want to eat it. I pack 4 oz of grilled chicken and 1/2 cup of rice in these, and they stack perfectly. If you’re serious about this, spend the twenty bucks. It saves you from eating out of stained, smelly plastic.
2. Master The Pasta Method For Fluffy Grains

Most people get this wrong. I tried this wrong for months before figuring it out. I’d cook quinoa with the standard ratio and end up with a sticky, mushy paste that looked like wallpaper glue. It was disgusting. Then I learned the pasta method. Instead of measuring exact water ratios, just boil 1 cup of grains in a huge pot of well-salted water. I buy the Whole Foods 365 Organic Quinoa for $4.49 a bag. I boil it for exactly 14 minutes. If I’m making brown rice, I boil it for 35 minutes. Once it’s tender, you drain it thoroughly through a fine mesh sieve. Here is the most important part. You spread the hot grains out on a bare metal baking sheet to cool completely. This stops the cooking process and lets the steam escape. Your grains won’t turn into a solid brick in the fridge. You get individual, fluffy grains every single time. I portion out 1/2 cup of this fluffy quinoa into my containers, and it stays perfectly textured all week long.
3. Buy Budget Proteins Like Chicken Thighs And Lentils

Protein gets expensive fast. I used to spend fifty dollars a week just on dry, chalky chicken breasts. Skip the fat-free stuff. It tastes like wet cardboard. Now, I buy bone-in, skin-on chicken thighs from Walmart. A huge family pack costs around $8.50. At roughly $0.04 per gram of protein, they’re a steal. Chicken thighs have more fat, which means they won’t dry out when you microwave them on Wednesday. I bake 6 thighs at a time with 2 tablespoons of olive oil and a heavy pinch of salt. But if you really want to save money, dried lentils are the undisputed budget king. I buy a 16 oz bag of brown lentils for $1.48 at Walmart. One serving costs about eight cents and gives you 18g of protein. I also boil eggs for my snacks. Two large eggs cost maybe fifty cents and provide 12g of protein. I’ll chop up 2 hard-boiled eggs and mix them into 1 cup of lentils for a massive protein boost. It’s cheap, filling, and tastes good.
![[8-Pack,30 oz]Glass Meal Prep Containers](https://m.media-amazon.com/images/I/713Zfdsgi4L._AC_UL320_.jpg)
[8-Pack,30 oz]Glass Meal Prep Containers
Honestly, [8-Pack surprised me — sturdier than it looks in the photos, and over 7 buyers gave it 4.5 stars.
4. Submerge Your Carrots For Maximum Shelf Life

This trick blew my mind. I used to buy baby carrots, throw them in the crisper drawer, and find them covered in white slime three days later. It was a gross waste of money. Now, I prep hearty vegetables for maximum shelf life using water. I buy large whole carrots from Sprouts for $1.29 a bunch. I peel them, chop them into 2-inch sticks, and put them in a large glass jar. Then, I completely submerge them in cold tap water and seal the lid. They’ll stay crisp for up to three weeks. You just have to change the water every 4 days. I also do this with celery. For things like broccoli and cauliflower, water doesn’t work. Instead, I chop a whole head of broccoli, put it in a container, and cover it loosely with a dry paper towel. I leave the lid slightly cracked. The paper towel absorbs the moisture, and the venting keeps the sulfur smell from building up. I can keep 2 cups of chopped broccoli fresh for at least 4 days this way. You might also like: 15 Stunning Healthy Dinner Ideas to Steal Right Now
5. Stop Soggy Salads With A Layered Meal Prep Healthy Lunch

I’ve eaten so many soggy salads that I almost gave up on greens entirely. If you put dressing directly on your lettuce on Sunday, you’re eating compost by Tuesday. You have to layer your ingredients strategically. I use large, wide-mouth mason jars from Kroger that cost about $12.99 for a pack of twelve. First, pour 2 tablespoons of your dressing at the very bottom. Next, add hard vegetables that won’t absorb the liquid. I usually add 1/2 cup of cherry tomatoes and 1/4 cup of chopped cucumbers. Then, add your cooked grains and your protein. Finally, pack the top with 2 cups of dry leafy greens. The greens never touch the dressing until you dump the jar into a bowl. If you don’t like jars, buy small dressing containers. I use the Rubbermaid small dressing cups. A 3-pack costs around $5.00 at Kroger. I fill them with 2 tablespoons of vinaigrette and snap them inside my larger lunch containers. It takes two extra seconds and saves your lettuce from turning into a wet mess. You might also like: 15 Stunning Lunch Weekly Meal Prep Ideas You Haven’t Thought Of
6. Try Component Prepping Instead Of Full Meals

I can’t eat the exact same meal five days in a row. By Thursday, I’d rather starve. That’s why component prepping is great. Instead of building five identical boxes, you prep large batches of individual ingredients. Last Sunday, I bought a bag of sweet potatoes from Trader Joe’s for $4.49. I chopped and roasted the whole bag with 1 tablespoon of avocado oil. Then I grilled 1 pound of chicken and cooked 2 cups of farro. I put each ingredient in its own large glass container in the fridge. On Monday, I made a Buddha bowl with 1/2 cup of sweet potatoes, 4 oz of chicken, and a handful of spinach. On Tuesday, I stuffed the chicken and sweet potatoes into a tortilla with some salsa. On Wednesday, I mixed the farro with the chicken and added some feta cheese. You mix and match components so you don’t get bored. It takes the pressure off having to plan specific recipes. You just open the fridge, grab a protein, a carb, and a veggie, and you’re done. You might also like: 20 Inspiring Sunday Dinner Ideas You Need to See

KOMUEE 10 Packs 30 oz Glass Meal Prep Containers
KOMUEE 10 Packs 30 oz Glass Meal Prep Containers punches above its price — 46 buyers rated it 4.5 stars. I would buy it again.
7. Freeze Tofu For A Meatier Texture

I avoided tofu for years because I hated the squishy texture. It felt like eating a wet sponge. Then my vegan friend told me to freeze it. Honestly, this changed how I eat plant-based meals. I buy the 4-pack of extra firm organic tofu from Costco for $6.99. I take one block, press it with heavy books for 20 minutes to drain the water, and cut it into 1-inch cubes. Then, I put the cubes in a freezer bag and freeze them overnight. When you thaw the tofu the next day, the water inside has expanded and created little pockets. The texture becomes incredibly chewy and spongy in a good way. It feels almost like chicken. Because of those little air pockets, it absorbs marinades better. I soak the thawed cubes in 3 tablespoons of soy sauce and 1 tablespoon of sesame oil. When I bake it at 400 degrees for 25 minutes, it gets crispy on the outside. I pack 1 cup of this crispy tofu with my lunches and it holds up perfectly all week.
8. Spin Your Greens Completely Dry

Water is the enemy of fresh produce. If you wash your spinach and throw it straight into a bag, it will rot in 48 hours. The smell of rotting spinach is something I can’t stomach. You have to dry your greens completely. I finally bought the OXO Good Grips Salad Spinner at Target for $29.99, and it paid for itself in a month. I buy the big 16 oz plastic tubs of spring mix. I wash 4 cups of greens at a time and spin them aggressively until not a single drop of water comes out. Then, I take a clean, dry glass container and line the bottom with a paper towel. I pack the dry greens loosely on top and put another paper towel over them before snapping the lid shut. The paper towels absorb any residual moisture. My greens stay crisp for a full week. Don’t skip the paper towels. I tried to save money by not using them once, and my lettuce was slimy by Wednesday. Take the extra five minutes to dry your greens.
9. Respect The Danger Zone With Food Safety

Food poisoning isn’t a joke. I got violently ill in 2019 from eating some sketchy prepped chicken that I left sitting on the counter for four hours. You have to respect the danger zone. Bacteria multiply fast between 40 degrees and 140 degrees Fahrenheit. When I cook a big batch of food, I don’t let it sit out to cool for hours. I portion it into my shallow glass containers and put them in the fridge within two hours. Shallow containers cool down much faster than one giant deep pot. I also strictly separate my raw and cooked foods. I use a cheap red plastic cutting board specifically for raw chicken, and a wooden board for my vegetables. I store all my raw meat on the very bottom shelf of my fridge. That way, if a package leaks, raw chicken juice won’t drip onto my fresh strawberries. When it’s time to eat, I microwave my meals until they reach 165 degrees internally. I use a $15 ThermoPro meat thermometer to check. It gives me total peace of mind.

M MCIRCO 10-Pack,30 Oz Glass Meal Prep Containers 2
M MCIRCO 10-Pack punches above its price — 23 buyers rated it 4.5 stars. I would buy it again.
10. Label Every Single Container With Dates

My freezer used to be a graveyard of mystery containers. I’d pull out a block of frozen brown soup and have no idea if it was chili from last month or beef stew from last year. I ended up throwing so much food away. Now, I label everything. You don’t need fancy stickers. I use a roll of basic masking tape that costs $3.99 at Walgreens and a black Sharpie. I write the name of the meal and the exact date I cooked it. Chicken Curry Oct 12. I stick it right on the glass lid. I follow the first in, first out rule. The oldest meals sit at the front of the fridge, and the newest ones go in the back. This forces me to eat the older food before it goes bad. I keep cooked leftovers in the fridge for a maximum of four days. If I know I won’t eat it by day four, I move it to the freezer immediately. Taking ten seconds to write a label saves you from playing Russian roulette with your stomach.
11. Let Your Instant Pot Do The Heavy Lifting

I used to stand over a hot stove for three hours every Sunday, stirring pots and flipping chicken. I was exhausted before the week even started. You need to let your appliances do the heavy lifting. I bought a 6-quart Instant Pot Duo for $89.00 on Amazon, and it’s a workhorse. I toss 2 pounds of frozen chicken breasts in there with 1 cup of salsa. I set it for 25 minutes, and I walk away. When it beeps, I shred it with two forks. I get shredded salsa chicken for tacos and bowls all week, with zero effort. I also use a cheap $20 Aroma rice cooker from Walmart. I rinse 2 cups of brown rice, add the water, push one button, and ignore it. It never burns on the bottom like it does when I cook it on the stove. While the appliances are running, I use my hands to chop vegetables or mix dressings. It cuts my total kitchen time in half. You don’t need to babysit your food.
12. Start Small And Mix Up Your Textures

The biggest reason people quit prepping is boredom. A bowl of soft rice, soft beans, and soft chicken is depressing. It feels like baby food. You need a mix of textures and colors to make your meal prep healthy lunch satisfying. I always add a crunch element. I buy a bag of roasted pumpkin seeds from Trader Joe’s for $4.99. I keep them in my pantry and sprinkle 1 tablespoon over my lunch right before I eat it. I also add fresh, bright ingredients at the last minute. I’ll pack 1/4 of an avocado in its skin, wrapped tightly in plastic wrap, and slice it over my bowl at work. The creamy avocado against the crunchy seeds makes a huge difference. Also, don’t overcommit. When I first started, I tried making breakfast, lunch, and dinner for seven days straight. I burned out in two weeks. Start small. Prep just three days of lunches. Make 3 portions of a simple grain bowl. Once you get the hang of it, you can add more days. Build the habit slowly so you won’t quit.
I hope these honest tips help you avoid the massive headaches I dealt with when I first started out. Eating clean doesn’t have to be a miserable, soggy experience. If you found this helpful, please pin this post to your favorite Pinterest board so you can find it next Sunday!

M MCIRCO 10-Pack,22 Oz Glass Meal Prep Containers
A dependable everyday pick — M MCIRCO 10-Pack pulls in 86 ratings at 4.5 stars. Not flashy, just solid.
Frequently Asked Questions
How long does a meal prep healthy lunch last in the fridge?
Most prepped lunches stay fresh for three to four days in airtight glass containers. If you’re prepping for later in the week, I highly recommend freezing your meals to maintain texture and prevent bacterial growth.
Can I freeze a meal prep healthy lunch with fresh vegetables?
You can’t freeze raw, watery vegetables like lettuce, cucumbers, or raw tomatoes because they turn to mush. However, roasted vegetables like sweet potatoes and broccoli freeze beautifully. Keep raw greens separate and add them fresh.
What is the cheapest protein for a meal prep healthy lunch?
Dried lentils are the absolute cheapest option, costing just pennies per serving while offering massive protein. Eggs and bone-in chicken thighs are also incredibly budget-friendly compared to expensive cuts of beef or pre-packaged deli meats.
How do I stop my meal prep healthy lunch salad from getting soggy?
You have to keep the dressing completely separate. Use small plastic dressing cups or layer your salad in a tall mason jar with the dressing at the very bottom and the leafy greens at the very top.
