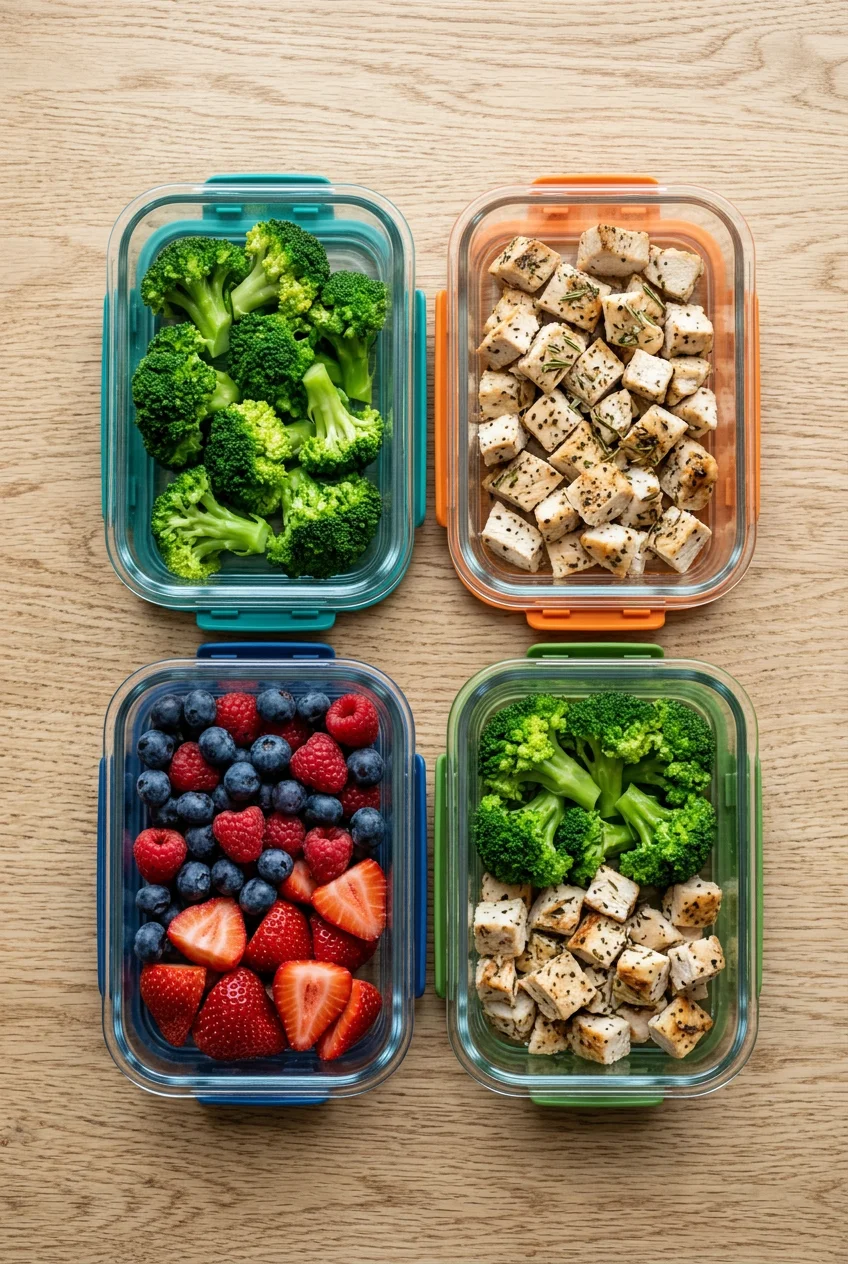
What’s Inside
- Mastering Exact Portion Sizes for Meal Prep for Toddlers
- Batch Cooking Proteins to Save Your Weeknights
- Investing in the Right BPA-Free Storage Containers
- Swapping to Reusable Food Pouches for Snacks
- Freezing Tiny Portions Using Ice Cube Trays
- Testing the Deconstructed Meals Approach
- Choosing the Right Kitchen Appliances for Prep
- Prepping Produce Without It Going Bad
- Blending Hidden Veggies into Familiar Sauces
- Stocking Up on Healthy Store-Bought Shortcuts
- Rotating Dips to Make Meal Prep for Toddlers Fun
Last Tuesday at Target, I was scraping dried, crusty macaroni off the inside of my diaper bag while my two-year-old screamed for a snack. That was my breaking point. Figuring out meal prep for toddlers isn’t about cute bento boxes; it’s about survival. Without a plan, you’ll end up feeding them plain crackers for dinner while you cry into the kitchen sink. I tried winging it for months before realizing I needed a strict system. Now, meal prep for toddlers is the only reason we survive the 5:00 PM meltdown hour. Here are the exact steps I use to keep my sanity.
1. Mastering Exact Portion Sizes for Meal Prep for Toddlers

I used to pile food on a plate like I was feeding a teenager. My daughter would take one look at a mountain of spaghetti, get overwhelmed, and throw it on the floor. Toddler stomachs are roughly the size of their clenched fist. A good rule of thumb is one tablespoon of each food per year of age. For my two-year-old, I measure two tablespoons of cooked peas, two tablespoons of brown rice, and two tablespoons of shredded chicken. I portion this into Munchkin Multi Bowls. They cost $8.99 for a four-pack at Target. Aim for about 40 calories per inch of height daily. That’s roughly 1,000 to 1,400 calories for toddlers aged one to three. Over-serving just wastes money. I learned that the hard way after tossing pounds of expensive organic raspberries. Keep portions small. I bought a cheap set of measuring spoons to keep in my prep drawer. When I’m scooping sweet potato mash on a Sunday, I use the tablespoon measure. It trains your brain to see how little they actually need. Skip the adult-sized plates. They just cause anxiety.
2. Batch Cooking Proteins to Save Your Weeknights

“Cook once, eat many times” is the only rule that matters when you’re exhausted on a Wednesday. I used to cook fresh mini meals every evening, but I burnt out in three days. Now, I double or triple recipes for staples like turkey meatballs and lentil patties. Last weekend, I mixed two pounds of ground turkey with 1/2 cup of finely grated zucchini and 1/4 cup of breadcrumbs. I baked the batch on a sheet lined with Reynolds Kitchens Parchment Paper. It runs $4.99 at Kroger and stops the meat from sticking. I keep enough in the fridge for three days and freeze the rest. You have to label everything. I once thought I’d remember what was in the mysterious frosty bag in the freezer. Spoiler: I didn’t. I ended up thawing what I thought was butternut squash puree, but it turned out to be spicy pumpkin soup. My kid was furious. Now, I use a Sharpie and masking tape on every container. If I’m too tired to cook, I’ll buy a pack of Applegate Turkey Pepperoni ($5.49 at Whole Foods) and chop it into quarters. Having pre-cooked protein means I’m never scrambling.
3. Investing in the Right BPA-Free Storage Containers

You can’t do meal prep if your fridge is full of mismatched, stained plastic tubs missing their lids. I tried this with cheap takeout containers, and the food spoiled fast. You need durable, airtight containers made from glass or BPA-free plastic. For lunches, I bought the Bentgo Kids bento box. It costs around $29.99 at Target. The latches are tight enough that purees don’t leak into the crackers. For freezing larger batches, Souper Cubes are worth the cost. A two-pack of the 1/2-cup silicone trays is about $34.95 on Amazon. I pour leftover lentil soup into the compartments, freeze them, and pop the blocks into a gallon-sized Ziploc bag. It saves freezer space. For snacks, I use WeeSprout glass baby food jars. A set of 12 costs roughly $24.99. They have colorful lids that screw on tight. Clear containers are mandatory. If I can’t see what’s inside, it rots in the back of the fridge. Stick to glass or transparent plastic. It makes grabbing a snack at 6:00 AM much easier. You might also like: 15 Creative Cold Lunch Ideas to Transform Your Space
![[8-Pack,30 oz]Glass Meal Prep Containers](https://m.media-amazon.com/images/I/713Zfdsgi4L._AC_UL320_.jpg)
[8-Pack,30 oz]Glass Meal Prep Containers
[8-Pack punches above its price — 7 buyers rated it 4.5 stars. I would buy it again.
4. Swapping to Reusable Food Pouches for Snacks

Store-bought pouches are a financial trap. When my son started solids, I was buying organic fruit pouches at $2.50 a pop from Sprouts. I spent over $500 a year on pureed apples. I switched to reusable pouches. I bought the Squeasy Snacker silicone pouch. It costs $16.99 for the 6 oz size. He can shake it upside down, and the yogurt stays inside. For bulk, I use WeeSprout Double Zipper Reusable Pouches. A 12-pack is about $17.99. Every Sunday, I blend 2 cups of plain whole milk yogurt with 1 cup of thawed frozen strawberries and 1 tablespoon of chia seeds. I use a funnel to fill the pouches. I keep four in the fridge and freeze the rest. They thaw perfectly in a lunchbox by noon. The only downside is cleaning them. You need a skinny bottle brush. If you let a pouch sit in the sink overnight, the chia seeds cement into the corners. I ruined three pouches before I learned to rinse them with hot water immediately. Skip the disposables. You might also like: 15 Inspiring Chicken Meal Prep Ideas You Haven’t Thought Of
5. Freezing Tiny Portions Using Ice Cube Trays

The freezer is your best friend, but only if you freeze in toddler-sized portions. I used to freeze giant blocks of macaroni and cheese. When I needed a quick lunch, I’d have to hack at the frozen block with a butter knife. It was dangerous and dumb. Now, I freeze in miniature formats. Mini egg muffins, silver dollar pancakes, and tiny oat bars are my weekly staples. For purees, I use OXO Tot Baby Food Freezer Trays. They cost $14.99 at Walmart. I take one cooked sweet potato, blend it with 2 tablespoons of breastmilk, and spoon it into the tray. Each cube holds exactly 3/4 of an ounce. Once frozen, I transfer them to a labeled freezer bag. When dinner is sparse, I microwave two cubes for 30 seconds. I do this with leftover pasta sauce, too. If I open a jar of Rao’s Marinara ($7.99 at Costco) and we don’t finish it, I freeze the rest in the OXO trays. Throwing away half-empty jars of expensive sauce used to make me sick. Now, I have perfect two-tablespoon portions ready. You might also like: 20 Gorgeous Meal Planning Ideas for Any Style
6. Testing the Deconstructed Meals Approach

If your kid refuses to eat anything that touches something else, you aren’t alone. Pediatric dietitians are pushing the “deconstructed meals” trend, and I get why. I used to spend thirty minutes making a chicken and broccoli casserole. My toddler would take one look at the mixed textures and push the plate to the floor. Infuriating. Now, I serve the same ingredients, just separated. I use an EZPZ Mini Mat. It costs $27.49 at Target. The divided sections force me to keep foods apart. I put 2 ounces of diced roasted chicken in one section, 1/4 cup of plain white rice in another, and three steamed broccoli florets in the top section. This gives them autonomy. They can inspect the broccoli without the rice getting in the way. It’s easier to heat up 1/2 cup of plain pasta and 1/4 cup of ground beef separately than forcing a mixed bolognese on a stubborn two-year-old. The deconstructed method removes the pressure. They poke, they sniff, and eventually, they might taste it. Keep textures distinct and you’ll throw away less food.

KOMUEE 10 Packs 30 oz Glass Meal Prep Containers
If you want something that just works, KOMUEE 10 Packs 30 oz Glass Meal Prep Containers is a safe bet (46 reviews, 4.5 stars).
7. Choosing the Right Kitchen Appliances for Prep

You don’t need a massive commercial kitchen, but you do need tools that work. I started by mashing steamed carrots with a fork. It took twenty minutes and left lumps that made my baby gag. I finally bought the NutriBullet Baby Food Processor for $59.99 at Target. It’s compact and perfectly sized for small batches. If you have the budget, the BEABA Babycook Neo is incredible. It retails for about $279.95 at Nordstrom. The glass bowl is the selling point. I hate steaming food in cheap plastic because it warps and absorbs smells. The BEABA steams and blends in the same glass container, saving me from washing an extra pot. For larger families, a standard non-toxic food processor is better. I use a Ganiza Food Processor with an 8-cup stainless steel bowl. It costs around $45 on Amazon. I pull it out when I’m shredding cheddar or grinding oats. Don’t bother with tiny manual hand choppers. I bought one for $15 and the string snapped on the third pull while I was dicing an onion. Invest in a machine with a real motor.
8. Prepping Produce Without It Going Bad

Prepping fruits and vegetables ahead of time is great in theory, but a disaster if you don’t store them right. I used to chop a whole cantaloupe on Sunday, throw it in a plastic bowl, and by Wednesday it was a slimy mess. Now, I use the OXO Greensaver Produce Keeper. The medium size is $22.99 at Target. It has an elevated basket that keeps fruit out of its own juices and a carbon filter in the lid. I wash, dry, and chop hearty vegetables like bell peppers, cucumbers, and carrots at the start of the week. They stay crisp until Friday. However, do not prep items that brown quickly. I tried slicing apples and potatoes on a Sunday. I soaked them in lemon water, wrapped them tight, and they still turned brown by Tuesday. My kid took one bite and spit it out on the rug. Keep apples whole until you serve them. For berries, I wash them in a solution of 1 part white vinegar to 3 parts water. I rinse and dry them completely before putting them in the fridge. Moisture is the enemy.
9. Blending Hidden Veggies into Familiar Sauces

I’m not above tricking my child into eating vegetables. When the picky phase hit at eighteen months, my daughter refused anything green. I had to get creative. Blending cooked vegetables into sauces is the only way I get vitamins into her. Every Sunday, I roast a butternut squash. I scoop 1 cup of flesh and blend it into a jar of marinara sauce. It thickens the sauce and adds sweetness, but the color stays red. I pour this over Banza Chickpea Pasta. A box is $3.99 at Whole Foods. She devours it. I also bake green muffins using spinach. I take one box of Simple Mills Banana Muffin Mix ($8.59 at Sprouts). Instead of just water, I blend 1/2 cup of water with a massive handful of fresh spinach until it’s bright green. I mix that into the batter. The muffins come out green, which I tell her is dinosaur food. My early mistake was hiding cauliflower in mac and cheese. Cauliflower has a distinct, sulfur-like smell when reheated. She took one sniff, yelled “stinky!”, and threw the bowl. Stick to mild, sweet vegetables like butternut squash, zucchini, or spinach.

Vtopmart 5Pack 22oz Glass Storage Containers with Lids
If you want something that just works, Vtopmart 5Pack 22oz Glass Storage Containers with Lids is a safe bet (34 reviews, 4.5 stars).
10. Stocking Up on Healthy Store-Bought Shortcuts

You don’t have to make everything from scratch. That’s a fast track to burnout. I lean on healthy store-bought shortcuts when prep time gets cut short. Pre-chopped frozen fruits and vegetables are lifesavers. They retain their nutrients and require zero chopping. I buy massive bags of frozen crinkle-cut carrots and broccoli from Costco. I steam a handful in the microwave for three minutes. For pantry snacks, I keep That’s It Bars in my bag. They cost $1.79 each at Trader Joe’s, and the ingredient list is just fruit. No added sugar. When my son wants something crunchy, I hand him Harvest Snaps Green Pea Crisps. A bag is around $2.49 at Kroger. They have less sodium than chips and pack protein. My emergency snack is Natierra Freeze Dried Berries. They run about $6.99 at Whole Foods. Always check the labels for hidden sodium. I once bought generic sweet potato puffs thinking they were healthy. I tasted one, and it was saltier than a fast-food fry. I saw 250mg of sodium per serving. Stick to freeze-dried fruit, pea crisps, and 100% fruit bars.
11. Rotating Dips to Make Meal Prep for Toddlers Fun

Toddlers love to dip. It gives them control and turns a boring vegetable into an activity. Plain carrot sticks sit untouched; carrot sticks with a dollop of dip vanish. I rotate through three main dips to keep things interesting and boost healthy fats. First is Sabra Classic Hummus. A tub is $4.99 at Walmart. I spoon exactly 2 tablespoons into a small silicone cup. Second is plain Greek yogurt with a dash of cinnamon. Third is peanut butter. I buy the Justin’s Peanut Butter squeeze packs ($1.19 each at Target) because I can squeeze out a small amount without dirtying a knife. My early mistake was giving my kid a giant bowl of ranch. No exaggeration. Now, I strictly portion the dips. I use the tiny condiment containers that came with my bento box. It forces him to use the food as a vehicle for the dip, rather than just drinking it. Rotating these dips during your weekly prep adds zero cooking time but changes how your toddler views their plate. It turns a rigid meal into a fun sensory experience.
Meal prep for toddlers doesn’t have to be a nightmare of tiny cookie cutters and food art. It’s about a solid plan, a few reliable containers, and a freezer full of backup options. Start with just one thing. Try batch cooking your proteins on a Sunday. Once you see how much easier Tuesday night dinner feels, you’ll stop winging it entirely. If you found these tips helpful, pin this article to your favorite Pinterest parenting board so you can find it next time you’re staring blankly into the fridge at 5:00 PM!
Frequently Asked Questions
How long does meal prep for toddlers last in the fridge?
Most meal prep for toddlers lasts three to four days in an airtight container in the fridge. For anything containing meat or dairy, I stick to a strict three-day rule. If I prep on Sunday, anything not eaten by Wednesday goes into the freezer.
Can I meal prep for toddlers who are picky eaters?
Yes, meal prep for toddlers who are picky eaters is actually easier when using the deconstructed method. By prepping ingredients separately and storing them in distinct containers, you can offer small, unmixed portions. This reduces anxiety and gives them control over what they taste.
What are the best containers for toddler meal prep?
The best containers are clear, BPA-free plastic or glass with airtight lids. Brands like WeeSprout glass jars or Bentgo Kids lunchboxes are incredibly durable. Transparency is key so you can instantly see what is prepped when you’re rushing to pack a daycare lunch.
How do I save time on meal prep for toddlers?
Batch cook your proteins and utilize healthy store-bought shortcuts. You don’t have to make everything from scratch. Pre-chopped frozen vegetables, freeze-dried fruits, and 100% fruit bars are excellent time-savers that keep your weekly meal prep for toddlers manageable and stress-free.
