What’s Inside
- 1. Invest In Glass Containers For Your Healthy Lunch Meal Prep
- 2. Master The 50/25/25 Rule For Balanced Portions
- 3. Separate Wet And Dry Ingredients To Save Your Sanity
- 4. Batch Cook Anchor Proteins For Easy Healthy Lunch Meal Prep
- 5. Rely On Frozen Vegetables For Fast Volume
- 6. Beat Flavor Fatigue With Aggressive Seasoning
- 7. Sneak In Fermented Foods For Gut Health
- 8. Prep Your Snacks Or You Will Fail
- 9. Use Your Freezer Strategically With Silicone Molds
- 10. Start Small And Embrace Zero-Waste Planning
Three years ago, I stood in my cramped kitchen crying over a puddle of murky brown chicken juice leaking from a cheap plastic tub onto my favorite white sneakers. That was my absolute rock-bottom moment with healthy lunch meal prep. I tried saving a few bucks on flimsy containers from a discount bin, and I paid for it with ruined shoes and a lunch that tasted like sad, wet cardboard. If I’m being honest, it took me months of eating soggy spinach and dry rice before I finally figured out how to make food I actually wanted to eat by Wednesday. You can’t just throw hot chicken into a plastic tub and expect magic. It takes a specific strategy to keep your food tasting fresh, crunchy, and flavorful four days later. I’ve ruined enough expensive groceries to know exactly what works and what doesn’t. Today, I’m walking you through my exact system for healthy lunch meal prep that actually tastes good, saves you serious cash, and won’t leave you starving by 3 PM. Let’s get into the exact products, measurements, and hard-learned lessons that changed my Sunday routine forever.
1. Invest In Glass Containers For Your Healthy Lunch Meal Prep
I’m begging you to throw away those stained, warped plastic containers crowding your cabinets. I tried to make cheap plastic work for years, but the lingering smell of old garlic never truly washes out. If you’re serious about healthy lunch meal prep, you need borosilicate glass. I personally swear by the Rubbermaid Brilliance Glass containers. They cost exactly $24.99 for a 4-pack at Target, and it’s worth every single penny. Glass produces zero chemical leaching when you heat it up, unlike plastic. Plus, they never stain when I pack a heavy tomato sauce or turmeric-spiced curry.
Most people get the cooling process completely wrong. I used to shove boiling hot rice straight into the fridge, snap the lid on, and wonder why my food spoiled by Thursday. You’re creating a massive condensation trap that breeds bacteria. To prioritize food safety, you must let your cooked food cool to room temperature within two hours before refrigerating. I leave my glass containers open on the counter for exactly 45 minutes. Once the steam stops rising, I snap on those airtight lids. This simple cooling trick ensures your cooked meats and poultry easily last 3 to 4 days, while grains and pasta push safely to 5 days. Your fridge won’t smell like a cafeteria, and your food won’t get that slimy texture that makes you want to order takeout instead.

2. Master The 50/25/25 Rule For Balanced Portions
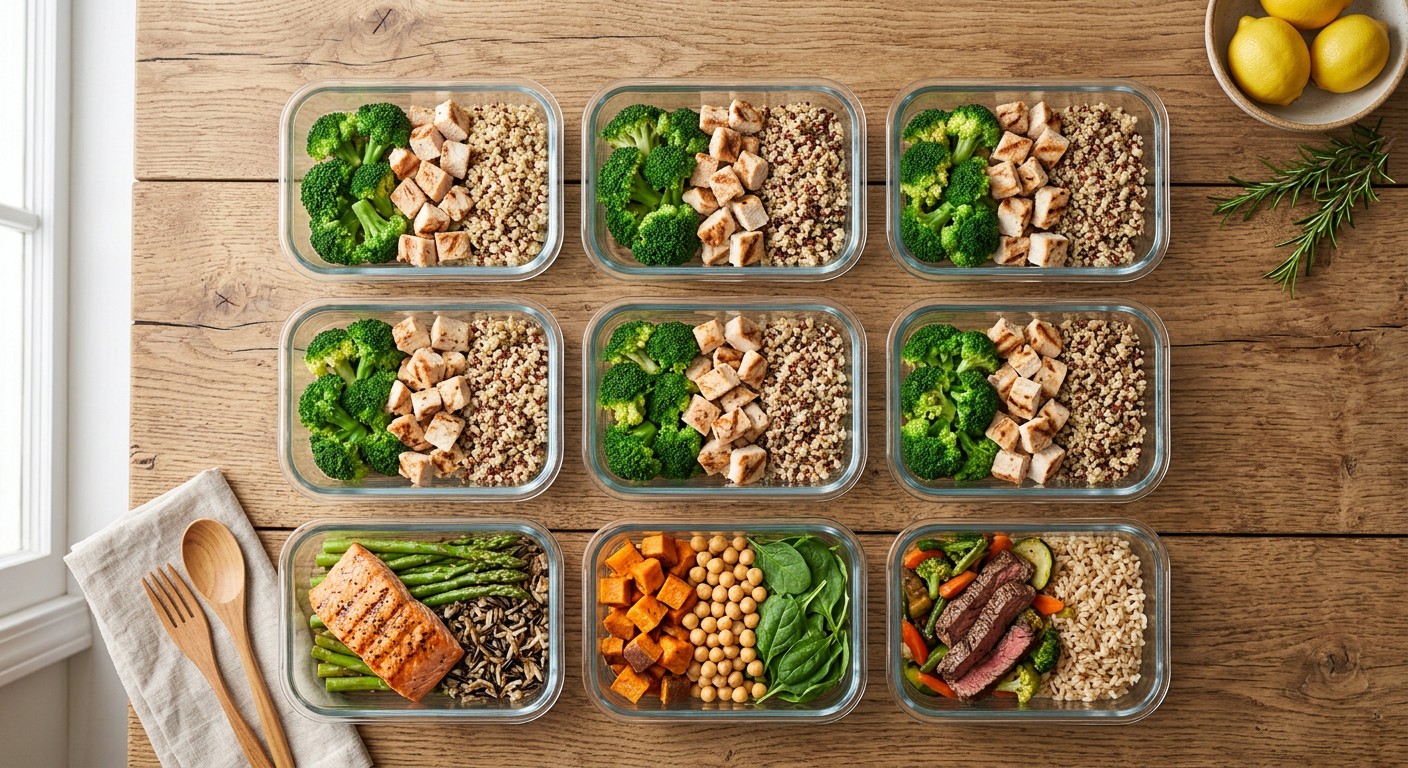
I tried doing the low-carb thing last year, and I lasted exactly three days before I nearly passed out during a Zoom meeting. You can’t starve yourself at lunch and expect to be productive. Now, I strictly follow the dietitian-approved 50/25/25 rule for my containers. It’s a visual trick that completely takes the guesswork out of macros. You fill exactly 50 percent of your container with non-starchy vegetables. I usually pack 2 cups of roasted zucchini or fresh mixed greens. Then, 25 percent goes to lean protein. Dietitians recommend 20 to 30 grams of protein to curb hunger and keep your metabolism firing. For me, that looks like 4 ounces of cooked chicken breast or 1/2 cup of ground turkey.
The final 25 percent is for complex carbohydrates. Please don’t skip the carbs. I learned this the hard way last Tuesday at Whole Foods when I skipped my grain bowl and ended up buying a $4 chocolate chip cookie in a panic. I measure out exactly 1/2 cup of cooked quinoa, brown rice, or roasted sweet potatoes. This specific ratio guarantees you’re getting enough fiber from the veggies, sustained energy from the carbs, and serious satiety from the protein. When you look down at your glass container, it should look like a pie chart of balanced nutrition. It’s simple. It’s visual. You won’t crash at 3 PM.

3. Separate Wet And Dry Ingredients To Save Your Sanity
There is nothing more depressing than opening your lunchbox to find a pile of mushy, wilted lettuce swimming in separated oil. I’m a texture person, and I can’t stomach soggy salads. If you’re making a salad or a bowl with a heavy sauce, you must separate your wet and dry ingredients. I bought these tiny 2-ounce stainless steel condiment cups with silicone lids on Amazon for $12.99, and I use them every single day. I pour exactly 2 tablespoons of dressing into the little cup and nestle it right inside my main glass container.
Skip the fat-free stuff. It tastes like wet cardboard. I always use flavorful, high-quality fats. My current obsession is Chosen Foods Ranch Dressing made with avocado oil. It costs $6.99 at Sprouts, and it actually tastes like real herbs and garlic. If I’m keeping it simple, I mix 1 tablespoon of extra virgin olive oil with 1 tablespoon of balsamic vinegar. The acid from the vinegar brightens up the whole dish without dumping excessive sodium onto your plate. Keep your croutons, crispy chickpeas, and leafy greens bone-dry until the exact second you sit down to eat. Pouring the dressing fresh transforms a sad desk lunch into something that actually tastes like a $15 restaurant salad. You might also like: 20 Inspiring Sunday Dinner Ideas You Need to See

HOMBERKING 10 Pack Borosilicate Glass Meal Prep Containers
A dependable everyday pick — HOMBERKING 10 Pack Borosilicate Glass Meal Prep Containers with Lockin pulls in 23 ratings at 4.5 stars. Not flashy, just solid.

4. Batch Cook Anchor Proteins For Easy Healthy Lunch Meal Prep
Let’s talk about the massive 2026 trend of anchor proteins. I used to try making three entirely different intricate recipes for my lunches every Sunday. By 4 PM, my kitchen looked like a disaster zone, and my feet ached. Now, I pick one single anchor protein for the entire week. Last week, it was roasted chicken thighs. I bought a pack of organic chicken thighs at Trader Joe’s for $6.49 per pound. I tossed them in olive oil, salt, and pepper, and roasted the entire batch on one sheet pan at 400 degrees for 25 minutes. You might also like: 15 Lovely Kids School Lunch Ideas That Changed Everything
While the chicken cooks, I batch cook a massive pot of whole grains. Usually, it’s 1 cup of dry farro or brown rice simmered in chicken broth for extra flavor. Once you have your anchor protein and your base grain, you can remix them into entirely different meals in about five minutes. Monday, I’ll chop the chicken over a massive green salad. Tuesday, I’ll mix the chicken and farro with some black beans and salsa for a burrito bowl. Wednesday, I’ll wrap it in a whole wheat tortilla with some hummus. You aren’t eating the exact same meal every day, but you only had to cook the heavy ingredients once. It’s the only way I survive busy weeks without losing my mind. You might also like: 20 Beautiful Food Prep Ideas for a Fresh New Look

5. Rely On Frozen Vegetables For Fast Volume
I’m officially giving you permission to stop chopping fresh vegetables on Sundays if you hate doing it. I used to buy beautiful bundles of fresh asparagus and heads of broccoli, only to watch them turn yellow and mushy in my crisper drawer because I was too tired to prep them. Frozen vegetables are picked at peak ripeness and flash-frozen, meaning they often have more nutrients than the sad, wilted produce sitting on grocery store shelves for days.
My ultimate secret weapon is the Kirkland Signature Stir Fry Vegetable Blend from Costco. It costs exactly $12.99 for a massive 5.5-pound bag. It has broccoli, sugar snap peas, carrots, and water chestnuts. I literally dump 2 cups of the frozen mix straight onto a sheet pan, spray it with avocado oil, and roast it at 425 degrees for 20 minutes until the edges get crispy. You don’t even have to thaw them first. Honestly, this changed how I view meal prep. It cuts my Sunday kitchen time down by at least 30 minutes, and I never have to feel guilty about throwing away rotting produce. If you aren’t utilizing your freezer aisle, you’re working way too hard for your healthy lunches.
6. Beat Flavor Fatigue With Aggressive Seasoning
I’ve choked down enough plain, unseasoned boiled chicken breasts to know that flavor fatigue is the number one reason people abandon their meal prep. By Wednesday, your brain is screaming for salt, sugar, or crunch. If you don’t provide it, you’ll end up at the drive-thru. You have to rotate your flavor profiles aggressively. I keep a dedicated shelf in my pantry just for high-impact, low-calorie sauces and spices.
Right now, I’m heavily rotating Primal Kitchen Hawaiian Style BBQ Sauce. It has no added sugar, costs $7.49 at Kroger, and gives a sticky, smoky-sweet glaze to basic ground turkey. When I need a kick, I reach for Yellowbird Sriracha. It’s oil-free, costs $5.99, and has a bright, garlicky heat that wakes up boring rice bowls. Don’t underestimate fresh herbs, either. I bought a sad little basil plant at Walmart for $3.98, stuck it in my kitchen window, and now I tear fresh basil leaves over my pasta salads. A heavy sprinkle of smoked paprika or turmeric costs pennies but completely changes the visual appeal and aroma of roasted vegetables. Stop eating bland food. You aren’t a monk, and your lunch shouldn’t taste like a punishment.

Skroam 10 Pack Glass Meal Prep Containers
Honestly, Skroam 10 Pack Glass Meal Prep Containers surprised me — sturdier than it looks in the photos, and over 56 buyers gave it 4.5 stars.

7. Sneak In Fermented Foods For Gut Health
This is a weird one, but stick with me. I started adding fermented foods to my lunches about six months ago, and my afternoon bloating completely vanished. Fermented vegetables are packed with natural probiotics that keep your gut happy and your digestion moving. Plus, they add a massive punch of tangy, salty flavor that cuts through heavy grains and meats. I’m slightly obsessed with Cleveland Kitchen Kraut. I buy the 16-ounce pouch at Whole Foods for $7.99. I grab the roasted garlic flavor, and it is intensely crunchy and sour.
I just drop exactly 2 tablespoons of cold sauerkraut right into the corner of my glass container next to my chicken and rice. It smells a little funky when you first open the lid in the breakroom, but the taste is incredible. If you prefer heat, grab a jar of authentic kimchi from an Asian market. The best part about fermented vegetables is their shelf life. Because of the natural fermentation process, a jar of kimchi or sauerkraut will easily last up to 2 months in your refrigerator. You don’t have to worry about it going bad by Friday. It’s an instant, zero-prep side dish that makes your stomach feel amazing.

8. Prep Your Snacks Or You Will Fail
Most people get this wrong: they prep a beautiful, balanced lunch, but they completely forget about the 3 PM slump. I’ve done this so many times. I’d eat my perfect quinoa bowl at noon, and by 3:30 PM, I was aggressively hunting through the office breakroom for stale donuts or leftover birthday cake. If you aren’t prepping your snacks alongside your main meals, you’re planning to fail. You need a bridge between lunch and dinner to keep your blood sugar stable.
I keep my snack prep incredibly lazy but highly specific. Every Sunday, I boil exactly six eggs. I peel them immediately (do it under running cold water, it’s so much easier) and store them in a glass container. Two hard-boiled eggs give you 12 grams of quick protein. I also hit Walmart for the Sabra Hummus Singles. A 6-pack costs $4.98. I chop up 1 cup of thick carrot sticks and celery ribs, and pack them with one hummus cup. The crunch of the cold carrots combined with the rich, garlic hummus completely kills my craving for potato chips. Don’t leave your afternoon hunger up to chance. Pack the snacks.
9. Use Your Freezer Strategically With Silicone Molds
I used to over-prep massively. I’d make eight portions of chili, leave them all in the fridge, and by day five, I’d find fuzzy green mold growing on my hard work. You shouldn’t try to eat the same meal for six days straight anyway. Instead, I started using my freezer strategically to build a massive stash of backup lunches. This completely saved me on weeks when I was too sick or tired to cook on Sunday.
You need to buy Souper Cubes. They are heavy-duty silicone freezing trays that portion your food into perfect 1-cup or 2-cup bricks. A 2-pack costs $29.95 at Target. I pour my leftover soups, stews, or heavy curries directly into the silicone molds and freeze them overnight. The next morning, I pop out the frozen bricks and toss them into a large Ziploc freezer bag. They stack perfectly and save so much space. These frozen portions are safe and delicious for 3 to 6 months. When I need a quick lunch, I just grab a frozen brick, drop it into my glass container, and by lunchtime, it’s partially thawed and takes exactly three minutes to microwave. It’s the ultimate lazy girl meal prep hack.
![[10-Pack] Glass Meal Prep Containers with Lids](https://m.media-amazon.com/images/I/71VKuXwIKOL._AC_UL320_.jpg)
[10-Pack] Glass Meal Prep Containers with Lids
A dependable everyday pick — [10-Pack] Glass Meal Prep Containers with Lids pulls in 146 ratings at 4.5 stars. Not flashy, just solid.

10. Start Small And Embrace Zero-Waste Planning
The biggest mistake you can make is trying to prep 15 meals your very first weekend. Expert recipe developers like Lisa Bryan constantly warn against this because it leads straight to burnout and a trash can full of wasted food. I tried doing a massive prep once, spent five hours in the kitchen, and swore I’d never do it again. Now, I start small. I only prep exactly 3 or 4 lunches for my busiest office days. If I work from home on Friday, I just make a fresh sandwich.
I’m also leaning hard into the 2026 trend of zero-waste meal planning. I use an app called PlanEat AI to help me cross-utilize ingredients. If I buy a $3.99 bag of fresh spinach for a salad on Monday, the app reminds me to throw the wilting leftovers into a hot soup on Thursday. This hyper-focus on zero waste saves me a fortune. Meal delivery services charge anywhere from $8 to $25 per serving. By prepping my own food and actually eating my leftovers, my lunches cost exactly $3.57 per meal. My total weekly grocery bill at Sprouts hovers right around $85.50 for just me. The financial savings alone make the Sunday effort completely worth it.
I know staring down a pile of raw chicken and unwashed vegetables on a Sunday afternoon feels daunting. But I promise you, the peace of mind you get on a chaotic Tuesday morning is worth the hour of chopping. Start with just one anchor protein, grab some glass containers, and don’t forget your snacks. I’d love to know what you’re planning to prep this weekend. Pin this guide to your favorite recipe board so you can pull up these exact measurements and brands while you’re standing in the grocery store aisle!

Frequently Asked Questions
How long does healthy lunch meal prep last in the fridge?
Most meal-prepped lunches will safely last 3 to 5 days in the refrigerator. Cooked meats and poultry are best eaten within 3 to 4 days, while grains and pasta can last up to 5 days if stored in airtight glass containers.
What is the 50/25/25 rule for meal prep?
The 50/25/25 rule is a simple portion control method. You fill 50% of your container with non-starchy vegetables, 25% with lean protein (like chicken or tofu), and 25% with complex carbohydrates (like quinoa or sweet potatoes).
How do I stop my meal prep salads from getting soggy?
You must separate your wet and dry ingredients. Store your dressings, oils, and sauces in tiny, separate condiment containers. Keep your leafy greens and crunchy toppings completely dry, and only mix the dressing in right before you eat.
Can I freeze my meal prep lunches?
Yes! You can freeze soups, stews, and heavy grain bowls for 3 to 6 months. I recommend using silicone freezing trays to portion your meals into perfect 1-cup or 2-cup bricks, then storing those bricks in freezer bags.