What’s Inside
- Optimize Your Chicken Salad Meal Prep Juiciness
- Cool Completely Before Mixing (The Golden Rule)
- Dice For Superior Texture, Never Shred
- Choose Health-Conscious Mayonnaise Brands
- Lighten Up With Plain Greek Yogurt
- Incorporate Acidity For Flavor And Shelf Life
- Season In Layers, Not Just At The End
- Add Essential Crunch With Toasted Nuts
- Surprising Sweetness With Fresh Fruit
- Invest In Glass Containers For Storage
- Prevent Soggy Salads By Separating Wet Ingredients
- Adhere Strictly To Food Safety Guidelines
I sat in the driver’s seat of my Honda last Tuesday, staring at a puddle of broken mayonnaise and shredded meat on my lap. My chicken salad meal prep had melted down because I mixed warm poultry with cheap mayo in a rush. It smelled like hot vinegar and despair. I spent twenty minutes cleaning grease off my steering wheel with a handful of dry napkins in the Target parking lot. I remember looking at my receipt, realizing I wasted fifteen dollars on ingredients that ended up in the trash. If you’re tired of soggy lunches that taste like wet cardboard, I’m here to fix that. Chicken salad meal prep doesn’t have to end in tears or a ruined pair of jeans. I’ve spent three years testing every variation of this dish, making every mistake so you don’t have to. I tried this wrong for months before figuring it out. Let’s talk about how to get juicy meat, the perfect crunch, and a dressing that won’t separate by Wednesday. I’m sharing my exact grocery lists, prices, and the hard truths about why your current prep method isn’t working. Grab your cutting board. We’ve got work to do.
1. Optimize Your Chicken Salad Meal Prep Juiciness

Stop boiling your poultry. Just stop. I used to drop raw meat into a pot of violently boiling water, and the result was always a dry, rubbery mass. I learned that the hard way. I used to hate Sunday meal prep because it always resulted in terrible food. I’d sit at my desk choking down chalky protein. Instead, you need to poach your boneless, skinless breasts. I buy the 2-pound pack of organic breasts from Whole Foods for $13.98. Gently simmer them in low-sodium broth until they hit an internal temperature of 165 degrees Fahrenheit. This usually takes exactly 10 minutes. The broth infuses the meat with a savory flavor that plain tap water just can’t provide. I personally swear by the Pacific Foods Organic Low Sodium Chicken Broth ($3.99 for a 32 oz carton). The texture difference is shocking. The meat comes out tender, yielding to a fork with zero resistance. It smells fragrant right out of the pot. If you’re still boiling your meal prep proteins into submission, you’re doing yourself a disservice. Poaching keeps the moisture locked inside the fibers, preventing that dreaded dry bite.
2. Cool Completely Before Mixing (The Golden Rule)

Here’s where most people get this wrong. I certainly did. Last summer, I was rushing to finish my Sunday cooking before a party. I pulled my freshly poached meat from the pot, chopped it up while it was still steaming, and dumped a massive scoop of mayonnaise on top. The heat from the meat instantly broke the mayonnaise emulsion. The oil separated from the egg yolks, creating a slick, greasy puddle at the bottom of my bowl. It looked like a science experiment gone wrong. You must ensure your cooked protein is completely cooled before mixing it with any dairy or mayo-based dressing. I’m talking refrigerator-cold. I usually pop my cooked meat into a glass bowl, cover it tightly, and leave it in the fridge for at least two hours. The meat should feel cold to the touch. Mixing warm ingredients with mayo doesn’t just ruin the texture; it creates an unappetizing, slippery coating that tastes heavy. Patience is required here. Don’t rush the cooling process, or you’ll end up with a weeping, oily mess that you definitely won’t want to eat on Tuesday.
3. Dice For Superior Texture, Never Shred

Put the forks down. Shredding meat for this recipe is a terrible idea. I know the internet loves a good shredded hack, but it ruins the structural integrity of your lunch. When you shred the meat, you create millions of tiny, stringy fibers that act like a sponge. They soak up all your dressing immediately, leaving the whole mixture tasting like a paste. I honestly hate that mushy, baby-food texture. Instead, you need to dice your cooked, cooled meat into small, uniform chunks. I aim for pieces about half an inch thick. This provides a satisfying bite. Your teeth actually have something to sink into. Plus, dicing ensures a better distribution of ingredients. You get a clean piece of protein, a crisp piece of celery, and a pop of sweetness in every single forkful. Culinary experts agree that dicing maintains moisture better than shredding. I use a sharp 8-inch chef’s knife to get clean cuts. It takes maybe three extra minutes, but the resulting texture is firm, meaty, and exactly what you want in a premium deli-style lunch.

KOMUEE 10 Packs 30 oz Glass Meal Prep Containers
Honestly, KOMUEE 10 Packs 30 oz Glass Meal Prep Containers surprised me — sturdier than it looks in the photos, and over 46 buyers gave it 4.5 stars.
4. Choose Health-Conscious Mayonnaise Brands

Skip the fat-free stuff. It tastes like wet cardboard and it’s usually packed with weird gums and artificial sugars. If you’re going to use mayonnaise, use the good stuff. Your dressing is the glue holding this whole operation together, so ingredient quality matters. If your ingredients aren’t top tier, the final result suffers. I’m highly opinionated about this. You want a mayonnaise made with healthier oils and zero added sugar. I personally buy Primal Kitchen Mayo with Avocado Oil. I usually find it for $8.99 at Sprouts, though it can run up to $11.99 depending on where you shop. It has a tangy, rich flavor and a thick, creamy texture that coats the ingredients perfectly without feeling heavy. If that’s too pricey, Chosen Foods 100 percent Pure Avocado Oil Classic Mayo is a fantastic backup. You can grab a jar for around $7 at Walmart. The smell of real avocado oil mayo is slightly nutty and clean, completely different from the highly processed soybean oil brands. Using a high-quality fat source makes the final product taste like something you’d pay fifteen dollars for at a fancy bistro. You might also like: 15 Stunning Aesthetic Batch Cooking You Need to See
5. Lighten Up With Plain Greek Yogurt

I love mayonnaise, but eating a full cup of it over the course of a week makes me feel sluggish. To reduce the overall calories and give the protein macro a nice little bump, I substitute half of the mayonnaise with plain Greek yogurt. This was a hard lesson. I tried substituting all the mayo with yogurt once, and it tasted incredibly chalky and sour. You need the fat from the mayo for mouthfeel. The perfect starting ratio is 1/4 cup of your avocado oil mayonnaise mixed with 1/4 cup of plain Greek yogurt for every 3 cups of cooked meat. I strictly use Fage Total 2 percent Greek Yogurt. It costs $3.49 for a 17.6 oz tub at Kroger. The 2 percent milkfat is crucial. Non-fat yogurt is too watery and will thin out your dressing, while whole milk yogurt makes it too thick. The combination creates a dressing that’s creamy, slightly tangy, and satisfying. It coats the back of a spoon perfectly. You won’t even notice you cut the mayo in half. You might also like: 15 Brilliant Simple Meal Prep Ideas for a Fresh New Look
6. Incorporate Acidity For Flavor And Shelf Life

A bowl of meat and mayonnaise is heavy. It sits flat on your palate. You need a sharp punch of acidity to wake up the flavors. I add exactly 1 tablespoon of fresh lemon juice or raw apple cider vinegar to my dressing base before mixing it into the meat. This brightens the entire flavor profile instantly. The smell of fresh lemon zest cutting through the rich yogurt is incredible. I usually buy a bag of organic lemons at Trader Joe’s for $2.49. If I don’t have fresh lemons, I use Bragg Organic Apple Cider Vinegar, which is $5.99 for a 16 oz bottle at Target. The vinegar adds a subtle, fruity tang that pairs beautifully with savory herbs. According to food safety experts, adding a bit of acid can also contribute to the mixture’s safety and longevity in the fridge by slightly lowering the pH. Don’t use bottled lemon juice. It tastes like metallic chemicals and will ruin your hard work. Squeeze a real lemon. It takes ten seconds and makes a massive difference in how vibrant your lunch tastes on day three. You might also like: 20 Cozy High Protein Lunch Ideas for Any Style
![[8-Pack,30 oz]Glass Meal Prep Containers](https://m.media-amazon.com/images/I/713Zfdsgi4L._AC_UL320_.jpg)
[8-Pack,30 oz]Glass Meal Prep Containers
[8-Pack has been one of the most consistently praised picks in this category. 7 reviewers averaged 4.5/5.
7. Season In Layers, Not Just At The End

If you wait until everything is mixed in the bowl to add your salt, you’ve already lost the flavor battle. You can’t just dump a teaspoon of salt over cold meat and expect it to taste good. You must season in layers. This means seasoning the meat during the actual cooking process. When I poach my breasts, I add a heavy pinch of kosher salt, whole black peppercorns, and fresh sprigs of dill or tarragon straight into the simmering broth. The meat absorbs these aromatics as it cooks. The kitchen smells like a French country house while it simmers. Then, when I mix my dressing, I add another small pinch of fine sea salt and freshly cracked black pepper. Herbs are non-negotiable. I use 2 tablespoons of finely chopped fresh dill. Dried dill just doesn’t pack the same punch. I buy the small plastic clamshells of fresh dill at Whole Foods for $2.99. The bright, grassy aroma of fresh herbs cuts right through the richness of the dressing. By seasoning the liquid, the meat, and the dressing separately, you ensure a well-rounded taste in every single bite.
8. Add Essential Crunch With Toasted Nuts

Texture fatigue is a real problem when eating the same lunch every day. If every bite of your food is soft and mushy, you’re going to get bored and order takeout by Thursday. You must introduce crunchy elements to create textural contrast. My go-to move is adding 1/2 cup of sliced almonds or chopped walnuts. But you can’t just throw them in raw. Raw nuts taste dusty and soft. You must toast them. I spread my nuts on a dry baking sheet and bake them at 350 degrees Fahrenheit for about 6 minutes until they smell deeply nutty and fragrant. Toasting them enhances their natural flavor and draws out the oils, which creates a protective barrier. This barrier prevents them from soaking up the dressing and becoming soggy in the fridge. I grab the Diamond of California Sliced Almonds for $6.49 at Target. When you bite into the finished dish, the crisp snap of a toasted almond against the tender meat and creamy dressing is incredible. It makes the eating experience dynamic. Don’t skip the toasting step. It fixes the texture.
9. Surprising Sweetness With Fresh Fruit

I used to think adding fruit to savory dishes was weird. I was a strict celery-and-onion purist. But then I tried a sample at a local deli that changed my mind. You need a sweet and savory balance to make this dish truly addictive. I now incorporate exactly 1 cup of halved red grapes or finely diced crisp apples into my mixture. This addition is wildly popular among prep enthusiasts for good reason. The sudden burst of sweet, juicy fruit against the salty, herby dressing is amazing. I usually buy a bag of Honeycrisp apples from Sprouts for around $2.99 per pound. You want an apple that has a loud, sharp crunch. Avoid Red Delicious apples. They turn mealy and soft in the fridge. If I’m using grapes, I slice them in half lengthwise so they integrate better into the mixture. The visual pop of bright red grape skins or yellow apple peels makes the container look appetizing. It feels like a premium lunch, not a sad desk salad.

Vtopmart 5Pack 22oz Glass Storage Containers with Lids
Vtopmart 5Pack 22oz Glass Storage Containers with Lids has been one of the most consistently praised picks in this category. 34 reviewers averaged 4.5/5.
10. Invest In Glass Containers For Storage

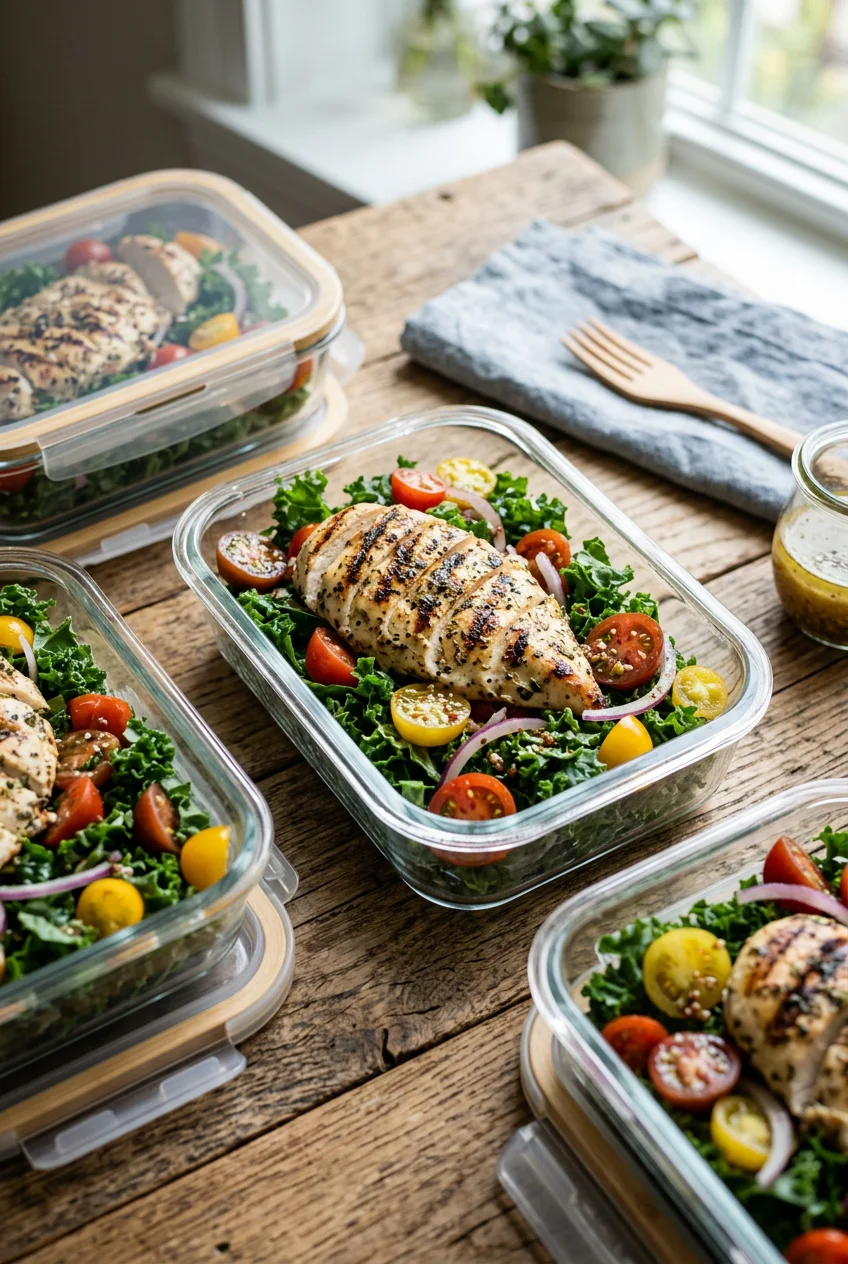
Let me tell you about a disaster I experienced two years ago. I packed my beautiful, freshly made lunch in a cheap, flimsy plastic container. By Wednesday, the plastic had warped, the lid popped off in my work bag, and my laptop smelled like onions and mayonnaise for a month. Never again. For optimal food safety and freshness, you must store your food in airtight glass containers. I exclusively use the Razab brand glass storage sets. You can usually find a 24-piece set for around $29.99 on Amazon. Glass is non-porous. It doesn’t absorb the strong smells of garlic or onion, and it prevents chemical leaching into your acidic dressing. Plus, it’s significantly safer for reheating other meals compared to plastic, which degrades and clouds over time. When you look into your fridge and see those clear glass rectangles stacked neatly, it’s incredibly satisfying. The snap-locking lids keep the air out, which stops the avocado oil mayo from oxidizing and turning a weird yellow color. Throw your stained plastic tubs in the recycling bin. You’re an adult, and your lunch deserves proper glassware.
11. Prevent Soggy Salads By Separating Wet Ingredients

If you like adding high-moisture vegetables to your lunches, you need a separation strategy. I love diced cucumbers and tomatoes, but they are essentially little water balloons. If you mix them into your creamy base on Sunday, they will slowly leak their juices all week. By Thursday, your lunch will be swimming in a watery, separated puddle of milky liquid. It’s visually repulsive. To prevent soggy salads, you must store your dressing and any wet ingredients in separate small containers. I buy a pack of 2-ounce stainless steel condiment cups from Target for $8.99. I put my diced Roma tomatoes (usually $1.49 a pound at Walmart) in one little cup, and my dressing in another. I keep the dry meat, nuts, and celery in the main glass container. I only combine everything right at my desk, exactly three minutes before I eat. It sounds tedious, but it guarantees absolute crispness. The celery stays loud and crunchy. The tomatoes stay firm. The dressing stays thick and rich. This strict separation of wet and dry components is the secret to making Friday’s lunch taste exactly like Sunday’s fresh batch.
12. Adhere Strictly To Food Safety Guidelines

We need to have a serious talk about food safety and the dreaded mayo tsunami. A common error is using excessive mayonnaise. If you use too much, it gets heavy and greasy. Start with a conservative amount, like 1/2 cup for 3 cups of meat. You can always add more. But more importantly, homemade mixtures must be stored in the refrigerator at 40 degrees Fahrenheit or below and consumed strictly within 3 to 5 days. If you leave your bowl sitting on the counter for more than two hours while you clean the kitchen, you must throw it away. Bacterial growth in warm dairy and meat is no joke. I got awful food poisoning in college from a warm deli sandwich, and I won’t risk it again. No exaggeration. If you’re short on time, use a store-bought rotisserie bird. I buy the Kirkland Signature Rotisserie Chicken from Costco for exactly $4.99. Just ensure it’s fully cooled before deboning. I’m obsessed with Mediterranean-inspired versions using Greek yogurt tzatziki and fresh mint, or a spicy buffalo version with a yogurt base. Keep it cold, keep the ratios tight, and enjoy your prep.
I hope these steps save you from the soggy, flavorless lunches I used to endure. Once you master the poaching technique and get your yogurt-to-mayo ratios dialed in, this will become a weekly staple. You don’t need to be a professional chef to make this work. You just need a little patience and the right grocery list. I’m always experimenting with new flavor profiles, so check back next month to see what I’m testing. I’d love to hear how your next batch turns out, especially if you try the toasted almonds or the Honeycrisp apples. Don’t forget to pin this article so you have the exact measurements and grocery prices handy for your next shopping trip. Happy prepping!

M MCIRCO 10-Pack,30 Oz Glass Meal Prep Containers 2
If you want something that just works, M MCIRCO 10-Pack is a safe bet (23 reviews, 4.5 stars).
Frequently Asked Questions
How long does chicken salad meal prep last in the fridge?
When stored in airtight glass containers at 40 degrees Fahrenheit or below, homemade chicken salad will stay fresh and safe to eat for 3 to 5 days.
Can I freeze my chicken salad?
I don’t recommend freezing it. The mayonnaise and Greek yogurt will separate and break when thawed, leaving you with a watery, unappetizing texture that you won’t want to eat.
Why is my chicken salad so watery?
You likely mixed in high-moisture ingredients like cucumbers or tomatoes too early, or you didn’t let your poached chicken cool completely before adding the mayo dressing.
What is the best way to cook chicken for salad?
Poaching boneless, skinless breasts in low-sodium broth for about 10 minutes until they reach 165 degrees Fahrenheit yields the juiciest, most tender meat for meal prep.
