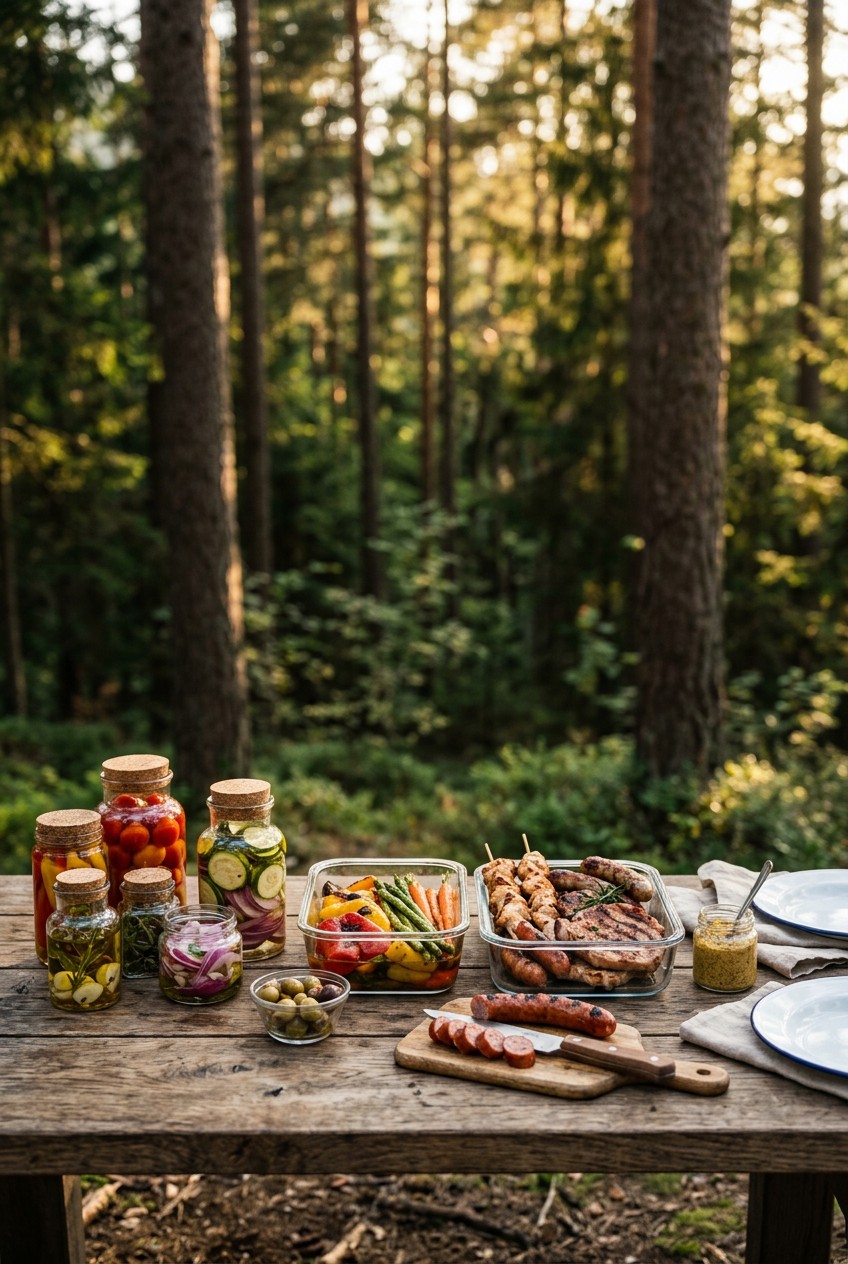
What’s Inside
- Master The Meal Plan And Pre-Chop Everything For Your Camping Meal Prep
- Use Sous Vide At Home For Gourmet Camping Meal Prep
- Ditch Plastic For High-Quality Reusable Silicone Bags
- Build A Strict Cold Zone Strategy In Your Cooler
- Raid Supermarkets For Budget-Friendly Base Ingredients
- Pack Premium Freeze-Dried Meals For Lightweight Trips
- Bring A Portable Induction Cooktop For Powered Sites
- Pre-Mix All Your Dry Spices And Pancake Batters
- Freeze Your Drinking Water In Gallon Jugs
Last July at Yosemite, my camping meal prep was a total disaster. We’d driven four hours up the winding mountain roads, surrounded by the sharp smell of pine needles. I opened my heavy plastic cooler after a long hike, and it was a swimming pool of floating, gray hot dogs and mushy bread. I spent three days eating dry granola bars because my raw chicken was swimming in warm, dirty water. It was miserable. I’m Esperanza Eliza, and I’ve learned the hard way—took me years to figure out—that winging it in the woods is a terrible idea. Good camping meal prep means you do the hard work in your own kitchen. You’re going to thank yourself when you’re sitting by the fire with a cold drink instead of aggressively chopping onions on a wobbly picnic table in the dark. Let’s fix your cooler chaos forever.
1. Master The Meal Plan And Pre-Chop Everything For Your Camping Meal Prep

I tried this wrong for months before figuring it out. I used to pack whole onions, whole bell peppers, and a massive wooden cutting board into my car trunk. Last Tuesday at Trader Joe’s, I bought three red bell peppers for $1.49 each and two large yellow onions. I brought them home, washed them, and chopped them into exact 1/2 inch squares on my clean kitchen counter. I used my sharpest chef’s knife to get the cuts perfect. I measured out exactly 2 cups of chopped peppers and 1 cup of onions. I shoved them into a tight, 32 oz airtight glass container with a locking lid. Why? Because chopping vegetables on a slanted, dirt-covered picnic table while mosquitos bite your ankles is pure torture. You’re going to hate it.
Pre-chopping everything changes the entire weekend. I’m talking about dicing your carrots, slicing your mushrooms, and mincing your garlic before you even pack the car. Store them in airtight containers. If you’re making stir-fry, cut your chicken breasts into 1-inch cubes and toss them in a marinade right in the bag. I use a simple mix of 1/4 cup soy sauce, 2 tablespoons honey, and 1 tablespoon sesame oil. When it’s time for dinner at the campsite, you just dump the bag into a hot skillet. The loud sizzle and the smell of garlic hitting the hot cast iron is incredible. You won’t have to clean a single knife or cutting board in the woods. This one step saves me at least forty minutes of awful cleanup every single night.
2. Use Sous Vide At Home For Gourmet Camping Meal Prep

Skip the fat-free stuff and the bland hot dogs. It tastes like wet cardboard. If you want real flavor, you need to prep your meats using the sous vide method at home. I’m obsessed with this trick. Last month, I bought a 3-pound pork shoulder from Costco for $14.99. I seasoned it heavily with 2 tablespoons of smoked paprika, 1 tablespoon of cumin, and 1 tablespoon of coarse sea salt. I sealed it in a FoodSaver vacuum bag and cooked it in my water bath at 165 degrees Fahrenheit for exactly 24 hours. The smell when I finally opened that bag was sweet, smoky, and absolutely mouthwatering.
Here is the secret. After cooking, I shredded the hot pork right inside the bag using my hands (wearing thick rubber gloves). Then, I re-sealed it and threw it straight into the freezer. When you’re packing your cooler, this massive block of frozen, fully cooked pulled pork acts as a giant ice pack. It keeps your drinks freezing cold. By the second night of your trip, it’s perfectly thawed. All you do is dump the soft, juicy meat into a hot pan for five minutes to get those crispy edges. I serve it on small corn tortillas with a squeeze of fresh lime juice and a sprinkle of cilantro. I’ve also done this with 16 oz of chicken breasts cooked at 147.5 degrees Fahrenheit for two hours. It makes the softest, most tender chicken tacos you’ve ever eaten. You aren’t dealing with raw meat or worrying about undercooking pork in the dark. It’s perfectly safe and ridiculously easy.
3. Ditch Plastic For High-Quality Reusable Silicone Bags

Stop buying flimsy plastic bags that rip and leak raw meat juice all over your cheese. I learned this lesson the hard way at a state park in Oregon when a cheap bag tore open, ruining my entire block of sharp cheddar. It was a slimy, disgusting mess. Now, I strictly use heavy-duty, food-grade silicone bags. You’re going to want to invest in the Stasher brand. I bought the half-gallon size in a bright aqua blue color at Target for $21.99. Yes, they are pricey upfront, but they are incredibly thick, completely leak-proof, and they last forever. When you get home, you just toss them on the top rack of your dishwasher. They come out completely spotless.
I also love the Tupperware Ultimate Silicone Stand-Up Bags. I use the 2.9 Liter X-Large size. They stand up on their own, which makes pouring 4 cups of hot soup or chili into them a breeze. These bags can handle extreme temperatures from negative 13 degrees Fahrenheit to 425 degrees Fahrenheit. You can freeze your pre-chopped veggies in them, and then drop the entire sealed bag into a pot of boiling water at the campsite to heat up your food. The thick silicone feels smooth and heavy in your hands. When they are empty, they collapse completely flat, saving precious space in your plastic bins. I’ve stored everything from 8 oz of marinated steak to 2 cups of trail mix in these. They won’t pop open in your cooler, and they keep the icy water completely out of your food. You might also like: 20 Beautiful High Protein Meal Prep Ideas That Are Totally Worth It

Vtopmart 5Pack 22oz Glass Storage Containers with Lids
Vtopmart 5Pack 22oz Glass Storage Containers with Lids has been one of the most consistently praised picks in this category. 32 reviewers averaged 4.5/5.
4. Build A Strict Cold Zone Strategy In Your Cooler

Most people get this wrong. They just dump a bag of ice over their food and hope for the best. I used to do this, and I always ended up with warm milk and floating grapes. According to experts like Michael van Vliet of Fresh Off the Grid, you must pre-chill your cooler. I bring my heavy Yeti cooler inside the house the night before and fill it with cheap ice to bring the plastic temperature down. The next morning, I dump that ice out. You might also like: 15 Creative Healthy Meal Prep Ideas That Make a Real Difference
Then, I build my cold zone. I buy two 10-pound solid ice blocks from Kroger for $3.99 each. I place them flat on the very bottom. Solid blocks melt much slower than cubes. Next, I place my raw meats directly on top of the ice blocks. I’m talking about my 16 oz packs of bacon and vacuum-sealed steaks. This keeps them at the absolute coldest temperature and prevents cross-contamination. Above the meat, I place a hard plastic barrier, like a cheap cutting board. Then I layer my perishables like 8 oz blocks of cheese, 1/2 dozen eggs in a plastic carton, and my pre-chopped vegetables. I make sure to open the drain plug at the bottom of the Yeti every single morning to let out any melted water. Standing water melts ice faster than air. I’ve started using two separate coolers. One cooler is strictly for drinks, because people open it twenty times a day. The second cooler is only for main meal ingredients. It stays zipped shut and freezing cold. You won’t believe how much longer your ice lasts when you organize it this way. Trust me on this. You might also like: 20 Lovely Work Lunch Ideas to Inspire Your Next Project
5. Raid Supermarkets For Budget-Friendly Base Ingredients

You don’t need to spend a fortune at specialty outdoor stores to eat well in the woods. I personally swear by raiding my local supermarkets for cheap, lightweight staples. Last Wednesday, I walked through Aldi and found some incredible deals. I bought three boxes of their parmesan instant couscous for just $1.99 each. Couscous is the ultimate camp carb because it doesn’t require boiling for twenty minutes. You just pour 1 cup of boiling water over 1 cup of dry couscous, cover it, and wait five minutes. The texture is light and fluffy, and it smells like salty cheese and garlic.
I also hit up Costco for bulk proteins. I bought a massive 28-count bag of Country Archer Grass-Fed Mini Beef Sticks for $16.79. They are salty, chewy, and packed with protein. I also grabbed a huge pack of Kirkland Signature Pre-Cooked Bacon. It costs around $14.99 for 48 slices. Pre-cooked bacon is a lifesaver. You don’t have to deal with splattering grease or trying to dispose of hot fat in the woods. I use a 10-inch cast iron skillet over the campfire grate for the bacon. You just throw four slices into a dry pan for thirty seconds until they are hot and crispy. I’ve also found great deals on large bags of dried mango slices and roasted almonds. Mixing 1 cup of almonds with 1/2 cup of dried fruit makes a perfect, cheap trail mix. You’re saving so much money by avoiding the tiny, overpriced snack bags at the gas station.
6. Pack Premium Freeze-Dried Meals For Lightweight Trips

If you’re hiking miles into the backcountry, carrying a heavy cooler just won’t work. I tried lugging a soft cooler filled with 2 pounds of fresh chicken on a five-mile hike once. My shoulders were screaming, and the ice melted by noon. It was awful. Now, I rely on high-quality freeze-dried meals for those intense trips. Top brands in 2026 have completely fixed my hiking trips. I’m a huge fan of Peak Refuel. I bought their Chicken Pesto pouch at Sprouts for $12.99. It weighs only 5.7 ounces but packs a massive 920 calories and tons of protein. We were sitting at 8,000 feet elevation, freezing in our puffy jackets, and that hot meal felt like a miracle.
The freeze-drying process locks in the texture. When you pour 1 cup of boiling water into the pouch and stir, the chicken actually rehydrates into soft, chewable pieces, not powdery mush. The basil pesto smells incredibly fresh and vibrant. Mountain House is another classic option that is slightly more affordable. I grabbed their Beef Stroganoff at Walmart for $10.99. It has a thirty-year shelf life, which is insane. Backpacker’s Pantry makes a spicy Pad Thai that I love. The crunchy peanuts they include add a fantastic texture contrast to the soft noodles. Freeze-dried meals rehydrate in just ten minutes. You aren’t wasting your precious fuel boiling pasta for twenty minutes. You just eat straight out of the foil pouch with a long metal spoon, which means zero dishes to wash in the dark.

M MCIRCO 10-Pack,22 Oz Glass Meal Prep Containers
M MCIRCO 10-Pack has been one of the most consistently praised picks in this category. 86 reviewers averaged 4.5/5.
7. Bring A Portable Induction Cooktop For Powered Sites

If you’re car camping at a site with electrical hookups, you need to ditch the messy propane stove. I used to struggle with those little green propane bottles. They’d run out of gas halfway through cooking my eggs, leaving me with a cold, slimy breakfast. It was incredibly frustrating. Now, I bring my Duxtop 9100MC Portable Induction Cooktop. I bought it on Amazon for $85.99, and it’s worth every single penny. You must use magnetic cookware, so my heavy cast iron skillet works perfectly on it.
This sleek, black glass cooktop plugs right into the power pedestal at the campsite. It offers fifteen different temperature settings, ranging from 140 degrees Fahrenheit up to 460 degrees Fahrenheit. The control is so precise. I can boil 4 cups of water in a stainless steel pot in under three minutes. The loud, rolling boil happens incredibly fast. I’ve used it to simmer a delicate tomato sauce without burning the bottom, which is nearly impossible on a blasting propane flame. The best part is the safety factor. The glass surface doesn’t get dangerously hot, so you won’t accidentally burn your hand if you brush against it. Cleanup is ridiculously easy. You just wipe the smooth glass flat surface with a damp paper towel. No grates to scrub, no grease traps to empty. It’s a clean, efficient way to cook a massive breakfast of pancakes and sausage for a hungry group without the hassle of open flames.
8. Pre-Mix All Your Dry Spices And Pancake Batters

Don’t bring your entire spice rack from home. I did this once and ended up with glass jars clinking around and eventually shattering in my plastic storage bin. Cleaning up sharp glass and spilled turmeric from a dirty campsite table is a nightmare. Instead, mix all your dry ingredients at home. I use small, cheap plastic containers or mini Ziploc bags. If I’m making chili, I measure out exactly 2 tablespoons of chili powder, 1 teaspoon of cumin, and 1/2 teaspoon of cayenne pepper into one tiny container. I label it with a piece of masking tape.
I do the exact same thing for breakfasts. I love Kodiak Cakes Flapjack Mix. I buy the big box at Whole Foods for $6.99. At home, I measure 2 cups of the dry mix into a large 32 oz mason jar. I add 1 tablespoon of cinnamon and 1/4 cup of brown sugar. When I wake up freezing at the campsite, I don’t want to measure sticky ingredients. I just pour 1 and 1/2 cups of water directly into the jar, screw the lid on tight, and shake it violently for thirty seconds. The thick batter is ready to pour straight onto the hot griddle. I flip them with a long metal spatula and drown them in pure maple syrup. The smell of sweet cinnamon cooking in the cold morning air is the best thing ever. You’re saving space, avoiding broken glass, and making your mornings completely stress-free.
9. Freeze Your Drinking Water In Gallon Jugs

This is my favorite trick for keeping things cold without creating a soggy mess. Bagged ice is expensive, and when it melts, it turns your cooler into a dirty pond. Your cheese gets slimy, and your deli meat gets ruined. I hate reaching into freezing, dirty water to fish out a slippery hot dog package. Instead, I buy three Crystal Geyser 1-gallon water jugs from Walmart for $1.25 each. I pour out about 1/2 cup of water from each jug to leave room for expansion, and then I freeze them solid for three days before my trip.
These massive blocks of frozen water act as the ultimate ice packs. They keep the cooler freezing cold for up to four days. As they slowly melt, I’ve got ice-cold, perfectly clean drinking water ready to go. You aren’t wasting money on frozen water that you just dump into the dirt at the end of the trip. I also use smaller 16 oz plastic water bottles frozen solid to tuck into the corners of the cooler. I wedge the smaller bottles right next to my delicate items like fresh berries to keep them crisp. The solid plastic barrier means zero leaks. Your cardboard egg cartons stay dry, your cheese stays firm, and your hands stay clean when you reach in for a snack. It’s a brilliant way to make your heavy water supply pull double duty. I can’t imagine packing a cooler any other way now.
I hope these tips help you rethink how you pack for the woods. Honestly, spending an hour in your clean kitchen on a Thursday night will save your sanity on a Saturday morning in the dirt. I’m telling you, pre-chopping those onions and freezing that pulled pork will make you feel like a genius. No exaggeration. You won’t ever want to go back to the disorganized chaos of a messy cooler. Give these methods a try on your next trip. Please save or pin this article so you have this exact list ready when you start packing!

M MCIRCO 10-Pack,30 Oz Glass Meal Prep Containers 2
A dependable everyday pick — M MCIRCO 10-Pack pulls in 23 ratings at 4.5 stars. Not flashy, just solid.
Frequently Asked Questions
How far in advance can I do my camping meal prep?
You can start chopping vegetables and marinating meats about two days before your trip. If you’re using the sous vide method and freezing the cooked meats, you can prep those several weeks in advance.
What is the best way to keep camping meal prep food cold?
Always pre-chill your cooler with cheap ice first. Then, use large solid ice blocks at the bottom, place raw meats directly on the ice, and use frozen gallon water jugs to maintain a strict cold zone.
Are silicone bags better than plastic for camping meal prep?
Yes. High-quality silicone bags are completely leak-proof, preventing cooler water from ruining your food. They withstand extreme temperatures, so you can boil food directly in them, and they won’t tear like cheap plastic.
What are the best cheap foods for camping meal prep?
Instant couscous, pre-cooked bacon, and bulk beef jerky from stores like Aldi or Costco are incredible. They require almost zero cooking fuel, pack easily, and save you from buying expensive specialty camping meals.
