What’s Inside
- Prioritize Nutrient-Dense Ingredients for Healing
- Master the One-Handed Breakfast Burrito
- Invest in High-Quality, Freezer-Safe Containers
- Batch Cook Hydrating Soups and Stews
- Don’t Underestimate One-Handed Snacks
- Embrace the Slow Cooker for Postpartum Freezer Meal Prep Ease
- Start Early, Finish by 36 Weeks
- Label Everything with Detail (And Avoid My Mistakes)
- Cool Meals Completely Before Freezing
- Individual Portioning for Postpartum Freezer Meal Prep Flexibility
I stood barefoot on the cold kitchen tiles last Tuesday at 3 AM, sobbing over a solid block of freezer-burned lasagna. My newborn was screaming in the bassinet in the next room. I was starving, exhausted, and completely unprepared for the physical toll of recovery. Getting your postpartum freezer meal prep right isn’t just a nice idea; it’s literally survival. I tried this wrong for months before figuring it out. I thought I could just throw random dinner leftovers into flimsy plastic bags. Wrong. The plastic ripped, the food tasted like wet cardboard, and I spent my precious maternity leave scraping thick ice crystals off my dinners. Let’s fix that right now. I’m sharing the exact system that actually works, down to the specific grocery store prices and exact measurements.
1. Prioritize Nutrient-Dense Ingredients for Healing

Postpartum recovery demands heavy-duty nutrition. I learned that the hard way after my first baby. I filled my freezer with frozen pizzas and sugary waffles, and I quickly felt like a deflated balloon. You need dense protein, iron, and healthy fats to rebuild your tissue and keep your milk supply up if you’re breastfeeding. Skip the fat-free stuff. It’s awful and tastes like wet cardboard. Last month at Sprouts, I grabbed 3 pounds of grass-fed ground beef for $6.99 a pound to make massive batches of chili. It makes a huge difference in how you feel. I also highly recommend stocking up on 365 Everyday Value Organic Black Beans from Whole Foods. They run about $1.49 for a 15 oz can. I drain them, rinse them, and toss exactly 1/2 cup into every single soup or stew I make. The fiber keeps your digestion moving, and trust me on this, you want that postpartum. You also need massive amounts of healthy fats. I’m obsessed with Kirkland Signature Organic Extra Virgin Olive Oil from Costco. It costs $18.99 for a heavy 2-liter bottle. I pour at least 2 tablespoons over my roasted vegetables before freezing them. The rich oil helps protect the veggies from freezer burn and adds dense calories. If you skip the fats and proteins, your energy crashes hard by 2 PM. I’d rather eat plain toast than skip the healthy fats. Buy the good meats and heavy oils. Your recovering body desperately needs the raw materials to heal properly.
2. Master the One-Handed Breakfast Burrito

When you’re holding a sleeping infant in your left arm, you only have your right hand to feed yourself. This is why the one-handed breakfast burrito is absolutely mandatory. I spent two weeks trying to eat scrambled eggs with a fork while balancing my daughter. I dropped hot eggs right on her forehead. Total disaster. Now, I prep a massive assembly line of burritos. You need sturdy tortillas that won’t rip. I buy the Good & Gather Large Flour Tortillas from Target. They cost $2.59 for a 10-count pack and they hold up beautifully. For a batch of 10 burritos, I scramble exactly 10 large eggs. Then I cook up 12 oz of Trader Joe’s Soyrizo. It costs $2.99 and packs a spicy, salty punch that wakes you up after zero sleep. I add 1 cup of diced red bell peppers and 2 cups of fresh spinach. Cook it all down until the spinach wilts completely. Let the filling cool on the counter. If you wrap hot eggs in a tortilla, it turns into a soggy, disgusting mess in the freezer. I wrap each burrito tightly in a 10-inch square of heavy-duty aluminum foil. You can’t skip the foil. Plastic wrap melts in the microwave if you forget to take it off, and I’ve definitely done that while sleep-deprived. When you’re starving at 6 AM, you just unwrap the foil, wrap the burrito in a damp paper towel, and microwave it for exactly 2 minutes. It’s hot, filling, and you won’t drop it on your baby.
3. Invest in High-Quality, Freezer-Safe Containers

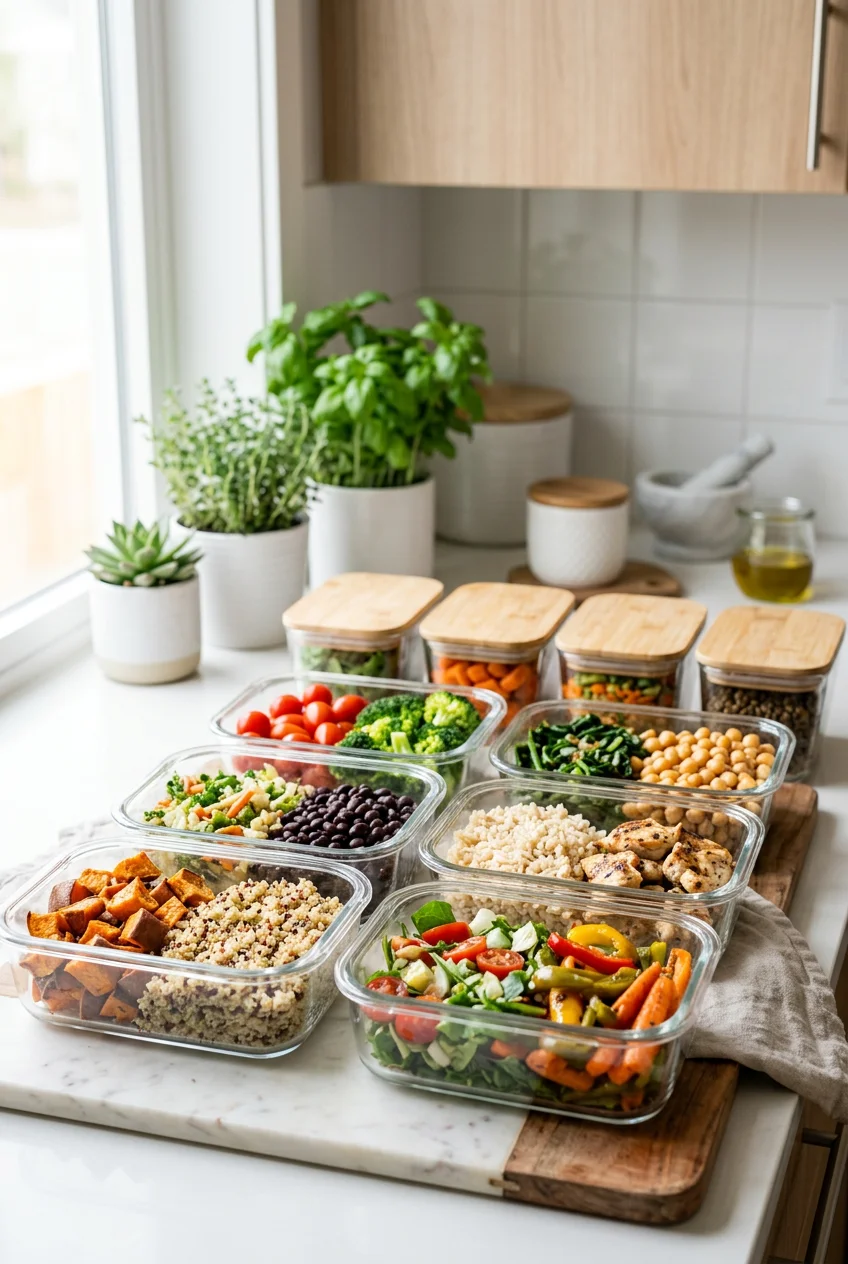
Don’t freeze your precious meals in cheap plastic takeout containers. I did this with my first batch of postpartum chili. The cheap plastic cracked in the deep freeze, and when I tried to microwave it, the lid warped and sealed shut. I had to stab it with a steak knife just to get my food out. It’s not worth the frustration. You need heavy glass or specialized silicone. I personally swear by the Pyrex Simply Store Glass Rectangular and Round Food Container Set. I bought mine at Walmart for $34.98. It comes with 18 pieces. The thick glass goes straight from the freezing cold shelves to a 350-degree oven without shattering. For liquid meals, I’m completely devoted to Souper Cubes. They are thick silicone trays that freeze food into perfect blocks. I bought the 1-cup tray size off Amazon for $19.95. You pour your soup into the square molds, snap the lid on, and freeze. The next day, you pop out a solid frozen block of soup with a satisfying snap and drop it into a gallon-sized Ziploc Freezer Bag. A box of 30 Ziploc gallon bags costs $5.99 at Kroger. By freezing in cubes and storing in bags, you save massive amounts of space. My freezer used to look like a chaotic game of Tetris. Now, it holds neat little bricks of food stacked up perfectly. If you’re going to spend hours cooking, spend the $50 on decent containers so your food doesn’t taste like freezer frost.
![[8-Pack,30 oz]Glass Meal Prep Containers](https://m.media-amazon.com/images/I/713Zfdsgi4L._AC_UL320_.jpg)
[8-Pack,30 oz]Glass Meal Prep Containers
A dependable everyday pick — [8-Pack pulls in 7 ratings at 4.5 stars. Not flashy, just solid.
4. Batch Cook Hydrating Soups and Stews

Nursing makes you incredibly thirsty. I remember chugging three bottles of water during one feeding session and still feeling completely parched. Your body needs liquid to make milk and to physically heal. This is why hydrating soups are the ultimate recovery food. I make a gigantic pot of hearty lentil and vegetable soup every single Sunday. I start with 2 cartons of Pacific Foods Organic Low Sodium Chicken Broth. I get it at Sprouts for $4.49 per 32 oz carton. I chop up 2 cups of carrots, 2 cups of celery, and 1 large yellow onion. The smell of the onions sizzling in butter is pure heaven in my kitchen. I add 1.5 cups of dry green lentils and let it simmer for an hour. The trick is to undercook the vegetables just a tiny bit. If you boil them to mush on the stove, they turn into a grainy, disgusting paste when you reheat them from the freezer. I learned that after throwing away a whole batch of potato soup. Once the soup finishes cooking, I let it sit on the stove until it stops steaming. Then I portion it out using a 1-cup measuring scoop. When you’re ready to eat it, you dump the frozen block into a saucepan and add exactly 1/4 cup of water or extra broth. The freezing process sucks out some moisture, so the extra liquid brings it back to life. It’s warm, comforting, and forces you to consume fluids without just chugging cold water all day. You might also like: 15 Cozy Easy Dinner Ideas for Every Budget
5. Don’t Underestimate One-Handed Snacks

Everyone talks about prepping huge dinners, but nobody warns you about the 2 AM hunger pangs. You wake up to feed the baby, and suddenly your stomach growls so loudly it wakes your partner. You aren’t going to heat up a heavy casserole in the middle of the night. You need dense, sweet, one-handed snacks. I aim to prep at least 8 dozen snacks for the first month. My absolute favorite is peanut butter energy bites. I buy a 32 oz bag of Bob’s Red Mill Old Fashioned Rolled Oats at Kroger for $5.49. I mix 2 cups of oats with 1 cup of Jif Creamy Peanut Butter (which costs $3.29 for a 16 oz jar). Add 1/2 cup of honey and 1/4 cup of ground flaxseeds. The sticky texture gets all over your fingers while you roll them, but the smell of sweet peanut butter is amazing. I roll them into 1-inch balls and freeze them on a flat baking sheet lined with parchment paper. If you just throw them in a bag right away, they freeze into one giant, solid clump. I actually chipped a tooth trying to bite a chunk off a frozen peanut butter boulder once. Don’t do that. Once they freeze solid individually, I transfer them to a freezer bag. You can eat them straight from the freezer. They are chewy, cold, and packed with calories. I keep a baggie of them right on my nightstand. It’s the only way I survive the night shifts. You might also like: 15 Brilliant Salmon Dinner Ideas for Any Style
6. Embrace the Slow Cooker for Postpartum Freezer Meal Prep Ease

Standing over a hot stove for six hours when your ankles are swollen is pure torture. By my third trimester, my feet looked like overinflated balloons. I couldn’t stand for more than ten minutes without wincing. This is why the slow cooker is your best friend for postpartum freezer meal prep. I use my Crock-Pot 6-Quart Programmable Slow Cooker. I bought it at Target for $49.99, and it handles massive batches of food. I buy a 4 lb beef chuck roast. I drop it into the heavy ceramic pot with 1 lb of 365 Organic Baby Carrots from Whole Foods (only $1.99 a bag) and 2 cups of beef broth. I set it on low for 8 hours. The house fills with this rich, savory aroma of roasting beef that makes your mouth water. When it’s done, the meat literally falls apart when you touch it with a fork. A 4 lb roast yields about 8 generous servings. I shred the meat, mix it with the cooked carrots and the cooking juices, and freeze it in 2-cup portions. The biggest mistake people make is freezing the meat dry. If you don’t freeze the shredded beef in its own fatty broth, it dries out in the freezer and tastes like sawdust when you microwave it. I’ve ruined three pounds of expensive pulled pork that way. Always freeze meat in liquid. When you thaw this pot roast, the gravy keeps the meat incredibly tender. It takes exactly zero effort to dump ingredients into a slow cooker. You might also like: 15 Stunning Lunch Weekly Meal Prep Ideas You Haven’t Thought Of

KOMUEE 10 Packs 30 oz Glass Meal Prep Containers
A dependable everyday pick — KOMUEE 10 Packs 30 oz Glass Meal Prep Containers pulls in 46 ratings at 4.5 stars. Not flashy, just solid.
7. Start Early, Finish by 36 Weeks

Don’t wait until your due date to start cooking. I planned to do all my cooking during week 38. My son decided to arrive at 37 weeks. I came home from the hospital to an empty fridge and a box of stale crackers. It was miserable. You need to start your prep around 28 weeks and finish everything by 36 weeks. I break it down into tiny, manageable tasks. One Sunday I’ll make burritos. The next weekend, I’ll make a huge pot of soup. You won’t burn out if you pace yourself. To do this properly, you need industrial amounts of wrapping supplies. I buy the Reynolds Wrap Heavy Duty Aluminum Foil at Costco. It costs $22.99 for a massive two-pack of 150 square foot rolls. You’re going to use a lot of it to double-wrap your casseroles to prevent freezer burn. I’ve learned that cheap, thin foil rips when you stack containers on top of it. I once pulled a pan of enchiladas out of the freezer, only to find the foil had torn and a thick layer of ice had formed directly on the cheese. I had to scrape off the icy cheese with a spoon before baking it. Start early, buy the heavy-duty foil, and protect your hard work. By 36 weeks, your freezer should be packed tight. Then you can just sit on the couch, put your swollen feet up, and watch movies until the baby comes.
8. Label Everything with Detail (And Avoid My Mistakes)

Here’s a serious confession. I once thawed a frozen block of brown mush thinking it was apple butter for my morning oatmeal. I took a massive, warm spoonful. It was pureed beef liver. I nearly threw up all over my kitchen counter. This trauma is exactly why you must label every single container. Don’t trust your memory. Sleep deprivation destroys your brain cells. I use Sharpie Fine Point Permanent Markers. I grab a 5-pack at Walmart for $5.97. I write on Up&Up Freezer Labels from Target, which cost $3.19 for a 60-count pack. They actually stick to freezing cold glass and plastic without peeling off in the moisture. On every single label, I write the exact name of the dish, the date I cooked it, and the specific reheating instructions. For example: ‘Chicken Enchiladas. Cooked Oct 12. Bake covered at 350F for 45 mins.’ Most freezer meals start losing their flavor after 3 to 6 months. If you don’t write the date, you’ll find a mystery bag two years later completely covered in frost. I also write whether the meal contains dairy or gluten, just in case a friend comes over to help me eat it. It takes an extra 30 seconds to write out a detailed label. It saves you from eating beef liver on your morning oats. Trust me, you don’t want to skip this step.
9. Cool Meals Completely Before Freezing

This is the biggest food safety mistake people make. I used to pull a boiling hot pot of chili off the stove and shove it directly into my freezer. I thought I was being highly efficient. Wrong. The radiant heat from the hot chili partially thawed the frozen chicken breasts sitting next to it. The chicken refroze later, but the texture was totally ruined and it probably grew bacteria. You must let your food cool completely before it goes into the deep freeze. I usually cook a big batch of chicken soup using Trader Joe’s Organic Free Range Chicken, which costs $3.49 a pound. The meat is incredibly juicy. After simmering the soup, I take the pot off the heat. I let it sit on the kitchen counter for exactly 1.5 hours. You can see the steam slowly stop rising. Then, I portion it into my glass containers and put them in the refrigerator overnight. The next morning, when the soup feels completely cold to the touch, I move the containers to the freezer. Yes, it’s a slightly annoying two-step process. Yes, it takes up fridge space for a night. But it prevents you from poisoning yourself or ruining the other food in your freezer. If you put warm food in a sealed container in the freezer, condensation forms on the inside of the lid. That condensation turns into ice crystals, and those ice crystals drop down onto your food and cause severe freezer burn. Let it cool.

M MCIRCO 10-Pack,22 Oz Glass Meal Prep Containers
M MCIRCO 10-Pack has been one of the most consistently praised picks in this category. 86 reviewers averaged 4.5/5.
10. Individual Portioning for Postpartum Freezer Meal Prep Flexibility

You aren’t going to be eating dinner at 6 PM sharp anymore. Your new baby decides when you eat. Sometimes my husband eats at 5 PM, and I’m nap-trapped under a sleeping infant until 9 PM. If you freeze a giant 9×13 pan of lasagna, you have to thaw the entire thing just to eat one slice. Then you’re stuck eating leftover lasagna for five days straight until you’re sick of it. The ultimate trick for postpartum freezer meal prep flexibility is individual portioning. I freeze single servings of pasta bake. I use Rao’s Homemade Marinara Sauce from Whole Foods. It’s pricey at $8.99 for a 24 oz jar, but it tastes like an Italian grandmother made it from scratch. I mix the red sauce with ziti, ricotta, and ground turkey. Instead of putting it in a large casserole dish, I scoop 1.5 cups of the pasta mixture into small, individual glass bowls. I top each one with shredded mozzarella cheese. When I’m finally free from the baby at 9 PM, I just grab one small bowl. I microwave it for 3 minutes. The cheese gets bubbly, the sauce smells incredible, and I get a hot, fresh meal just for me. My husband can heat up his own bowl whenever he wants. Individual portions mean zero waste. You only heat up exactly what you’re going to eat. It stops you from throwing away half-eaten casseroles that got left out on the counter too long.
Preparing your freezer before the baby arrives is the greatest gift you can give your future self. I’m telling you, when you’re running on two hours of sleep and your body aches, pulling a home-cooked meal out of the freezer feels like pure magic. You won’t regret a single second you spent chopping onions or wrapping burritos. I’ve survived two postpartum periods now, and this system is the only thing that kept me sane. Grab your sharpies, buy the good glass containers, and start cooking. Save this article for your next meal prep Sunday, and please pin it to your favorite baby prep board so you don’t lose these exact measurements. Let’s get cooking—you’ve got this!
Frequently Asked Questions
When should I start making postpartum freezer meals?
I highly recommend starting your prep around 28 weeks of pregnancy. You want to finish by 36 weeks so you aren’t exhausted right before delivery. Pacing yourself over two months prevents burnout.
What are the best containers for freezing meals?
I’m obsessed with thick glass containers like Pyrex for casseroles and Souper Cubes silicone trays for freezing soups into blocks. Always transfer the frozen blocks into heavy-duty gallon bags to save space.
How long do freezer meals last?
Most homemade freezer meals taste their best when eaten within 3 to 6 months. That’s why labeling every single container with a permanent marker and the exact date is absolutely mandatory.
What foods should I avoid freezing?
Don’t freeze raw potatoes, cream-based sauces, or fully cooked pasta if you plan to microwave it later. The texture turns grainy and mushy. Undercook your vegetables slightly so they hold up during the reheating process.
